❌

Reading view

Is There a Scream Video Game? All Games and Ghostface Appearances

With Ghostface showing up in everything from Mortal Kombat to Fortnite, you might be wondering whether there is a Scream video game. While the horror franchise has had a mobile adaptation, fans are still waiting for a new standalone title. However, a leaked multiplayer prototype gives us a look at a game that never made it to release.

Is There a Scream Video Game?

Scream Video Game Call of Duty
Screenshot: Activision Blizzard

At the time of writing, there is no new standalone Scream video game has been officially announced. So if you were hoping for an upcoming Ghostface title with a confirmed release date, there isn’t one yet.

That said, the series hasn’t completely missed out on getting its own adaptation. An official Scream 4 mobile game was released in 2011 for iOS and Android. Ghostface has also appeared in several other popular titles, although those appearances are guest characters and cosmetics rather than full Scream video games.

There was even an unreleased multiplayer project that surfaced online following a Steam data leak. And based on the footage, it sounds like fans almost got a very different kind of Scream game.

Leaked Scream Video Game Prototype Explained

Scream Video Game Fortnite
Screenshot: Epic Games

In September 2026, reports revealed that playable builds of an unreleased Scream project had been discovered in leaked Steam files. The prototype was reportedly developed by Fatshark, the studio behind Warhammer: Vermintide and Warhammer 40,000: Darktide.

The multiplayer game had players trying to escape Ghostface, while another player controlled the masked killer. If you’ve played Dead by Daylight, you can probably picture the appeal of that setup. However, the reported final build dated back to February 2011, years before Behaviour’s horror game launched.

There is a catch, though. The person who examined the files suggested that the project may have been a pitch to secure the Scream license. That detail remains speculation, so the footage shouldn’t be treated as proof that an officially licensed game was approved for release.

All Scream Video Games List

Scream Video Game Mortal Kombat
Screenshot: NetherRealm

The list of standalone Scream games is pretty short. Below is the released mobile adaptation, followed by the unreleased project discovered in the Steam leak.

Standalone Scream Games

TitleRelease DatePlatforms
Scream 4 / SCRE4MApril 2011 on iOS; Android release also reported in 2011iOS, Android

Scream 4 was a tie-in to the fourth movie and let players take control of Ghostface. Contemporary coverage places its iOS launch in April 2011, although release listings differ on the exact day.

Unreleased Scream Projects

TitleRelease DatePlatform
Untitled Scream multiplayer prototype attributed to FatsharkNever released; reported final build dated February 2011PC

The prototype surfaced publicly in 2026, but that was the discovery of an old build rather than a release announcement.

Games Featuring Ghostface

If you mainly want to play as Ghostface, there are more options. The killer has appeared as a playable character, an Operator, and even a suspicious little crewmate. The dates below refer to Ghostface’s arrival, rather than each base game’s original release. Platforms include later ports where applicable.

TitleGhostface Release DatePlatforms
Dead by Daylight – The Ghost Face DLCJune 18, 2019PC, PS4, PS5, Xbox One, Xbox Series X/S, Nintendo Switch
Call of Duty: Black Ops Cold War – Ghostface OperatorOctober 19, 2021PC, PS4, PS5, Xbox One, Xbox Series X/S
Call of Duty: Warzone -Ghostface Operator in the original gameOctober 19, 2021PC, PS4, Xbox One; playable on PS5 and Xbox Series X/S through backward compatibility
Among Us – Scream Mask and Scream RobesMarch 31, 2022PC, iOS, Android, PS4, PS5, Xbox One, Xbox Series X/S, Nintendo Switch
Mortal Kombat 1 – Ghostface DLCNovember 19, 2024, early access; November 26, 2024, general releasePC, PS5, Xbox Series X/S, Nintendo Switch
Fortnite – Ghost Face OutfitOctober 10, 2025, US time; October 11 UTCPC, PS4, PS5, Xbox One, Xbox Series X/S, Nintendo Switch, Nintendo Switch 2, supported iOS and Android devices
Mortal Kombat Mobile – Nightmare GhostfaceOctober 15, 2025iOS, Android

For now, fans hoping for a full Scream adventure will have to keep waiting. The leaked prototype is an interesting look at what could have been, but we still don’t have an announced new game or a release date.

The post Is There a Scream Video Game? All Games and Ghostface Appearances appeared first on VICE.

Screenshot: Activision Blizzard

Screenshot: Epic Games

Screenshot: NetherRealm
  •  

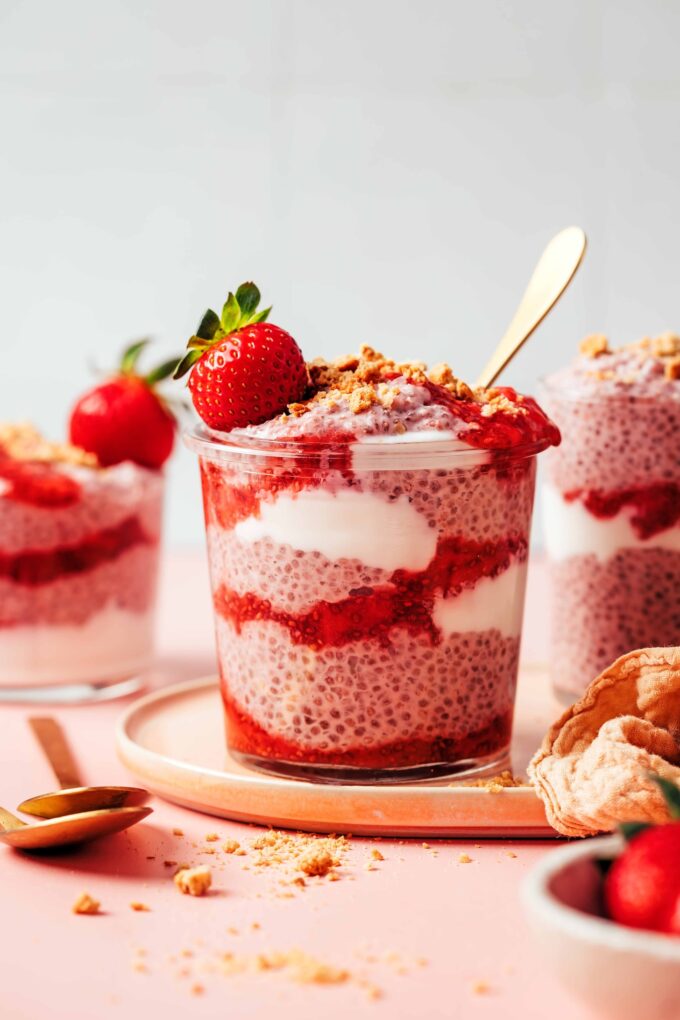
Strawberries & Cream Chia Pudding

Strawberries & Cream Chia Pudding

Friends, welcome to a land where you can float on strawberry dream clouds all day long. This chia pudding is next-level but still ultra simple (5 ingredients!). Just blend strawberries into your favorite milk, sweeten to taste, add chia seeds, and chilllllll.

The result is a heavenly, fiber-rich snack or breakfast that tastes just like strawberries and cream but more sophisticated — mmmmmm. Let us show you how it’s done!

Strawberries & Cream Chia Pudding from Minimalist Baker →

  •  

Tahini Hot Chocolate (Super Dreamy, Protein-Rich!)

Tahini Hot Chocolate (Super Dreamy, Protein-Rich!)

If you’re looking for a decadent, elevated hot chocolate with wholesome ingredients, this one’s for you! We’ve been serving up this frothy, tahini-infused, super dreamy hot chocolate, and even cocoa connoisseurs agree this one deserves accolades.

Despite being naturally sweetened and blended with water, it’s perfectly sweet, deeply chocolaty, and velvety on the palate. It even sneaks in healthy fats, fiber, protein, and cinnamon for balancing blood sugar levels.

Tahini Hot Chocolate (Super Dreamy, Protein-Rich!) from Minimalist Baker →

  •  

chipwich ice cream cake

High on the list of cooking things that I’ve got far more opinions on than anyone has ever asked of me (and may have even, at times, prayed I’d stop yapping about), are homemade ice cream sandwiches. Why? Because it’s devastating when you realize something that should bring us nothing but incandescent summer joy — ice cream! cookies! — rarely work as well as promised. Most cookies become so hard once frozen, you feel like you’re breaking a tooth with each bite. Unyielding cookies also squeeze the ice cream out the sides, leading to drips down your arms and an immediate bad mood (for adults; kids, naturally, love it). While writing Smitten Kitchen Keepers, I became obsessed with creating a deeply nostalgic homemade chipwich-style ice cream sandwich that did everything right and I had three big a-ha moments along the way:

Read more »

  •  

Creamy Mocha Chia Pudding

Creamy Mocha Chia Pudding

For those days when you’re needing an extra skip in your step, try this Mocha Chia Pudding! It’s a rich, creamy, chocolaty, energizing, fiber-packed breakfast or snack.

It’s also easy to make with just 1 bowl, 7 ingredients, and 5 minutes hands-on prep time required! We think it’ll become a new grab-and-go, meal prep-friendly staple in your kitchen. Get your coffee brewing, let’s make chia pudding!

Creamy Mocha Chia Pudding from Minimalist Baker →

  •  

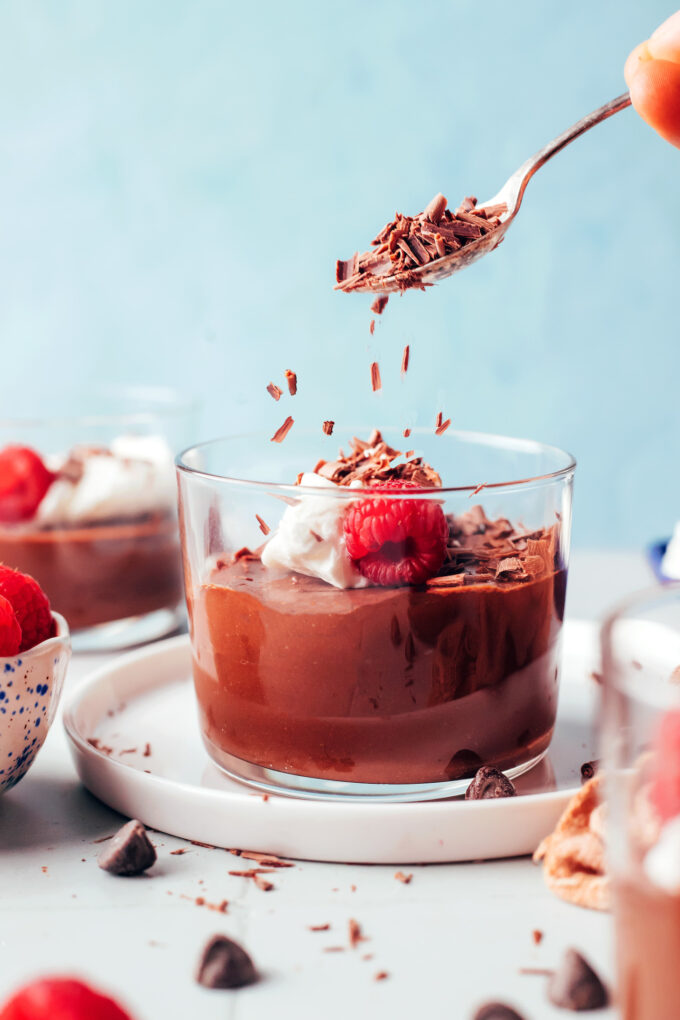
Chocolate Pot de Crème (with a Secret Ingredient!)

Chocolate Pot de Crème (with a Secret Ingredient!)

Is this a safe space to admit we have a problem? Specifically an insatiable appetite for adding sweet potato to desserts? First we made brownies, then blondies, then truffles. And now? Pot de crème! Which is really just a thick, silky smooth pudding (YUM!).

This super chocolaty, 5-ingredient, French-inspired wonder dessert feels elegant and indulgent! No one will know it’s vegan, nutrient-rich, and so simple to make. Get your sweet potatoes ready…let’s make pot de crème!

Chocolate Pot de Crème (with a Secret Ingredient!) from Minimalist Baker →

  •  

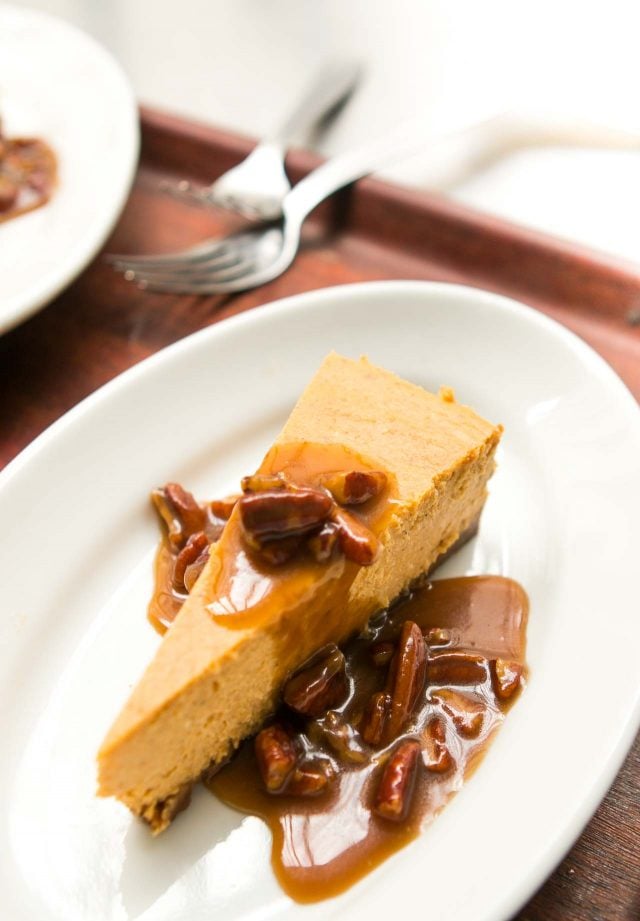
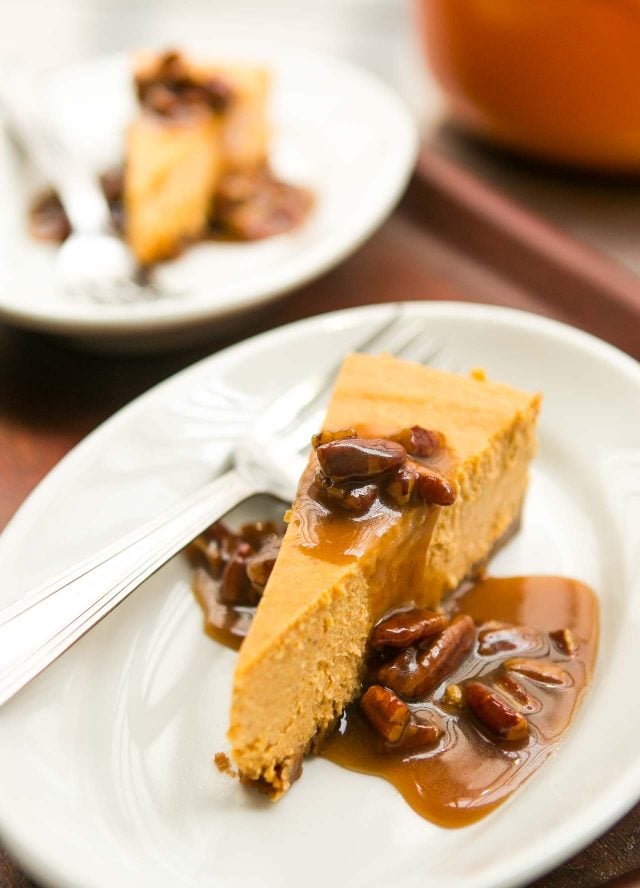
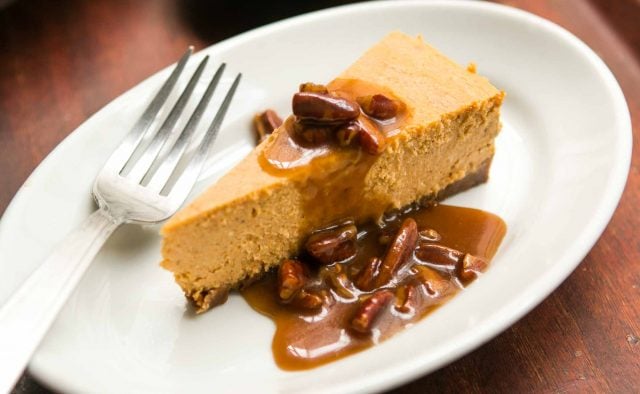
Pumpkin Cheesecake with Pecan Praline Sauce

It’s that time of year again. And that only means one thing: time to start thinking about the holiday baking. In Paris, bakery windows fill up with Bûches de Noël (Yule log cakes) and bourriches (wooden crates) of oysters are piled up at the markets. The chocolate shops are crammed with people, buying multiple boxes as gifts, and people splurge on caviar and Champagne, one of the few things that go on sale in France during the holidays.

One thing you don’t see is the use of pumpkin in desserts. A tart or pie (or ice cream) made of squash might sound funny, especially to non-Americans, but helps to remember that pumpkins, and other squash, are technically fruit. One could also point out the classic Swiss Chard Tart from Provence (which is in a whole other category), and Melanzane al cioccolato, eggplant with chocolate sauce, which I like. (Which one could argue is good because it’s smothered in dark chocolate.) But I don’t think everything goes with chocolate: A friend tried the hot chocolate with oysters at a famed chocolate shop in Paris, and after her description, I wasn’t rushing over there to try a cup.

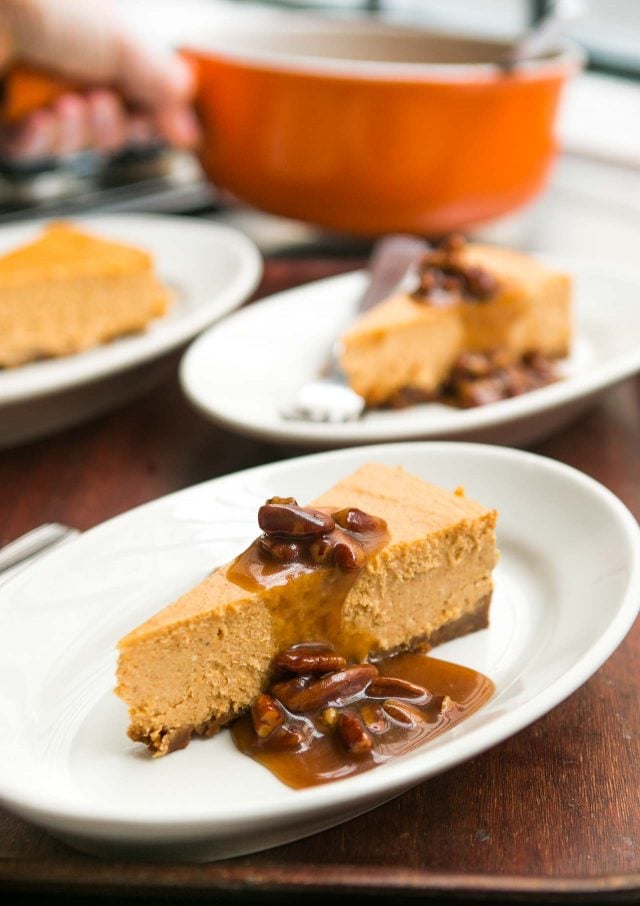
To get that last image out of your mind, I present pumpkin cheesecake with a pecan praline sauce, that has nothing not to like about it. Cream cheese and sour cream, a buttery cookie crust, and a brown sugar and bourbon-tinged sauce loaded with crunchy pecans. I’m in.

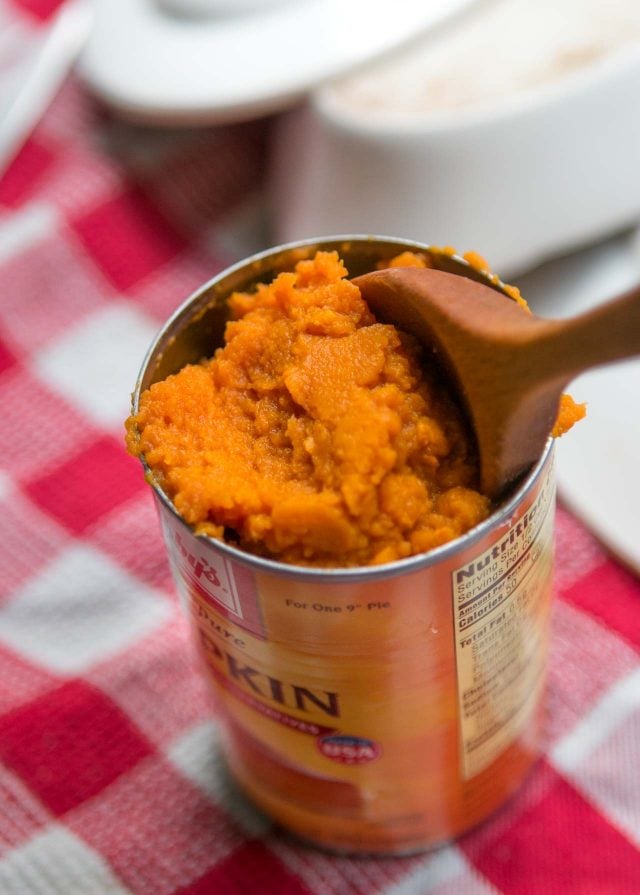
DIYers may raise an eyebrow at using canned pumpkin. I’ve got a few reasons for using it. (And as many of you perhaps know, it’s not made from pumpkin, but a variety of squash similar to butternut squash.) One, is that when writing a recipe, it’s easy to get consistent, similar results when we’re all using the same ingredient. And two, it’s a heckuva lot easier, which is appreciated around the holidays when all of us have enough on our plates, and in our ovens, and it’s  fewer dishes to wash to boot.

If you want to go the other route, you can also make your own cream cheese and Graham crackers, grow your own pecans, churn up your own butter, and make your own cake pan. If you do go that route, let me know when your cheesecake is done ; )

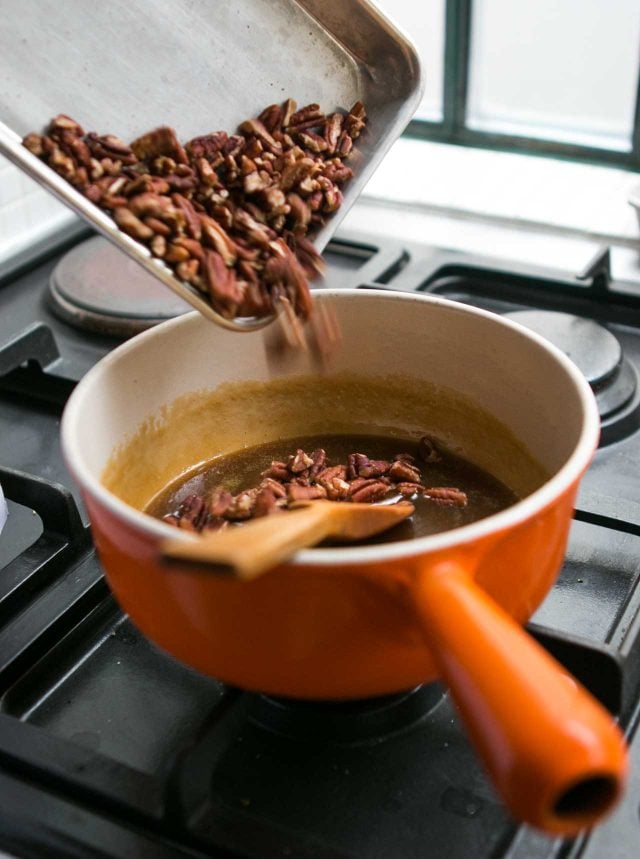
In the meantime, I’m standing over my stove, stirring warm, just-toasted pecans into my praline sauce before lacing it with a dash of bourbon.

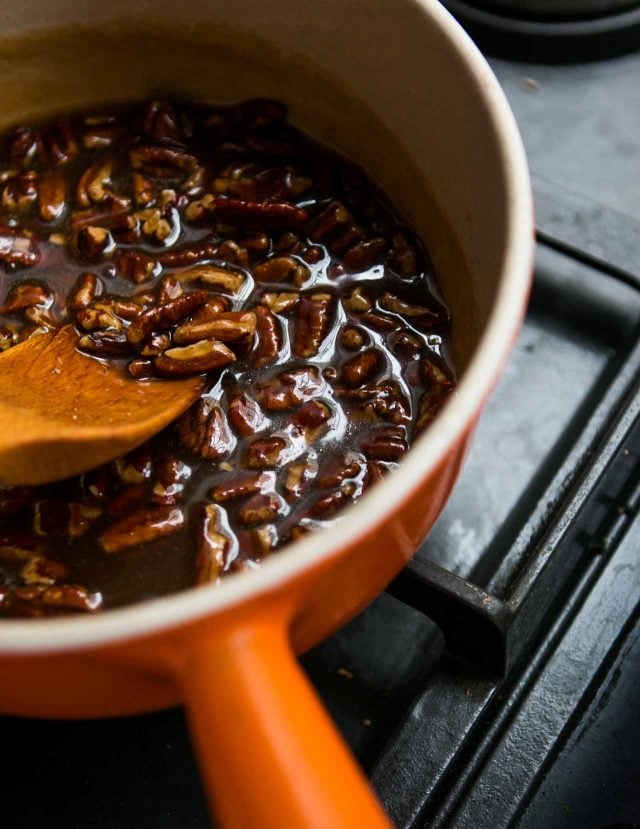
The praline sauce is decidedly on the sweet side. But that didn’t stop me (like, at all…) from dipping my spoon into it over and over and over again. Be sure to toast the pecans before using them. My pet-peeve in restaurants is when they don’t toast nuts. Toasting any nut usually improves it by at least 99%, if not more, so if you’re not consistently toasting your nuts before using them on salads, sauces, and in ice creams, start doing it now. It’s not too late.

But I can’t imagine this cheesecake being served without it. Although I could imagine eating the sauce without the cheesecake. And if you’re anything like me, you might find yourself spooning it over ice cream, ladling it over pumpkin pie (without the marshmallow topping), or even spooning it right into your mouth, like I do.

Print

Pumpkin Cheesecake with Pecan Praline Sauce

If using canned pumpkin, make sure that you don't use canned pumpkin pie 'filling' (which is sweetened and spiced); use canned pumpkin that is 100% pumpkin puree. If you want to make sugar pumpkin puree yourself, you can split a sugar pumpkin (or butternut squash) in half and scrape out the seeds. Butter the cut side of the pumpkin and bake cut side down on a parchment-lined baking sheet in a 375ºF/190ºC oven until very tender, about 35 to 45 minutes. When cool enough to handle, scoop out the flesh and puree in a blender or food processor, or pass it through a food mill. If you want to balance the sweetness of the sauce, you could add a scant teaspoon of apple cider vinegar or lemon juice to it, or to taste. Conversely, adding more liquor will take the edge off as well. Outside of the U.S., I often use speculoos cookies in place of the Graham crackers for the crust. If you go that route, you might want to reduce the butter in the crust by about 20% since speculoos cookies tend to be more buttery than Graham crackers. I use a glass-bottom springform pan for cheesecakes, which makes serving them much easier.
Servings 12 servings

Ingredients

For the crust

  • 1 1/2 cups (180g) Graham cracker crumbs
  • 4 tablespoons (60g) melted butter
  • 2 tablespoons sugar
  • 1/4 teaspoon ground cinnamon

For the pumpkin cheesecake filling

  • Three 8-ounce (680g) packages cream cheese at room temperature
  • 1 1/4 cups (250g) sugar
  • grated zest one lemon preferably unsprayed
  • 4 large eggs at room temperature
  • One 15-ounce (425g) canned pumpkin puree
  • 1/2 cup (125g) sour cream or whole-milk plain yogurt
  • 1 tablespoon cornstarch or 2 tablespoons flour
  • 1 teaspoon vanilla extract
  • 1 teaspoon ground cinnamon
  • 3/4 teaspoon dried ground ginger
  • 1/4 teaspoon ground nutmeg
  • 1/4 teaspoon ground cloves
  • pinch of salt

Pecan praline sauce

  • 3/4 cup (105g) packed light or dark brown sugar
  • 1/2 cup (125ml) heavy cream
  • 6 tablespoons (85g) unsalted butter
  • 1/4 cup (60ml) maple syrup
  • 1/2 teaspoon kosher or sea salt
  • 1/4 cup (60ml) bourbon
  • 1 1/2 cups (160g) pecans toasted and coarsely chopped
  • 1/2 teaspoon vanilla extract

Instructions

  • To make the crust, in a medium bowl, mix the Graham cracker crumbs together with the melted butter, sugar, and cinnamon until the crumbs are thoroughly moistened. Butter a 9-inch (23cm) springform pan then press the crumbs evenly across the bottom of the pan. Refrigerate until ready to bake.
  • Preheat the oven to 350ºF (180ºC). Bake the crust until it feels set in the center, 10 to 12 minutes. Let cool on a wire rack. Turn the oven down to 325ºF (165ºC).
  • To make the filling, in the bowl of stand mixer fitted with the paddle attachment (or by hand, in a large bowl), beat together the cream cheese, sugar, and lemon zest, until smooth. Add the eggs one at a time, stopping the mixer between each addition to scrape down the sides of the mixing bowl, then add the pumpkin puree, sour cream, cornstarch or flour, and vanilla extract, along with the spices and salt.
  • Line the outside bottom of the springform pan with foil so it reaches all the way up to the top of the outside of the pan. If you have to use several pieces, I recommend triple-wrapping it to prevent leaking or water getting in the cake pan. (Better yet, use extra-wide foil, so you only need one sheet.) Scrape the mixture into the prepared springform pan and smooth the top. Place the cheesecake in a larger pan, such as a roasting pan, then add very warm water to the larger pan until it reaches halfway up the outside of the cake pan.
  • Bake the cheesecake in the oven until the center looks just slightly set, but not wet and sloshy in the center when you jiggle the pan. I start checking the cheesecake at the 50 minute mark, as it usually takes about 50 minutes to 1 hour, but may take up to 1 hour and 15 minutes. Remove the cake from the oven, then remove the cake from the water bath and let cool completely on a wire rack. Refrigerate for at least 4 hours before serving.
  • Make the pecan praline sauce by heating the brown sugar, cream, butter, maple syrup and salt in a medium saucepan over medium-high heat, until it comes to a boil, stirring frequently. Let boil for 1 minute without stirring. Remove from heat and add the bourbon, pecans, and vanilla.

Notes

Serving: Run a sharp knife around the outside of the cheesecake to release it from the springform pan, then remove the sides of the pan. Dip the knife in warm water, wipe it dry, and use it to cut clean slices from the cheesecake. Serve with a ladleful of warm sauce poured over it. If the sauce gets too thick upon standing, you can thin it with milk or water.
Storage: The baked or unbaked crust can be made up to three days ahead and stored at room temperature (if baked), or refrigerated (unbaked). It can also be frozen either baked or unbaked for 2-3 months. The baked cheesecake will keep for up to 4 days in the refrigerator.

Related Recipes and Links

Dulce de leche cheesecake

Ingredients for American Baking in Paris

Pumpkin Ice Cream

Cheesecake

Maple Pumpkin Flan

Homemade Graham Crackers (Smitten Kitchen)

Homemade bourbon (Bourbon of the Day)

Homemade salt (Ruhlman)

  •  

Summer Fruit Recipes

It’s summer! Whether you’re in or outdoors, hopefully for all of you there are beautiful summer fruits and berries to be had, and I hope that you’re able to get your hands on as many of them as you can. I am loading (actually, overloading…) myself up at the market. While a good portion on the fresh fruit gets eaten just as-is, some of it goes into the following dessert recipes that I continue to make year after year. Others go into jam, which is a great way to preserve all those summer fruits and berries, and make them last through fall and winter.

Cherry season is behind most of us (sniff…sniff…), but if they are still lingering where you live, you can type “cherry” or “cherries” into the search engine at the top right corner of the page to find cherry recipes. (And we don’t get a bountiful array of fresh raspberries and blackberries here, so I don’t have many recipes that use them on the blog.) But for nectarines, strawberries, peaches, plums and other summer fruits, here are some of my favorite recipes on the blog…
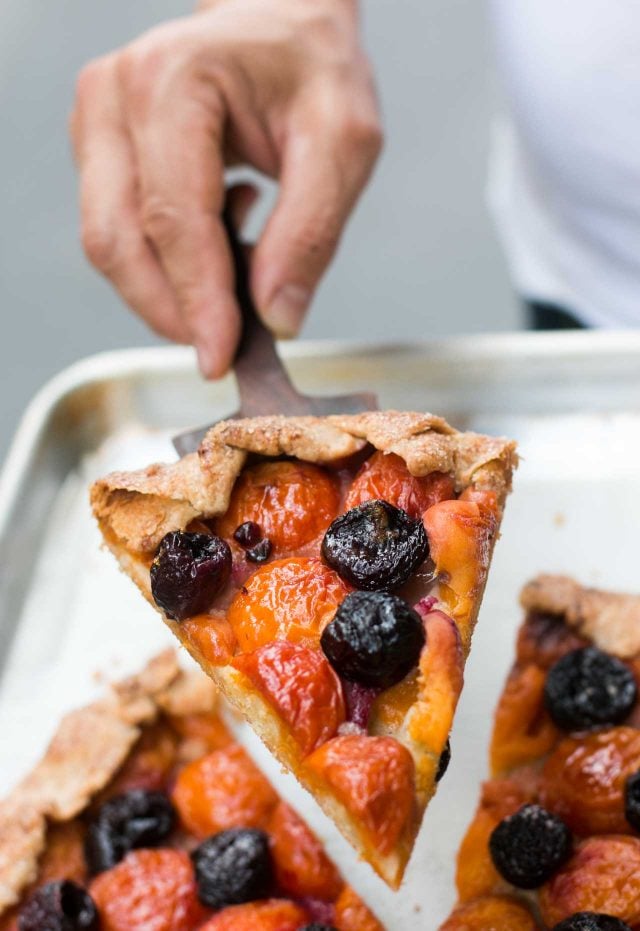
Summer Fruit Galette with Frangipane

I’ve seen so many galettes this year on social media, that it’s tempting to already call galettes The Dessert of the Year. (Okay, there were plenty of Banana Breads as well. And it’s hard to knock Banana Bread, even my low(er) fat one.) But for the bang-for-the-buck, it’s hard to beat the silly-easy galette, made with a fail-safe dough that gets rolled out, topped with fresh fruit, and baked until ripe ‘n ready. Mine has a layer of frangipane under the fruit to keep some of those juices away from the bottom crust, so it stays crisp. It also tastes good, too! Apricots work especially well in this one but you can use nectarines, plums, peaches, or…
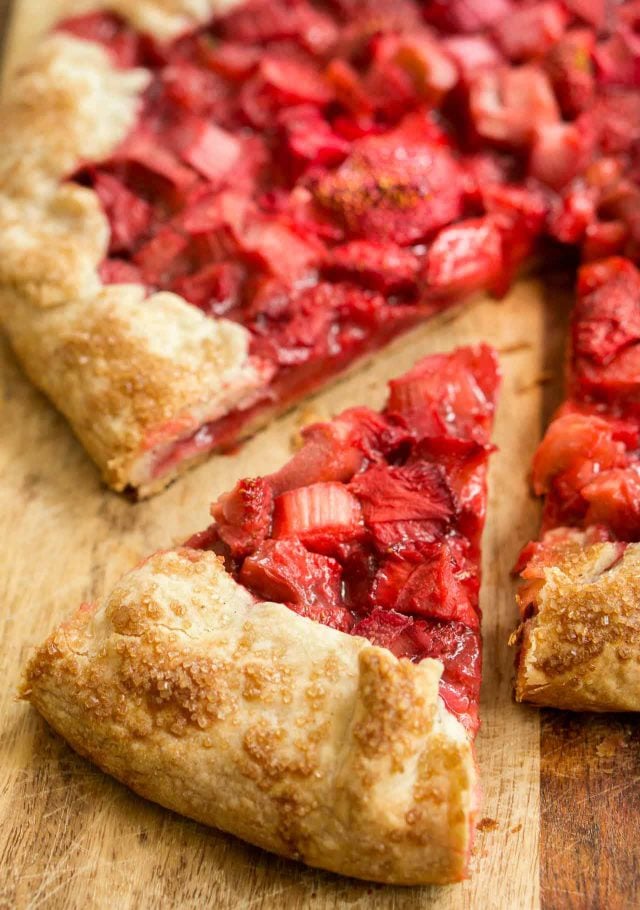
Strawberry Rhubarb Galette

…rhubarb and strawberries! Yes, the classic combo works well as a galette, too. But don’t let tradition stand in the way of deliciousness and you can swap out cherries, raspberries, or blackberries for the strawberries.
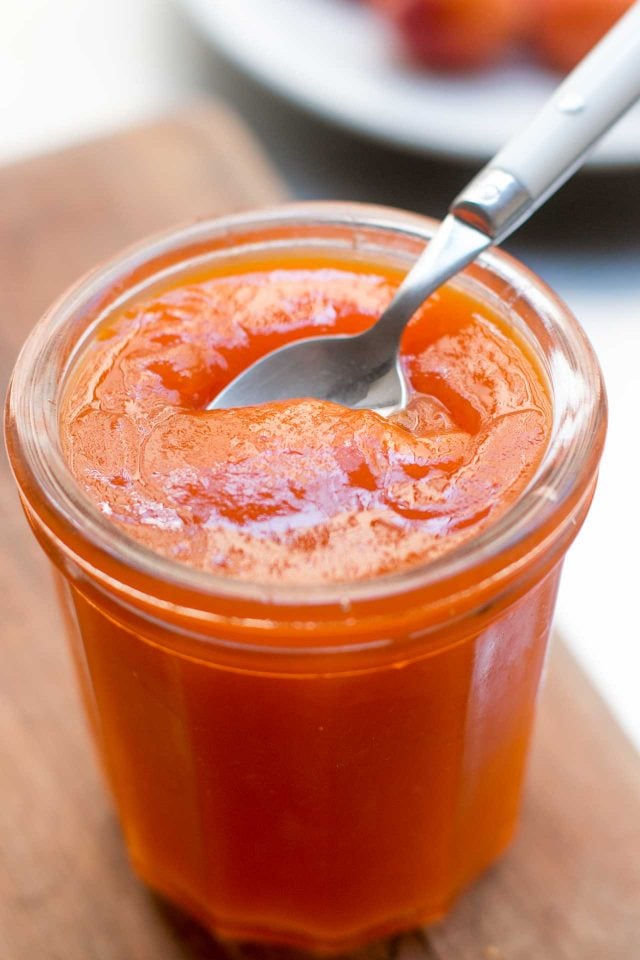
Apricot Jam

When I was a cook in upstate New York back in the 1980s (!) I remember someone brought us a (as in 1) basket of fresh apricots from California, which I’d never seen before. I made a simple tart with them and only eight lucky customers could get a taste of it. (Or maybe I cut it into ten?) Fast-forward to today, summer brings a cavalcade of fresh apricots to the markets and toward the end of the season, I don’t have time to shed any tears as I’m piling apricot jam into pots, to save them for the coming months. It’s Romain’s favorite jam so I make sure there’s enough to keep him happy, because I’ve learned what happens when I don’t : 0
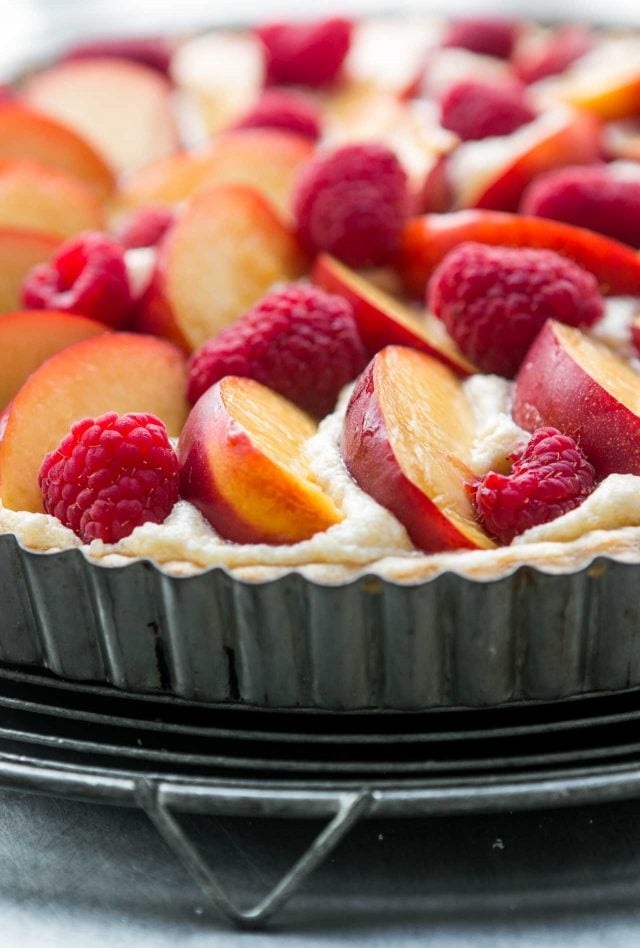
Summer Fruit Tart (with frangipane)

Another summer fruit favorite, yes, with more almond cream than the galettes above, this is that classic French tart that you’ll find in many pastry shops all year round, using everything from pears to pineapple. Don’t love almonds, or want to take it in a different direction? Replace the almonds with hazelnuts for a special treat.
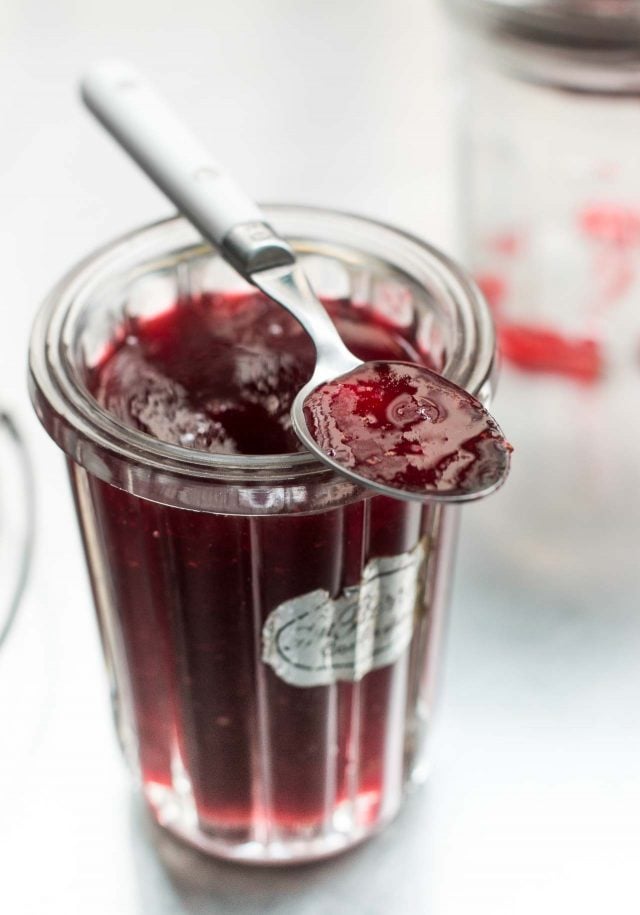
Plum-Strawberry Jam

While apricots are Romain’s favorite for jam, I am 100% on team plum. The luscious tang of juicy plum, and the high natural pectin content, makes this one of the easiest jams to make. And it’s not too difficult to eat, either.
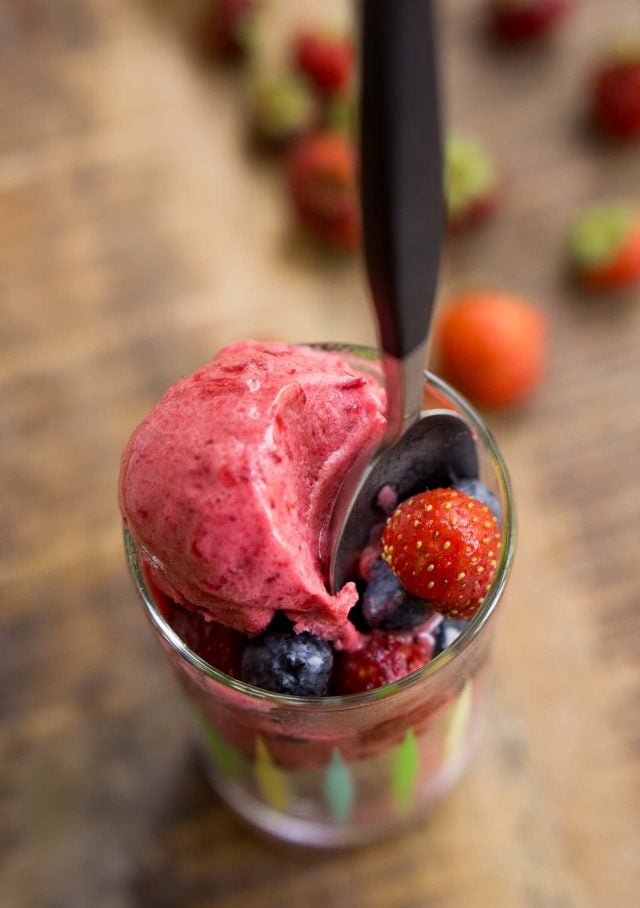
Plum Sorbet

While I miss the purple Santa Rose and Elephant Heart plums we got in California, France has its own special selection of delectable plums, including Mirabelles, quetsches, and even wild plums. While the wild plum trees that we used to pick/glean from have been pruned by the absentee owners (phooey!) we found another source last summer. And the only thing better than free plums is free wild plums, which come in an array of snazzy colors and are extra tangy, perfect for those of us that like some pucker in our pastries.
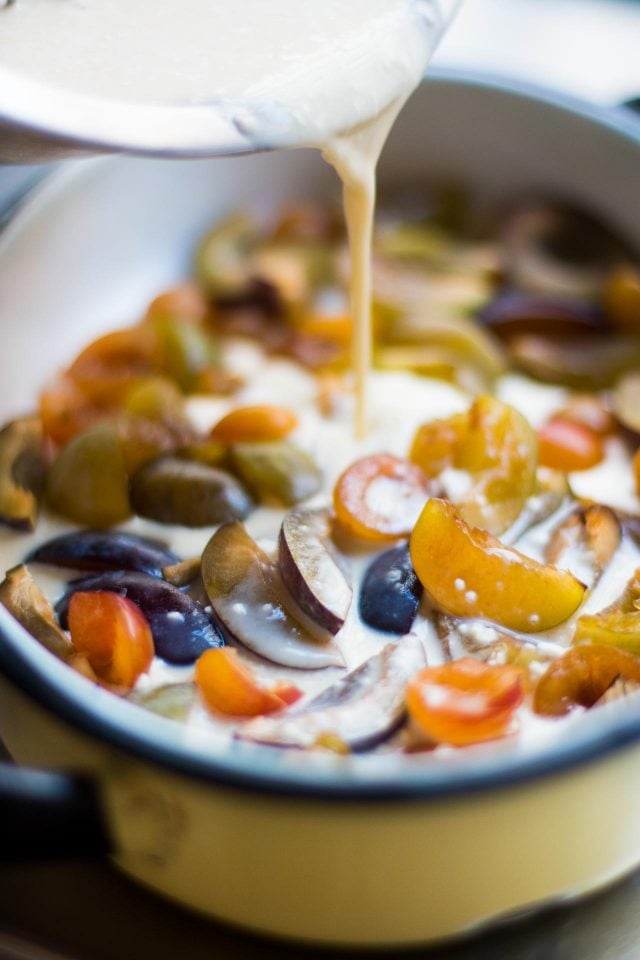
Plum Flaugnarde

The cousin of clafoutis, this flaugnarde features a jumble of plums baked in a silky custard. They’re so pretty I almost hate to bake them. But then, when I pull it out of the oven, I’m happy to have a beautiful baked gratin dish of custardy plums for dessert on a warm summer night.
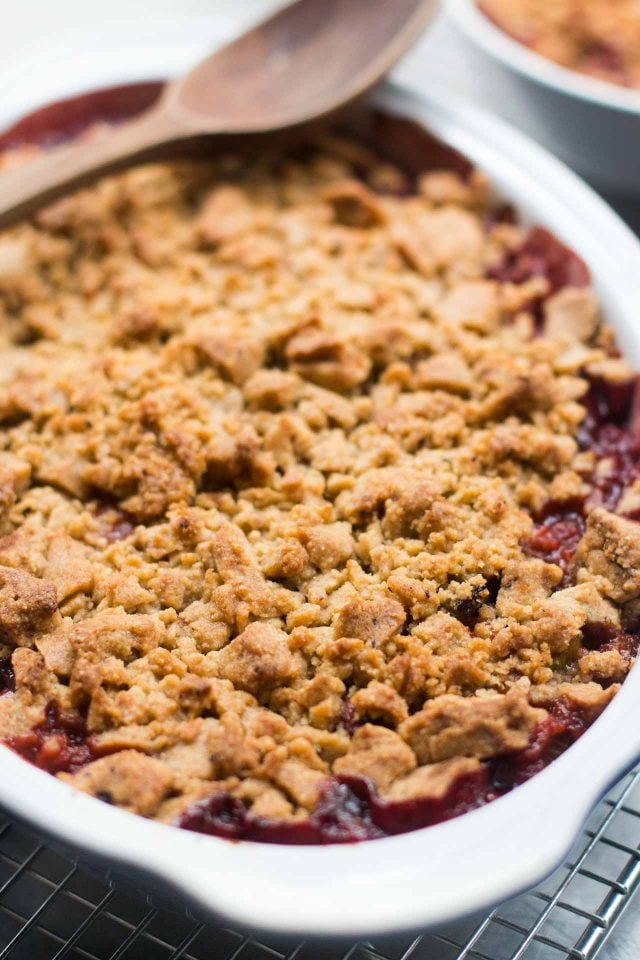
Plum-Rhubarb Crisp

Two tart fruits come together, baked under a buttery blanket of streusel. If these two bedfellows are available at the same time where you live, you’re doubly lucky!
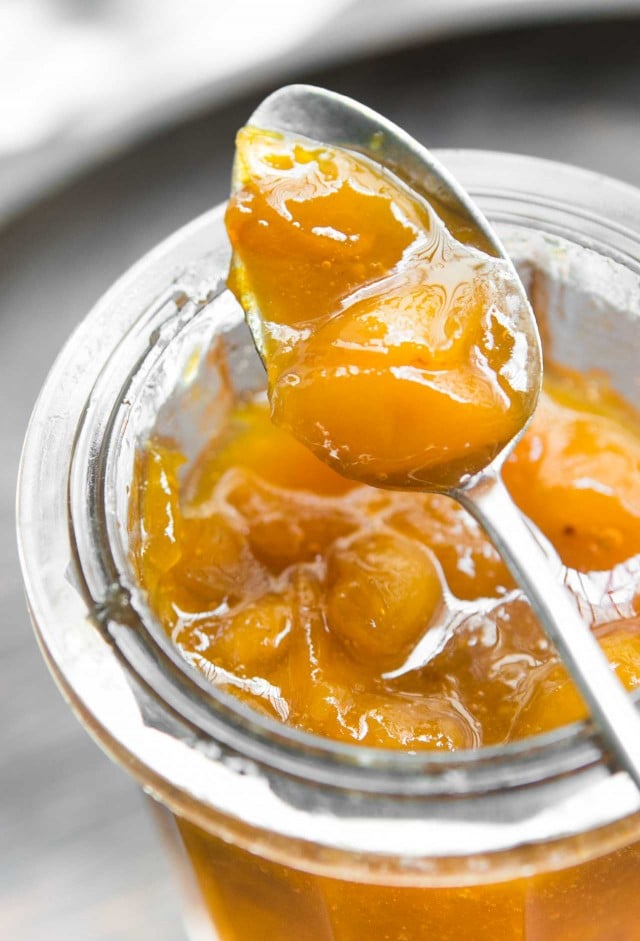
Mirabelle Jam

The elusive Mirabelle plums have a cult-like following and while some mistakenly think they aren’t available in the U.S. (they were briefly banned a few years ago), if you’re lucky, you can indeed find them. They’re intensely flavored and sweeter than other plums, and make a wonderful confiture with jewel-like fruits suspended in a shimmering jelly, which are lovely heaped on toast in the morning. (If you want to get a taste of Mirabelles but can’t find them, Bonne Maman makes a golden plum Mirabelle jam that’s exported from France.)

Angel Food Cake

While I wasn’t a fan of Angel Food Cake growing up, which my mother usually made to accompany strawberries, I became a convert as a grown-up. Perhaps it had to do with writing an ice cream book and having an overload of egg whites to use up. (And Angel Food Cake is an express route to doing that.) Nevertheless it’s a treat along with summer fruits and berries, either baked as a compote or fresh, tossed in a little sugar and perhaps a dash of crème de cassis. The spongy cake is an ideal way to make sure you get every drop of the fruit syrup that’s surrounding the airy slab. It’s French cousin, Gâteau de savoie, is equally enjoyable, and doesn’t require an Angel Food Cake pan.
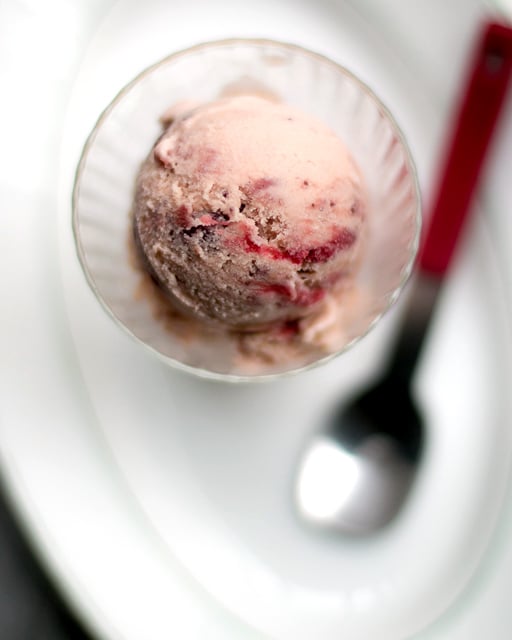
Roasted Strawberry Miso Ice Cream

Roasting strawberries is lesser-known way of coaxing out their flavor, but works well when making ice cream as it concentrates them and reduced the water, so the ice cream stays creamier. Adding a touch of salty miso provides a curious contrast to the berries juicy sweetness, and a little umami to boot.
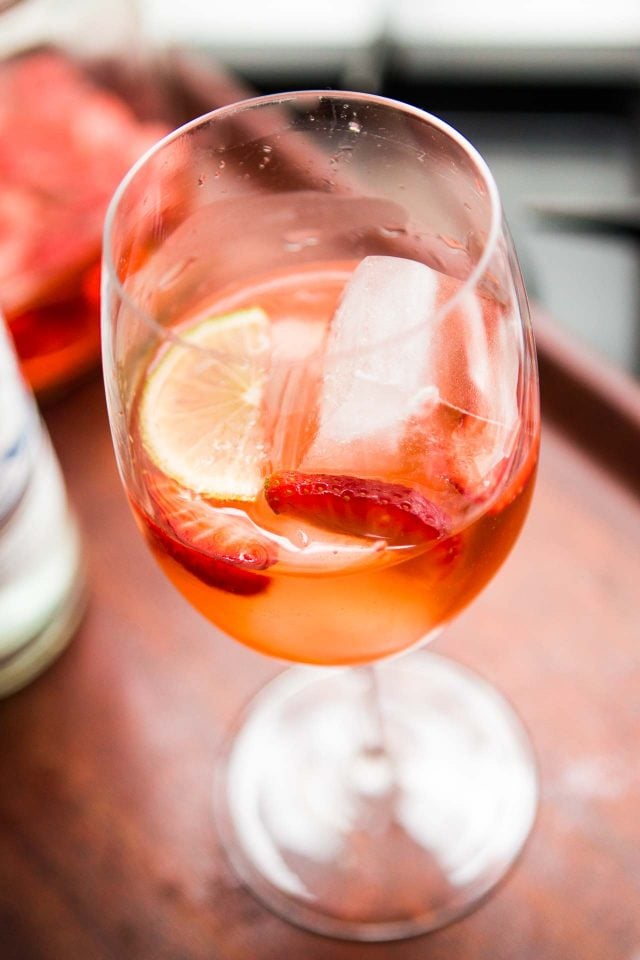
Strawberry Spritz

Once you make the (very) easy base for this Strawberry Spritz, you can use it to make Strawberry Margaritas, too. (And if you’ve got a hankering for a classic Spritz, I’ve got you covered there, too.) But this Spritz is a great, light apéritif to enjoy all season long. I was drinking lots of these a few weeks ago when strawberries were at their peak. If they available where you live, go infuse some in vermouth blanc for a great spring/summer sipper.
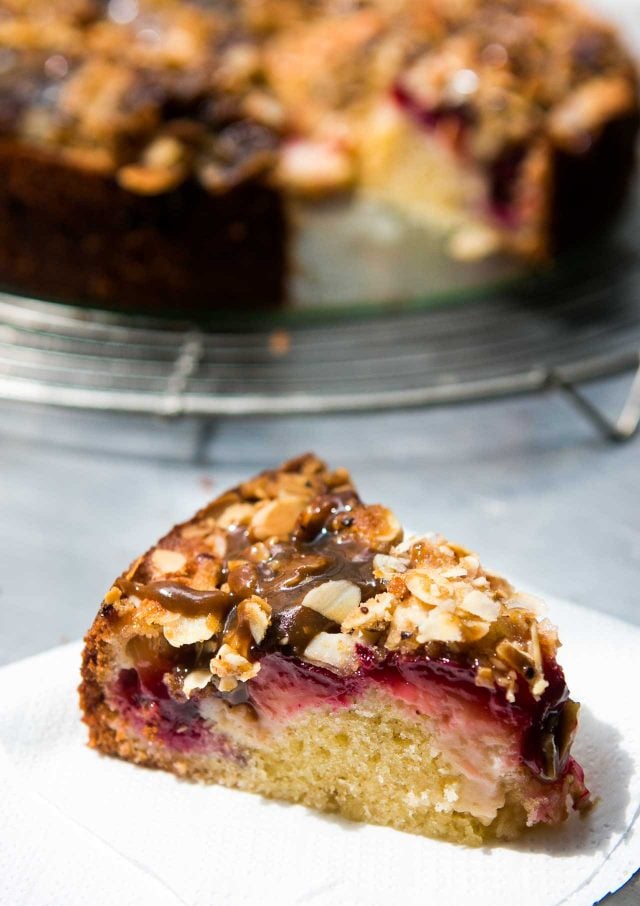
Spiced Plum Cake with Toffee Glaze

Toffee glaze is one of those things you could put on an old sneaker, and it would make those dilapidated Reeboks taste great. Even better (and more recommended) is this spiced plum cake, which isn’t too rich or too sweet. Crunchy toasted almonds on top are a nice contrast to the buttery glaze.
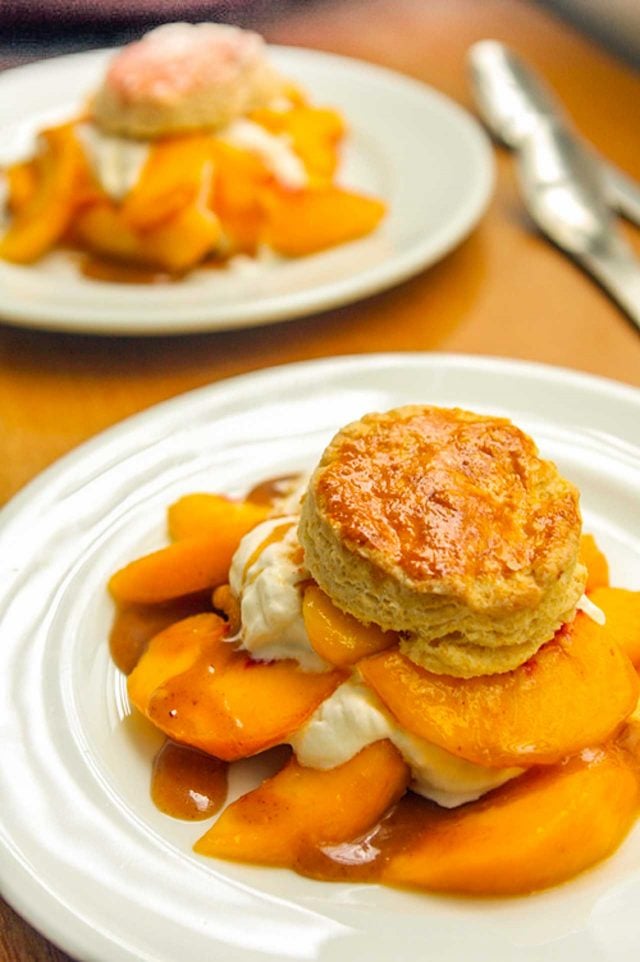
Peach Shortcakes with Butterscotch Sauce

Speaking of buttery sauces, butterscotch with peaches is a natural. Grammar-correct keeps asking me: A natural what? But I think you can figure that out. If not, give them a try together and you’ll see what I’m talking about.
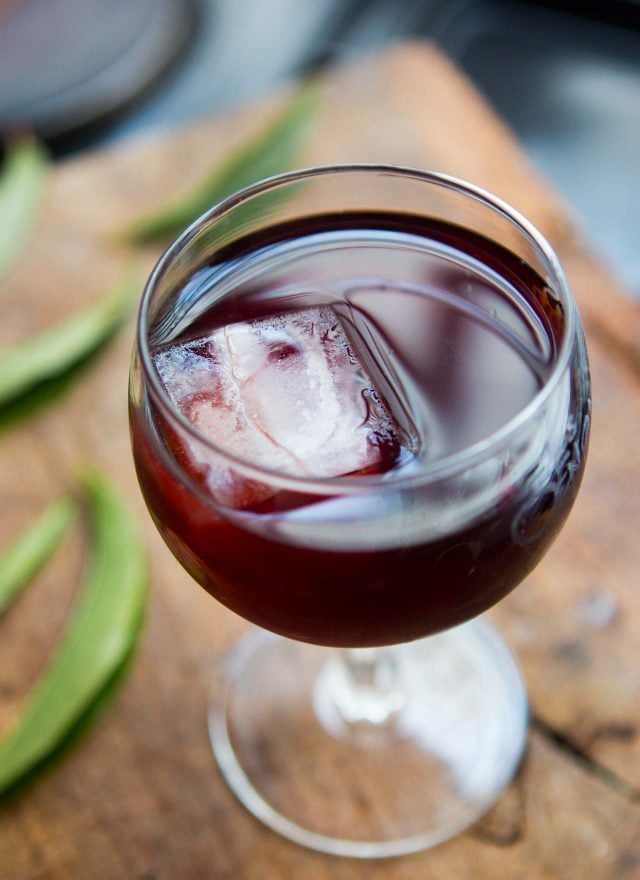
Vin de pêche

If you’re fortunate enough to have a peach tree or can get some of the leaves, they lend a delicate almond-like flavor to this intriguing apéritif wine. I try to make a few bottles every year and serve chilled glasses as the season’s change, reminding me of summer, and reminding me that the light almond flavor of peach leaves in wine is something to put on my calendar for the following year.
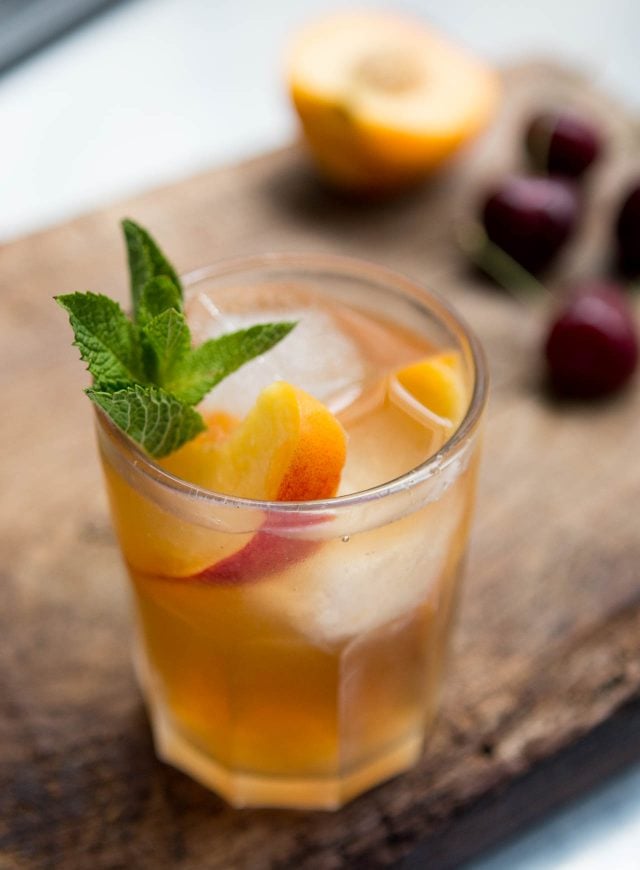
Bourbon Peach Cooler

Peaches and bourbon are natural partners, and they don’t mind sharing space in a tumbler with the classic French apéritif, Bonal. But not to worry if you don’t have it; I offer some substitutes that you might already have on your liquor shelf. This cocktail isn’t just pretty, it’s also a pretty effective way to beat the heat. (Yup, nectarines or plums could replace the peaches, if you’re so inclined.)
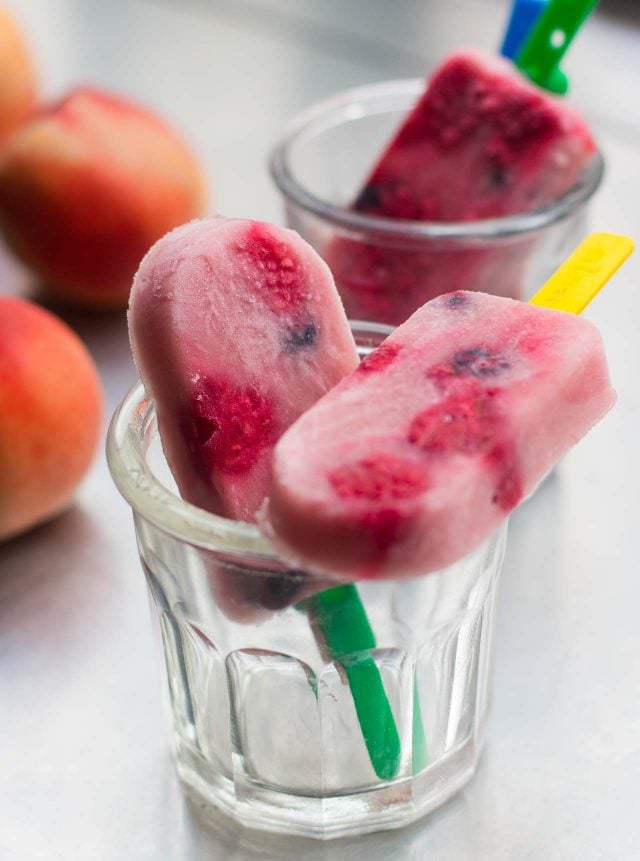
Nectarine-Berry Popsicles

A vintage metal popsicle mold that was a find at a flea market prompted these summer ‘sicles. You can load ’em up with berries and since I used white nectarines, the popsicles were extra-pretty in pink. But anyone would say “yes” to them in yellow, if you go with standard nectarines.
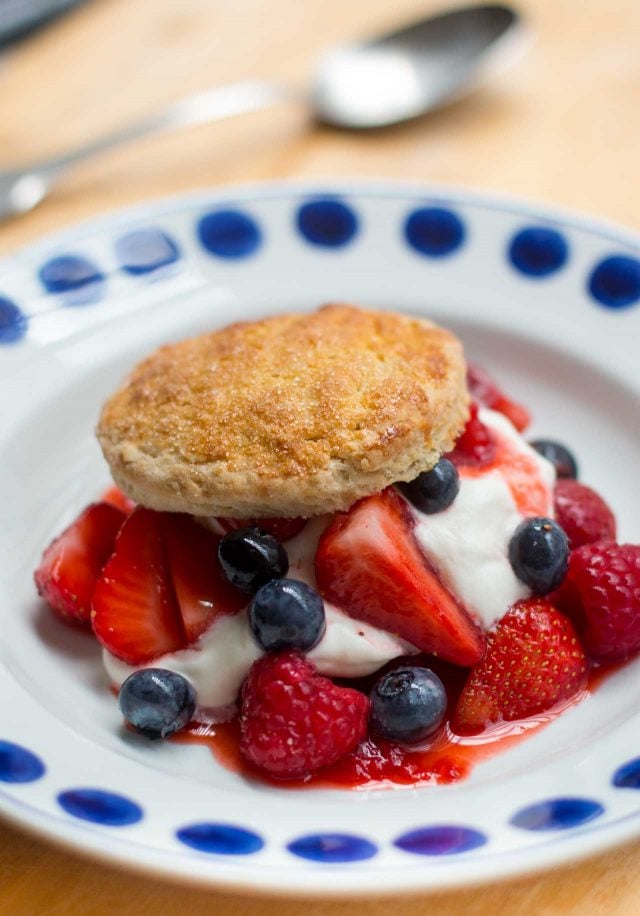
Mixed Berry Shortcakes

Mixed berry anything automatically makes something my favorite dessert. I love, love, love the juicy tumble of strawberries, blueberries, blackberries, red currants, or whatever else you’ve got. Bring the berries on!
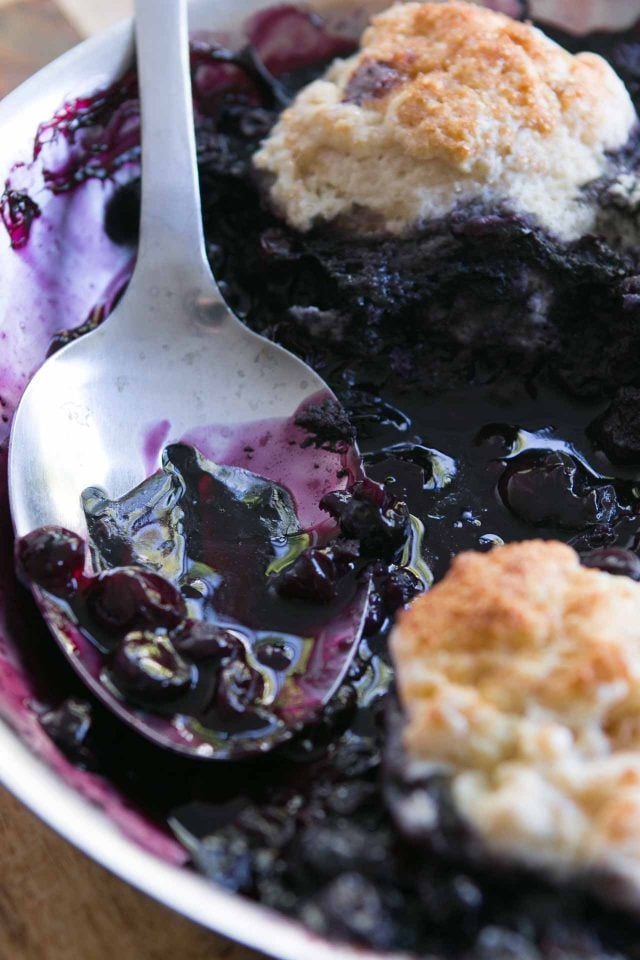
Blueberry Cobbler

While I am nostalgic for the overload of blueberries that I grew up with New England, when I do find myrtilles, I try to keep them as close to their pure state as possible. Topped with crumbly drop biscuits, all that’s needed is a scoop of vanilla ice cream to complete the picture, but white chocolate-fresh ginger ice cream would also be welcome…and appreciated, on this cobbler.
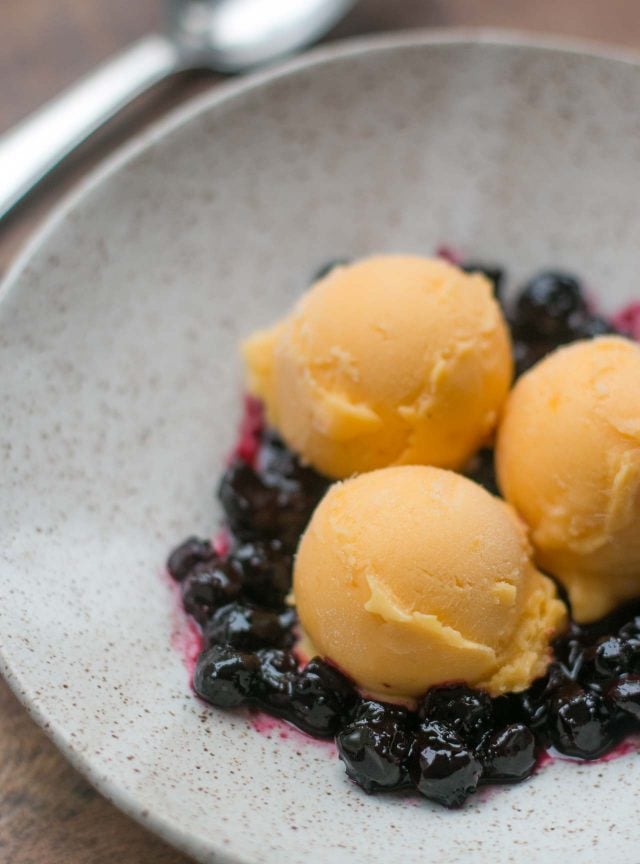
Mango Frozen Yogurt with Blueberry Compote

While everyone’s mind is on peaches and nectarines, don’t forget mangoes, their tropical counterpart, which go just as well with summer berries. Blueberries particularly come to mind but raspberries and strawberries could fill in for them.
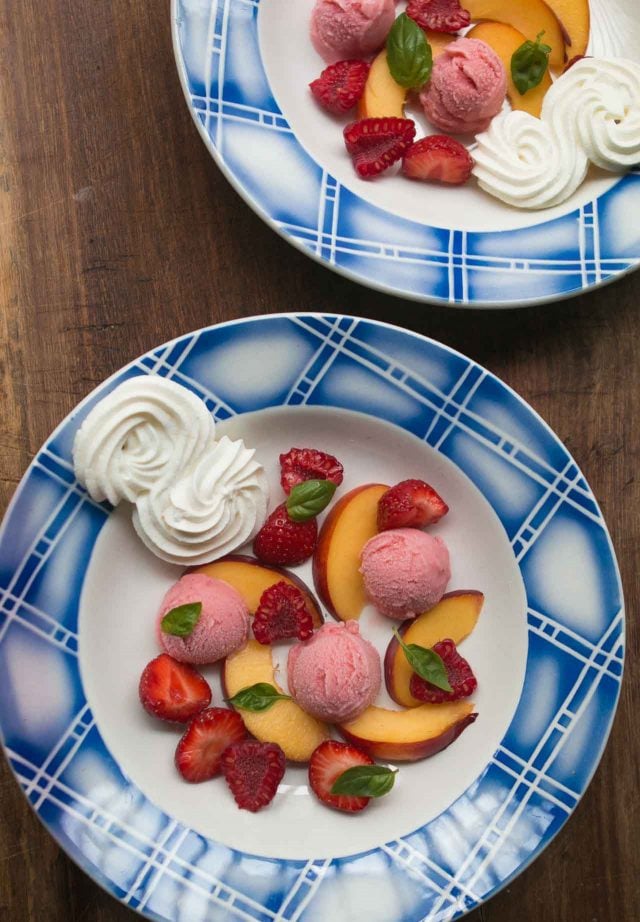
Strawberry Frozen Yogurt

With pretty swirls of crispy meringue, this tangy frozen yogurt can be part of a composed dessert, which I like to serve in the summer, being generous with the fresh fruit…and filling in the blanks with frozen yogurt and meringues.
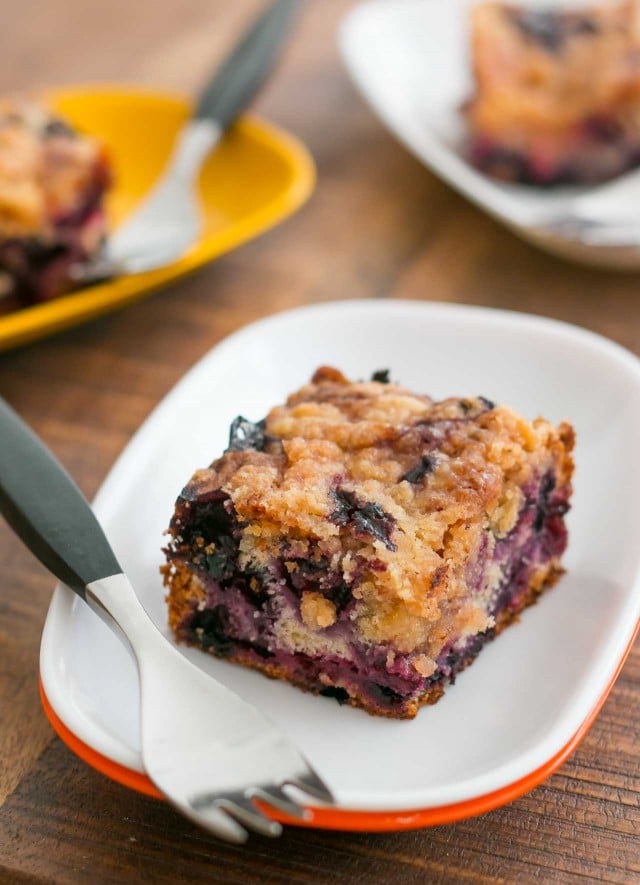
Blueberry Buckle with Lemon Syrup

I don’t know if blueberries get any better than in this buckle, which do indeed “buckle” under the weight of almost too many blueberries…if that’s even possible. A dousing with tart lemon syrup keeps things moist and tangy. You can skip the cream with this one. It’s great on its own.



  •  

Caramelized Peanut Coffee Cake

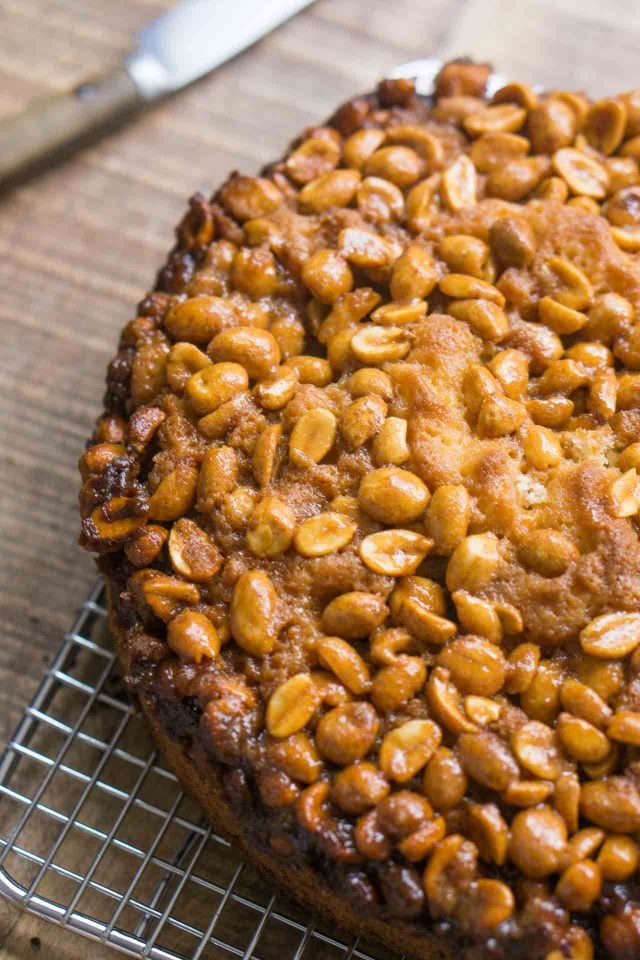
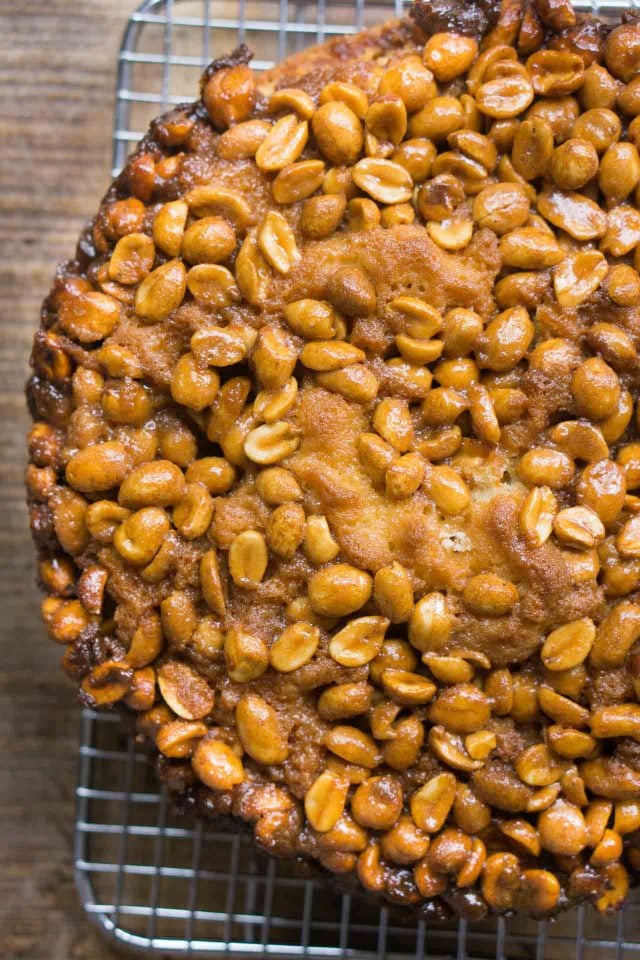
Whenever I’m looking through a new cookbook, what never fails to make me bookmark a recipe is when I come across something that has caramelized nuts on it, or in it. Whether it be Honey-Almond Squares or Swedish Almond Cake, you can be sure you’ll find me in my kitchen within the next 24 hours, and baking it. This Caramelized Peanut Cake that takes very little effort to make, but yields big rewards. Big, crunchy, peanutty ones, with a bonus of moist, buttery cake underneath, holding it all together.

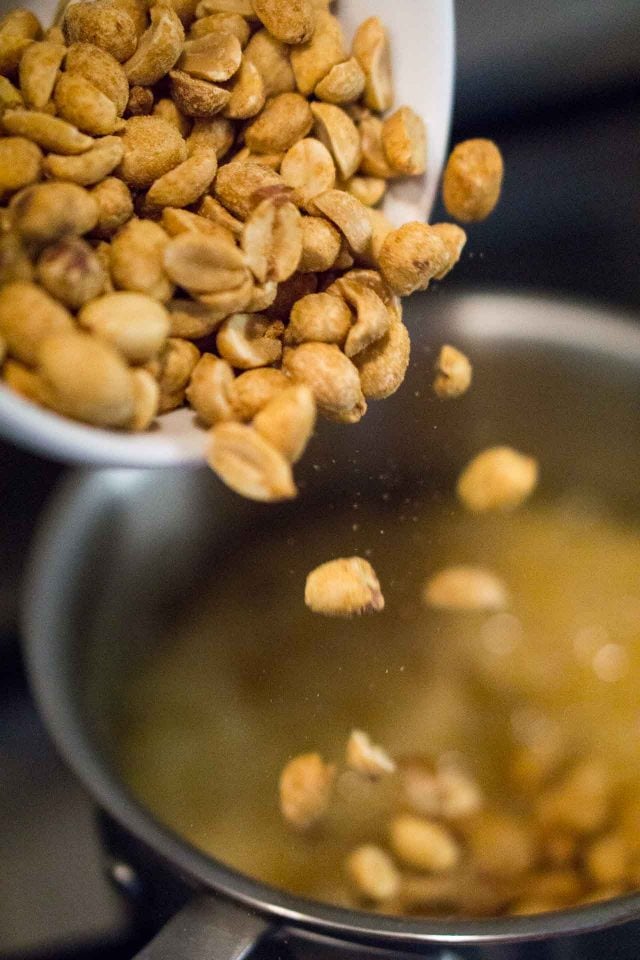
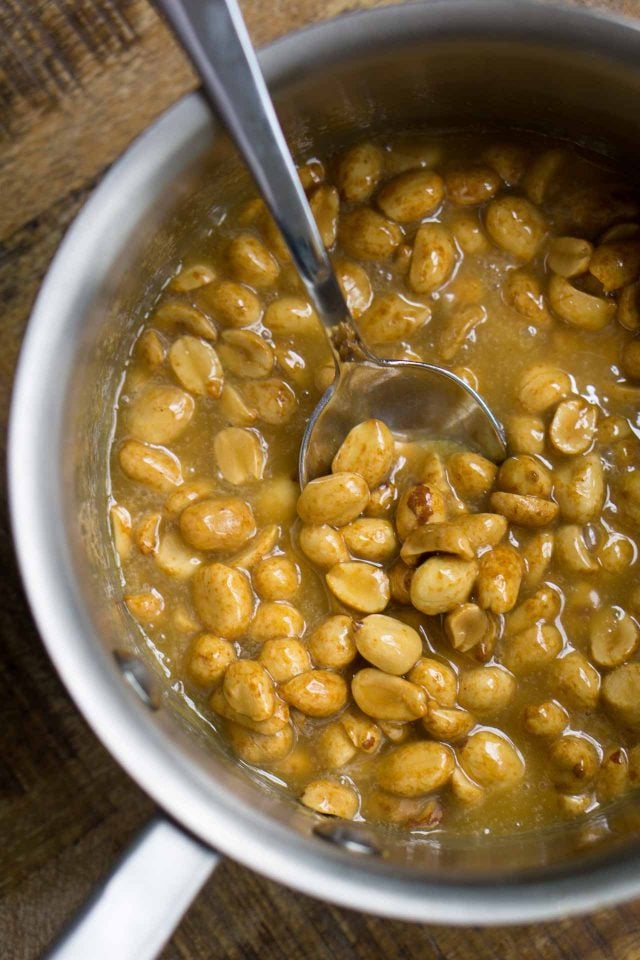
The good thing about this cake (aside from it being covered with a generous pile of caramelized salted peanuts, as if it can get any better than that) is that you likely have most of the ingredients already on hand. That was my case, so I was able to make it right away. The only ‘technique’ you need to master is boiling butter, honey, cream and sugar, then stirring in the roasted peanuts. The topping couldn’t be easier.

This recipe is adapted from The Joys of Baking, an unabashedly sweet ode to baking by Samantha Seneviratne that riffs off stories and situations in her life, ones that inspired the recipes. Gingered Cashew Nut Brittle showered with sesame seeds, a Roasted Plum Cloud Cake topped with swirls of snowy meringue, bittersweet Amaro Stracciatella Ice Cream, and Salted Chocolate-Covered Chocolate Caramels are the kinds of things that I’d agree are a joy to bake, and to eat.

So how could I resist cake topped with SALTED CARAMELIZED PEANUTS? Sorry for shouting, but this cake is something to shout about. I mean, just look at it…

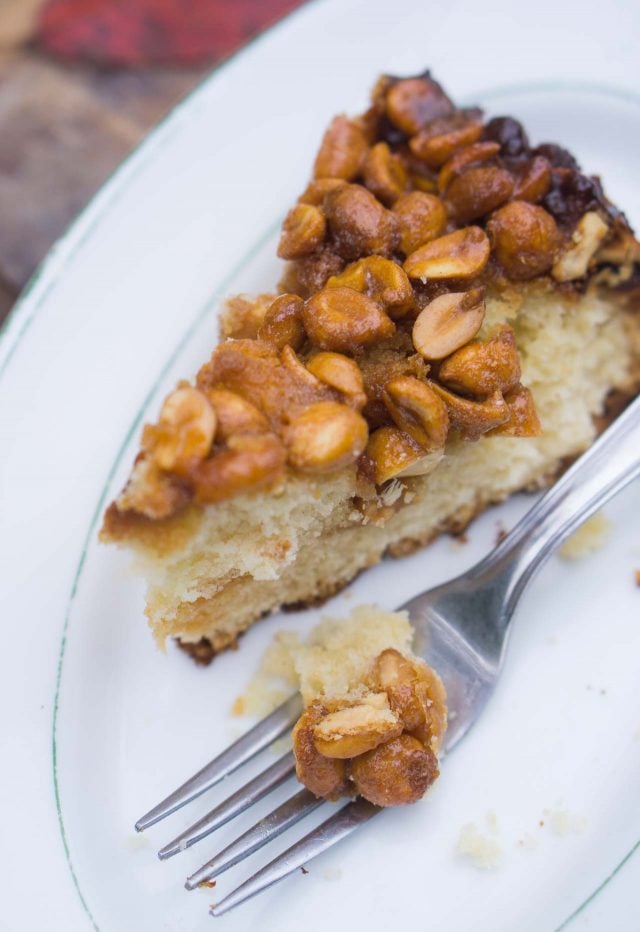
The only difficulty you might encounter is getting the cake neatly out of the pan. Mine got a little dark around the edges (why, oh why, wasn’t I born a food stylist, to make mine as neat as the one in the photo in the book?) I found that letting the cake rest for about 5 to 10 minutes after it comes out to the oven, then using a sharp paring or utility knife that’s either sprayed with a bit of non-stick spray, or lightly greased, to separate the sides from the cake pan while it’s still warm, is your best bet for easy (or easier) removal of the ring of the springform pan. Any pieces that fall off can be reaffixed to the cake.

Or let them cool…and eat them yourself.

Which is what I did with the missing chunk in the photo, above. (Why, oh why, wasn’t I born with photo editing skills?) But honesty is the best policy, and I hope you’ll trust me when I say this cake is as good as it looks. And if a few pieces go missing, here and there, well – you only have yourself to blame. But unlike me, you don’t have to tell anyone about it.

Print

Caramelized Peanut Coffee Cake

Adapted from The Joys of Baking: Recipes and Stories for a Sweet Life by Samantha Seneviratne
One tip: If you have low-fat milk on hand, you don't need to go out and buy whole milk just to make this cake. Since the topping only calls for 1/4 cup (60ml) of cream, you'll likely have some leftover cream if you've gone out and bought a carton or bottle. So you can mix some of that cream in 50:50 proportions with low-fat milk to approximate whole milk. Another tip from a reader, who used a silicone cake mold (which I don't own) and said the cake slipped out of the mold easily and the sides didn't get too dark.
Servings 8 servings

Ingredients

For the peanut topping

  • 6 tablespoons (3 ounces, 85g) unsalted butter cubed
  • 1/3 cup (65g) sugar
  • 3 tablespoons (60g) honey
  • 1/4 cup (60ml) heavy cream
  • 1 1/2 cups (7 ounces, 195g) roasted, salted peanuts

For the cake

  • 6 tablespoons (3 ounces, 85g) unsalted butter cubed, at room temperature
  • 2 cups (280g) flour
  • 2 teaspoons baking powder preferably aluminum-free
  • 1/2 teaspoon kosher or sea salt
  • 1 cup (200g) sugar
  • 1 large egg at room temperature
  • 2 teaspoons vanilla extract
  • 3/4 cup (180ml) whole milk at room temperature

Instructions

  • Butter the sides and bottom of a 9-inch (23cm) springform pan very well. Preheat the oven to 350ºF (180ºC).
  • To make the peanut topping, warm the unsalted butter, sugar, honey, and heavy cream in a small saucepan, stirring occasionally until the butter is melted. Bring the mixture to a boil and let it cook at a low, but steady boil, for 3 minutes. Remove from heat and stir in the peanuts. Set aside, stirring every once in a while to cool it down, while you make the cake batter.
  • In a small bowl, sift or whisk together the flour, baking powder, and salt.
  • In the bowl of a stand mixer fitted with the paddle attachment, or in a large bowl mixing by hand with a spatula or wooden spoon, beat the butter and sugar until light and creamy, about 3 minutes. Reduce the speed to low and add the egg and vanilla extract, stirring to combine. (You may want to stop the mixer during the step, and scrape down the sides if using a stand mixer, to make sure all the ingredients are well incorporated.)
  • Stir half of the flour mixture into creamed butter (with the stand mixer set on low speed), then add the milk, then mix in the rest of the dry ingredients.
  • Scrape the batter into the prepared pan and smooth the top. Spoon the peanut mixture over the top of the cake. It will have thickened up but do your best to make sure it's relatively even, and avoid pushing it right up to the sides of the pan, as it'll stick to the pan and make it a little difficult to release later.
  • Bake the cake for 50 to 55 minutes, until a toothpick inserted into the center of the cake comes out clean. Do not touch the top of the cake to check for doneness as the caramel is hot and sticky, and it can burn. (Trust me...) Let the cake stand 5 to 10 minutes, then lightly grease a paring or utility knife and run it around the outside of the cake to release it from the sides of the pan. Then remove the outside ring of the springform pan. If any bits of caramelized peanuts stick or come off when removing the outside ring, either reunite them with the cake, or let them cool and eat them yourself.

Notes

Serving: Serve the cake just as it is, or with lightly whipped cream or a favorite flavor of ice cream.
Storage: The cake is best the day it's made but can be kept at room temperature for up to three days either well-wrapped or under a cake dome.
  •  

Coffee Caramel Panna Cotta

Two of my favorite flavors come together right here, in this Coffee Caramel Panna Cotta, which offers up the rich flavor of caramel with a few strong shots of espresso. I seem to have good caramel karma and when I baked professionally, the executive pastry chef at one restaurant told me that I was the one she wanted to make the caramel desserts since I had a knack for getting caramel just right.

While I was flattered, in reality, caramel isn’t that hard to make. Like riding a bike, or when you wake up one morning and they upgrade the software on your phone for whatever reason, there’s a learning curve. (However, I still haven’t figured out how to use my photo editing software. Someone recommended a book that’s a whopping 533 pages long, but honestly, can’t they just make these things more intuitive?)

Unlike unintuitive tech, once you get the hang of making caramel, you know the pitfalls and issues that can arise, and you’ll feel like a pro when you take a taste of the finished caramel dessert and realize – whether a chef tells you so or not – that you’ve done a good job. You are a good person, and I know you can do it, too!

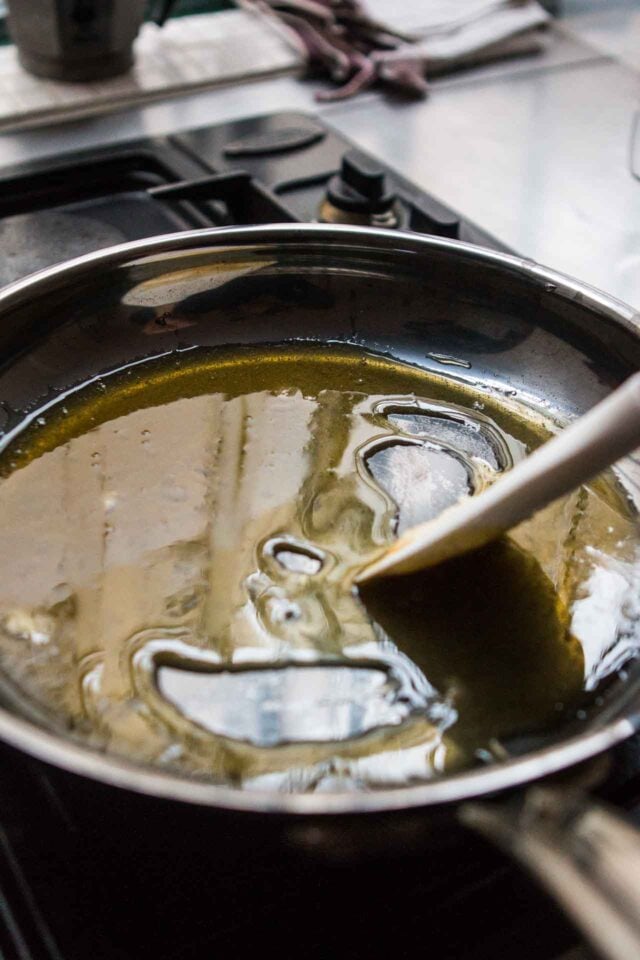
Here I use a dry caramel with no liquid added; it’s just sugar. The picture above may look scary, as in “What do I do wrong?” But dry caramel is pretty foolproof. I’ve given tips on making caramel here, but the basic action starts with spreading the sugar in a wide pan or deep saucepan (use a good-quality one for best results as thin pots and pans don’t heat evenly), heating it until it starts to liquify, then stirring it gently as you go, until it’s completely liquified.

Once it’s liquified, keep gently stirring it, and start watching carefully as things will now move quickly and you want to pay close attention to what’s going on in the pan. Don’t let anything distract you as a few seconds can make all the difference. Make sure the warm cream ready to go.

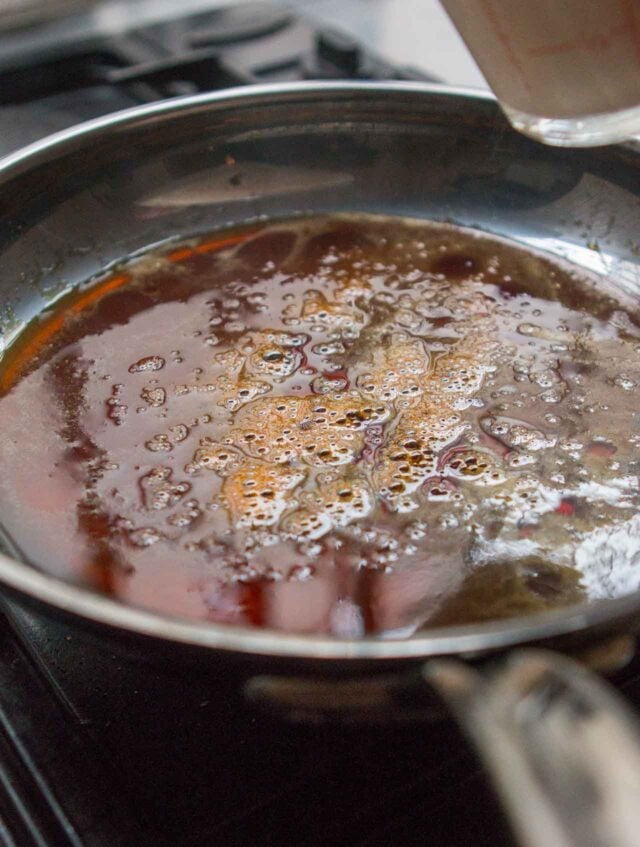
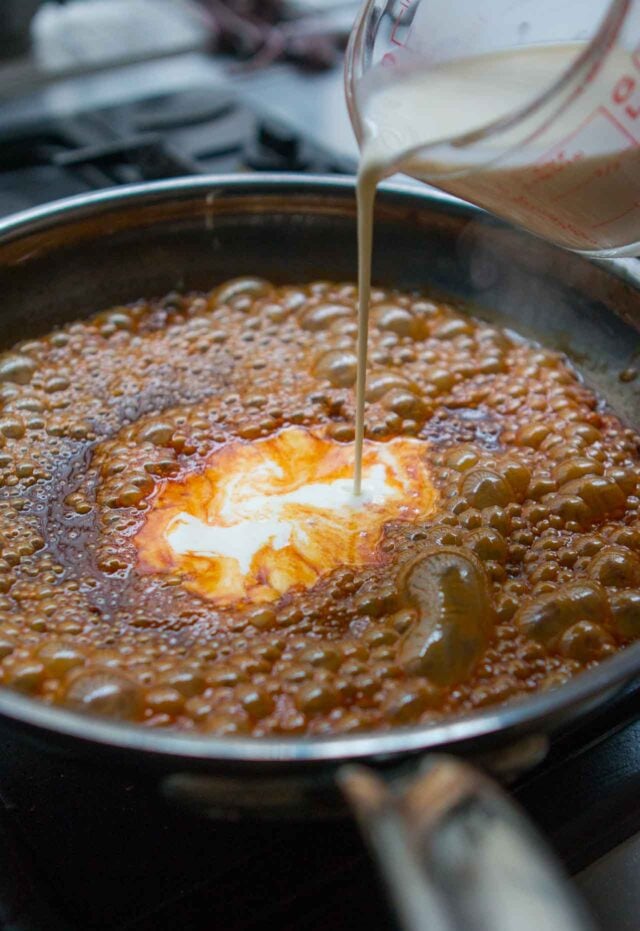
The caramel quickly goes from what it looks like above, to what it looks like below. When the caramel is bubbly, amber-colored (the color of an old penny), and smells just slightly smoky – as in, if you let it go a few more seconds, it’ll burn – turn off the heat and immediately add the warm cream to stop the cooking.

You want to get it to just the right color, aroma, and flavor where it’s cooked enough so it’s in the middle ground between being not sugary sweet, but not burned either. (I recently did a caramel video tutorial on Instagram that you might find interesting where I explain and demonstrate it in detail.)

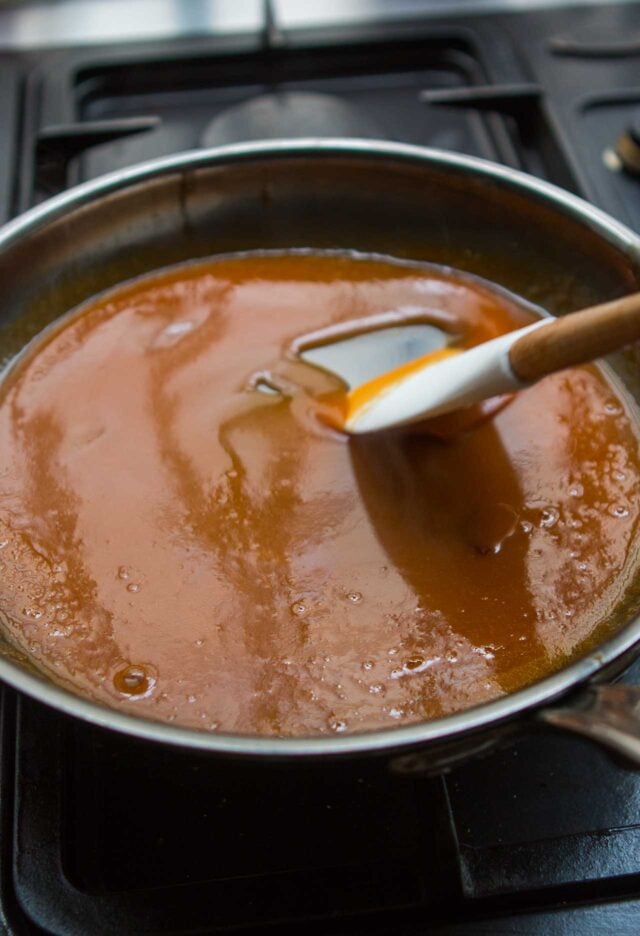
Once the caramel is done, and the cream has been added, it’s hard not to want to pour the caramel below in a bowl and spoon the whole thing up. Right?

I made this Coffee Caramel Panna Cotta recipe a few times the past week, playing around with different amounts of espresso and caramel. The caramel made with 3/4 cup (150g) sugar is more caramel-forward and made the coffee flavor a little less-prominent in the finished panna cotta. So I gave you a range to choose from in the recipe.

Panna cotta is different than its custardy counterparts as it’s made with gelatin rather than eggs. There’s no water bath or constant checking in the oven to check for doneness. Although the name in Italian means “cooked cream,” the dessert has a relatively light profile since whole milk is used, rather than all cream. Here I use just enough cream to ‘stop’ the caramel (whole milk can curdle in caramel) then I add whole milk later, although lowfat will work, too. I’m not against lowfat milk. Nor am I against decaf if you want to use that.

When I had to give up coffee for a while, I turned to an instant roasted grain-based substitute, which can fill in for coffee in baking, too. Just make it as strong as espresso. Most natural food stores and well-stocked supermarkets carry different brands of them. If anyone gives you a hard time for not drinking coffee, which happened to me when I had to give it up, many espresso bars in Italy offer caffè d’orzo made with roasted barley. And anyone who wants to argue with Italians about anything coffee-related, let me tell you, it will not end in your favor.

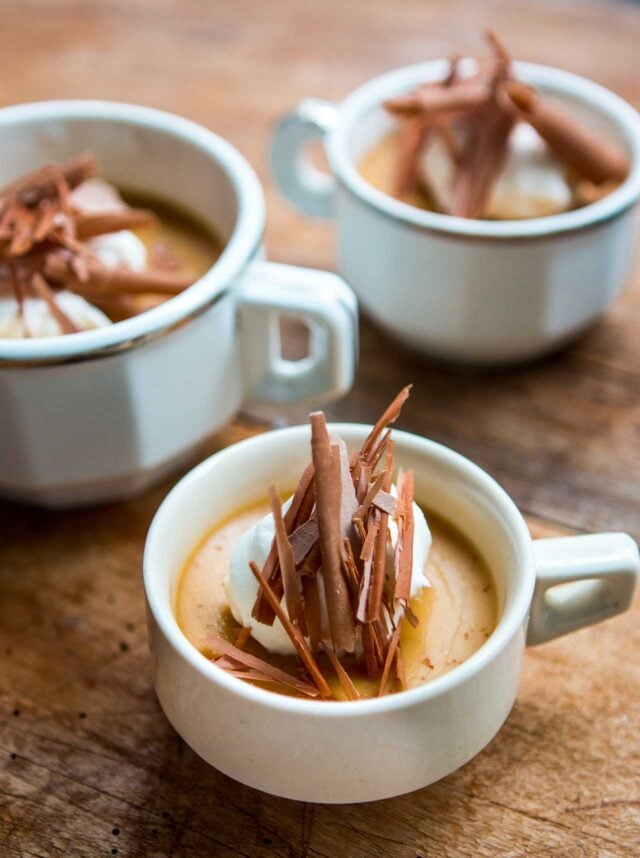
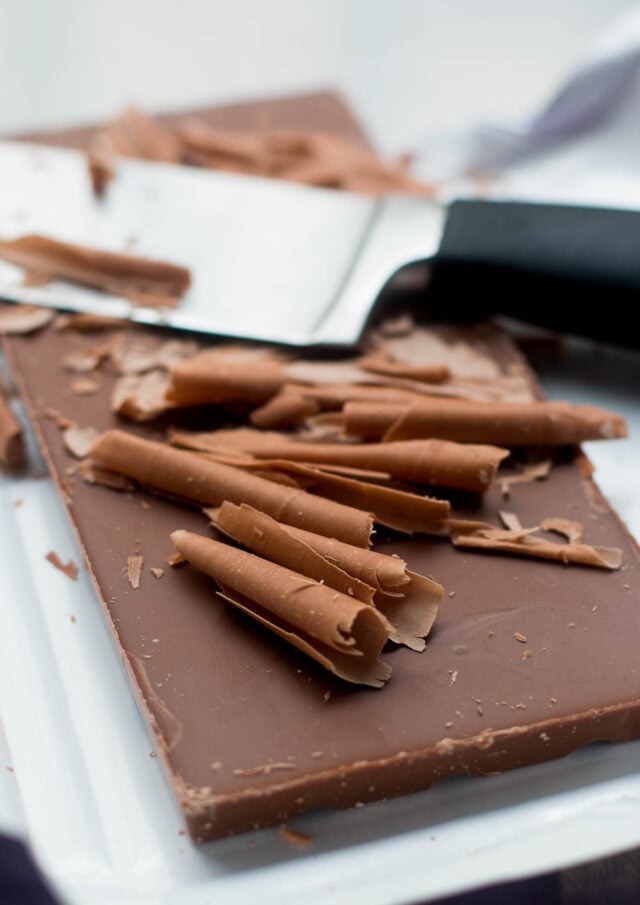
Once you’ve mastered caramel, chocolate curls are always fun to try, which you can make by either scraping a chef’s knife down a bar of milk or dark chocolate. If using dark, use one that’s not too cold or the curls will shatter. Pastry chefs will sometimes rub a chocolate bar briskly up and down with their (clean and dry) hands to warm it up a bit before trying to make curls.

Place the block longwise at the edge of the counter you’re standing at and, holding the bar in place against you with your waist, holding the handle and the top of the blade, scrape curls toward you with the knife at a near 90º angle, angling the blade just a bit away from you as you drag it down. You don’t have to press down very hard and after few tries, you’ll find the angle and pressure that works best for you. Of course, be careful dragging the knife toward you and make sure the blade is facing away from you. You can also use a sharp swivel-bladed vegetable peeler and make shorter curls by running it down the long side of a chocolate bar. Once again, milk chocolate is softer and easier to use than dark if you want more cohesive curls. But there’s no shame in shards, either.

As mentioned, I made a few batches of this Coffee Caramel Panna Cotta before settling on the proportions here. I know some of you may have questions about using gelatin and gelatin substitutes, which I answered here. In Europe, sheet gelatin is more prevalent but sheets vary in size and in strength, ranging between five different strengths. The best approximation here would be to use two sheets of gelatin: a general rule is 3 sheets of gelatin equals one 1/4 ounce (7g) envelope gelatin. To use sheets here, soften them in a bowl of cold water for a few minutes then wring them out and add them to the warm (not boiling hot) caramel mixture after you’ve added the cream.

Print

Coffee Caramel Panna Cotta

If you want a fuller caramel flavor, use the 3/4 cup (150g) of sugar to caramelize in step 2. The caramel flavor will be a bit more pronounced than the coffee flavor but I tried it both ways and like it, for different reasons. And you can use lowfat milk rather than whole milk, although it'll be less-smooth, but I wouldn't call this an overly rich dessert.
It goes without saying that the stronger the espresso, the more forceful the coffee flavor will be. I tried it with a few long (allongé or lungo) shots of espresso as well as espresso made in a moka pot, and both were good. If you don't have an espresso maker, use good-quality instant espresso powder dissolved in hot water. Taste and make sure it's quite strong as it'll be diluted later with the other ingredients. I've mentioned some coffee alternatives in the post.
I've not had experience using agar-agar, but fish-based gelatin is available and is said to work the same as standard gelatin. For more on gelatin, including using sheet gelatin, check my post on how to use gelatin. If you do try sheet gelatin, or another type, feel free to share how they work out in the comments.
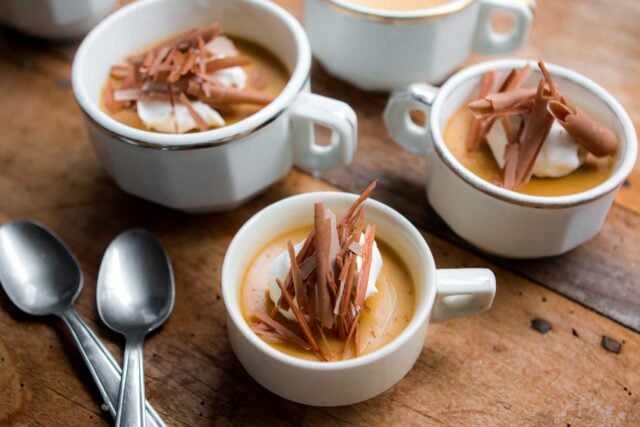
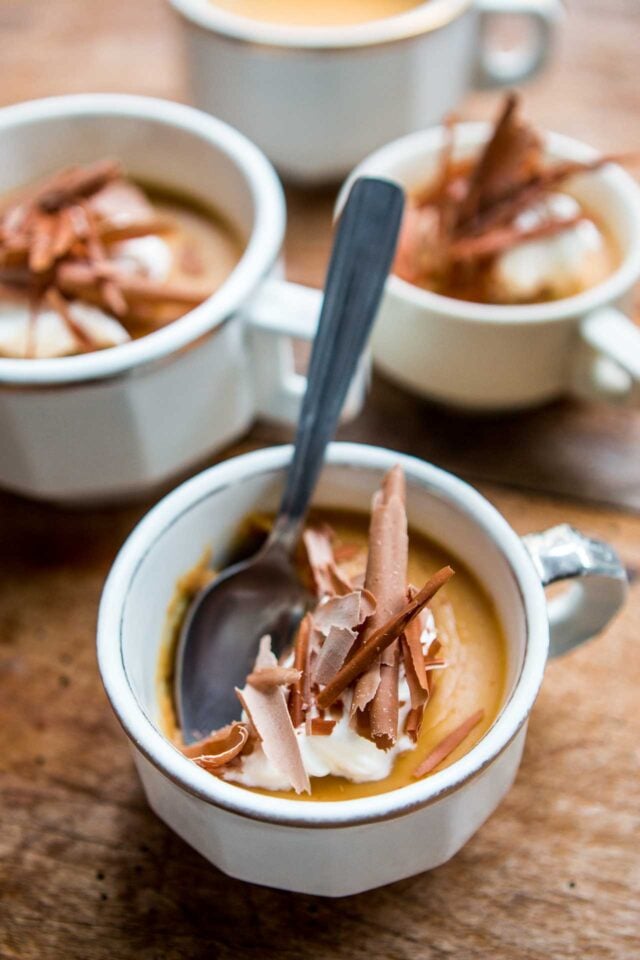
When done, because these aren't baked, you can simply pour the finished mixture into coffee or espresso cups or other decorative glasses. The number of servings will depend on how large or small you make them. The recipe plug-in I use to write up recipes so they're printable doesn't allow me to add a range of serving sizes (which I learned when they kept disappearing after I added them...) but this recipe will make 4 to 6 servings.
Course Dessert
Servings 4 servings

Ingredients

  • 1 cup (250ml) whole milk (lowfat can be used)
  • 1 1/2 teaspoons unflavored powdered gelatin
  • 2/3 - 3/4 cup (130-150g) sugar (see headnote)
  • 3/4 cup (180ml) heavy cream warmed
  • 1/3 cup (80ml) liquid espresso
  • 1/2 teaspoon vanilla extract
  • pinch of salt

Instructions

  • Pour 1/2 cup (125ml) of cold milk in a small bowl and sprinkle the gelatin granules over it in an even layer. Set aside for at least 5 minutes to allow the gelatin to soften.
  • Spread the sugar in an even layer in a medium skillet or wide, deep saucepan. Warm the sugar over medium heat until it starts to liquify. (Generally it'll start to liquify in certain spots, depending on your pan.) When it starts to melt, gently stir the sugar with a heatproof utensil so it liquifies evenly. It will get grainy as you stir it, but as you continue to cook it, it should smooth out as it begins to take on a light amber color.
  • Continue to cook the sugar, swirling the pan more than stirring it, until the caramel starts to smoke and is a deep amber color. Smell the caramel and when it just starts to smell smoky, turn off the heat and add the warm cream gradually, stirring, until it's incorporated into the caramel. If there are any lumps, continue to stir the mixture until the lumps are melted. (You may need to rewarm the mixture over very low heat to get them all melted.)
  • When the mixture is cooled down a bit, until it's the temperature of a very warm cup of coffee, add the softened gelatin and stir until dissolved, then stir in the remaining 1/2 cup (125ml) of milk, espresso, vanilla, and salt.
  • Transfer the mixture to a large measuring cup so it's easier to pour, and divide it into custard cups or glasses. Depending on the size of servings you want, choose whatever cups or glasses you'd like to use. Chill until firm, about 6 to 8 hours, or overnight.

Notes

Serving: Serve the custards cold, on their own or with a dollop of whipped cream. They can be decorated with chocolate shavings, a sprinkle of cocoa powder, or toasted sliced almonds.
Storage: The custards will keep for up to five days in the refrigerator. 

  •  

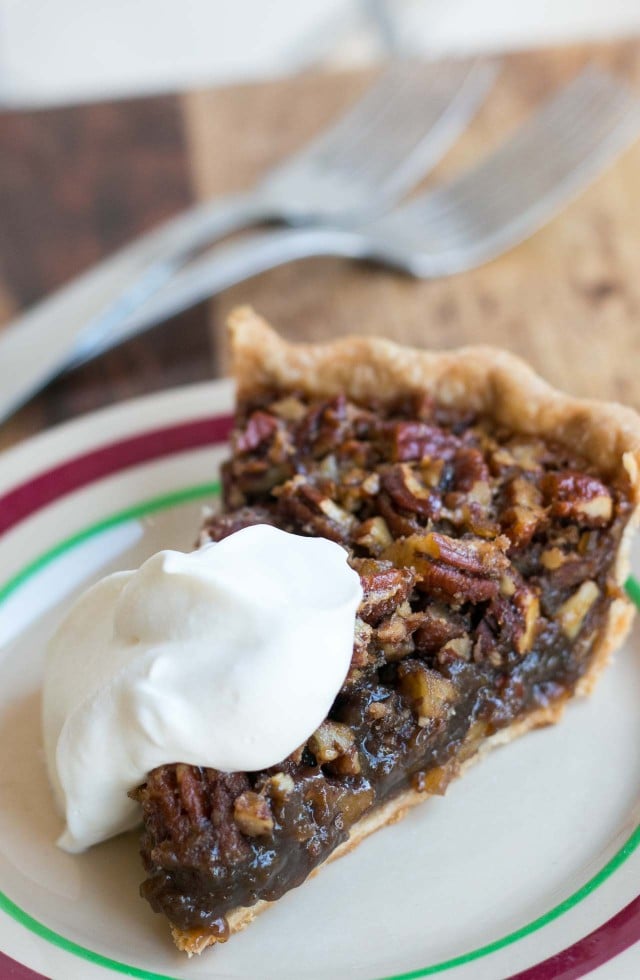
Bourbon-Ginger Pecan Pie

Pecan Pie with Bourbon and Ginger

I wasn’t planning on beginning this post for a pie recipe with anything other than a story about how much I liked it, encouraging you to make it. (Which I’ll get to later.) But after I had started writing it, several neighborhoods in Paris came under attack, including mine, and I put everything on hold.

Pecan Pie with Bourbon and Ginger

Cafés and restaurants that I knew, and areas that I frequent, were targets, as was the area around the theatre where my outdoor market is, which suffered the worst of it. Everyone I know is okay, but others were not so fortunate. It’s a crazy world we are living in and often we just see it on television and switch the channels to something more entertaining, so we don’t have to think about it. But when it happens right outside your door, or in a city that you love so much (whether you live there or are just an occasional visitor), you can’t avoid the shock and the grief. In addition to some introspection, my hope is that this will bring a conversation and dialogue that will somehow address why – and how – this happened, and where to go from here.

I couldn’t think of a very good transition from the heartbreaking tragedy, to pie, and I’m not used to being short on words, so I’ll just say that I was happy to have this pie sitting on the counter after all that happened this weekend. It made us feel a little better.

Pecan Pie with Bourbon and Ginger

Some say baking heals and while I’m not much for catch-phrases and slogans, it did feel nice to be rolling out some dough to have a pie around. And a new one to me, at that. A few years ago I gave pecan pie a makeover using dark chocolate chunks, which came out so well that it became my go-to pecan pie.

Pecan Pie with Bourbon and Ginger

But with the upcoming holidays arriving, I was perusing First Prize Pies from Allison Kave of Butter & Scotch, looking for another pie to make for the fêtes, and landed on her Bourbon ginger-pecan pie.

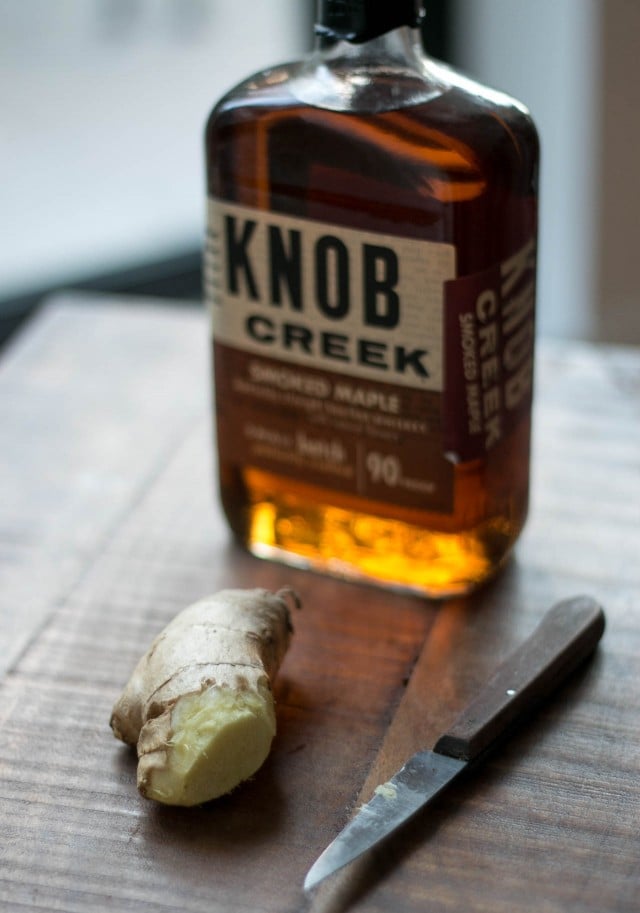
As luck would have it, in addition to a bag of beautiful pecans, I also had a bottle of Knob Creek smoked maple bourbon that was so good that it was freaking me out. It was a gift from my bourbon-loving friend Elizabeth Karmel and I was looking for an opportunity to crack it open. Recent events make me realize that you don’t necessarily need to squirrel everything away until another time or save it until later. Maybe now it that time.

Pecan Pie with Bourbon and Ginger

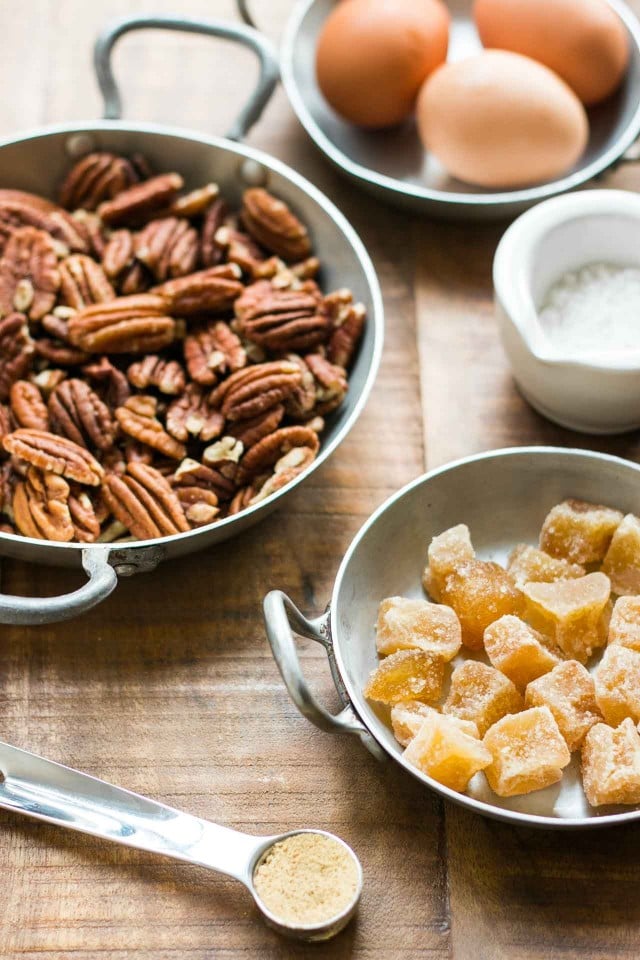
This dialed-up pecan pie won first prize at the Brooklyn Pie Bake-Off, and if you’ve visited Brooklyn in the last few years, you’ll know that there’s some heavy competition out there in the cooking and baking categories. So that’s saying something. Allison noted that a heavy hand with the bourbon is always appreciated. (And I agree.) But it’s also special because of the triple-whammy of ginger, courtesy of a handful of candied ginger, a spoonful of dried ginger, and a dose of freshly grated ginger in the nutty filling.

Pecan Pie with Bourbon and Ginger

It was hard to interrupt him while he was eating the pie so ravenously. But when he came up for air, Romain said it was the best thing he’d ever eaten. And that’s coming from someone who’s often looked at me quizzically when served some of the foods associated with Thanksgiving that perplex the French: Gravy? Pepperidge Farm stuffing mix? A one-week obsession with cranberries? Marshmallows? Sweet potatoes? Marshmallows and sweet potatoes together?

Pecan Pie with Bourbon and Ginger

It helps that he, like any sane person, loves maple syrup, as well as fresh and candied ginger, which the French call gingembre confit. I gotta say, I loved this pie as much as he did. The zing of ginger really took it up beaucoup de notches, not just one notch, and the shots of bourbon helped temper what is traditionally a rather sweet dessert, which this pie isn’t. Or wasn’t, I should say. Because it’s now long-gone.

Pecan Pie with Bourbon and Ginger

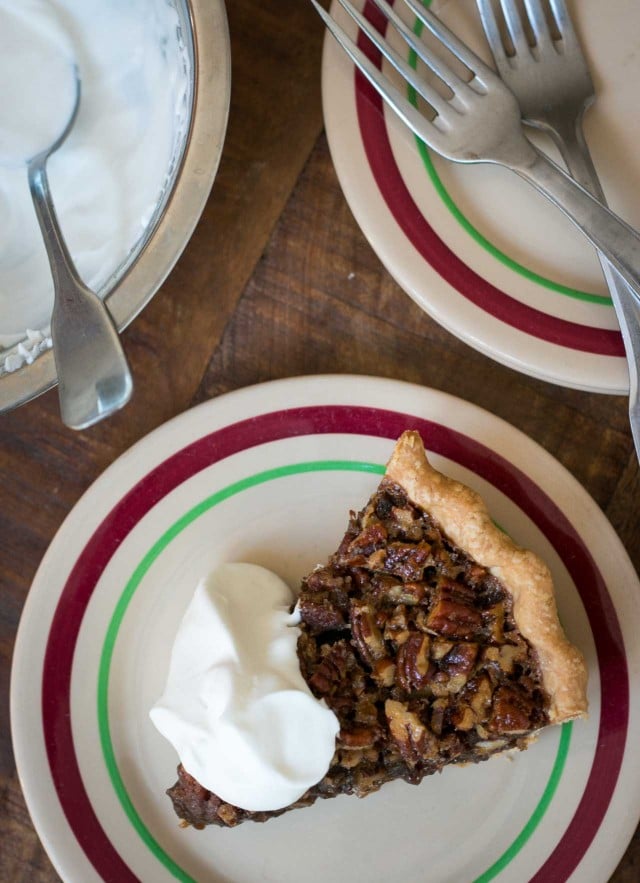
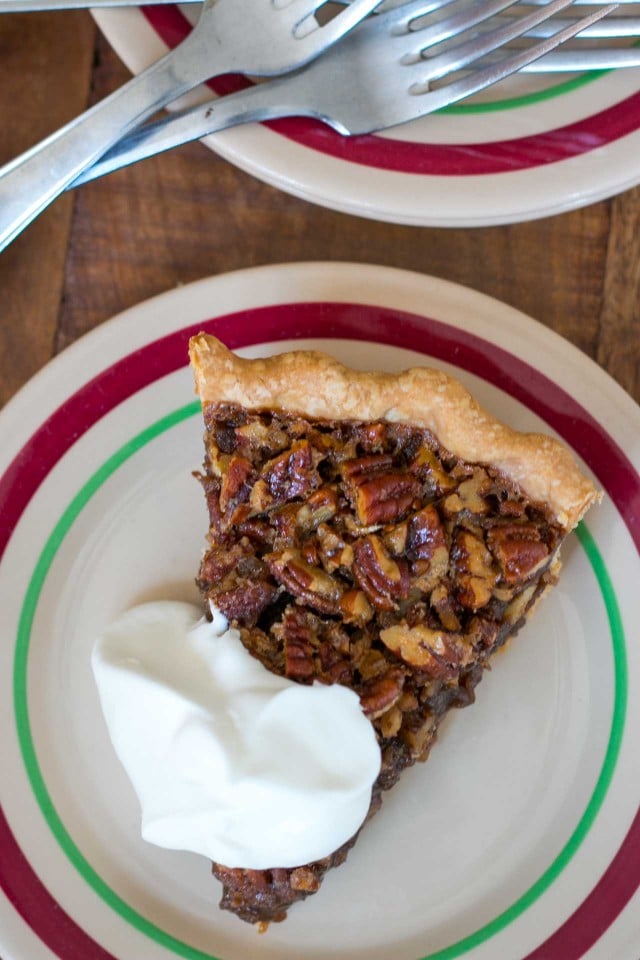
Whipped cream is always the classic to serve with pecan pie. If you’re looking for an ice cream to pair with it, I recommend white chocolate-fresh ginger ice cream, or it might also be nice with milk chocolate ice cream instead, if you’re someone – like me – that has a hard time imagining dessert without chocolate. And if that’s the case, bourbon always plays a good second fiddle to chocolate. The pecans and maple syrup-rich filling are an added bonus.

Print

Pecan Pie with Bourbon and Ginger

Adapted from First Prize Pies by Allison Kave I loved the idea of adding three kinds of ginger to pecan pie and using maple syrup as a sweetener. If you don’t have maple syrup, you can go with golden syrup, which is available in well-stocked supermarkets (depending on where you live), or online. I’ve not used it, but some recommend sorghum syrup as another substitute. Because I’m like that, I veered from the original proportions a bit. One was that I added a few more pecans, and toasted them first, adding an additional handful to the baking sheet to make up for the ones that I nibbled on. ; ) I also added some melted butter to the filling to give it a little extra silky richness. If you don’t want to use bourbon, dark rum would be a nice substitution, as would Cognac or rye whiskey. If you want to leave out the liquor, just add 2 teaspoons of vanilla extract and a few drops of lemon juice to counterbalance the brown sugar and maple syrup. Although I didn’t do it, you could brush the rim with an egg wash – one egg yolks mixed with 1-2 teaspoons of milk, and brush it over the rim before baking the pie. If glazing the rim, it may need to be covered during baking if it gets too dark before the filling is done. You can fashion strips of aluminum foil to cover the rim of the pie if that happens.

Ingredients

For the dough

  • 1 1/4 cups (175g) flour
  • 2 teaspoons sugar
  • 1/4 teaspoon salt
  • 4 ounces (115g) chilled unsalted butter cubed
  • 3-4 tablespoons ice water

For the pecan pie filling

  • 1 cup (215g) packed dark brown sugar
  • 1/2 cup (125ml) dark amber maple syrup
  • 3 large eggs at room temperature
  • 4 tablespoons melted butter salted or unsalted
  • 3 tablespoons bourbon
  • 2 teaspoons grated fresh ginger
  • 1 teaspoon ground (dried) ginger
  • 1/2 teaspoon vanilla extract
  • 1/4 teaspoon salt
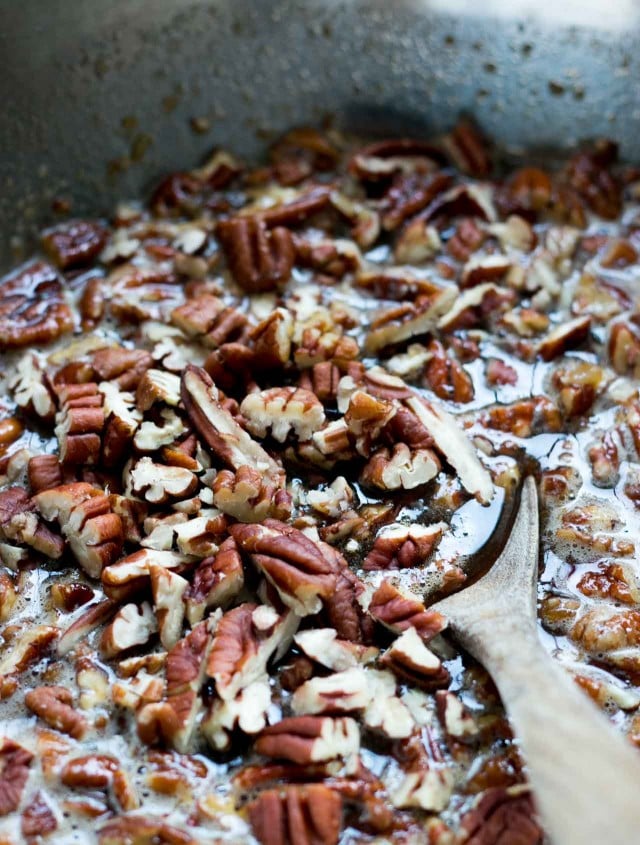
  • 2 cups (225g) pecans lightly toasted, very coarsely chopped
  • 1/4 cup (50g) candied ginger finely chopped

Instructions

  • To make the dough, mix the flour, sugar, and salt in the bowl of a food processor, or in a stand mixer fitted with the paddle attachment. (The dough can also be made by hand, in a bowl with a pastry blender, or using your hands.) Add the chilled butter and mix or pulse the dough until the butter is broken up into small pieces about the size of peas.
  • Add 3 tablespoons of ice water and mix until the dough begins to come together. If necessary, add 1 more tablespoon of water if the dough needs it to come together. Turn the dough out on a work surface and give it a few turns with your hands. Shape the dough into a disk, wrap in plastic wrap, and refrigerate for at least 1 hour.
  • Roll the dough on a lightly floured surface, or between two pieces of parchment paper until it’s about 13-inches (33cm) in diameter. Brush off any excess flour and transfer it to a 9-inch (23cm) pie plate or pan. Tuck the overhanging edges under, between the rim of the pie plate and the dough, and crimp the edge of the dough. Chill the dough in the refrigerator until firm.
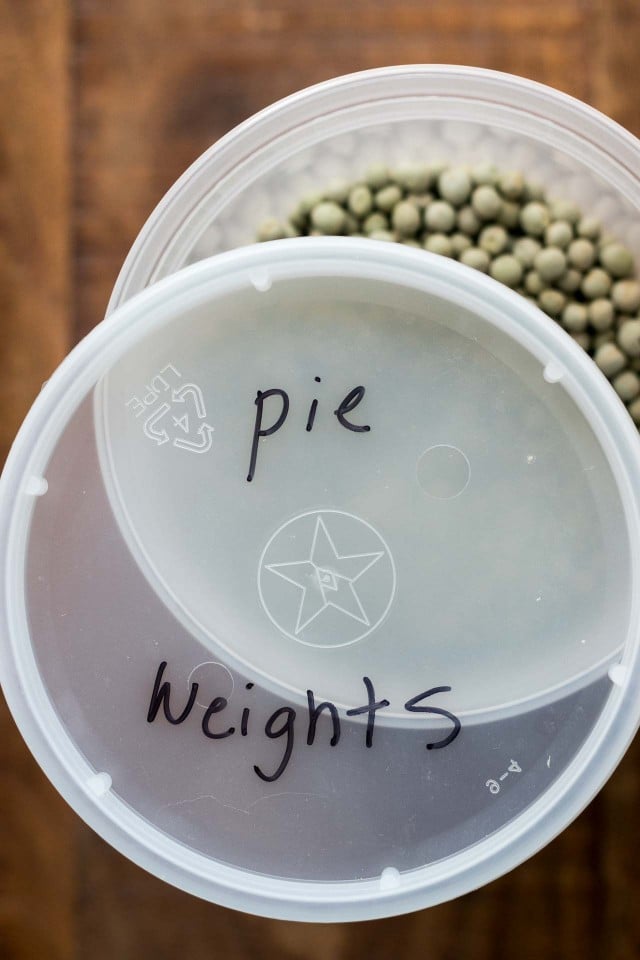
  • To bake the pie dough, preheat the oven to 375ºF (190ºC). Prick the pie dough a few times with a fork. Line the pie dough with aluminum foil and fill halfway with beans, rice, or pie weights. Bake until the dough is set and starting to get lightly golden brown, about 15 to 20 minutes. Lift out the foil with the weights and bake until the dough is well-browned, about 5 to 8 minutes more. Turn the oven down to 350ºF (180ºC).
  • To make the filling, in a large bowl, whisk together the brown sugar, maple syrup, eggs, melted butter, bourbon, fresh ginger, ground ginger, vanilla, and salt. Stir in the pecans and candied ginger.
  • Pour the filling into the prebaked tart shell and bake until the center of the pie is seems just about set. It should still jiggle a little. Begin checking it at the 40 minute mark, but it may take 45 to 50 minutes to reach that point of doneness. Remove it from the oven and let cool on a wire rack.

Notes

Serving and storage: Pecan pie is best served at room temperature and it’s easier to cut when it’s cooled completely. Although it’s no slouch if slightly warm, as long as you don’t mind the pieces looking a little sloppy. Ice cream or whipped cream are fine accompaniments.
The dough can be made up to two days in advance and refrigerated, or frozen for up to two months, either unrolled, or rolled out and fitted into the pan.
The baked pie can be kept at room temperature for up to four days. I’ve not frozen pecan pie but it can probably be done, if well wrapped.

Related Recipes

Cranberry Raisin Pie

How to make candied ginger

Chocolate Pecan Pie

Apple Harvest Tart

French Apple Cake

  •  
❌