❌

Reading view

Cherry Jam

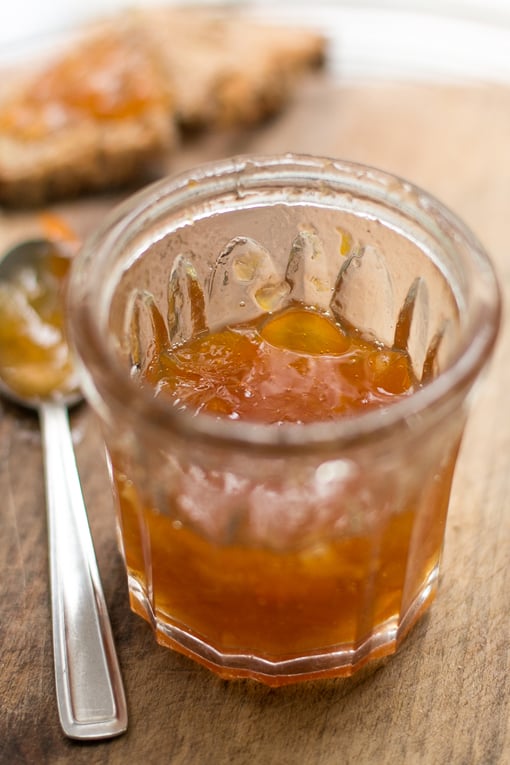
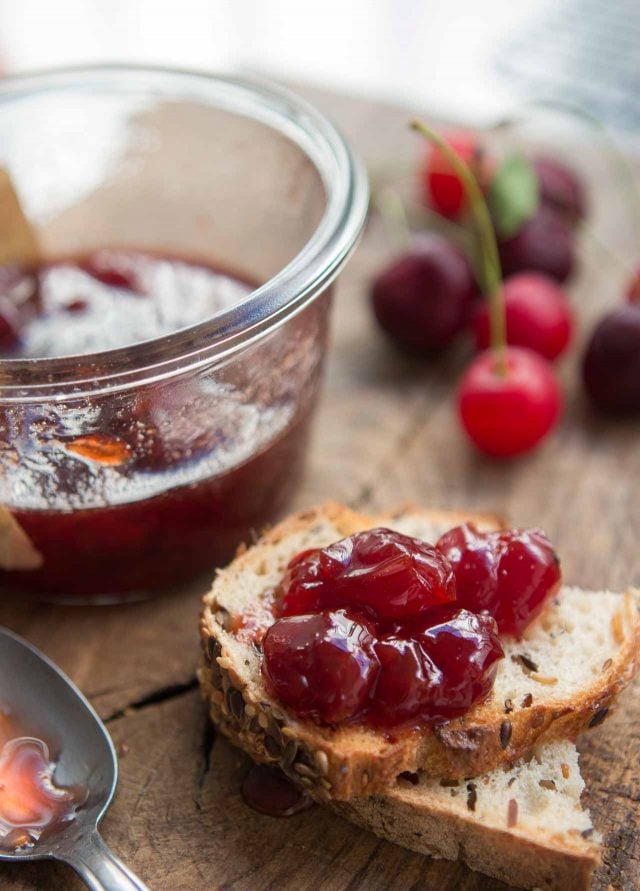
One of the first “recipes” on this blog was No-Recipe Cherry Jam, posted in 2005, which wasn’t quite a recipe. Nevertheless, a lot of people successfully used those guidelines to make cherry jam over the last fifteen years. The basis for it was how I’ve been making jam forever, using 3 parts sugar to 4 parts fruit puree. The standard ratio is to use equal parts sugar to fruit puree but I like to use less.
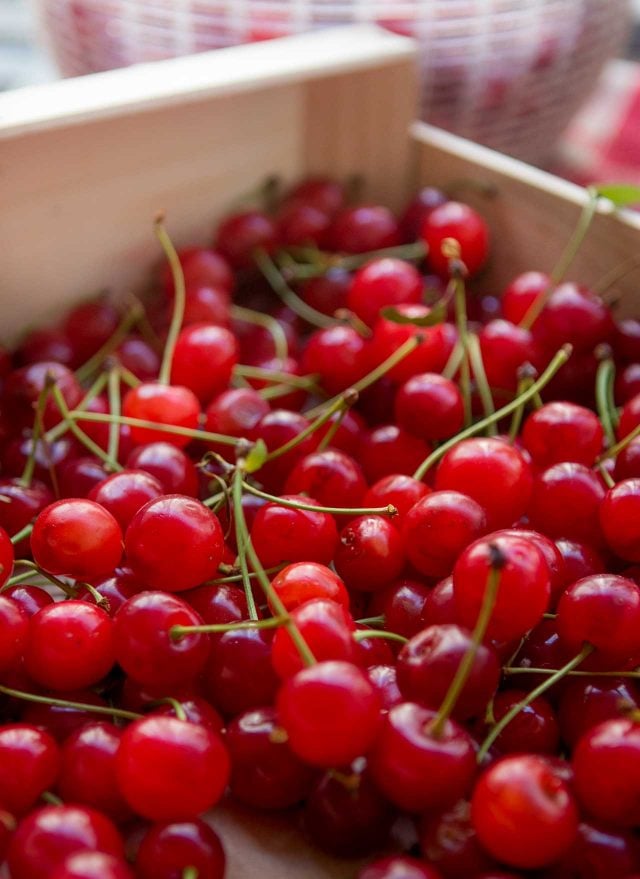
I often make cherry jam with sweet cherries, which are what one usually finds at the market. But if you can find sour cherries, those are wonderful in the mix, but when fresh, they have a short shelf life so should be used, pronto.
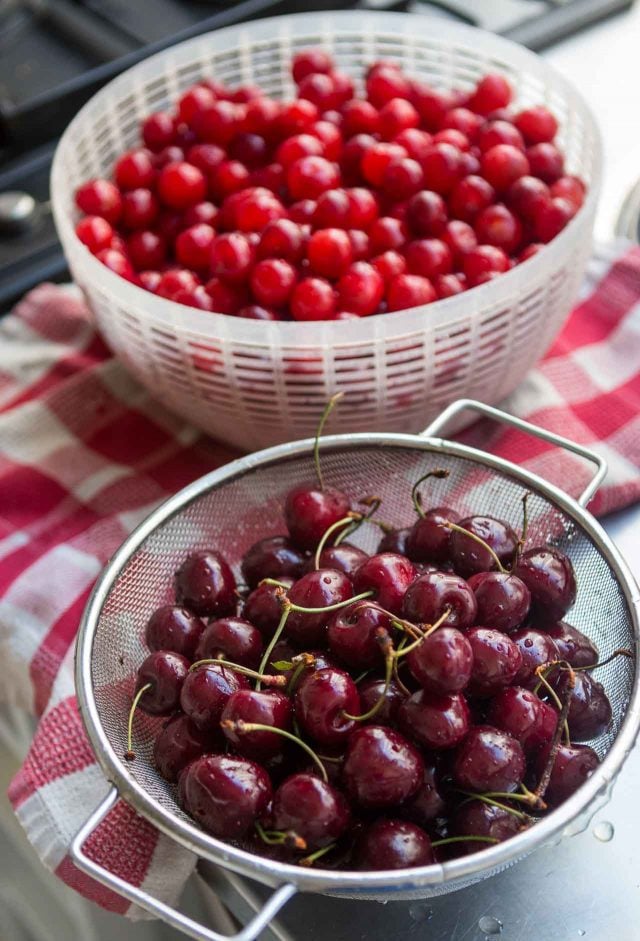
So feel free to mix things up, cherry-wise!

Unlike other recipes, making jam can require a bit of using your instincts, rather than relying on set times and temperatures. Checking the jam texture on a chilled plate is the best way to tell you when it’s done. (As an example, jam usually sets between 218-220ºF,103-104ºC, but this one set a few degrees higher.) Because cherries are low in pectin, this one often “sets” a few degrees higher, although don’t expect cherry jam to be as stiff as other jams that you might be used to, or buy. It’ll be a bit runny, which is just how it should be.
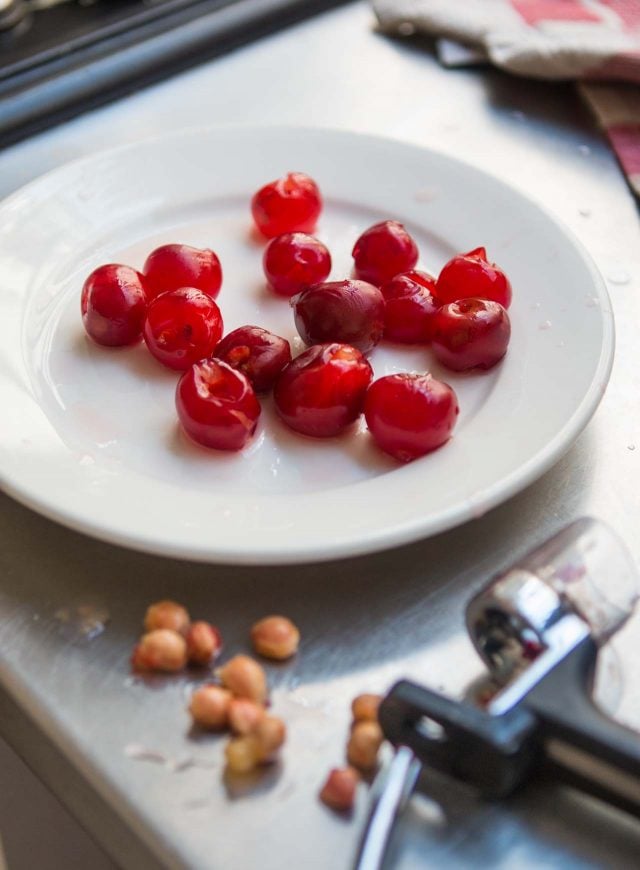
One tool I do recommend is a cherry pitter. Not everyone has one, and they do fall into the “single use” category, but come cherry season, mine gets a good workout. I wrote more about why you should get a cherry pitter here.
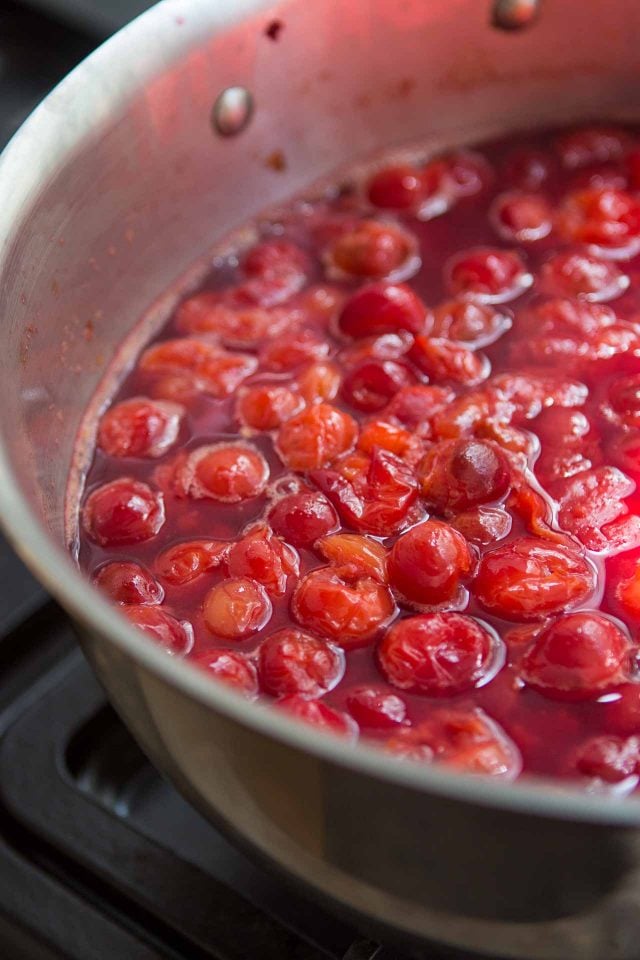
The biggest question I get about jam recipes is people asking about reducing the amount of sugar in them. Sugar in jam does a couple of things. One, it helps the mixture jell, along with any natural pectin in the fruit. And two, it preserves it. If you use less, the jam will be runnier and won’t last as long.

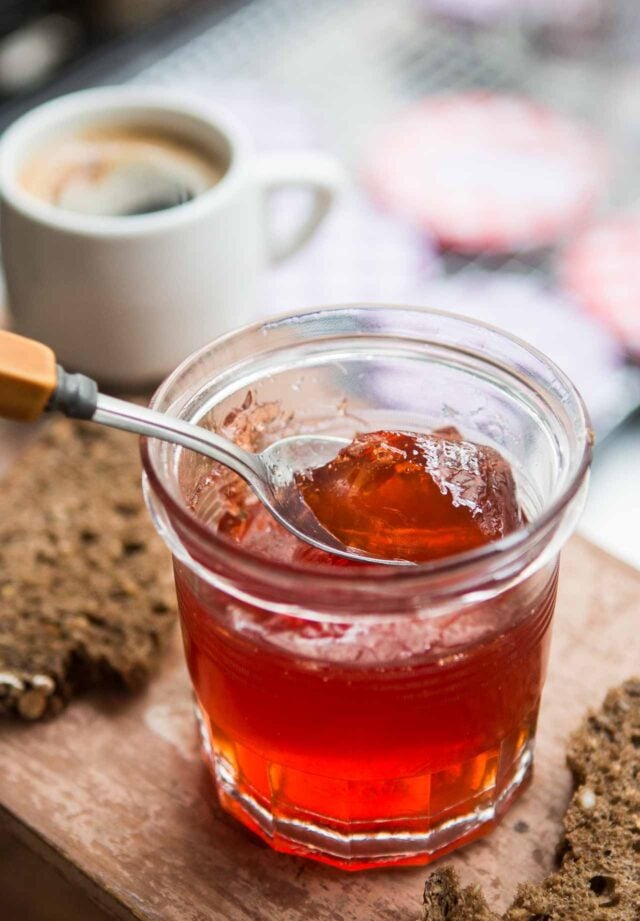
Europeans tend to like their jams runnier than their American counterparts, so in the morning, you can have a European experience when you spoon some of this jam on your morning toast, as we do.
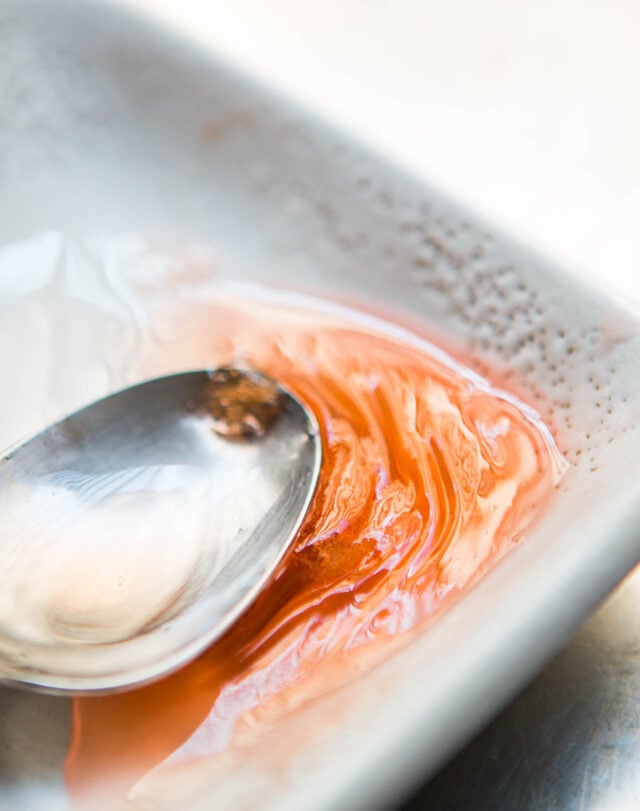
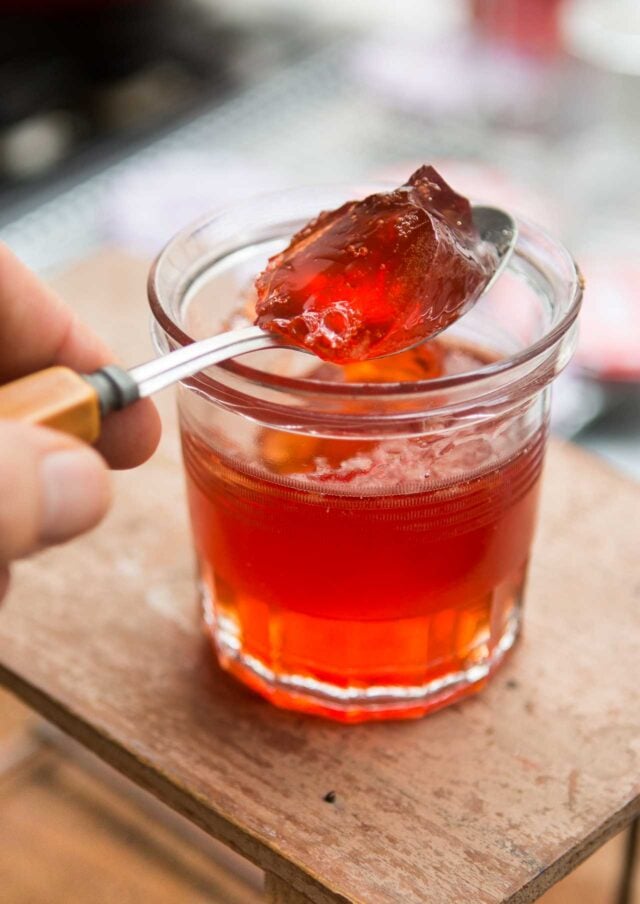
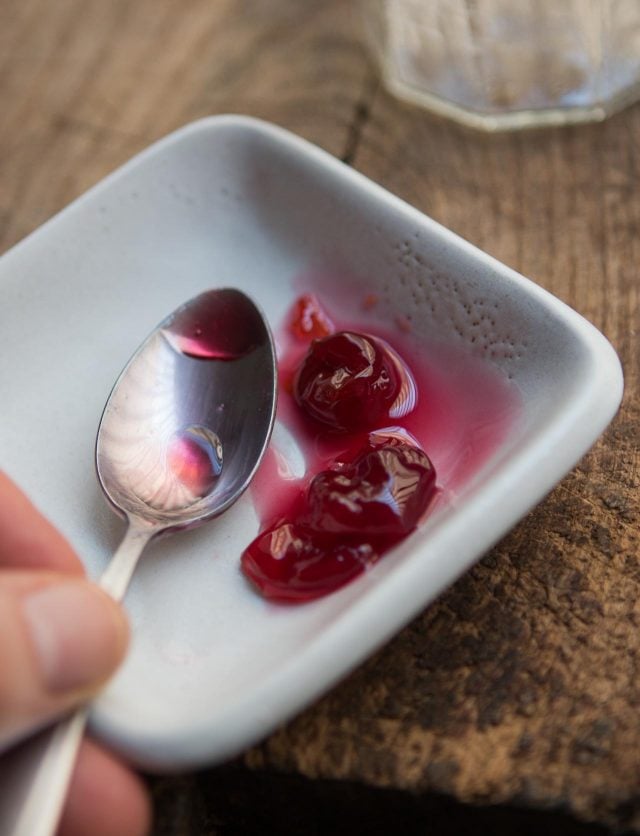
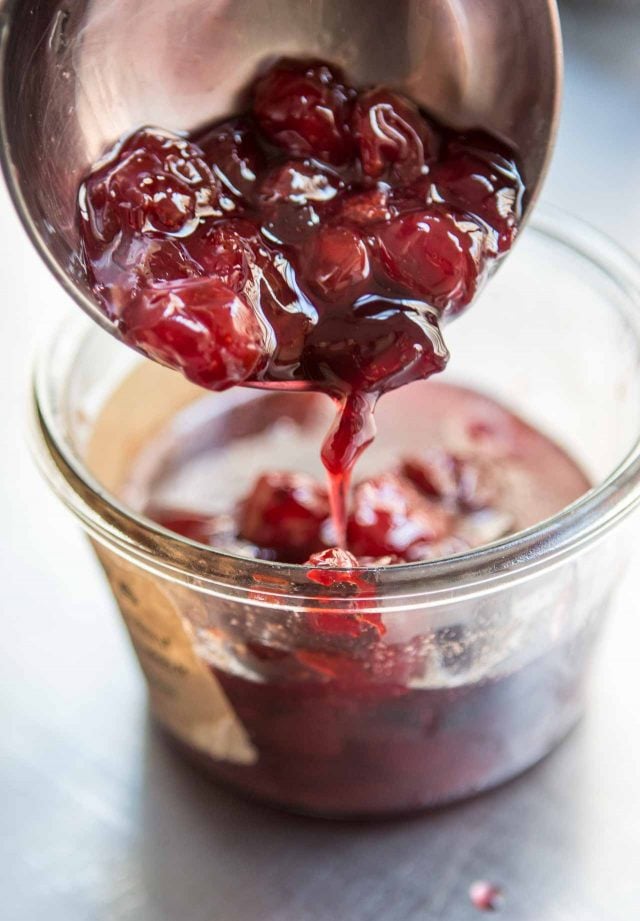
Unlike other jams that wrinkle when you do the wrinkle test (putting a spoonful of jam on a frozen plate, returning the plate to the freezer and when the jam wrinkles with you nudge it, it’s done), this one will be more like thickened syrup. It’s done when it’s thick and sticky and holds its shape for a few moments after you drag a spoon through it (below.) The cherries will be shiny and glossy, like beautiful ruby-colored jewels.
Print

Cherry Jam

If you only have 1 pound (450g) of cherries, feel free to cut the recipe in half. The liqueur is optional but heightens the flavors of the jam. Use only enough so it complements the fruit – you don't want to overwhelm it. As mentioned, this jam will be a bit on the runny side when "set." Sour cherries will produce a softer-set jam than sweet cherries.
Course Breakfast
Cuisine American
Keyword cherries, cherry, jam

Ingredients

  • 2 pounds (900g) sweet or sour cherries or a mix
  • 2 1/2 cups (500g) sugar
  • freshly squeezed juice of one medium lemon plus additional juice if desired
  • 1-2 drops of almond extract or 1-2 teaspoons of kirsch or another liqueur, such as amaretto or vodka

Instructions

  • Remove the stems and pit the cherries. Put them in a large non-reactive pot. If using only sweet cherries, add 2-3 tablespoons of water to the pot. (Sour cherries will exude enough liquid on their own so no need to add additional water.) Put a small plate or saucer in the freezer.
  • Cover the pot and cook over medium heat, stirring occasionally, until the cherries are wilted and cooked through, about 10 minutes.
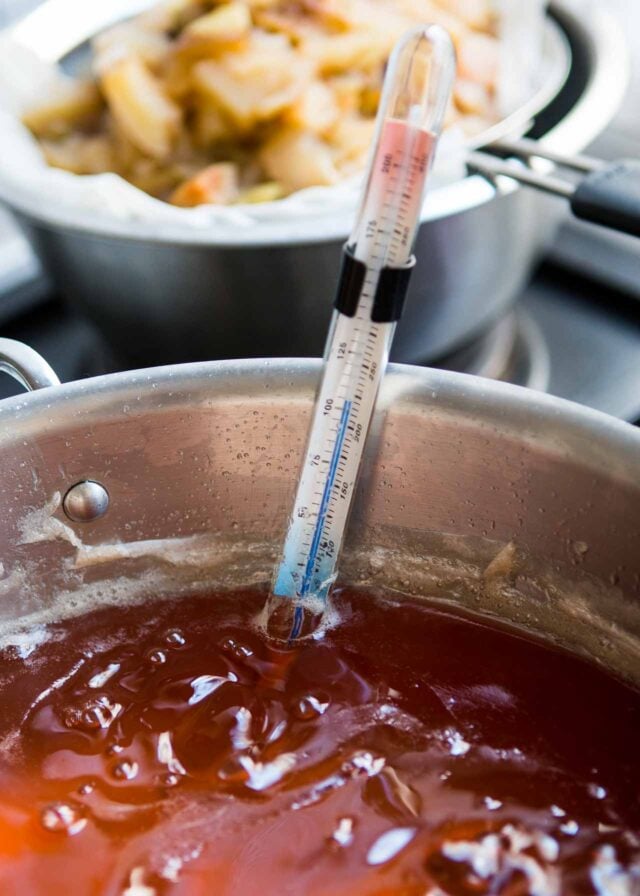
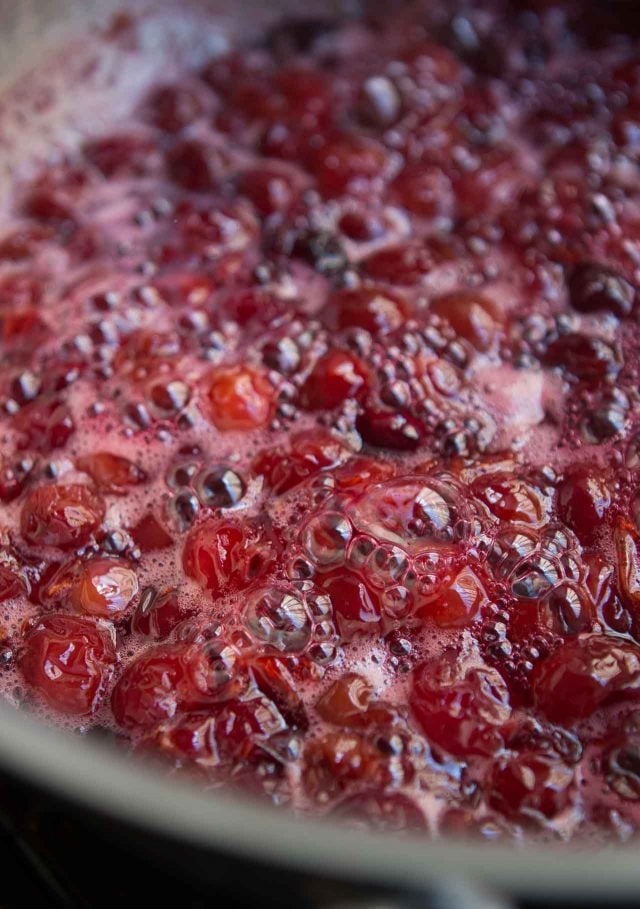
  • Remove the lid and stir in the sugar and lemon juice. Increase the heat to medium-high and cook, stirring frequently until the mixture thickens. It's hard to say how long it will take, but when the mixture resembles the sixth picture in the post, the one in the pot with the bubbles, turn off the heat and test the jam by putting a small spoonful on the frozen dish. Return the dish to the freezer for a few minutes until the jam on it is cool. Run a spoon through it and if the liquid is very thick and leaves a clear patch, as shown in the photo in the post, it's done. If not, return the plate to the freezer and continue to cook the jam, testing it at various intervals, until it's done. (If you want to use a thermometer to check the jam, it should be ready somewhere between 220º and 225ºF, 104º-107ºC.)
  • When ready, turn off the heat and stir in the almond extract or liqueur (or both, if you wish). If desired, you could add an extra squeeze of lemon juice to balance the sweetness. Ladle into clean jars.

Notes

Storage: This jam will last several weeks in the refrigerator. If you wish to can it, you can find instructions here.
 

  •  

Strawberry Jam

Strawberry Jam recipe

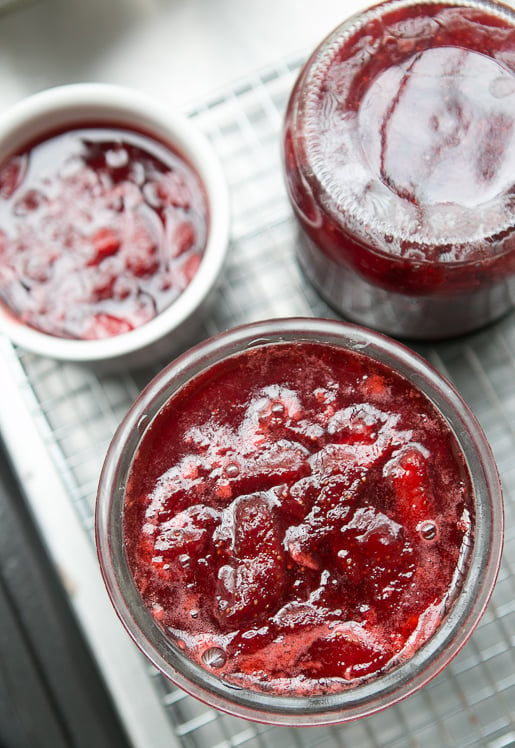
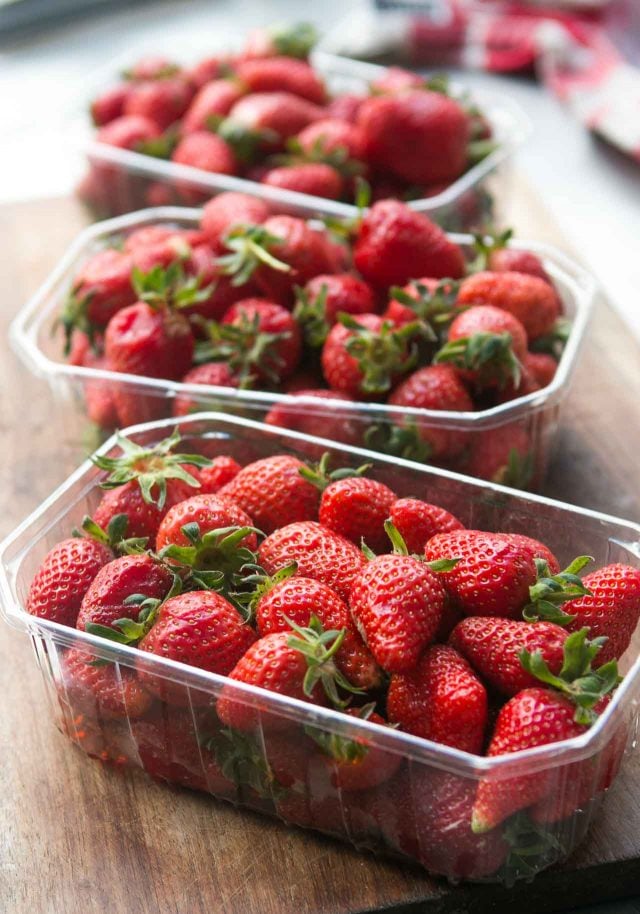
I was recently gifted an overload of strawberries: I bought four baskets from a vendor at the market, whose booth I shop at often, and he threw in two extra baskets for free, the equivalent of a carte de fidelité (loyalty card) in Paris. So I’ve spent the past few days washing, hulling, cutting and cooking my unexpected bounty.

I’ve been making a number of things with the gorgeous strawberries. But I also realized that while I have a Strawberry-Rhubarb Jam recipe on the site, I didn’t have a strawberry jam. So here it is.

Strawberry Jam recipe

Although I’m giving you a recipe for the amount of strawberries that I used, you can use the same proportions if you have just a basket…or a bushel. You’ll just need to do a slight amount of math. Only the cooking time will change, so keep an eye on things.

Jam-making is not something you walk away from and you need to rely more on look and feel, rather than exact times. Another thing about jam-making is that fruit and berry jams are always better made in small batches; the shorter the cooking time, the better the flavor. So if you have more than 2-pounds (900g) of strawberries, consider making jam in a couple of batches rather than one big one.

Frozen zabaglione recipe

Print

Strawberry Jam

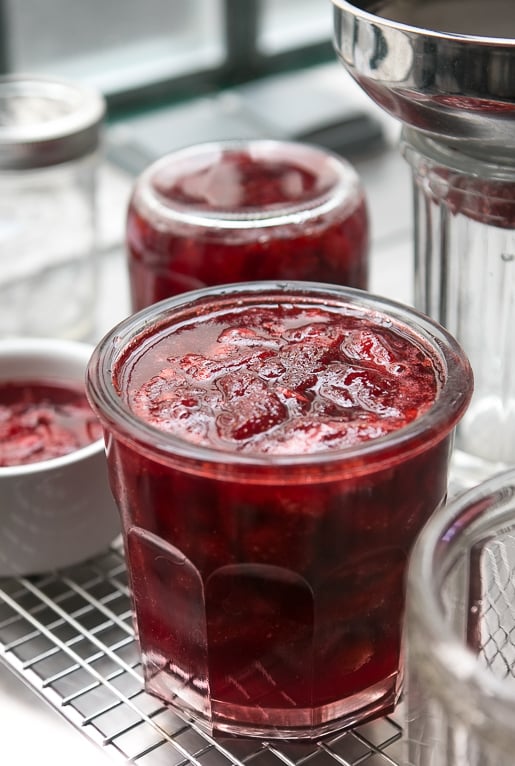
Many traditional recipes use an equal amount of sugar to fruit, by weight, but I find it’s okay to decrease it to these proportions. Sugar is both a thickener and a preservation agent. If you reduce it too much more, your jam may not thicken and won’t keep for a long time. (Which is okay if you want thinner jam, you keep it in the refrigerator, and eat it relatively quickly.) This recipe can be scaled up or down, depending on how many strawberries you have. But if you want to make a lot more, best to make it in a couple of batches. To prepare the jars, pour boiling water into them, as well as into the lids. Let them sit 5-10 minutes, then carefully pour out the hot water and set them upside down on a cooling rack until ready to fill. Since I keep my jams in the refrigerator, I don’t put them up them in a traditional sense. I usually just overturn the jars and let them cool, which provides a reasonable seal, then refrigerate them. I find my jams keep well this way for up to one year. Check the National Center for Home Food Preservation website for instructions on how to can fruit jams. Note: Last season strawberries tend to have less natural pectin than ones that arrive earlier. So your jam may be less jelled. One strategy is the finely grate a green apple into the strawberries before cooking them, which adds pectin. (There are guidelines here for using liquid and powdered pectin.) I don’t mind the slightly runnier jam and it’s terrific on yogurt or served with fresh goat cheese for dessert.

Ingredients

  • 2 pounds (900g) strawberries
  • 1 1/4 pounds (2 2/3 cups, 580g) sugar
  • one lemon organic or unsprayed
  • optional: kirsch (or eau-de-vie, or crème de cassis)

Instructions

  • Wash and hull the strawberries and cut them into quarters. If some are larger or smaller, just make sure the pieces all about the same size.
  • 2. Toss them in a large pot, such as a Dutch oven casserole made of a nonreactive material, with the sugar. Cut the lemon in half, squeeze the juice into the pot, and add the lemon halves to the berries. Stir well, cover, and let sit a couple of hours (up to 8 hours) at room temperature, stirring one or two times while they marinate.
  • Put a small plate in the freezer. Turn the heat on under the strawberries to medium-high and cook the strawberries, stirring occasionally, as they reduce and the juices thicken. If a lot of foam rises to the surface, skim it away. When the syrup is the consistency of warm maple syrup – it will take about 10 to 15 minutes or so, depending on the pot and berries, turn off the heat and put a spoonful of the jam on the frozen plate and return the plate to the freezer. Check it in a few minutes; if it wrinkles when you nudge it, it’s done. If not, return the plate to the freezer and cook the jam a little more, testing it again. It may take a few times before you get it to the right consistency.
  • When the strawberry jam is done, remove the lemon and stir in a few drops of kirsch, if using, then ladle the jam into the prepared jars.

Related Recipes and Links

Apricot Jam

No-Recipe Cherry Jam

Pickled Strawberries

Easy Jam Tart

Eggplant Jam

Baking Ingredients and Substitutions

  •  

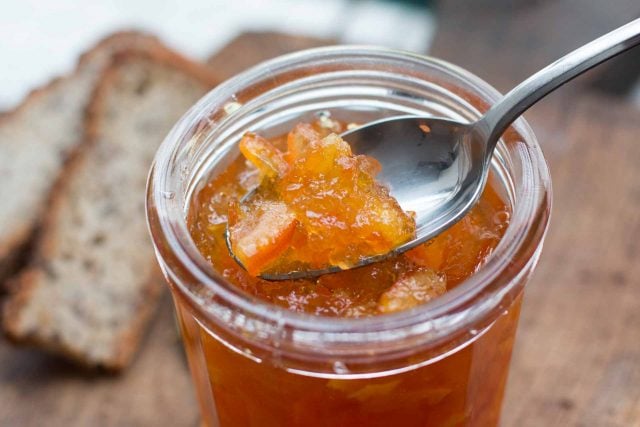
Seville Orange Marmalade

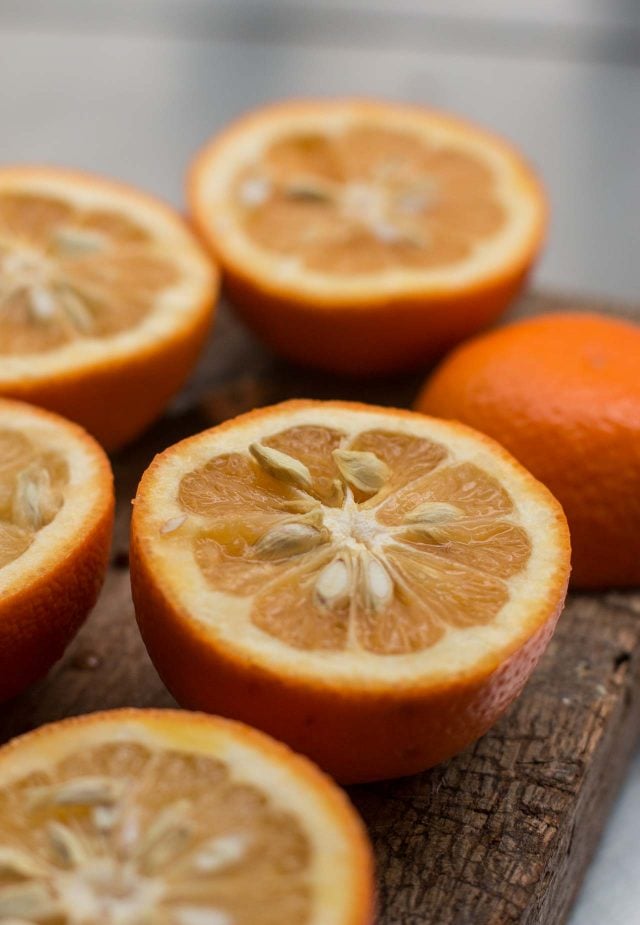
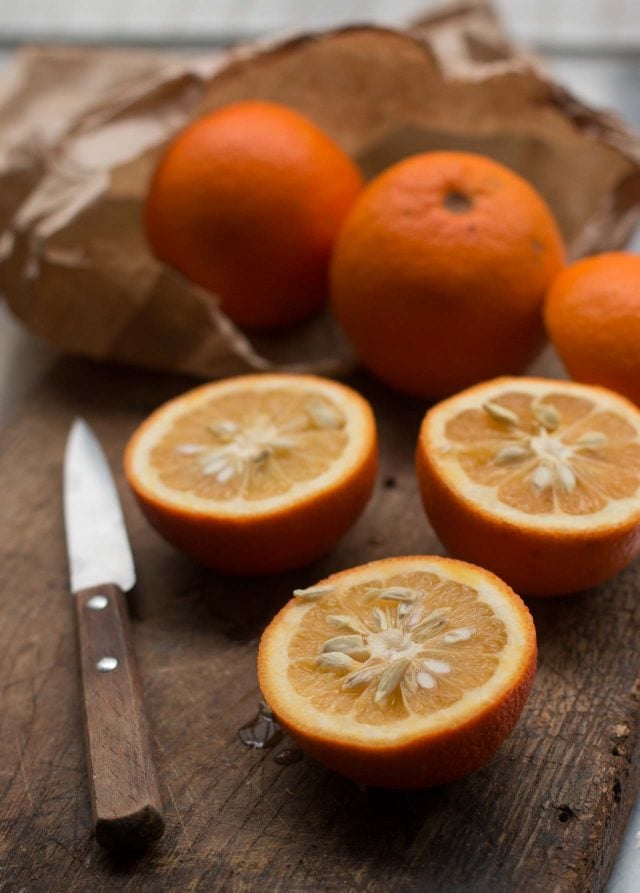
This time of year brings Seville oranges to the markets in Paris. For the past few years, I kept wondering why they were so hard to find since it’s perhaps my favorite of all jams and jellies to make, and eat. But lately, they’ve been everywhere.  And I found myself busy making a lot of marmalade, which was easier since I came up with a brand-new, revolutionary technique which I couldn’t wait to share.

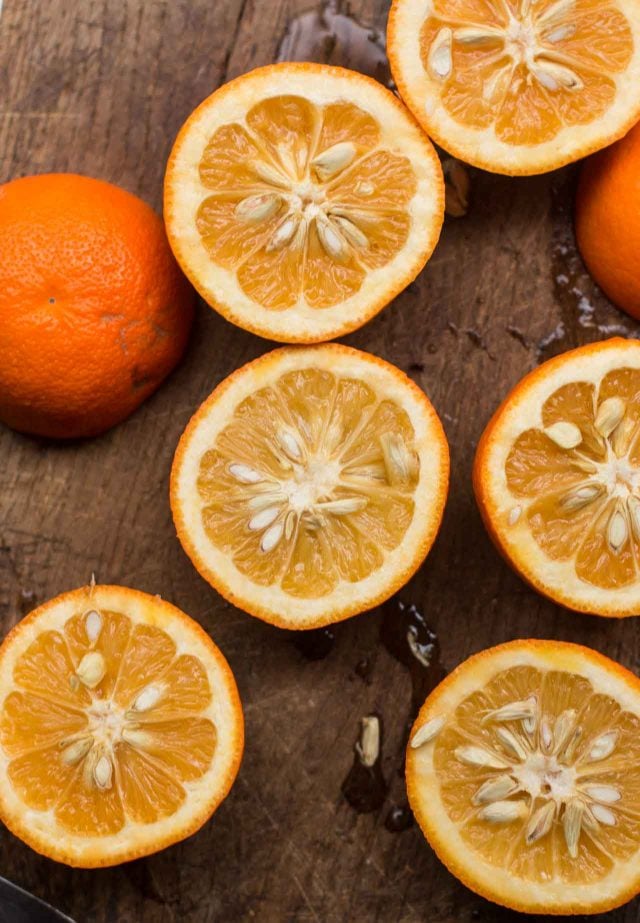
Since Seville oranges are rife with seeds, which makes slicing them difficult since you have to keep moving the seeds around with your slippery fingers, while trying to cut the oranges, then finding more, and fishing around deeper inside to extract more, plucking them out, etc… Each Seville orange has perhaps twenty to thirty inside.

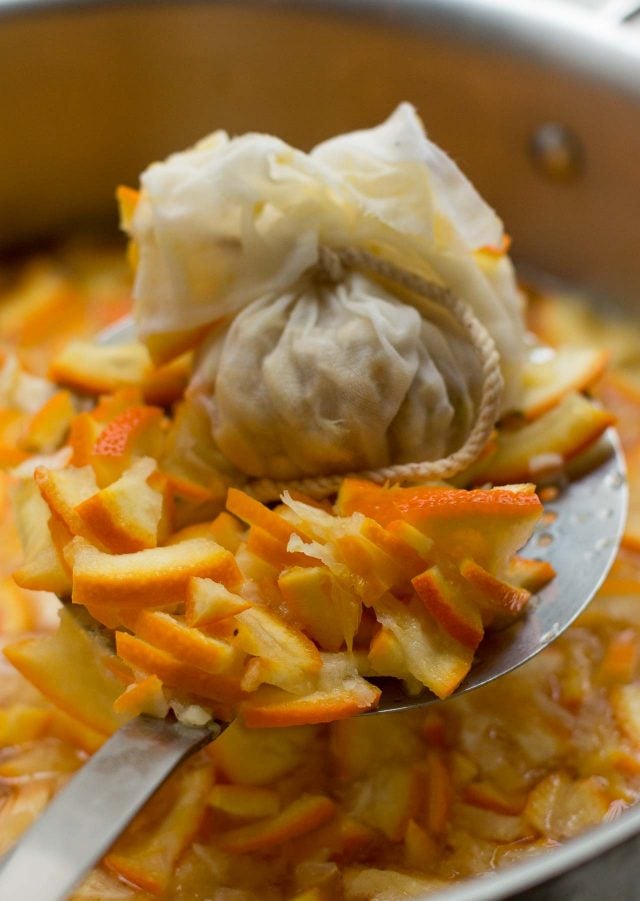
So I thought, what if I was to squeeze the juice and seeds out first, strain them, then pour the juice back in? The seeds are precious commodities in jam-making, and get saved and used since they’re so high in pectin.

They’re wrapped in a sack and cooked with the marmalade giving the marmalade gets a suave, jellied texture. And this simple method, featured in my book Ready for Dessert, makes the whole process much easier.

You might be interested to know that Seville Orange Marmalade was created because of an error. Apparently, an Englishwoman in 1700, the wife of a grocer, was stuck with some sour oranges that were bought cheaply from a boat that was carrying them from Seville.

Since there was a storm, they wanted to get rid of their stock or oranges quickly, so the grocer bought them. But they were inedibly sour so his wife decided to try making jam from them, and viola!…Seville Orange Marmalade was invented.

Print

Seville Orange Marmalade

Adapted from Ready for Dessert (Ten Speed)
In my book, I advise letting the cooked oranges and the seeds rest overnight. That's an optional step. If you want to go ahead and finish the marmalade the same day you start it, you can.
Course Breakfast
Keyword confiture, jam, marmalade, orange

Ingredients

  • 6 Seville oranges (see Note)
  • 1 navel orange
  • 10 cups (2.5L) water
  • pinch of salt
  • 8 cups (1.6 kg) sugar
  • 1 tablespoon Scotch (optional)

Instructions

  • Wash oranges and wipe them dry. Cut each Seville orange in half, crosswise around the equator. Set a non-reactive mesh strainer over a bowl and squeeze the orange halves to remove the seeds, assisting with your fingers to remove any stubborn ones tucked deep within.
  • Tie the seeds up in cheesecloth or muslin very securely.
  • Cut each rind into 3 pieces and use a sharp chef’s knife to cut the rinds into slices or cubes as thin as possible. Each piece shouldn’t be too large (no more than a centimeter, or 1/3-inch in length.) Cut the navel orange into similar-sized pieces.
  • In a large (10-12 quart/liter) stockpot, add the orange slices, seed pouch, water, and salt, as well as the juice from the Seville oranges from step #1. Bring to a boil, then reduce to a simmer, and cook until the peels are translucent, about 20 to 30 minutes. (At this point, sometimes I’ll remove it from the heat after cooking them and let the mixture stand overnight, to help the seeds release any additional pectin. But it's not imperative.)
  • Stir the sugar into the mixture and bring the mixture to a full boil again, then reduce heat to a gentle boil. Stir occasionally while cooking to make sure it does not burn on the bottom. Midway during cooking, remove the seed pouch and discard.
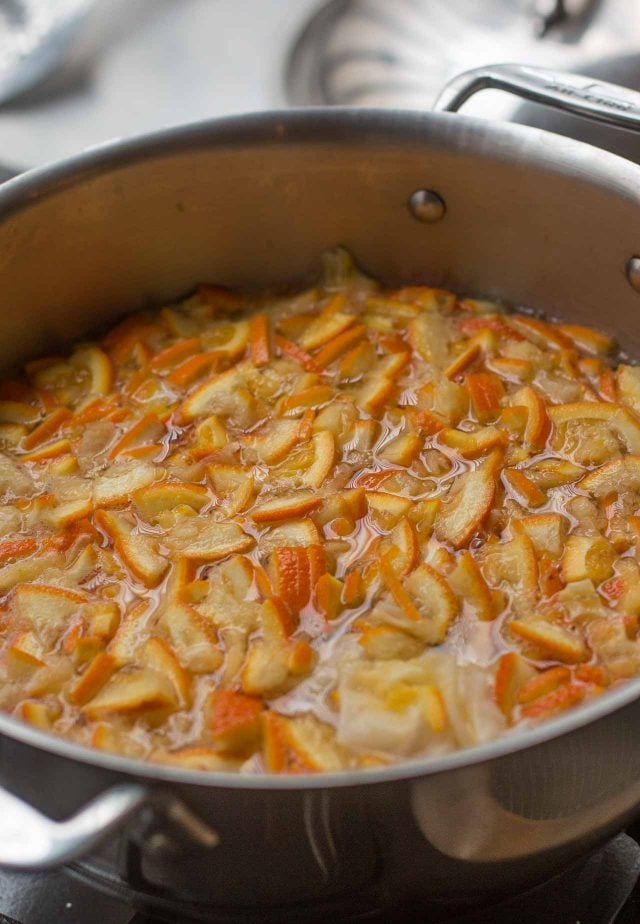
  • Continue cooking until it has reached the jelling point, about 218ºF degrees (103ºC), if using a candy thermometer. I cook this slightly less than other jams and marmalades because the high amount of pectin helps the marmalade set up more stiffly. To test the marmalade, turn off the heat and put a small amount on a plate that has been chilled in the freezer and briefly return it to the freezer. Check it in a few minutes; it should be slightly jelled and will wrinkle just a bit when you slide your finger through it. If not, continue to cook until it is.
  • Remove from heat, then stir in the Scotch (if using), and ladle the mixture into clean jars. Sometimes I bury a piece of vanilla bean in each jar. (Which is a great way to recycle previously-used or dried-out vanilla beans.)

Notes

I don’t process my jams, since I store them in the refrigerator. But if you wish to preserve them by canning, you can read more about the process here.
Note: Sour or Seville oranges are called in French oranges amères and are available mid-winter in many other countries around the world as well.
  •  

Apple Jelly

I was recently reunited with something I miss very much – a loaded apple tree! Friends of mine who had a house in the French countryside had a tree that, come fall, had so many apples, the limbs threatened to break off. Not wanting to be an accomplice in apple-cide, I decided to do my part to save the tree, and the apples, and make Apple Jelly.

Ten years later, my friends sold their house, which ended my bounty of apples (and medlars.) So how happy was I when some other friends bought a house in Brittany, which had not one, not two…but four apple trees. Score!

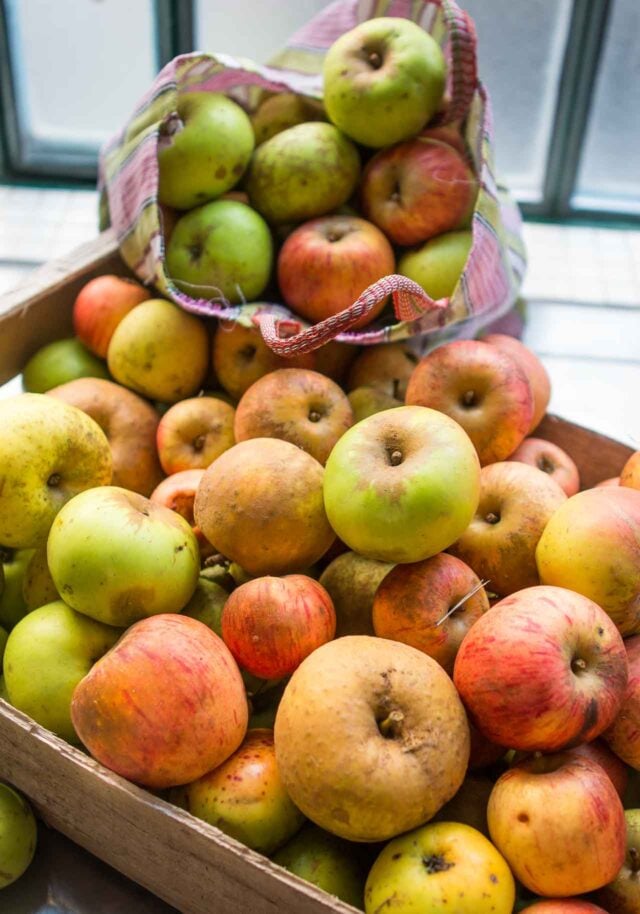
The varieties were Reine de Reinette, Canada, and Boskop, which I found out when a concerned neighbor saw someone (me) swiping apples off the trees, and the ground, loading up sacks of them. I think he figured I was pilfering the pommes, but was reassured when I told him I was friends with the owner of the mini-orchard.

After talking with him a few minutes, I realized he was an expert on the apples and not only knew about the varieties of apples, but also what to do with them and nodded in approval when I told him I was going to make Apple Jelly. He was happy to help me fill some bags, which included green varieties, which are high in pectin and help the jelly set, and are more acidic than other apples, which make the jelly well-balanced and delicious. (Calvados, the famed apple brandy from Normany, use very acidic apples since the flavor is more pronounced once cooked.)

To make Apple Jelly, it’s probably a good idea to either a friend with an apple tree (with an explanation ready in case a neighbor comes by…) or get apples from a source where they might sell you apples that are dented or dinged, which are called pommes à cuire (cooking apples) in France, and are quite popular. At the markets, those apples are usually the first to get sold as people use the bargain beauties to make compotes and tarts with. And French bakers like to use a variety of apples in dessert, like Apple Cake, as the flavor is more interesting than if using just one variety.

In the end, I came home with over 50 pounds (23kg) of apples in all shapes, colors, and conditions. And all went to a good cause. This recipe uses a good deal of apples but makes a half-dozen jars, which is good if you’re anything like me and need to reward your friends, and perhaps a local apple expert, with a jar of jelly.

Print

Apple Jelly

While some sources say to National Center for Food Preservation cook the apple jelly to 220ºF (104ºC), every time I've made this, it jelled at around 230ºF (110ºC). So it’s best to use a thermometer but also to test your jelly by dropping a dab on a chilled plate, putting it in the freezer for a few minutes, then checking to see if the mixture has jelled by nudging it and seeing if it mounds and wrinkles, as shown in the post. If you don’t have a candy thermometer, you can use the "nudge" method to test your jelly. One pound (450g) of apples cooked will yield about 1 cup (250ml) strained juice from the cooked apples. So if you have fewer apples, or you get a different yield (since all apples are different), you can use that as a guideline and add 3/4 cup (150g) sugar and 1 1/2 teaspoons of lemon juice per cup of strained apple juice. You can easily halve this recipe, too. Note that in step #3 depending on the size of your strainer or colander, you may need to use two, as I do. One tip is when putting the apples in the strainers if you can't get them all in, after filling them up, let the mixture sit 5 to 10 minutes; it'll settle down and compress, and you should be able to add the rest after that.
Servings 6 jars, 1 cup (250ml) each

Ingredients

  • 8 pounds (3.75kg) apples
  • 10 cups (2.25L) water
  • 6 cups (1,2kg) sugar
  • 1/4 cup (60ml) freshly squeezed lemon juice
  • 2 teaspoons Calvados brandy, or Cognac

Instructions

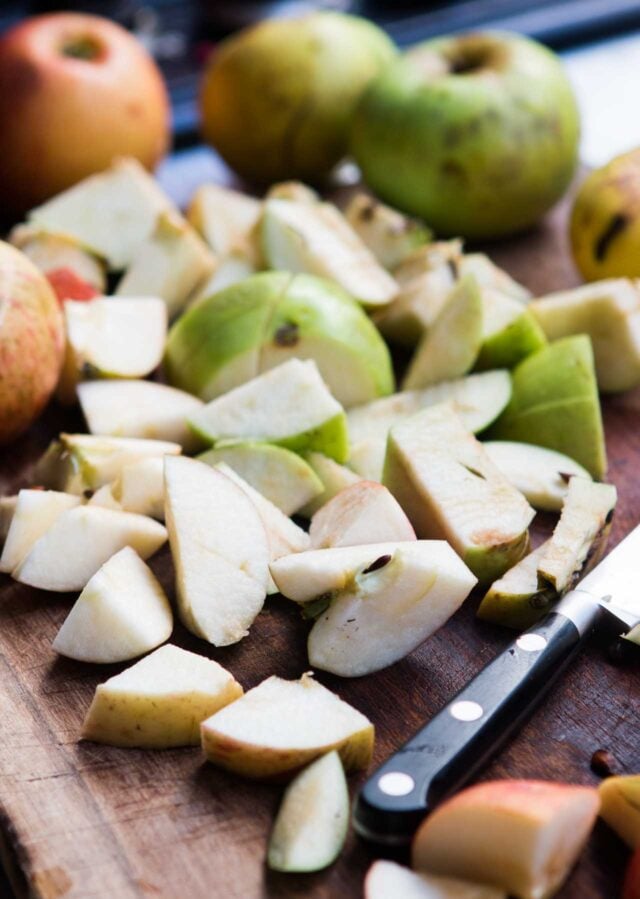
  • Rinse the apples and cut them coarsely into chunks, then put them and the cores and seeds, into a very large stockpot.
  • Add the water, cover, and bring to a boil. When bubbling, reduce the heat a bit, leave the lid askew, and cook for 20 to 30 minutes, until the apples are tender and cooked through.
  • Line a mesh colander with a piece of muslin cloth or a few folds of cheesecloth (or use a jelly bag and stand) and set it over a deep bowl, then ladle the apples and the liquid into the colanders. (I use two lined colanders since it was quite a bit of apples.)
  • Let stand or at least 3 hours (but you'll get more juice if you let the apples drain around ~8 hours), and during that time, no matter how tempting it looks,
    do not press down
    at any time on the apples to extract more juice or the jelly will get cloudy.
  • The next day, measure out the juice. You should have about 8 cups (2L) but may get a little more. Pour the juice into a large, non-reactive pot fitted with a candy thermometer, add the sugar and lemon juice, and bring to a boil. During cooking, as any white foam forms on the surface while the jelly is cooking, gently skim it off with a ladle. (See Note at the end of the recipe for some idea about repurposing the apples and the foam.)
  • Cook until the temperature reaches 220ºF (104ºC). At that point, turn off the heat and begin testing the jelly on a chilled plate in the freezer, using the method mentioned in the headnote. When it wrinkles and holds its shape, it’s done. If not, continue to cook and re-test it at intervals. This batch set at 230ºF (110ºC).
  • Remove from heat, stir in the liquor, and ladle into clean jars, then cap tightly.

Notes

Storage: I don’t preserve my jelly or jams in heat-treated jars because I eat them quickly, but store mine in the refrigerator where they’ll keep for several months. If you wish to preserve them, you can find instructions for canning at the University of Georgia website.
Notes: The cooked apples can be passed through a food mill and used as applesauce, or for Chewy Oatmeal Raisin Cookies, Nonfat Gingersnaps, or my favorite Granola recipe.
Any foam scraped off the top of the jelly while cooking can be refrigerated or frozen, and added to your next batch of jam. It's especially great used in jams made with low-pectin fruit, such as strawberries, apricots, peaches, pineapple, or cherries.

apple jelly

Related Recipes and Links

Les Jars

Apricot Jam

Seville Orange Marmalade

Easy Jam Tart

Bergamot Marmalade

No-Recipe Cherry Jam

Rhubarb-Berry Jam

Beer, Shallot, and Cocoa Nib Marmalade

  •  

Kumquat Marmalade

kumquat marmalade recipe

I’ve been on a marmalade bender lately. Well, it’s actually been for the last few weeks. Winter, of course, is marmalade season and the markets in Paris are heaped with citrus: Corsican clementines, pretty yellow bergamots, hefty pink grapefruits from Florida (although some infer appellations from elsewhere – namely, the Louvre), leafy lemons from Nice, and lots and lots of oranges.

Kumquat marmalade

The stands are so piled up that it’s not uncommon to be walking down the aisle and have an orange roll off of the piles and land on your foot. (Which is why it is a good idea to wash any fruit before you use it.) This means I’ve got so many jars of marmalade, that when my friend Luisa stopped by and saw the jars piled on top of a shelf in my bedroom, she said “I’ve doing the same thing ” at her apartment in Berlin. Sometimes I think jam-making could be classified as an epidemic and if so, there’s ample evidence that I’m ready for an intervention.

kumquat marmalade recipe

While kumquats were once classified with their look-alike citrus brethren and sistern (admittedly, it can be hard to tell as it’s difficult to get a look under their navels), they are now placed in another genus category (Fortunella), even though they share many characteristics of citrus fruits.

Kumquat marmalade

One of those characteristics is that they are winter fruits. And another is that they are très bon pour la santé (good for your health), containing lots of vitamin C. And they also make you feel happier, since not only does their tangy-bitter flavor brighten up even the darkest of winter day, nothing makes me happier than to wake up in the morning and gaze at my shelf of marmalade first thing in the morning.

Kumquat marmalade

I was especially happy when I was doing my shopping at the outdoor market and came across a big bin of kumquats. I scooped up a nice-sized bag of them and brought them home, where they patiently waited in the refrigerator until I decided what to do with them.

Originally I’d considered giving them a quick-candying and strewing them over poached prunes with a scoop of ice cream. But I ended up sticking my fingers into the bowl of prunes a few too many times during the week and ended up with a small puddle of cinnamon-spiced dark syrup pooled in the bottom of a container in my refrigerator, which I didn’t think would go with anything.

Kumquat marmalade

So I decided to get out my little serrated knife, slice up my Fortunella fruits, and make marmalade. I added a couple of lemons not just to bulk it up, but because I thought with the added sugar, the marmalade would benefit from some extra acidity.

Kumquat marmalade

I normally spoon my marmalades on morning toast, but after I made this batch, I had cleaned up the kitchen and was going to reward myself to a nice bowl of split pea soup for lunch with some Comté cheese and – like most good ideas (and a few of the bad ones) – it suddenly occurred to me that the tart marmalade might be nice with the nutty cheese I was cutting into batons.

Kumquat marmalade

And sure enough, it was. Fortunately I have three nice jars of marmalade to add to my collection. So far this year I’ve made Seville orange marmalade (eight jars) and four jars of mixed marmalade, using the bergamots and citron that were plucked off a tree in Sicily. After all that slicing, seeding, and simmering, the last pot of marmalade has been jarred and stored; they’ll last me through the winter. And if I am prudent, a number of spring and summer mornings as well.

Kumquat marmalade

Print

Kumquat Marmalade

Many of the little rings of kumquats will, unfortunately, come apart as you cook the marmalade. The reward, however, is gorgeous jars of tangy marmalade that you’ll be happy to spread on your morning toast or serve with a bit of cheese after dinner. I served mine with Comté, but a nice goat cheese or another nutty mountain cheese, like Gruyère, would pair nicely with it. It takes a bit of patience to slice and pluck out all the seeds from the kumquats, but you can get 2 to 3 jars of marmalade for your efforts. I use a small serrated knife to slice off the stem end, then start slicing the kumquats crosswise, until I get close to the center. Finally, I stick the tip of the knife into the area where the seeds are and slip them into a small bowl. Because the seeds are rather large, any that you miss you can usually find just by doing a little scanning of your pile of sliced kumquats. I use oval Nagami kumquats, which are more puckery than the round Meiwi kumquats, which you sometimes come across. Do try to get organic or unsprayed fruit from your local market or natural food store. The kirsch is optional, but it does nicely round out the flavor of the marmalade. You can substitute another liquor, such as gin, Grand Marnier or Cointreau, light rum, or a dash of brandy. Or it can be omitted, if you wish.

Ingredients

  • 2 lemons stemmed, halved lengthwise, seeded, and very thinly sliced
  • 1 pound (450g) kumquats stemmed, seeded, and sliced
  • Reserve the seeds from the lemon and kumquats
  • 5 1/2 cups (1.3L) water
  • 2 cups (400g) sugar
  • pinch of salt
  • Optional: 1/2 teaspoon kirsch or other liquor

Instructions

  • Put the lemon slices in a large non-reactive pot. Cover with cold water and bring to a boil. Reduce the heat and simmer until the lemons are translucent, about 5 minutes. Drain. (Discard the water.)
  • Put the blanched lemons back in the pot. Tie the seeds from the lemons and kumquats securely in a piece of cheesecloth and add the seed sack to the pot along with the sliced kumquats and water. Bring to a boil; remove from heat, cover, and let stand 24 hours.
  • The next day, put a small plate in the freezer.
  • Add the sugar and salt to the pot, and cook the marmalade for 30 to 45 minutes over medium heat. Remove the bag of seeds and when it’s cool enough to handle, squeeze the seeds in the cheesecloth using your hands or place it in a ladle and press it with the back of a soup spoon (being careful not to break the fabric and release the seeds) over the jam pot to so the pectin goes directly into the marmalade mixture.
  • Continue cooking until it has reached the jelling point, about 220ºF (104ºC) degrees, if using a candy thermometer. To test the marmalade, turn off the heat and put a small amount on the plate that has been chilled in the freezer and briefly return it to the freezer. Check it in a few minutes; it should be slightly jelled and will wrinkle a bit when you slide your finger through it. If not, continue to cook until it wrinkles slightly on the chilled plate when you nudge it.
  • Remove from heat, then stir in the kirsch (if using), and ladle the mixture into clean jars.

Notes
Note: I store my jams and marmalades in a cool place, often the refrigerator if not planning to use them within a few weeks. if you wish to can or preserve them, you can check out these canning tips.

Related Recipes

Kumquat Marmalade (Recipe Girl)

Kumquat Marmalade with Star Anise (Drizzle & Dip)

Sunday Morning Kumquat Jam (Amateur Gourmet)

Small Batch Kumquat Marmalade (Food in Jars)

Maple Kumquat Marmalade (A Bloggable Feast)

  •  
❌