Are you familiar with socca? If not, please let me introduce you! It’s basically a rich, savory and salted chickpea flour pancake cooked in piping hot olive oil. The edges are crispy and chewy, the insides are flaky and tender, and the bottom is lacy and golden. It is just so good. You’ll have to try it.
Socca is a street food popular in Nice, France, with origins dating back centuries (it’s closely related to Italian farinata). I had the chance to try the real deal on our honeymoon, and I’m obsessed with this homemade version.
To make socca, you’ll need a bag of chickpea flour (I like to use Bob’s Red Mill, which is available in well-stocked grocery stores). You probably have the remaining ingredients already—olive oil, water, salt, pepper and cumin. That’s it! You’ll find step-by-step photos and a brief cooking video below, followed by the recipe.
Among my 2026 goals is to try Substack’s live streaming function. Let’s do it next week:
When: Thursday, 4/30, 11-11:30am PST / 2pm EST / 7pm UK
What: Ask Me Anything (AMA) about Fish Sauce + uncommon fish sauce (I have some unusual fish sauce that I’ve never tasted before so why not register my opinion to you on the spot?!)
How to attend: You’ll get an email ping when I go live. I will also schedule it in Substack’s Notes app. Attend to ask your questions in the chat function. If you can’t attend and have a question, leave a comment in this dispatch. After the livestream, I’ll share the video so everyone will get the recording.
Now, as for my mom’s stove . . .
When you cook a lot, your stove is your BF (best friend). My parents bought a new tract house in the late 1980s and it came with an ok cooktop. By the early 2000s, my mom had put that cooktop through its paces and it was crapped out. She soldiered on because the first house she and my dad bought in the late 1970s still had had its original stove from the early 1960s. So anything was an improvement! Mom learned to cook using rice straw (really!) and can bake cakes using indirect coal heat and a flimsy metal box. My how times have changed!
Around 2010, a lady in the neighborhood was doing a kitchen renovation project and set her old cooktop out on the sidewalk with a “For Sale $100” sign.
That neighbor owned a swank home appliance shop, my mom said. The shop’s appliances were nice so my mom figured that the stove was good. After the cooktop languished for a few days with no takers, the sign changed to “Free”.
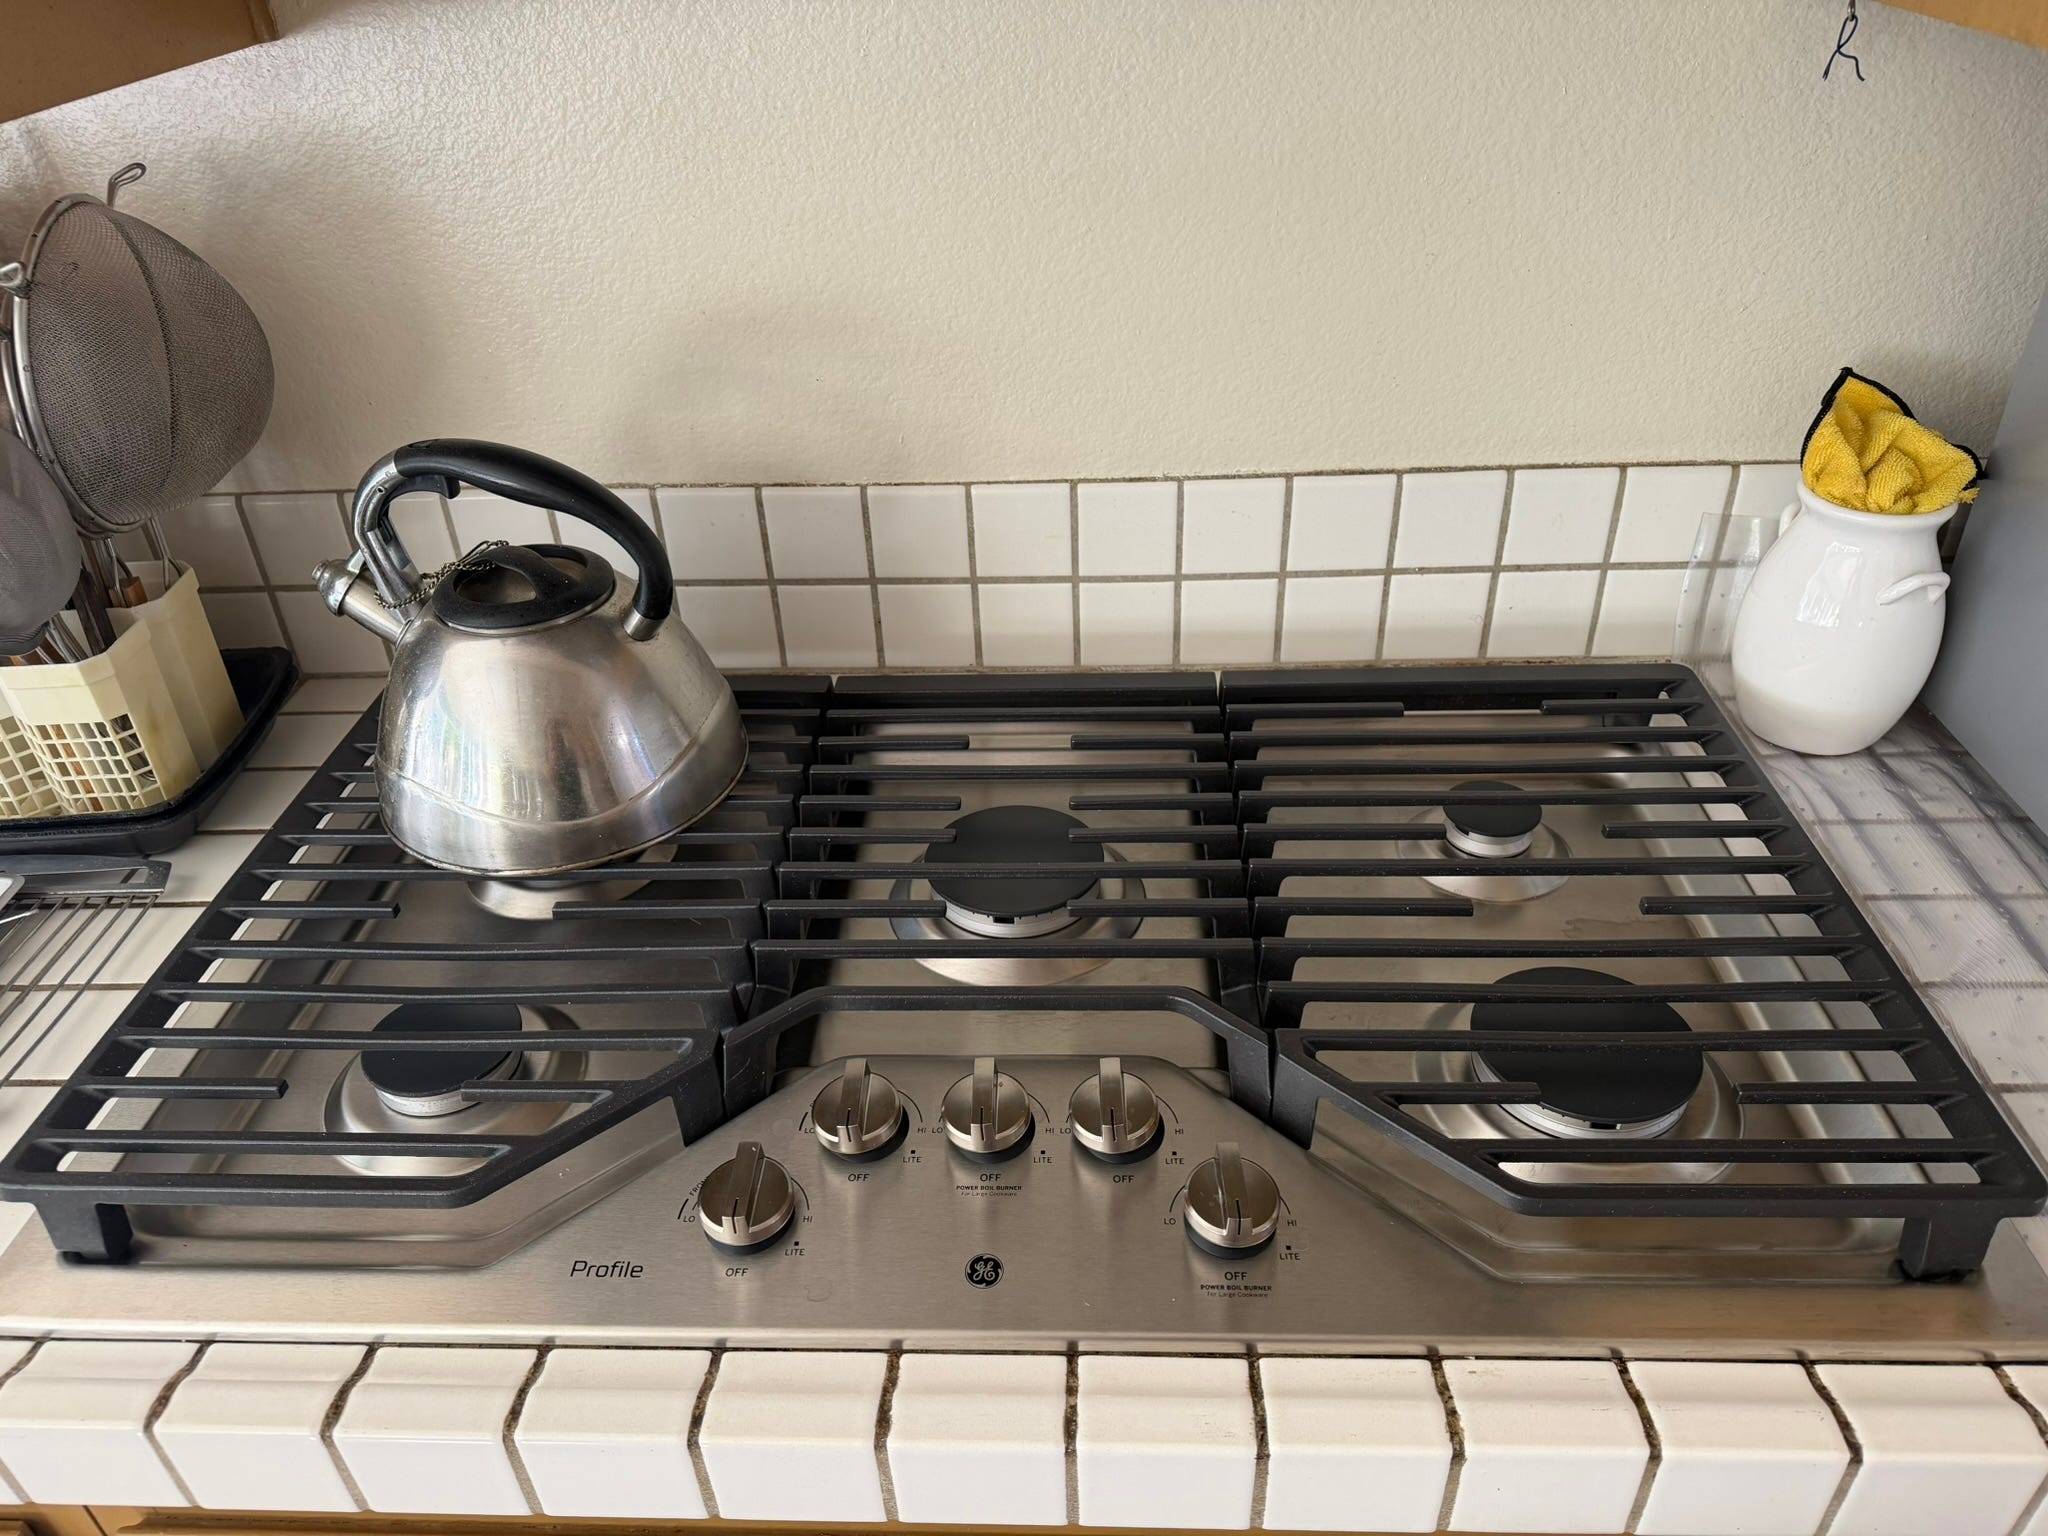
My dad promptly went over and brought the cooktop home. A handyman happened to be working for my parents that day, so within an hour, my mom had a “new” stove — a fancy-ish 36-inch, five-burner GE Profile.
The stove was well used before Mom got it but was reliable. She’s cooked on it for big family feeds, to prepare my dad’s last meals, and now, to cook for herself and her children whenever we’re around.
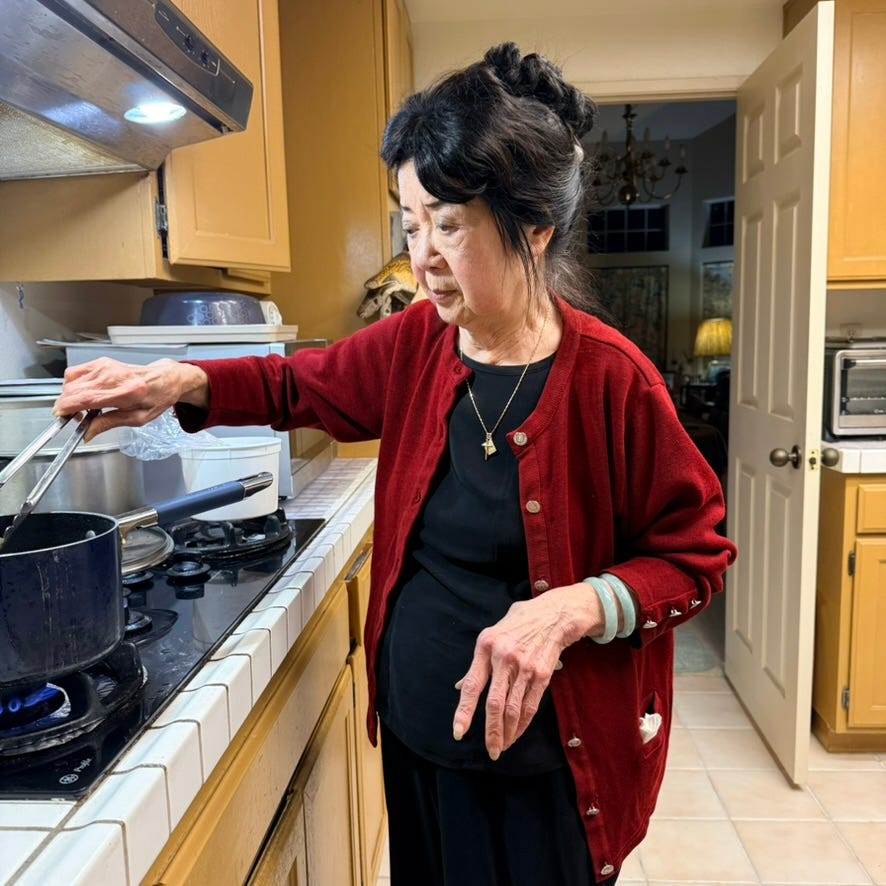
Mom at her very well used stove.
A couple weekends ago, we visited my mom and after we came back from a walk, Rory and I both smelled gas in the house. My mom was watching Viet shows on YouTube. I marched over to the stove and turned all the nobs to check. Sure enough, one of them was not fully turned off.
Thankfully, the smell dissipated right away.
“I smelled something and went to the stove to check but could not figure out how to stop it,” my mom said. “The same thing happened not long ago.”
The next morning, to my surprise mom said, “If you’re not busy today, would you take me shopping for a new stove?” Heck yes. I had lots of experiencing going back to when I selected my dream stove.
I’ll look online first to research, I told her. Her major caveat is that she wanted to touch the stove before deciding, she said.
Mom, Rory and I drove to Lowe’s where we considered the arrangement of the burners. Why were some curved and others straight? Thinking about how we cook and the pots and pans we have, my mom and I realized this: a curved arrangement of the burners means you can fit bigger pans along with smaller ones on the cooktop.
Additionally, the grates vary in weight and height. My mom lifted the grates of various cooktops and some were very heavy — even for 30-inch models. She had to get a 36-inch cooktop so she knew the grates would weigh more. “I will manage them,” she said.
The burners on her old stove were wimpy (none were more than 9,000 BTU but the cast iron grates heated up fast. The stove that Mom chose . . . a GE Profile was the priciest of the lot but she decided based on function and design. After 51 years of scrimping and saving, she bought herself a fancy new stove! I was so happy and excited for her.
The new stove!
She and my niece dealt with the installer who arrived a few days later. The grates sit up pretty high, as you can see. The flatness of the grates allow her to drag heavy pots across the stove easily, if she wants.
HOWEVER, once she started “making friends with the stove” my mom said that the burners were taking longer to heat up the pans than her old stove. The new stove’s flames heat up the grates so it takes longer to conduct heat to the pans. But after everything heats up, things stay very hot for a long time.
Moreover, when the knobs are on, there’s a blue backlight. That’s a fabulous reminder to turn off the stove.
“Your sisters wanted me to replace the toilets in the house so we did. But this stove is a more important purchase for me,” she said.
My mom is in the autumnal season of her life. Decades ago we talked about beginnings and nowadays, discussions lean toward endings. This stove, however, energizes my mom. She’s excited about learning to use it well for her cooking needs.
I told her, “Well, you better stick around longer to teach me how to cook more dishes!”
Remember our discussion about aging and maintaining the Japanese notion of ikigai (生き甲斐) — a life purpose? Turns out, ikigai can come in the form of a new stove.
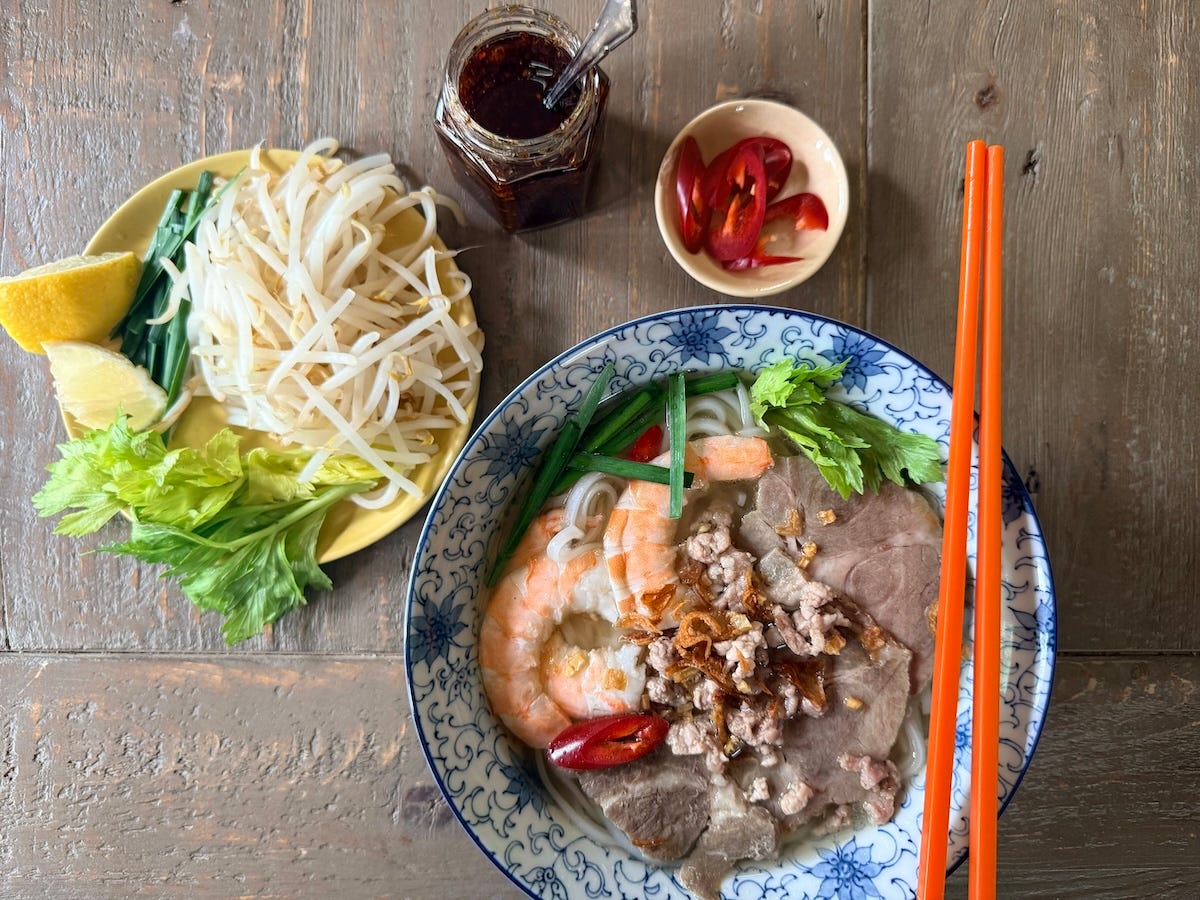
Even though my mom is northern Vietnamese to the core, she does appreciate a good bowl of hu tieu, the iconic southern Vietnamese noodle soup. There are many renditions but the one our family enjoys most it hu tieu Nam Vang — Phnom Penh-style hu tieu. It’s a Chinese-Cambodian-Southern Vietnamese surf and turf combo.
Hu Tieu Nam Vang — a surf-and-turf classic southern Viet noodle soup.
I don’t make it often but thinking about what I’d like to make for my mom on her new stove, I made hu tieu this past week from a recipe that my family has relied on for many years. Unlike pho, it’s very versatile. I updated the recipe to offer tips and pointers so you can plan ahead and tweak it as you like. Get the Hu Tieu Noodle Soup recipe at the website!
💎 Stress-testing lemongrass tofu
As a recipe tester, I leave food in the fridge to determine how long it stays fresh. That’s to say, I stress test my recipes. I’m happy to report that the crispy lemongrass tofu and its crispy lemongrass-y topping can be kept refrigerated for five days. I kept the stuffed tofu in one container and the topping in another. I finished the tofu in the pan and served it up for dinner on Wednesday. So, it’s extra handy for meal planning or even just to top a salad. Head to the PTFS Crispy Lemongrass Tofu recipe!
Support Pass the Fish Sauce! Join us for free or upgrade to a become a paid subscriber to enjoy 125+ professionally developed recipes, seed new content, and get future class discounts. Thanks for your enthusiasm!
Coming up for this Sunday Special are recipes and ideas to celebrate a precious springtime vegetable.
A comforting Korean beef noodle soup topped with tender beef and spicy seasoned buchu in a clear anchovy-kelp broth. A flavorful and nourishing one-bowl meal.
I’m very excited for the release of my newest book, The Great Book of Chocolate. This totally revised edition is filled with lots of new information about the world of chocolate, as well as a chapter on my favorite addresses for chocolate in Paris, and, yes, there are over 50 recipes that span the world of chocolate, including a chocolate cake from the late, great MaidaHeatter that she appreciated so much she sent me a letter about it…
Due to global events, it was a challenge planning an overseas trip, and some venues weren’t available on shorter notice. But I will be going to four cities — New York, New Jersey, San Francisco, and Los Angeles. Alas, I can’t visit all the places I wanted to go, but you’re welcome to come visit me wherever I am. And yes, I’ll be doing an event in Paris, in late May, if you fancy a trip to Paris! 😃
If we missed each other and you want a signed copy of The Great Book of Chocolate and Ready for Dessert, get in touch with Kitchen Arts & Letters, Omnivore Books or Now Serving LA, and they can send you a copy! -dl
Below are the dates for the events. Note that a number of them are ticketed, which usually includes the price of the book. Ticketed events also help support the bookstores and ensure that a book will be available for you. If you have questions about events, feel free to contact the venue directly.
May 5th: Release of TheGreat Book of Chocolate, which is now available for pre-order. Pre-orders will arrive on, or very close to, the release date. It’s available at these retailers, or order a copy at your local bookshop.
May 30: Booksigning at La Trésorerie Rive Gauche (48, rue de Grenelle, 7th, Paris), 3pm to 4:30pm. Copies of The Great Book of Chocolate and My Paris Kitchen will be available for sale and signing.
Please note that events are subject to change and revision (like everything these days…*sigh*), although we’re hoping that doesn’t happen. If anything changes, I’ll do my best to post about it but you’re welcome to contact a venue before an event to confirm the time and date, or if you need additional information.
Wor Shu Duck, also called Mandarin Pressed Duck or Almond Pressed Duck, was a popular Cantonese dish in Chinese and Polynesian-themed restaurants in the United States in the 1950s-1980s (right alongside the famous Pupu Platter). Known as wor shu opp in Cantonese, this dish is now seldom seen on menus. We’ve gotten countless requests for […]
My toe is healing up well and thankfully I wasn’t limping at last weekend’s Viet Book Fest in Orange County’s Little Saigon. Alas, I’m still not quite up for my usual long daily walks.
Not being as active as I’d like to, I’ve been trying to eat a bit lighter. I’ve been air-frying lots of tofu in the Ninja Combi oven, which excels at air-frying without leaving foods desiccated and chewy awful.
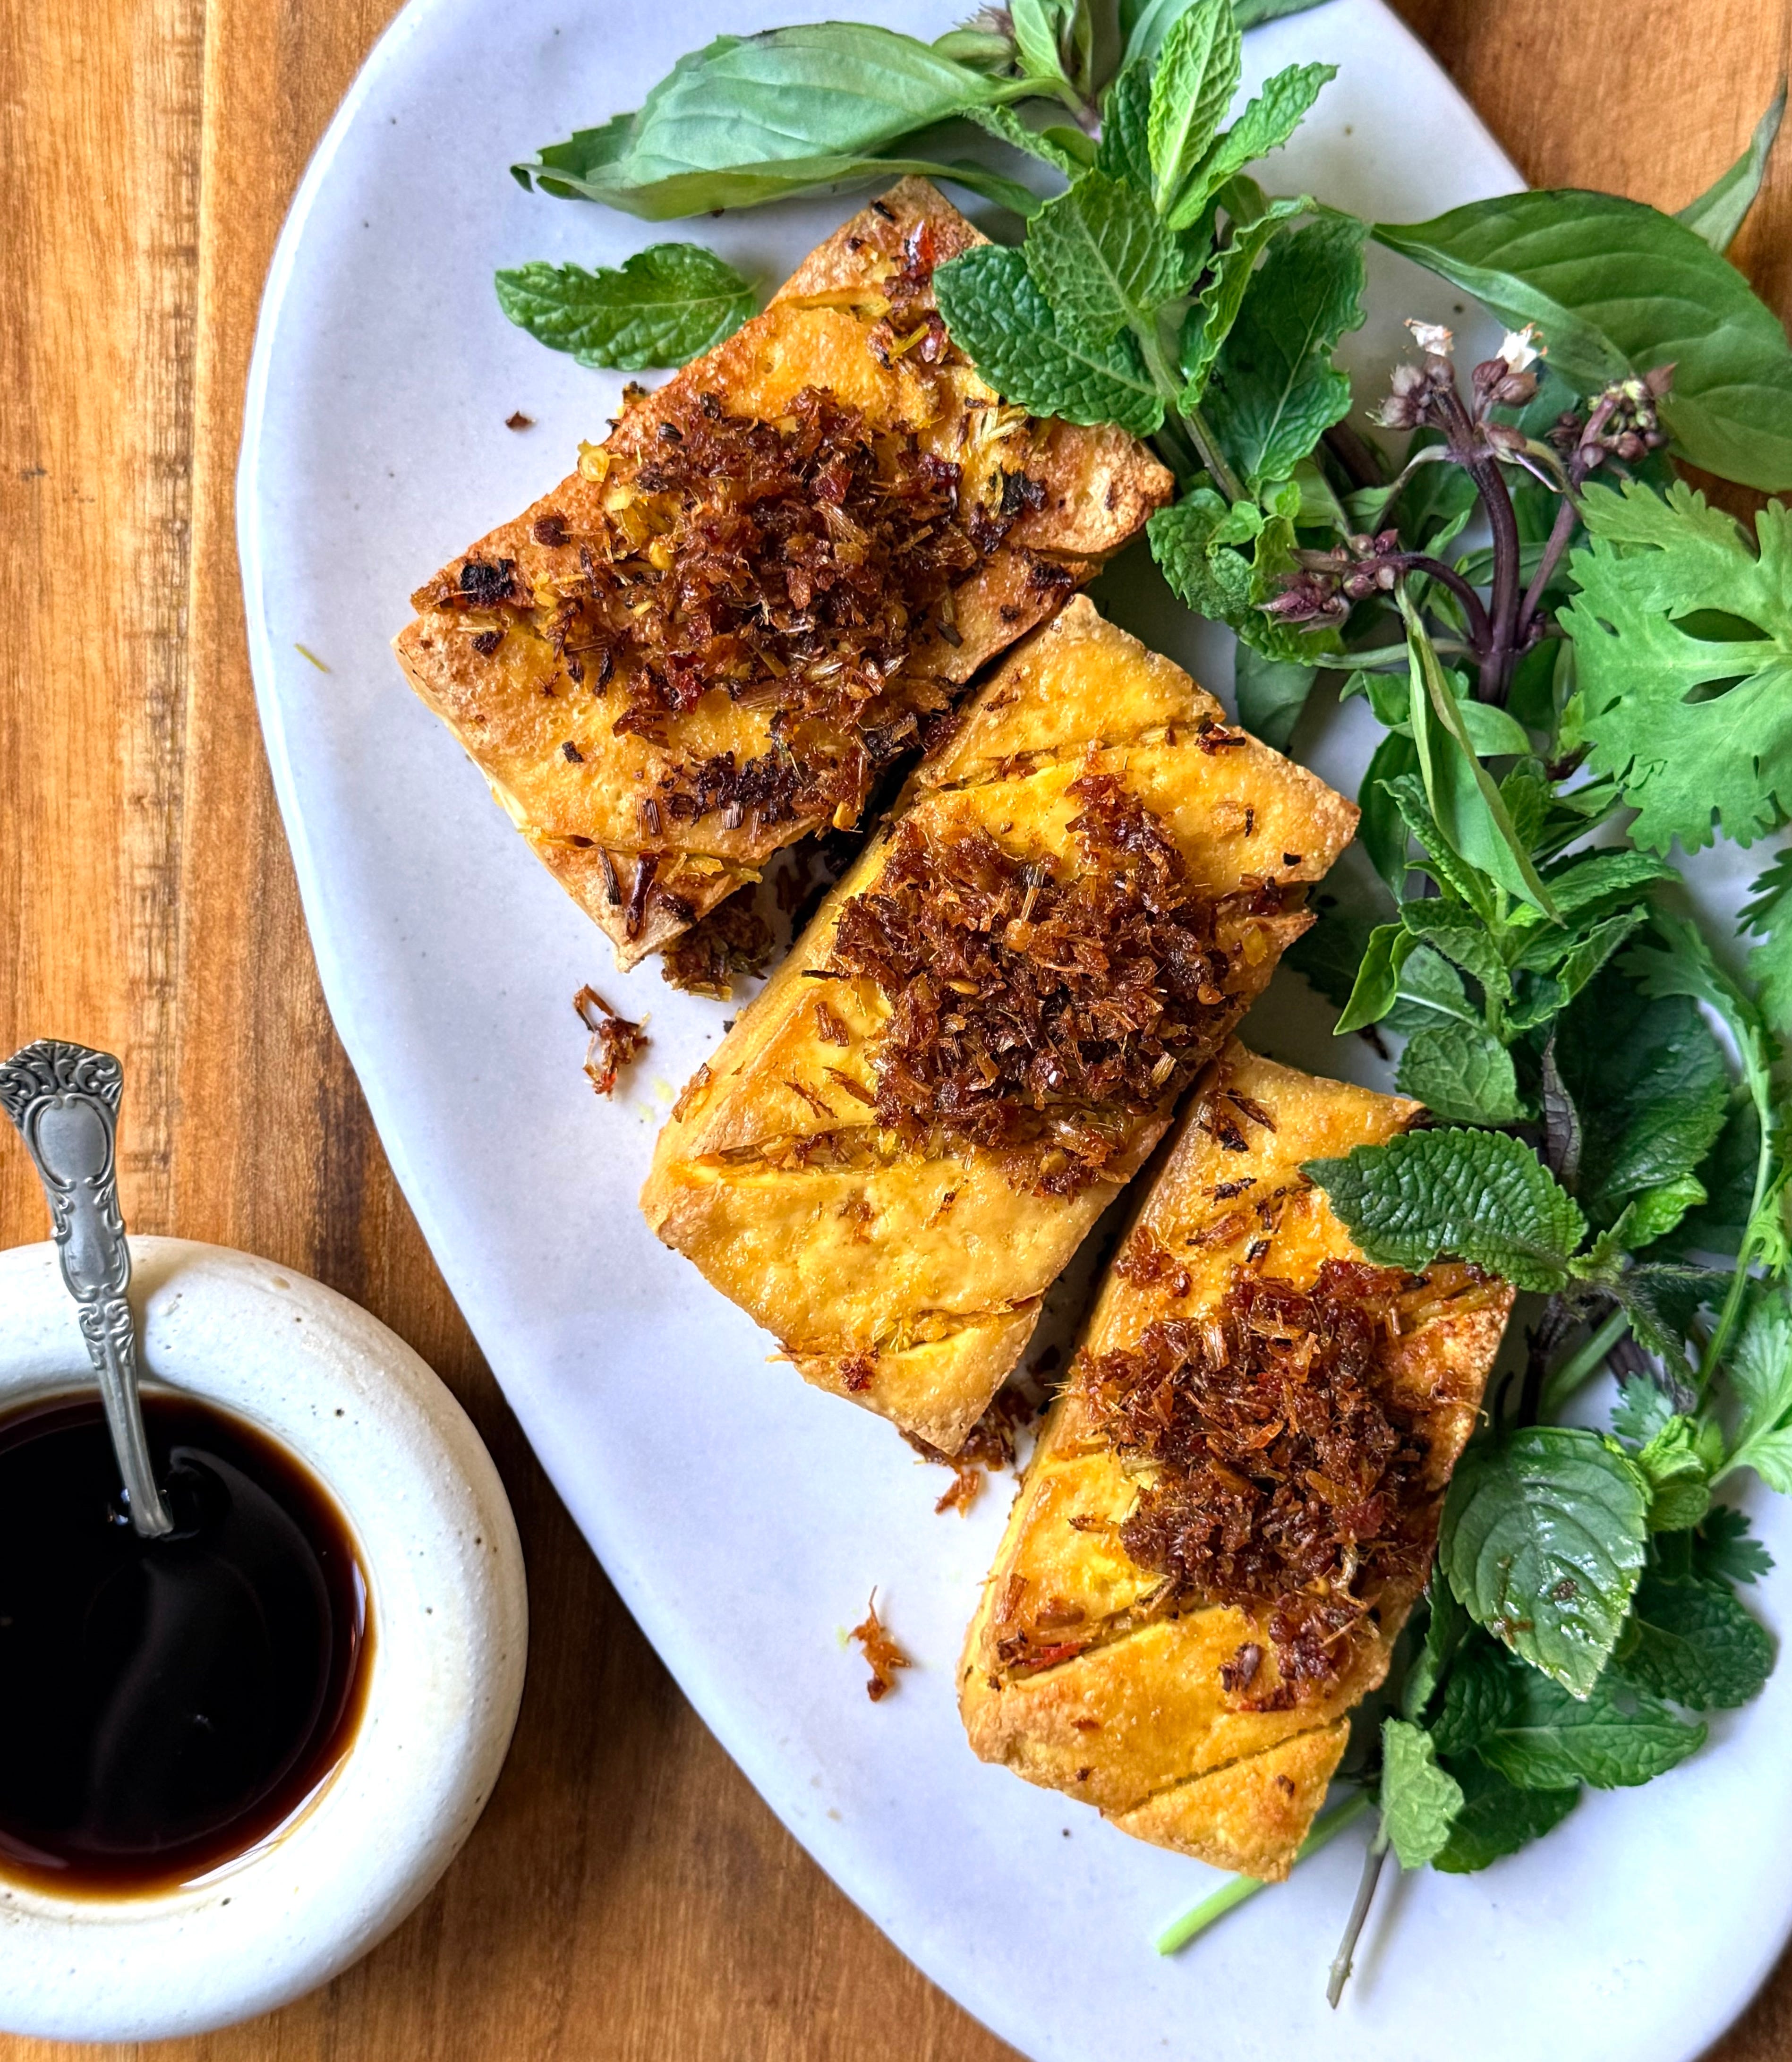
Feeling lucky, I reworked my Vietnamese chili-lemongrass tofu (đậu hủ chiên xả ớt) recipe so it’s prepped in the air-fryer. I love this dish, which I first ate as a deep-fried bar snack (món nhậu) in Ho Chi Minh City years ago. At the brewpub near our hotel, everyone sipped beer from utilitarian bowls. My travel buddy Karen and I joined in on the fun and ordered a bunch of snacks to make a dinner. This lemongrass tofu was the evening’s standout.
Even though I developed a recipe for this tofu several years ago, this past week, I retooled it to air-fry the tofu and make it easier and crispier! Shazam, it was even better. ⚡️
Make lots then dole it out over days! That’s the extra beauty of this recipe.
This fried lemongrass tofu tofu is so good that I made a lot, actually too much. In the process, I realized that it can be totally prepped in advance for easy meals during the week. Trot it out to enjoy with jasmine rice as a main dish, or feature it in a bun rice noodle bowl or grain bowls. Add Viet daikon and carrot pickle for refreshing crunch.
Like Rory, you probably worry about my crush on the Ninja Combi oven. I was skeptical about the steam oven but it’s does do a lot for your for $200. As I’ve played with it, I’ve discovered that one of its most outstanding functions is air-frying. In particular, it outperforms by trusty Cuisinart to air-fry tofu to a golden crisp.
The Ninja combi doesn’t just blow hot wind on food. It smartly air-fries food to circulate the heat and bit of oil that you put on the food. The result is wonderful crispiness. And, with no wiry air-fry baking tray to deal with, food doesn’t stick and clean up is so much easier.
Here’s the Ninja Combi air-frying tofu for today’s recipe:
Don’t have the Ninja Combi or an air-fryer yet? You can still make this terrific lemongrass tofu recipe. Use your regular air-fryer or use the conventional instructions in the recipe to cook the tofu on the stove! The crispness won’t be quite the same as with the Ninja oven. But either way, I’ve got you covered.
Lemongrass tofu for lemongrass 💘 and crispy tofu lovers
In this dispatch, expectthe following:
Lemongrass tofu recipe in full text and downloadable PDF with air-frying and pan-frying instructions
Two (2) videos on tofu butchering and potentially tricky steps
Make-ahead pointers so you can add this tofu into your rotation or make it for your next party
Ingredient sourcing tips
If you love lemongrass, this recipe highlights its citrusy flavor super well. It’s naturally vegan and appeals to omnivores like my mother who ate seconds and then guarded the leftovers!
Let’s make it.
Thank you for being here.Paid subscribers sponsored this Sunday Special dispatch. Join us at any level. Become a paid subscriber for the full lemongrass tofu lowdown plus many other recipes, insights, and benefits. Your support matters.
Fish Ball Soup is a point of pride in Taiwanese households. This one is super quick to make with lots of flavor from just a few ingredients that we always keep on hand. Most fish ball soups served in restaurants are just fish balls, broth, and maybe a sprinkling of scallions or cilantro. For this […]
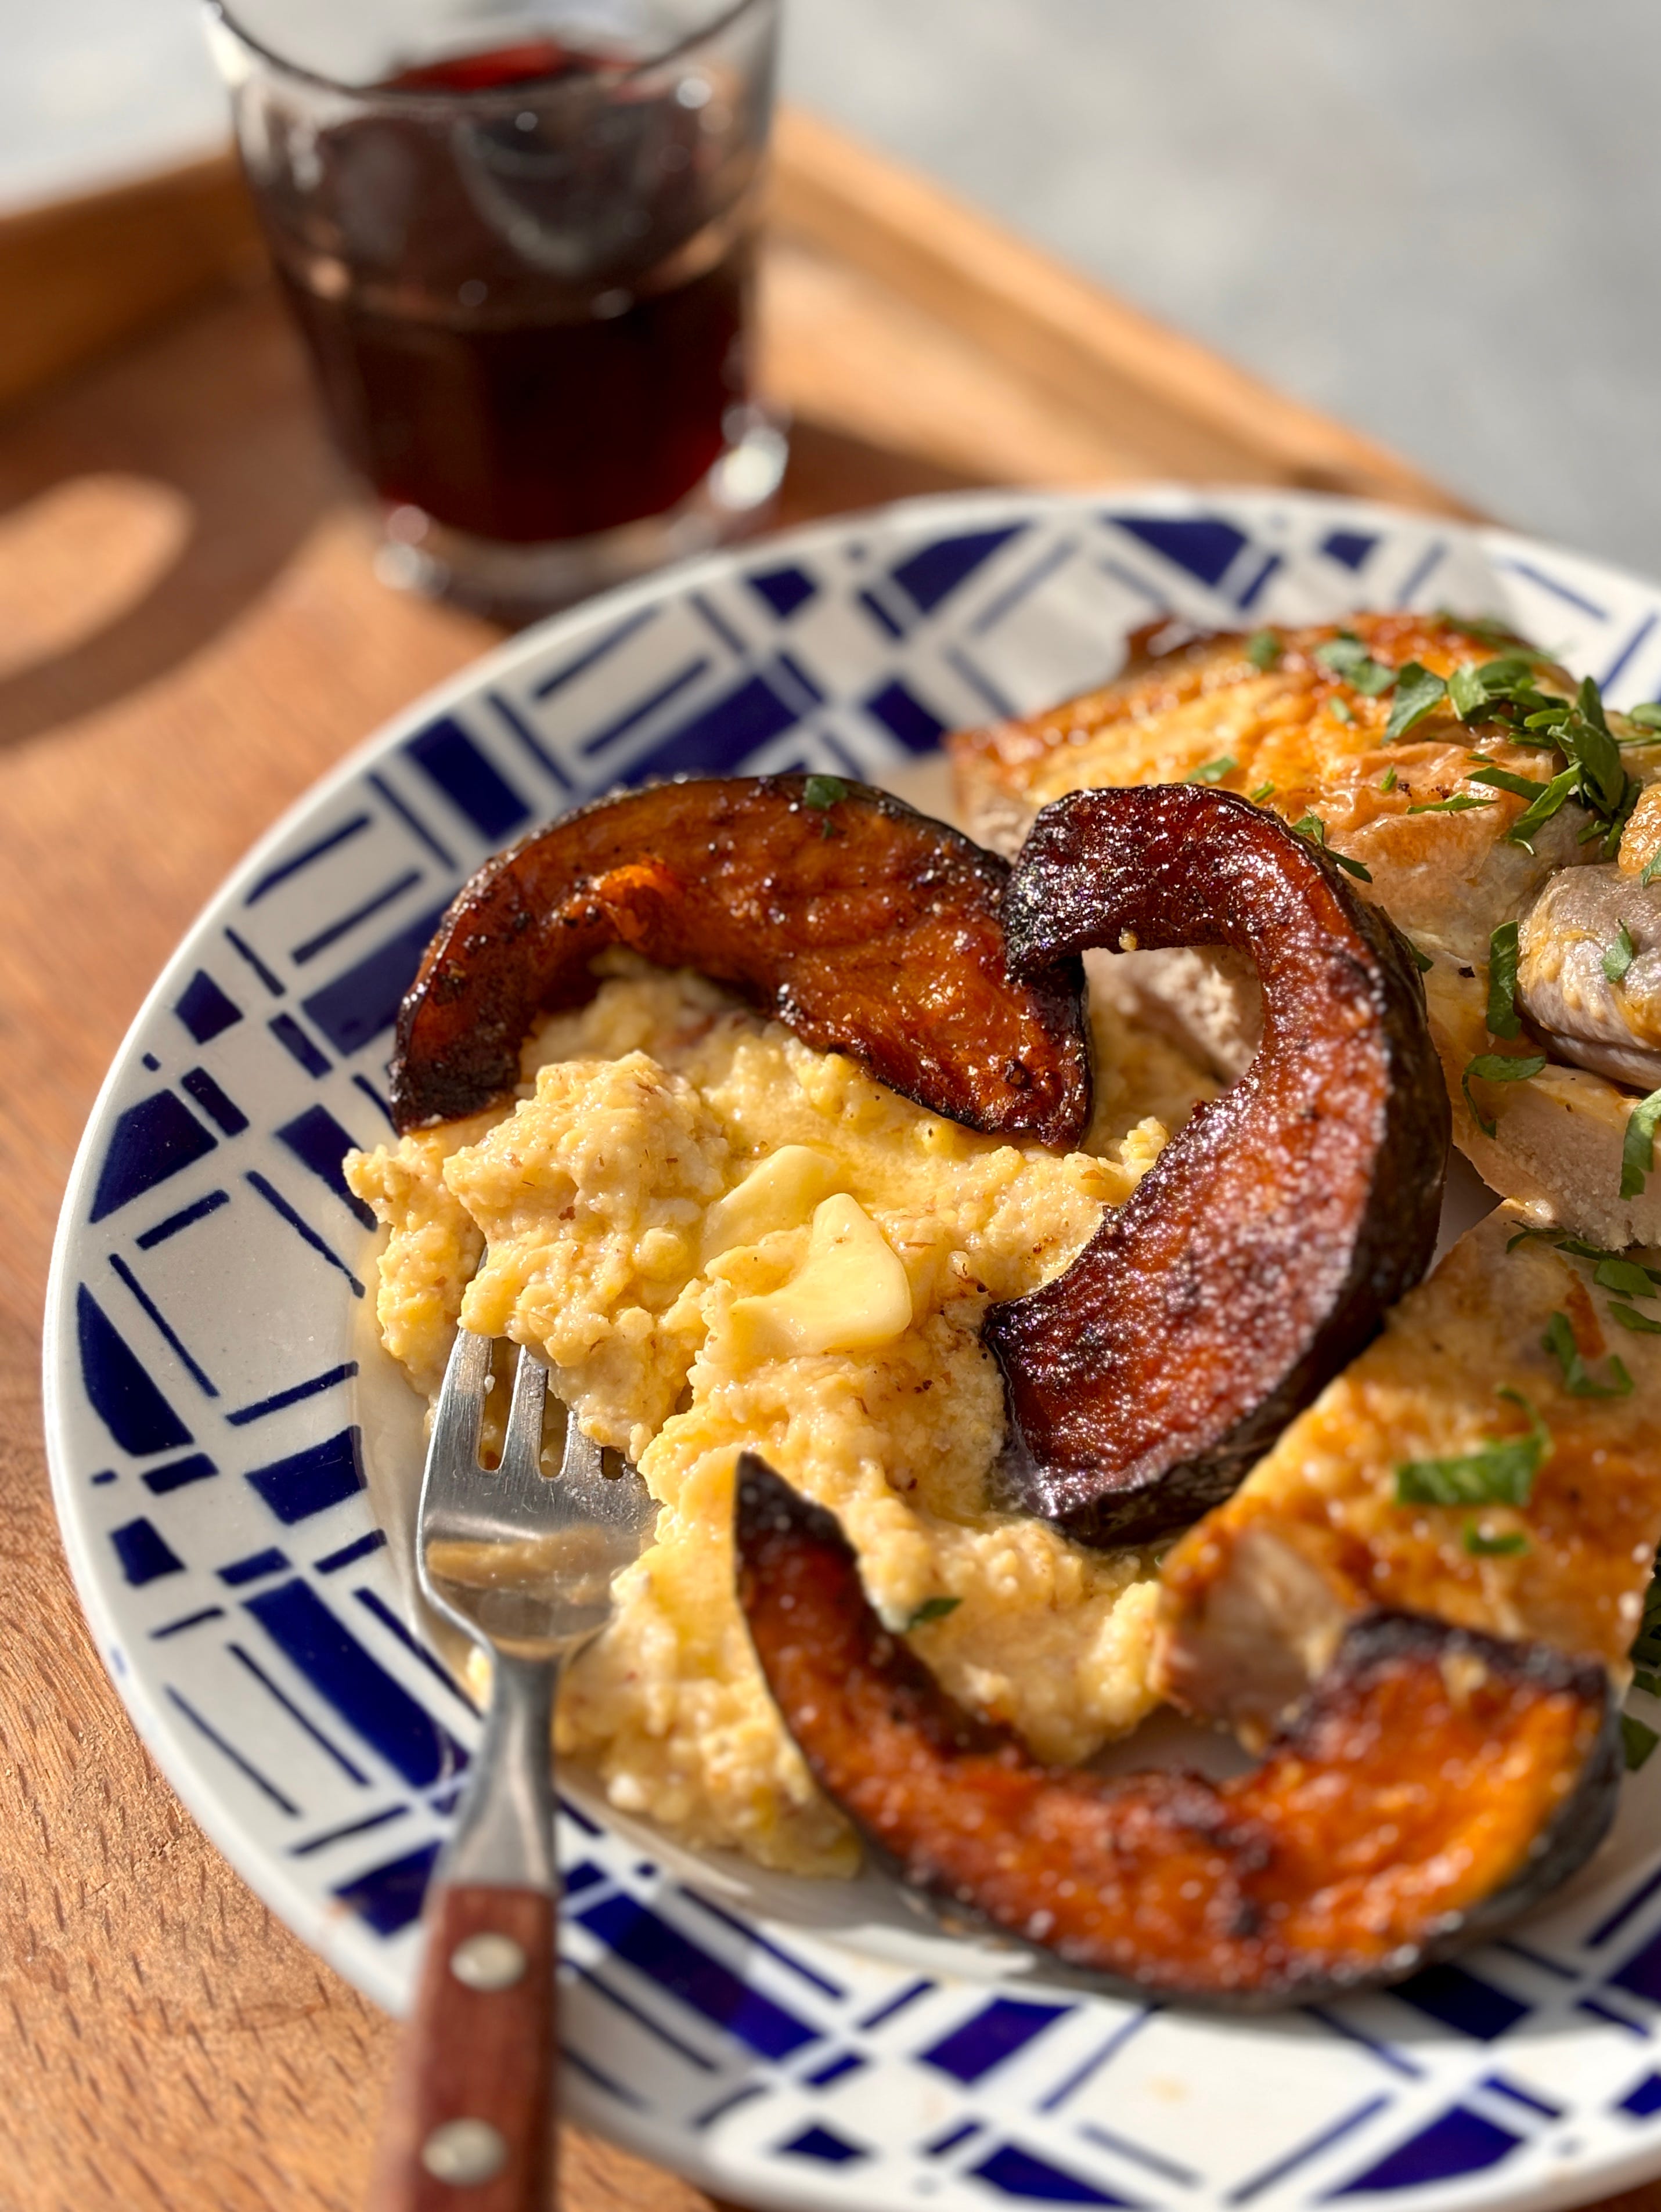
I love polenta, especially in the winter. It goes well with grilled or roasted meats, vegetables, fish, and poultry. It can be served for breakfast with butter. If made in advance and left to firm up overnight, it can be cut in slabs and grilled. And if you’re the kind of person who doesn’t mind firing up the deep-fryer, you can make polenta fries. (Which I love to eat, but not clean up after. Option B is to cut the polenta into batons and fry them in olive oil a skillet )
I keep a bag of polenta at home, and used to make it by stirring it on the stovetop, which took nearly an hour of constant vigilance, not to mention cleaning up the stovetop afterwards, and nursing a few burns on my arm from getting splattered by hot polenta.
When I arrived in France, I was surprised at the prevalence of instant polenta, which is polenta that’s finely ground so it absorbs liquid quickly. (There’s also precooked polenta grains, and precooked sliced polenta, which were new to me, too.) Admittedly, it’s very easy to make and is ready in about five minutes. People don’t seem to mind it, but I like the texture of traditional polenta, so stick with that.
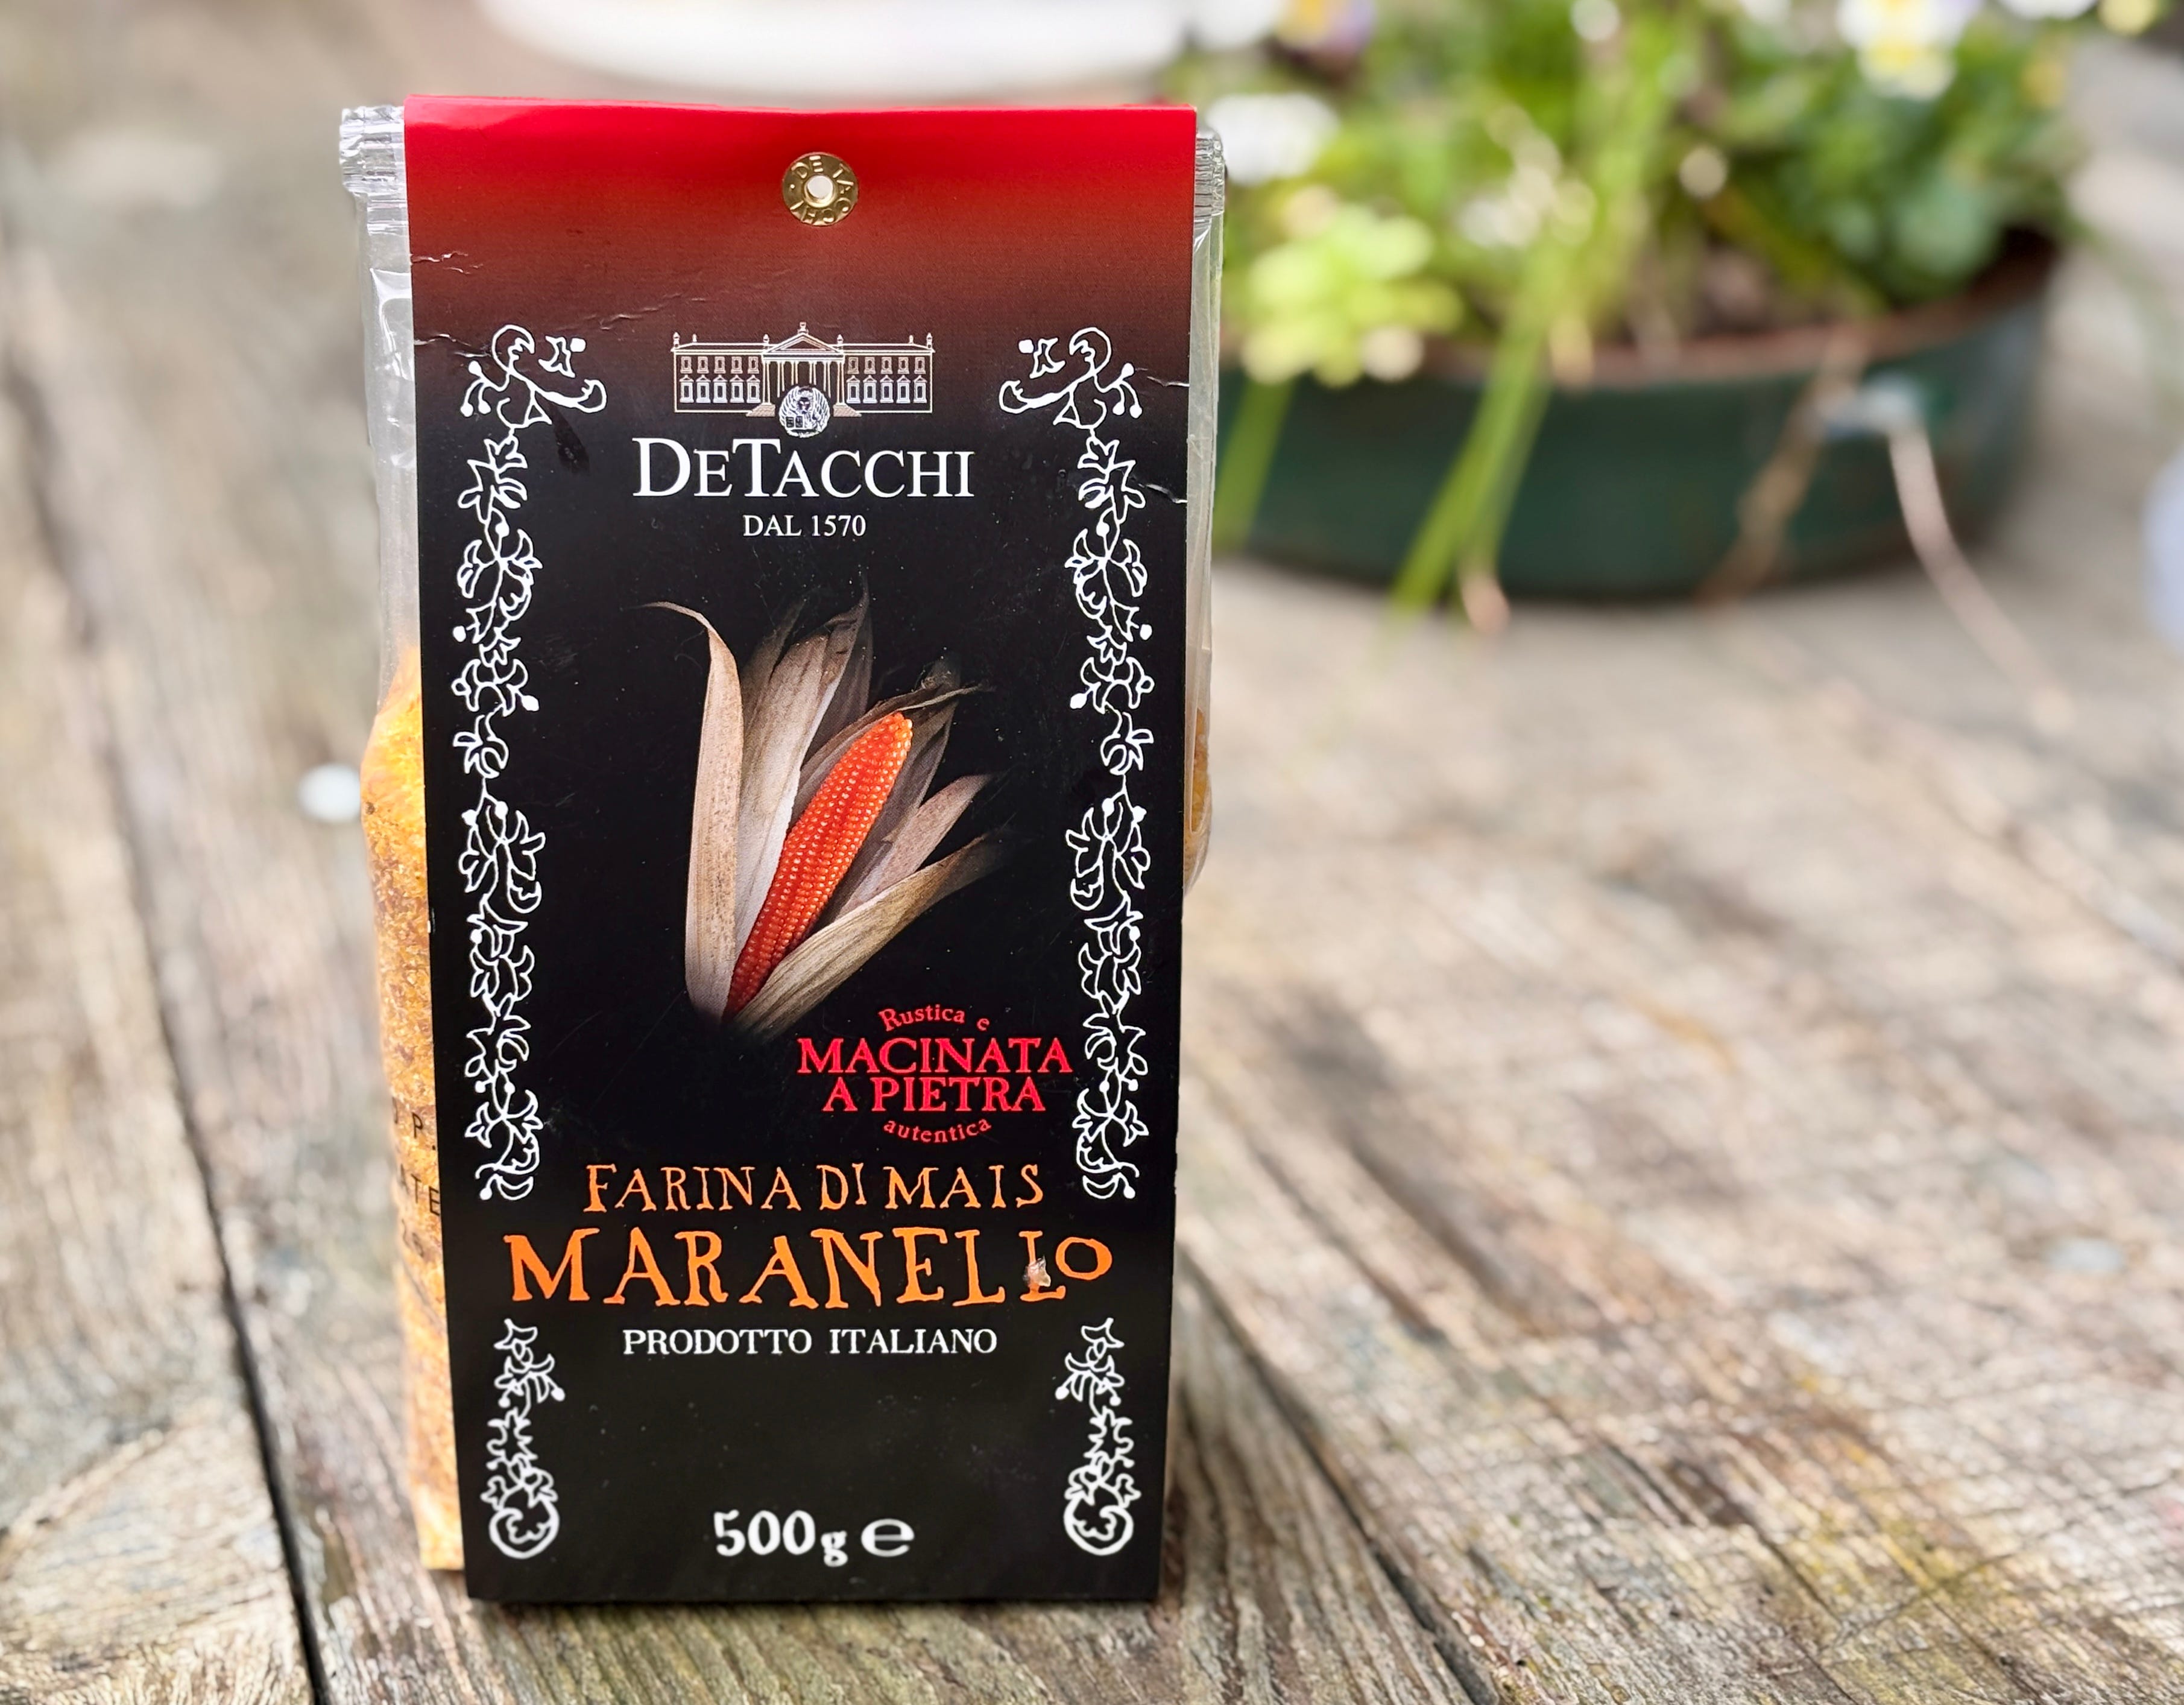
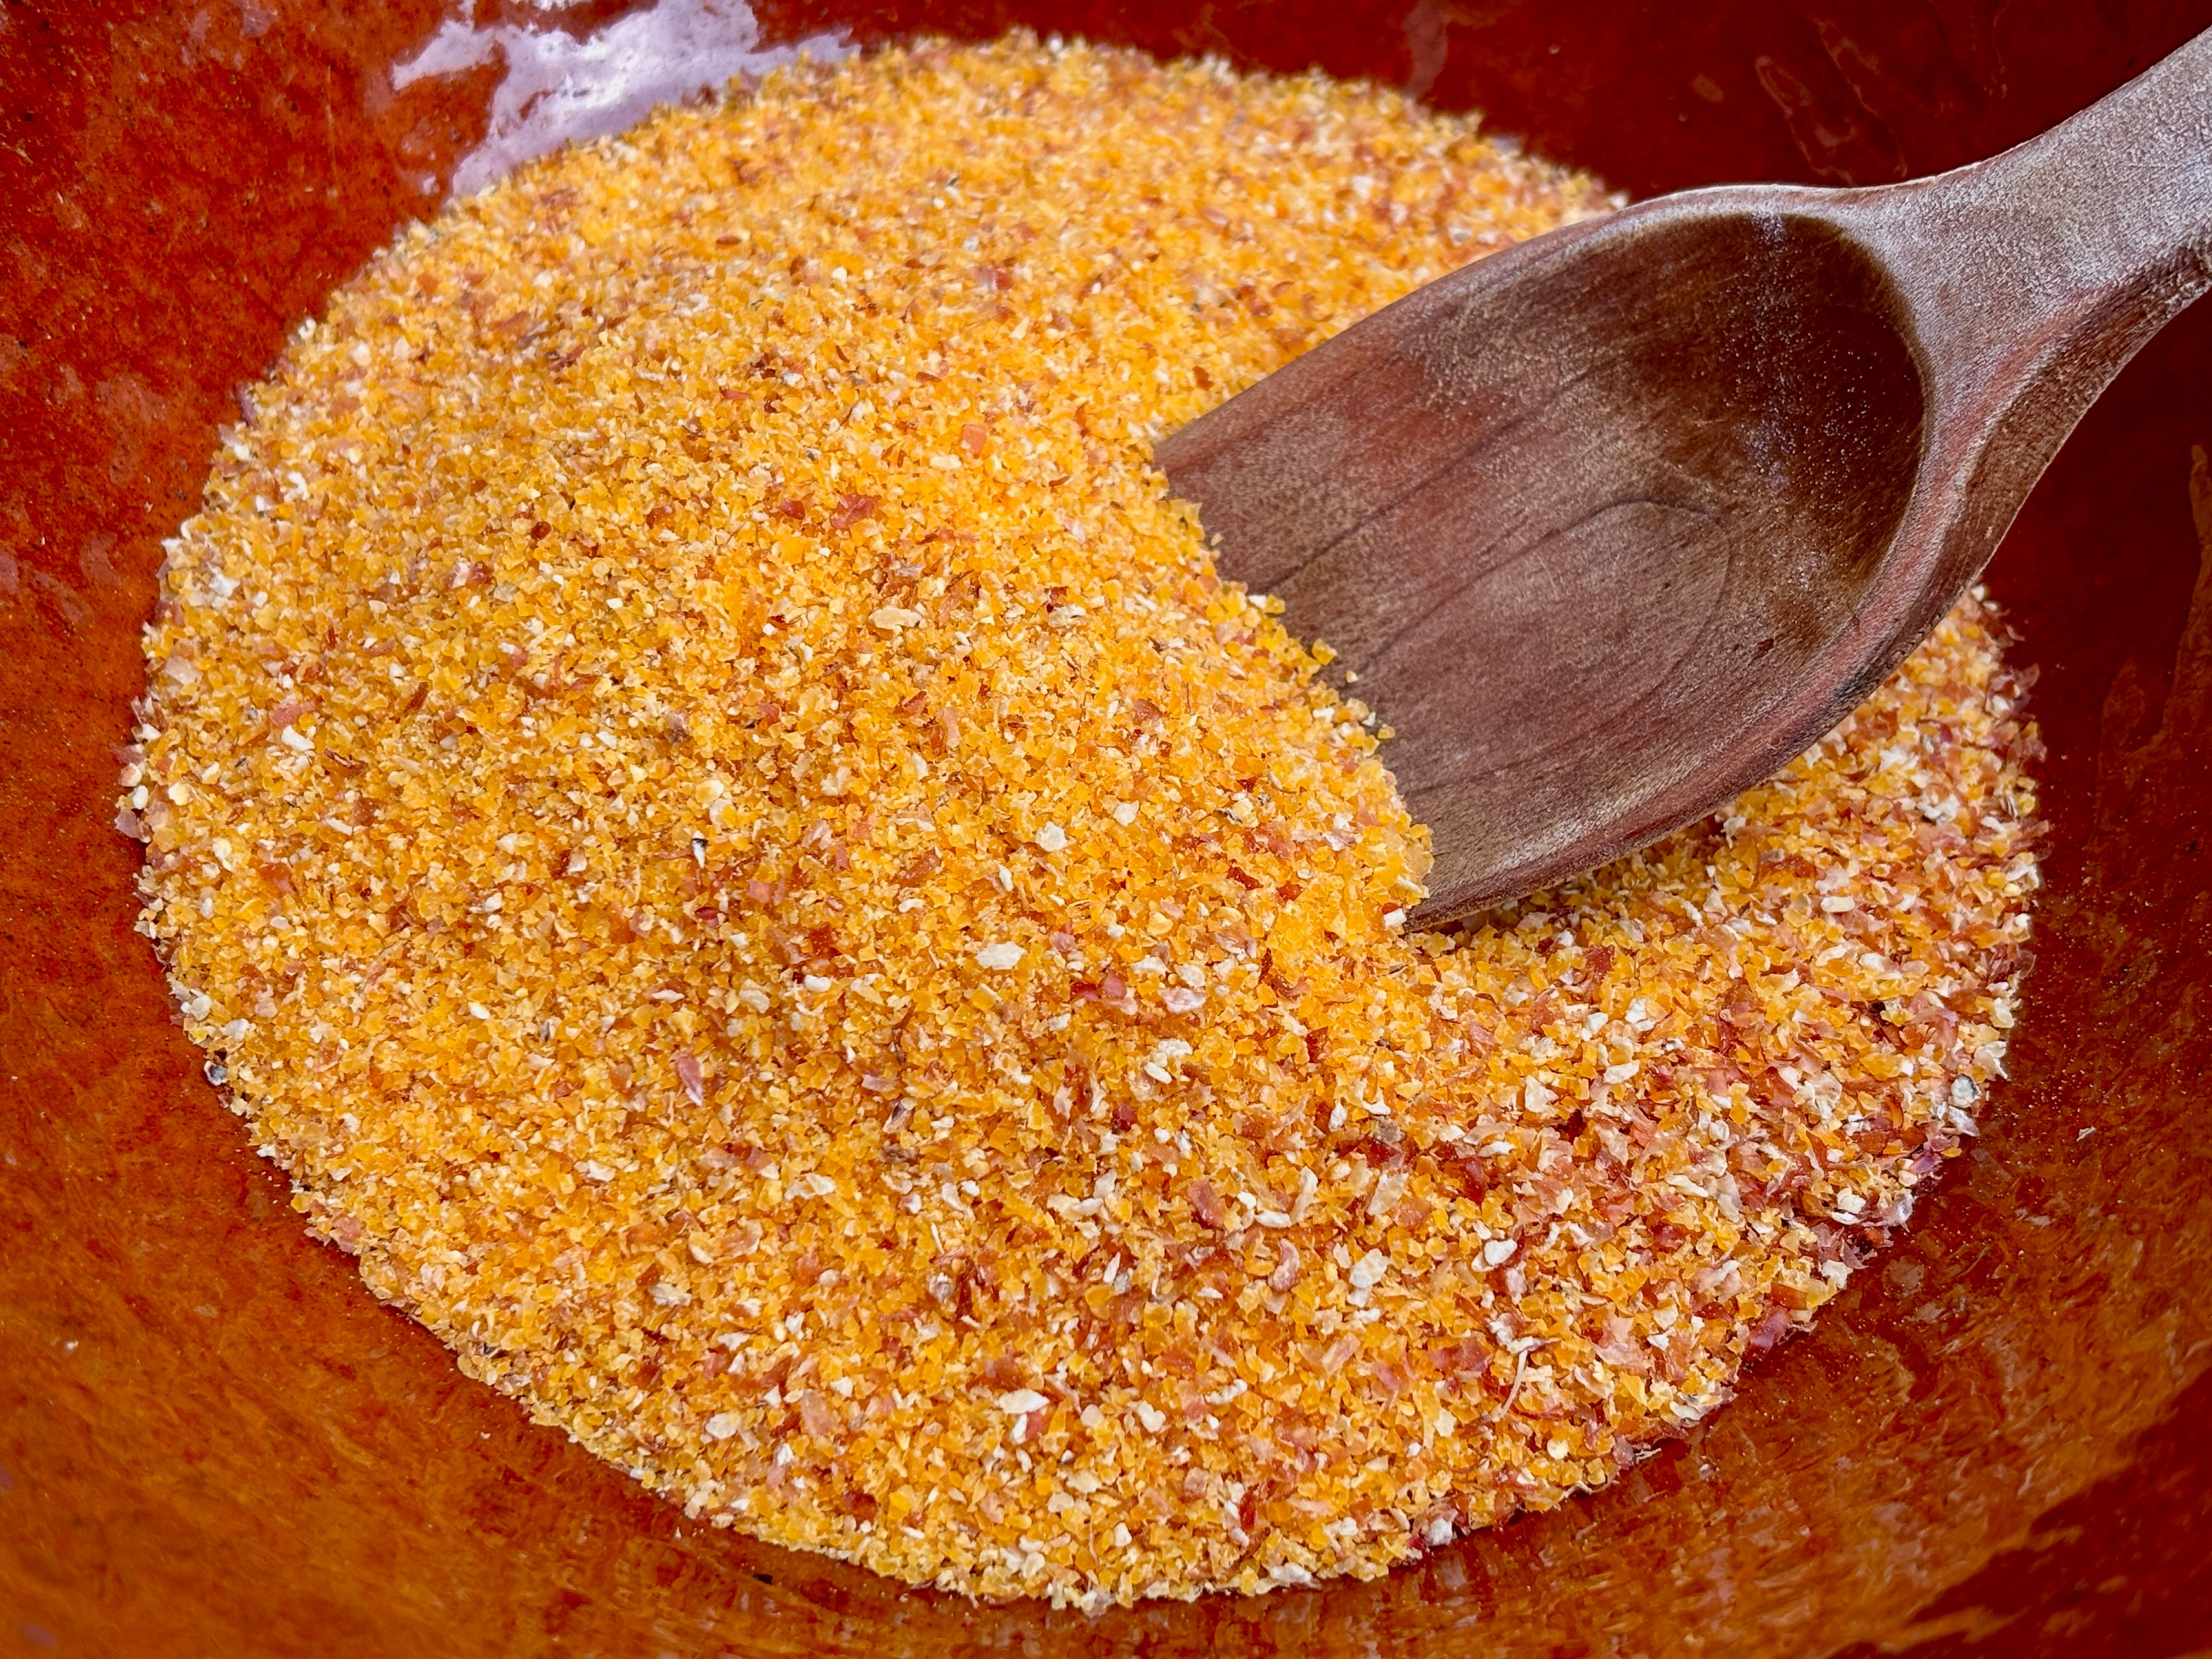
If you want to take your polenta to the next level, seek out stone-ground polenta. Stone-ground polenta (like stone-ground cornmeal) includes the whole grain, and contains the germ and the bran. It also has retains more of its flavor during grinding since the stones grinding the corn don’t heat it up, which can diminish its flavor. But I also like the irregularity of it. It looks like real corn, not like powder.
Stone-ground polenta.
I’ve been cooking polenta for years, stirring it on the stovetop, but recently I remembered this technique, which was introduced in the pre-internet days by the great Paula Wolfert. The recipe was in her book, Mediterranean Grains & Greens, a treatise I sadly had to leave behind in the States, but she attributed to a recipe on the back of a package of Golden Pheasant polenta, although the California-based company no longer seems to be in business. 😔
I’d made it way-back-when, but for whatever reason, I continued making polenta the traditional way. It reminds me of a quote from Judy Rodgers in the Zuni Café Cookbook, something along the lines of finding, and sticking to, a harder way of doing something. For better or for worse, that’s sometimes as I operate. Old habits die hard, I suppose.
I’ve been pining for a springy way to combine leeks and lentils in an unfussy, one-pot, weeknight-friendly meal but would get stuck on one thing: how annoying leeks are — and I say this from a place of adoration! I think leeks are one of the most stunning vegetables, an ombre of chromatic ringlets from buttery yellow to pea green and back to a pale shade of lima. They look exactly like spring (even though it’s climatically July outside but will be March again next week), and taste even better: Oniony but not harsh and silky, wonderful, and a little sweet when braised. They should be everywhere, but first we need to address the fact that if you go to the store or market for a bundle of leeks right now, you have no idea how much leek you’re getting.
This No-Sugar Banana Bread is flavorful with a tender crumb and a sticky top crust. In short, it’s got the key hallmarks of banana bread, with no added sugar OR dairy! Our Go-To Healthy Banana Bread It seems that avoiding added processed sugars has become everyone’s business. This healthy, sugar-free banana bread is here to […]
May 5th marks the release of TheGreat Book of Chocolate which is now available for pre-order from your local independent book seller as well as Bookshop, Amazon, and Barnes & Noble online. And I’m going on book tour! Due to global events, travel has become more challenging, especially internationally.
If you can’t make it to an event, and I’m not coming to where you live, and you’d like a personalized, signed copy of a book, you can order one from Kitchen Arts & Letters (before May 4th), Omnivore Books (before May 11th) or Now Serving LA (before May 14th), and they will send you a copy. Should you have questions, please contact the shops.
Note that a number of events are ticketed, which helps support the bookstores, and at places where books can be pre-purchased, that ensures that you’ll get a book. If you do have questions about events, please contact the venue directly as they are best equipped to answer your questions.
Hope you can make it!
May 4: Chat and booksigning with Matt Rodbard of Taste Live at RizzoliBookstore, New York City – tickets here
May 5: Booksigning at Williams-Sonoma, Columbus Circle, New York City – tickets here
May 6: Booksigning at Williams-Sonoma, Short Hills, New Jersey – tickets here
May 9: Markethall Foods, Oakland, CA – more info here (I’ll be signing books Noon to 1:30pm)
Note that this event is open to all, but books can be prepurchased from their website prior to event, and pastry boxes inspired by The Great Book of Chocolate and Ready for Dessert will also be available for pre-purchase. Prepurchasing a book ensures that you’ll get a book and also supports small, local businesses. Check the event page for details!
May 30: Booksigning at La Trésorerie Rive Gauche (48, rue de Grenelle, 7th, Paris), 3pm to 4:30pm. Copies of The Great Book of Chocolate and My Paris Kitchen will be available for sale and signing.
You can purchase or order the book at your local bookstore or online retailer from one of these links:
Events will be published and updated here as they are announced. Please note that events on this page are subject to change and revision. It’s suggested that you contact the venue before an event to confirm the time and date, as well as if a ticket or purchase is required, if you can bring books purchased elsewhere to be signed, or if you have any other questions or need additional information.
Beef chow mein is a delicious Chinese dish made with thin, chewy noodles, seared flank steak, and crisp-tender vegetables. Pull off restaurant-quality beef chow mein right in your own kitchen with our step-by-step recipe, all brought together by the rich savory depth of Chinese light and dark soy sauces! We also put together a YouTube video […]
Last Sunday I had a gardening accident. A large rock fell on my big toe as Rory and I were trying to maneuver a heavy pot. There was blood and pain and I also fainted from the shock of it all. Rory woke me with a gentle slap to my face.
X-rays showed I luckily had no broken bones or fractures. The kind Urgent Care folks sent me home with instructions for “wound care” and to take it easy.
The accident was caused by a very, very stoopid move, one that even a professional gardener would not do. We were rushing because that’s what we do nowadays – try to rush to squeeze everything in during our waking hours. Does that rush yield a better life? My toe and the rock reminded me to take time to unwind, learn new and fun things, but still focus on fundamentals.
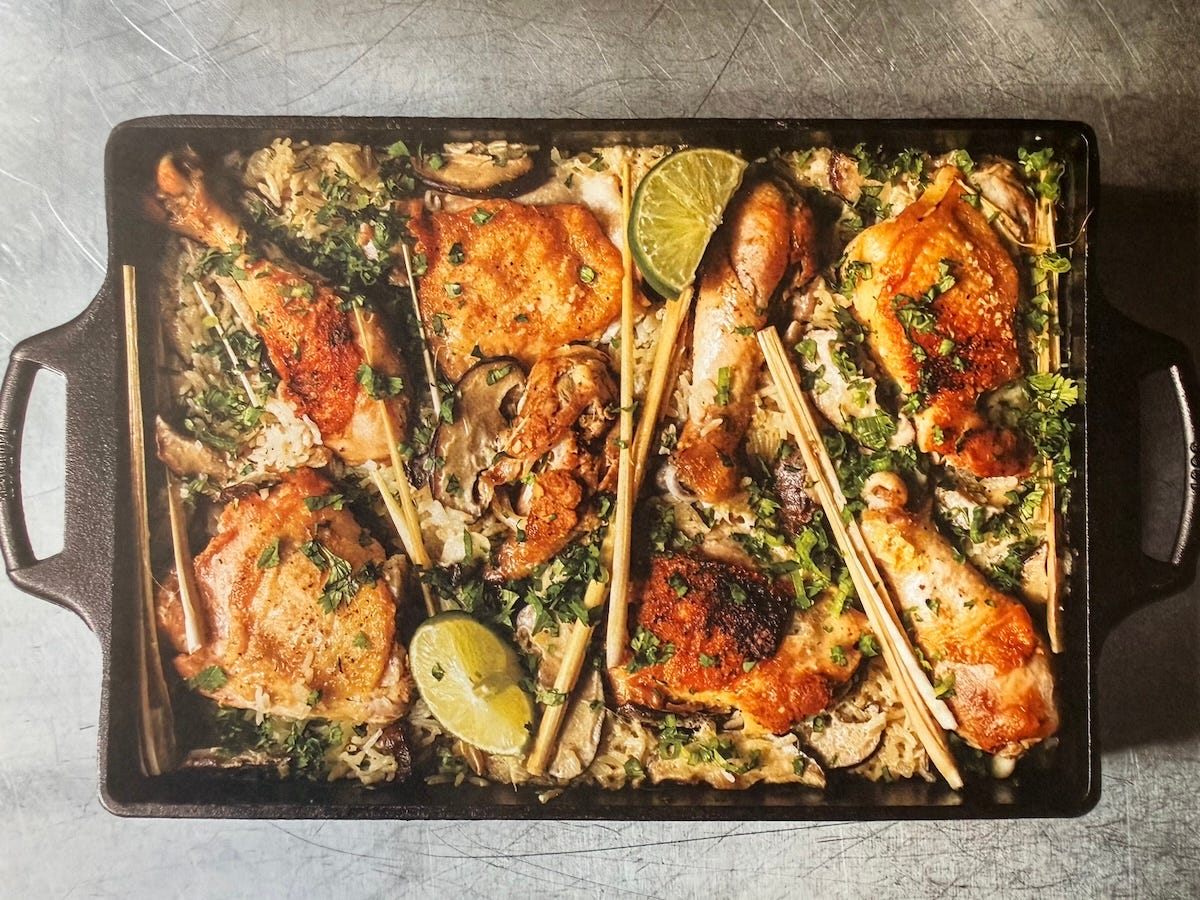
That’s how I got to playing with rice. First, I experimented with adapting chef Ron Hsu’s chicken and rice casserole for the Ninja Combi oven. I was curious about its Sear/Saute function plus something called “Combi Crisp.” The little machine has its beeping quirks but surprisingly, it produced a casserole with an incredible rice crust at the bottom. The chicken skin was delicately crisp too.
What the Ninja Combi produced was was an excellent reason to indulge in lots of white rice! Instead of using the stove and oven to make the dish, I prepped and organized the ingredients, turned on the combi, and played with its various functions. It’s pretty amazing for a countertop appliance. Head to the website to grab the recipe and watch my video of how the dish comes together. (Ron’s conventional recipe for the casserole is also at the website.)
Rory asked me how I dialed in cooking the rice so well in the combi, an appliance that cooks fast and furious and sometimes seems to be out of control. The machine is forgiving but also, I know how to cook rice in a pot on the stove as well as in the microwave.
Why cook rice in a pot if a rice cooker is around?
When I’m in a hurry, I cook rice in my Cuckoo rice cooker. It’s a good machine but to be honest, the cooked, while good, is shy of great. When I take time to cook rice on the stove, I can coax the grains into tender-chewy, fluffy perfection. I don’t consider it a feat of daring do.
Cooking rice the old fashioned way is not only a survival skill (someday, you may lack electricity for that cooker!) but also an opportunity to practice the craft of making good food. What you learn from cooking rice on the stovetop is portable knowledge to apply elsewhere — for a paella, risotto, and sushi rice, for instance. No matter how fancy the rice dish is, cooking rice is simply hydrating and heating up grains. You just need confidence in manipulating the cooking process to meet your needs.
Every person has a cooked rice ideal based upon their cuisine, culture, and personal preference.
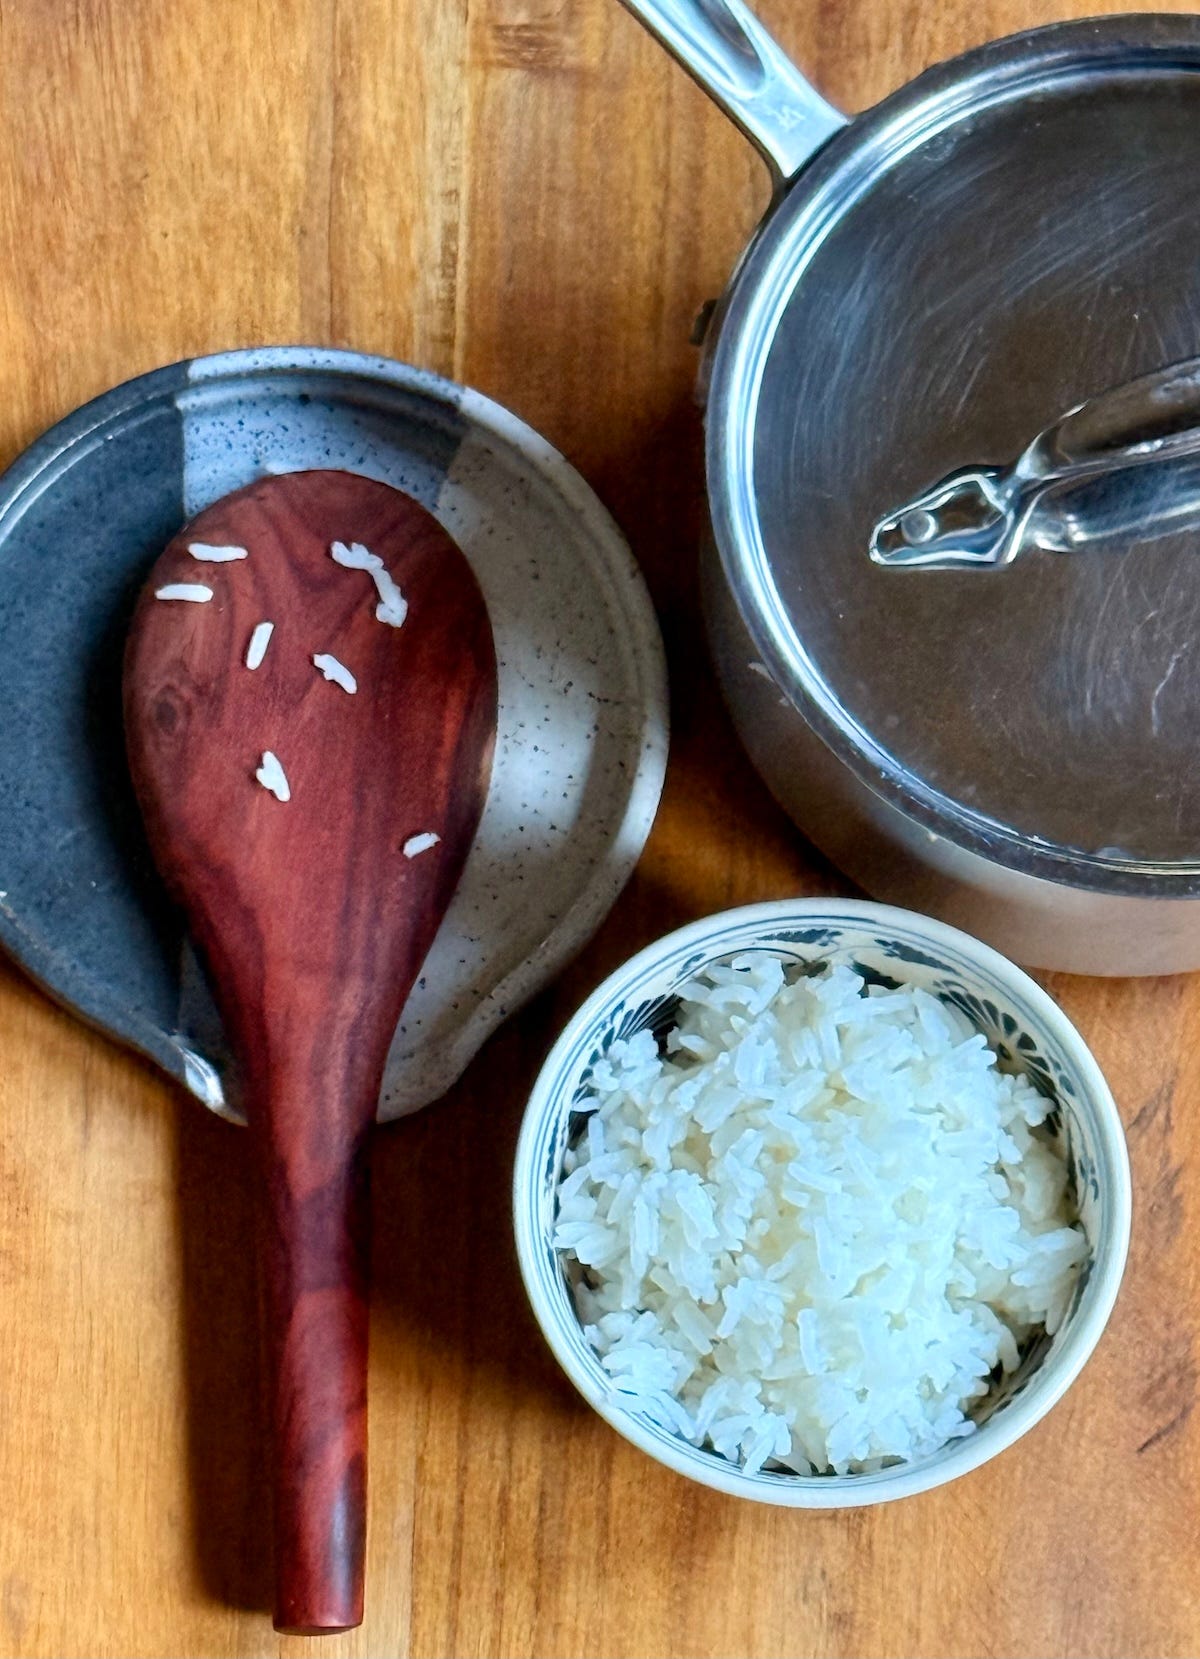
For my everyday eating, I like chewy tender grains of Thai jasmine rice that stick together ever so slightly. They’ll hold together as a mass when you’re dishing up the rice from the pot but when you look at them, you can clearly distinguish their shape. Such grains are more receptive to sauces and other flavors that hit them on the plate or in a bowl. (When I’m cooking Japanese, Korean, or South Asian dishes, I use different kinds of rice.)
In this dispatch, you’ll find:
Rice cooking myth busting to help you confidently cook rice
Pointers on rice and pan selection
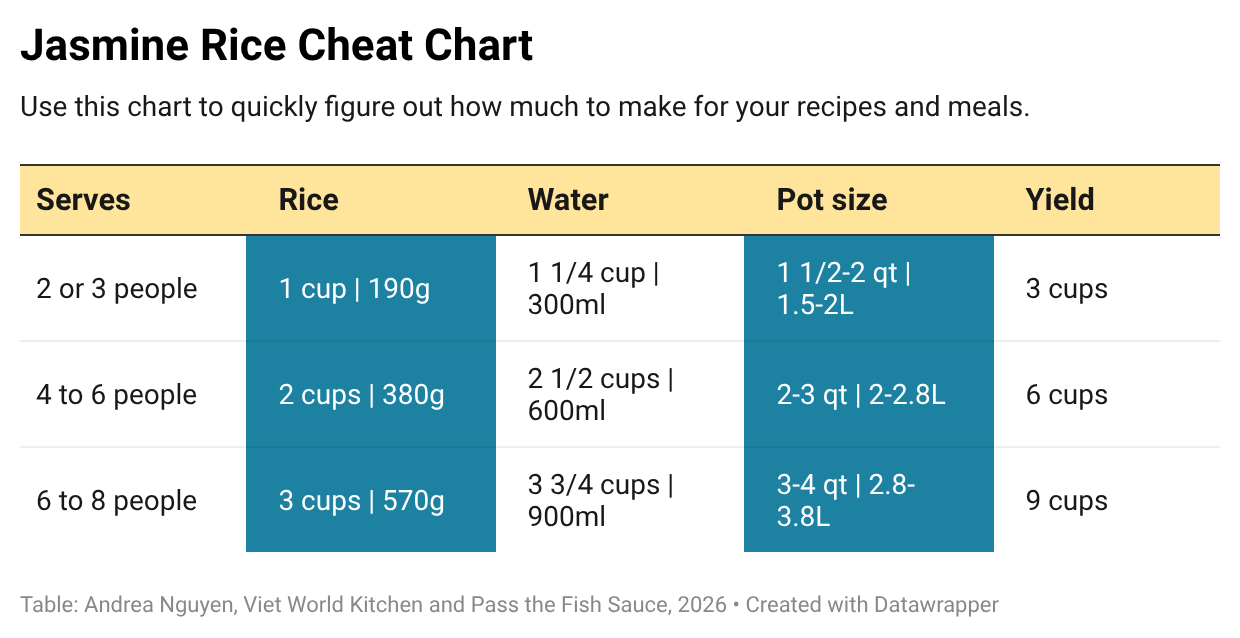
A scalable chart for you to make as much as you need
My perfect jasmine rice recipe in full text and downloadable PDF
Troubleshooting tips for you to craft your ideal pot of rice
Pass the Fish Sauce is 💯 reader-supported. Paid subscribers sponsored this dispatch, which is free to everyone. Join us at any level to satisfy your culinary curiosity. Become a paid subscriber to pitch in, gain extra insights, and enjoy extra perks. Your support matters.
Let’s bust 3 myths about cooking rice
My mom first taught me how to make long-grain rice in a basic National rice cooker. When I asked her about cooking rice on the stove, she told me about her unplugged another, which I followed before eventually developing my own recipe. When I’ve made rice with friends, they’re often surprised that I break the golden rules of cooking rice.
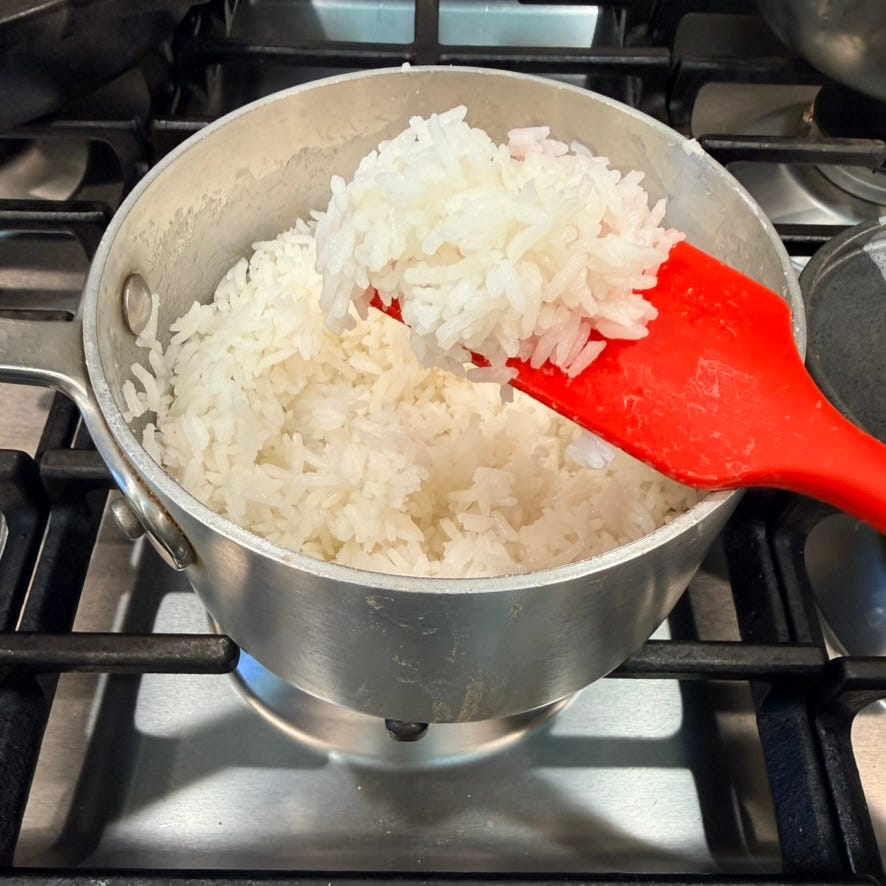
Wash the rice until the water runs clear. Washing the grains rids them of some starch so they taste fresh and clean. I wash and rinse white rice about three times and these photos show the progression. The water is never fully clear when you’re washing white rice. Just get close to it then move on to cook the rice!
Measure water by your knuckle. There is no universal knuckle and universal pot for all people who cook rice. The water level depends on the pot, the amount of rice you’re cooking, and your personal knuckle! Cook the same amount of rice in the same pot for a month or so to gauge the water level that works for you. Then try eyeballing the water level. Only you and your personal knuckle can truly know your equipment, ingredients, and taste preference.
Don’t lift the lid before the rice is done. Rice cooks by gentle steam action so a heavy pot with a secure lid helps. If you cook rice in a not-so-good pot with a loosey goosey lid, you’ll have a hard time retaining the heat if you open the pot up during cooking. With good modern pots, you can open and close the lid often without ruining the rice. Go ahead and peek!
My default rice for everyday eating is white or brown jasmine rice grown in Thailand. Usually, the rice is Three Ladies brand. Regardless of brand, look for handsome grains with a slight polished sheen, very few broken grains, and a good flavor, aroma, and texture. Private label supermarket jasmine rice is great too, so long as it’s from Thailand.
Jasmine rice grown in the United States is unfortunately not as aromatic or flavorful as Thai-grown rice. That said, cook up Lundberg jasmine or Jazzmen rice, if you like. When my family first came to America, we cooked Texas long-grain rice.
As for the pot, use a heavy one with a lid that will sit tightly on top. You want good heat circulation to cook the grains evenly. Choose your pot to be about twice as big as the yield. That ensures you have space to easily stir, fluff and cook the grains.
My 10-10-10 Rice cooking method
Some people boil and drain rice like pasta, but that rids too much of the sweet starches that define the grains’ comforting texture and flavor. I prefer an approach that involves a heavy pan and a gradual lowering of the heat.
To easily remember the method’s cooking and resting times, one of my friends and long-time recipe testers, Alex Ciepley, dubbed them the “10-10-10”. Use the mnemonic to cook rice in the same pot and eventually you’ll just eyeball the water level. And, after practicing this method and recipe, you’ll confidently apply it to cooking rice in claypot and donabe ceramic vessels.
💯 👌 jasmine rice!
Jasmine rice and water ratio
To yield grains that aren’t too firm or too soft, opt for a 4-to-5 ratio of rice to water. In the Asian kitchen, salt isn’t typically added to plain rice because other dishes will season it at the table. Use this chart for an easy rice cooking life!
When you wash rice, the grains absorb some water. That’s why my rice-to-water ratio may differ from that of people who do not wash their rice before cooking.
Hold on. When you fluff the finished rice, there may be a Goldilocks moment to manage. For instance:
If the grains are too firm and dryish, sprinkle on water, fluff to incorporate, then cover. Set the pot over low heat for 10 minutes to hydrate; let it rest about 5 minutes, then re-fluff.
If the rice is mushy, eat it up and tweak your next batch by decreasing the water by 1 tablespoon per 1 cup of raw rice.
If the rice smells burnt, you had the heat on way too high. I’ve accidentally done that a few times while trying to get a crusty bottom. If the rice smells and tastes acrid and burned throughout, I’m sorry. Start a new pot in a heavier pan and/or lower the heat.
Tinker to find the best rice-to-water ratio for your tastes. Jot down your ratio for future batches.
After reading all that, you’re definitely ready to cook a perfect pot of rice! There are extra pointers below so don’t scroll too fast.
RECIPE
10-10-10 Perfect Jasmine Rice
✅ Managing leftovers: Refrigerate leftover rice for up to 5 days, or freeze for a good month and thaw to eat. To reheat, sprinkle the rice with a little water, cover with a microwave splatter guard (or loosely cover with a silicone lid or parchment or wax paper), then microwave on high at 30 to 60 second blasts. If the grains compress, let briefly cool and fluff to serve. Always re-fluff before serving!
✅ Making rice for fried rice: When specifically making rice for fried rice, turn the cooked rice onto a rimmed baking sheet, spreading it out to allow the grains to dry quickly so they will fry up nicely. Let cool completely, uncovered, 1 to 2 hours at room temp (or freeze for about 20 minutes), before frying. Or, cover the baking sheet with plastic wrap and refrigerate overnight.
✅ CookingThai-grown brown jasmine rice: Use a 2-to-3 ratio of rice to water. Wash and rinse the rice once, drain and return the grains to the pan. (The bran is intact, so one rinse is enough; no starch release.) Add 1 1/2 cups (360ml) water for every 1 cup (190g) of raw rice. Bring to a boil, and then lower the heat to medium. Simmer briskly, partially covered, for about 5 minutes, stirring occasionally, until the liquid is opaque light beige and slightly thick. Turn the heat to low, completely cover, and cook for 20 minutes. The rest remains the same, with resting and fluffing.
1 cup | 190g white jasmine rice or similar type of long-grain rice
1 1/4 cups |300ml water
Instructions
Wash the rice: Putthe rice in a small (1 ½ to 2-quart | 1.5 to 2L) heavy pot and add water to cover by about 1 inch (2.5cm). Vigorously stir with your fingers to loosen surface starch then pour off the water (I save it to water our garden). Repeat two or three times, or until the water is nearly clear -- it will never be crystal clear. Dump the rice into a mesh strainer, shake to expel excess water, and return the rice to the pan.
Cook for 10: Add the 1 1/4 cups (300ml) water to the pan. Bring to a boil over high heat, stirring now and then with a silicone spatula or chopsticks to prevent clumping. Lower the heat slightly to maintain a brisk simmer for 1 to 3 minutes, stirring often to scrape bottom and circulate the grains, until glossy on top. (It’s normal for a few craters to form.) Decrease the heat to low, cover the pan, and cook for 10 minutes.
Rest for 10, fluff, rest for 10: Turn off the heat. Leave the rice to gently cook on the burner’s residual heat or 10 minutes. Uncover, fluff with chopstick, a fork, or spatula to circulate the grains. Re-cover and let rest again for 10 minutes to firm up the grains and finish cooking. Keep covered and cozy warm for up to 30 minutes. Re-fluff before serving.
One of my favorite parts about writing my chocolate book was getting to explore, and share, the world of chocolate. Chocolate is a pretty wonderful ingredient all by itself. But I wanted to feature friends in the chocolate world, so I culled recipes from bakers, pastry chefs, chocolatiers, cookbook authors, and even bartenders for the book.
For the revision of The Great Book of Chocolate, I completely rewrote the book (since so much has changed!) and wanted to include a chocolate marshmallow recipe. So I thought about Amanda Bankert of Boneshaker donuts in Paris, who taught me how to make vegan marshmallows, which were game-changers since many people have asked me about substitutions for the gelatin and egg whites that are normally used in marshmallow recipes.
Subscribe to my newsletter to get recipes, videos, stories from Paris, and more, sent right to your Inbox!
Amanda is one of the most fun people I know, and is also a graduate of the prestigious Cordon Bleu cooking school in Paris. So when revising The Great Book of Chocolate, I thought, “Why not veganize chocolate marshmallows?”
With the book coming out in less than a month, I then thought, “Wouldn’t it be fun to have Amanda come over and make them with me in my kitchen?”
So we made a video of us preparing them together. We had such a good time whipping them up, and it’s great that anyone - vegan or not - can enjoy these delicious marshmallows. And next time you’re in Paris, stop by Boneshaker for a donut and a cup of coffee. Like Amanda, her shop is one of the most fun things in Paris. And if you see her behind the counter, say hi for me, and enjoy the video!
You may have to do a bit of shopping to get the xanthan gum andagar-agar, a natural gelatin substitute, which, interestingly, is sold in French grocery stores. Natural food stores or online shops are good places to look where you live. In Paris, G. Detou sells them, as well as cream of tartar. The good thing is, you’ll have them on hand for next time : )
Aquafaba is the chickpea cooking liquid found in canned chickpeas, not jarred, nor is it the liquid from dried chickpeas that you cook at home. (Interestingly, aquafaba was “discovered” by a French opera singer.) In the U.S., generally one 15-ounce/425g can yields 3/4 cup (180ml) liquid, but you may want to get an extra can just to be sure. (You can use the chickpeas to make my really good hummus.)
It’s nice to have a helper in the kitchen to steady the bowl while you fold in the cocoa powder, as I did with Amanda. If you’re by yourself, resting the mixing bowl on a silicone baking mat will help keep the bowl in place.
And don’t forget to pre-order The Great Book of Chocolate - it’s out May 5th and you’ll be the first to get a copy!
Palak paneer is my favorite dish to order at Indian restaurants, and I’m excited to offer my homemade version to you! Palak paneer features tender cubes of paneer cheese in a well-seasoned, silky, spinach gravy. Palak literally means spinach, and this vibrant green dish is fully loaded. It’s vegetarian comfort food at its finest.
Palak paneer hails from the Punjab region in Northern India. I hope to visit India someday, but until then, I’m basing my version on the various Indian restaurants I frequent. I wanted to learn how to make my own palak paneer with organic spinach when I was expecting our son, since spinach is unfortunately higher in pesticide residues by weight than any other type of produce.
I made this dish over and over (no less than six times, to be exact) to ensure that the recipe offers maximum flavor while being streamlined from start to finish. Now you can make palak paneer for dinner any time you crave it. This recipe is ready in about 45 minutes!
This Chicken with Lobster Sauce recipe takes that silky, savory sauce from our beloved Shrimp with Lobster Sauce and gives it a new home — nestled around tender chunks of chicken instead of shrimp. Growing up, I was not a seafood kid, which meant I spent many years watching everyone ELSE eat shrimp with lobster […]
Few people know, or write about, Paris as well as Elaine Sciolino. With an extensive background in journalism, Elaine was the Paris bureau chief for the New York Times and remains a contributing writer. She has also written four books on Paris and French culture.
Her book, The Only Street in Paris, put her neighborhood on the map, portraying the various merchants, food sellers, and restaurants that line the rue des Martyrs, a microcosm of life in the city.
Her recent book is Adventures in the Louvre: How to Fall in Love with the World’s Greatest Museum. If the subtitle intrigues you, it’s because the Louvre has had its ups and downs over the years, beginning its life as a fortress, then becoming a residence, then a public “shopping” center, and now, a museum. Elaine takes readers on a journey through the imposing wall and behind the scenes of this famous museum, which both captivates, and vexes, visitors.
Being right next to the Seine, the museum is prone to flooding, crowds crane their necks to see the Mona Lisa, and robbers broke in recently, in broad daylight, snatching €88 million ($102 dollars) in jewels, which haven’t been seen since. Security has been a recurring problem at the museum, and the video security system password at the time of the robbery was “Louvre.”
Elaine’s book is also full of fun facts about the museum, including one that notes if you wanted to see the whole museum, the walk would be nine miles (14.5km). Other helpful advice: “Never go on an empty stomach and with a full bladder,” because the food offerings in the museum don’t match the cultural treasures in the galleries and corridors.
In the podcast, Elaine gave a great tip for visiting the Louvre and avoiding the crowds and the lines, which you might find helpful on your next visit.
Nasi Goreng is the beloved national dish of Indonesia, an Indonesian fried rice with aromatic shrimp paste, sweet soy sauce, and savory elements like garlic and fried shallots. This Nasi Goreng recipe isn’t your average takeout fried rice, but a complex, smoky, and deeply satisfying dish. What Makes Nasi Goreng Different? Nasi goreng literally means […]
While working on our taxes I needed a fun, easy dinner and landed on chef Ron Hsu’s uncommonly good chicken and rice casserole.
His recipe in Down South + East cleverly layers gingery, garlicky, umami notes into a one-pan dish that’s doable on a weeknight. He’s also loaded the keeper recipe with great pro-chef ideas. Get Ron’s recipe for chicken and rice casserole.
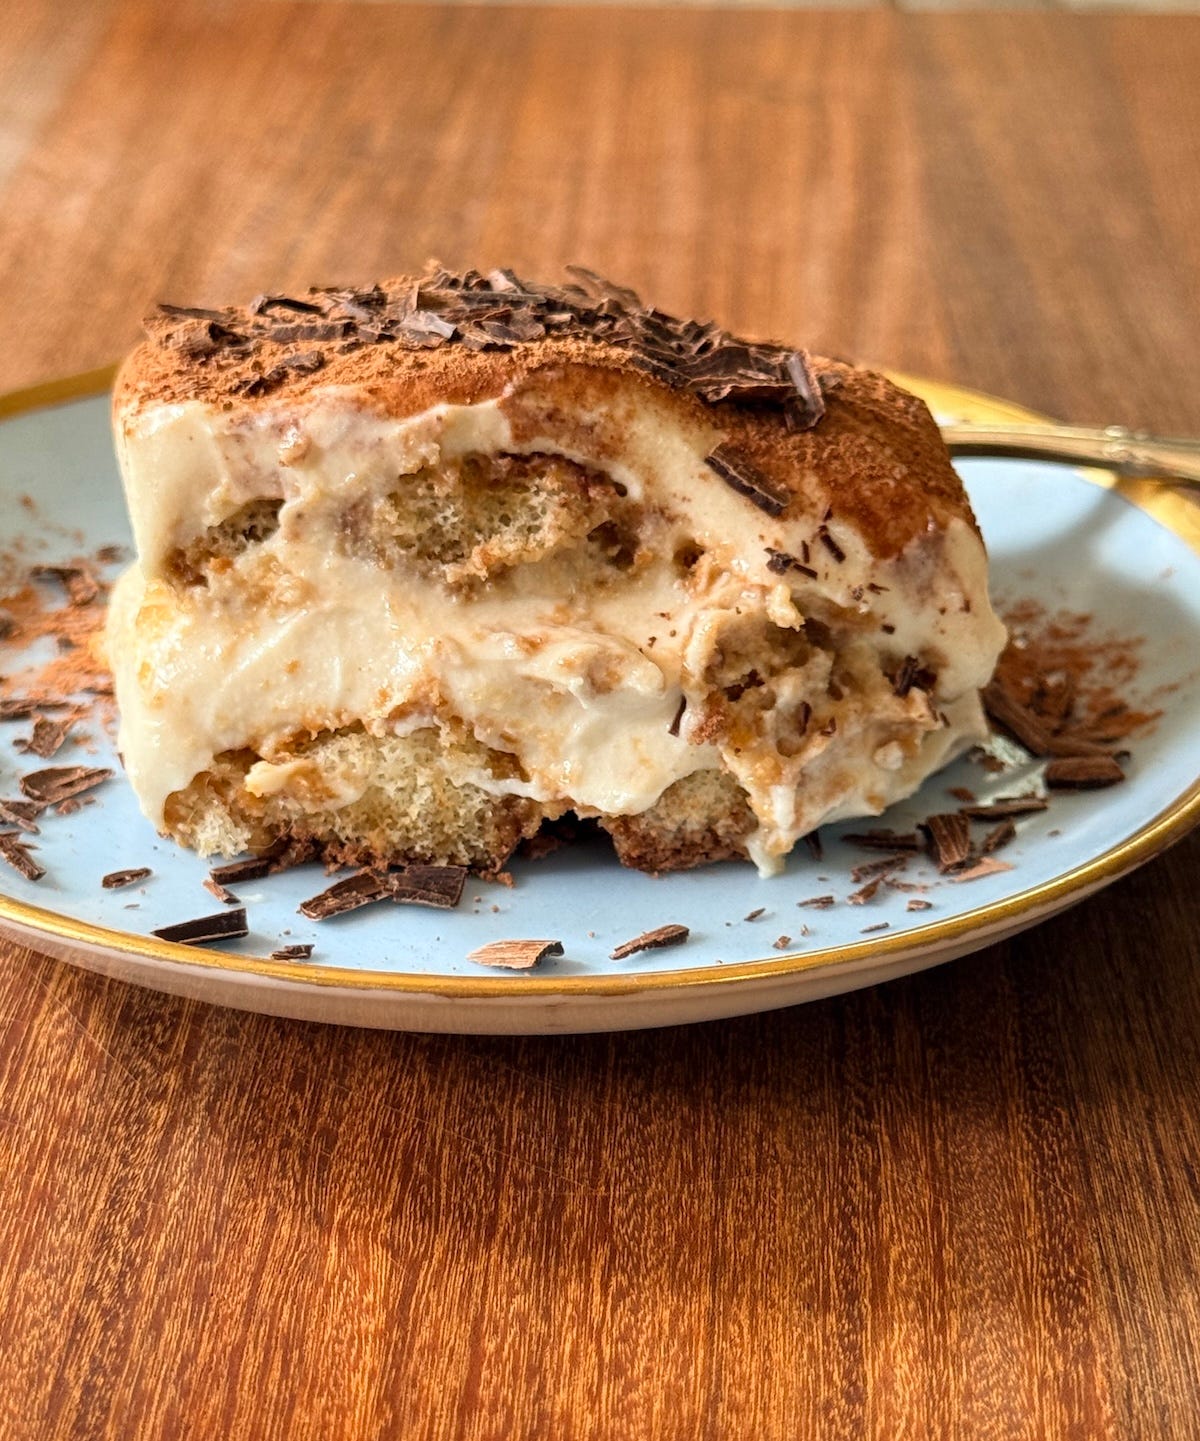
Ron’s casserole recipe got me thinking about dishes that get assembled in a deep dish. Although tiramisu doesn’t require baking, it’s traditionally put together in a casserole dish. It’s made of layers of coffee soaked savoirdi biscuits (crisp ladyfinger cookies, not the soft ones) bound together by a heavenly, slightly sweet cream; it’s finished with a dusting of cocoa powder and maybe chocolate too. Tiramisu needs to sit overnight to age into excellence, making it an utterly easy and impressive make-ahead sweet.
Traditional tiramisu involves whipping egg yolks and sugar to a thick consistency much like you’d do for Vietnamese egg coffee. Thinking about casseroles and egg coffee led me to buy a large (400g) package of savoirdi biscuits at Eataly. (Note that there are gluten-free biscuits made with rice flour nowadays, too!)
When Rory saw me holding the savoirdi, he sweetly said, “Maybe you’ll make tiramisu for me?”
Spousal mind meld moment. However, I’d give my tiramisu a Viet touch!
In Vietnam, there are mousse cakes called bánh Tiramisu but I wanted to devise a Viet take on the Italian icon, which has a fuzzy history.
Tiramisu may have originated in the 1800s at a brothel in Treviso, Italy, as an aphrodisiac; if that’s true, it gives new meaning to the name’s literal meaning as a ‘pick me up’. Or perhaps someone invented it in the 1930s. No one really knows, but what is clear is tiramisu’s incredible popularity, which started in the 1980s. It’s now known internationally, with endless iterations.
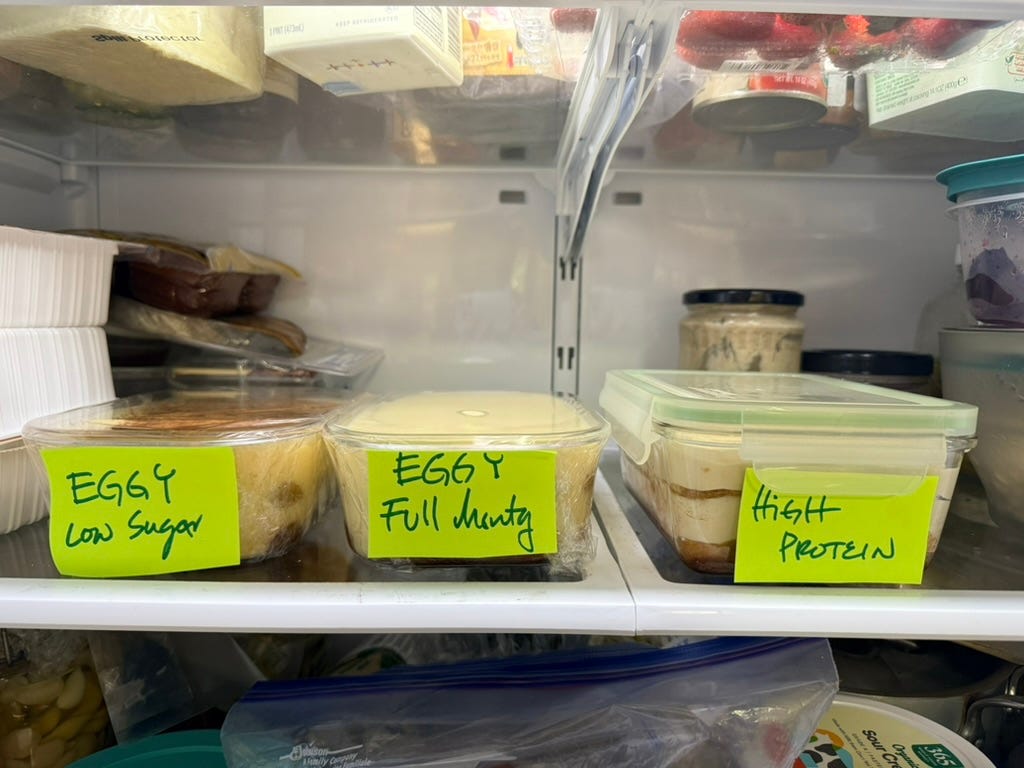
By the end of the week, I had gone three rounds with tiramisu.
What I learned was this: Tiramisu is elastic and foolproof. All of the trials tasted very good, though they have their pluses and minuses, which I detail below.
It was hard to decide which to present to you so this tiramisu recipe allows you to choose for yourself. Shape your Vietnamese coffee tiramisu for your needs and interests! Regardless, the result will be a delicious Italian-Viet dessert. (Rory is very happy and so are our neighbors with all three versions.)
This dispatch fully equips you to make a killer good tiramisu. You’ll find the following:
Vietnamese Coffee Tiramisu recipe in full text and as a downloadable PDF
Three ways to craft tiramisu (old school, low sugar, or high protein)
Ideas for making vegan tiramisu
Pointers for building Vietnamese coffee flavor, scaling up this small-batch recipe, and how to serve tiramisu gracefully
Ingredient swaps and advance prep ideas to save time
Thank you for being here. Full access to this tiramisu recipe is for paid subscribers who sponsored this recipe and much, much more. Join us to pitch in and benefit in many ways. I appreciate your support on all levels.

 Login
Login