Normal view

Fresh Tomato Tart

29 June 2026 at 10:50

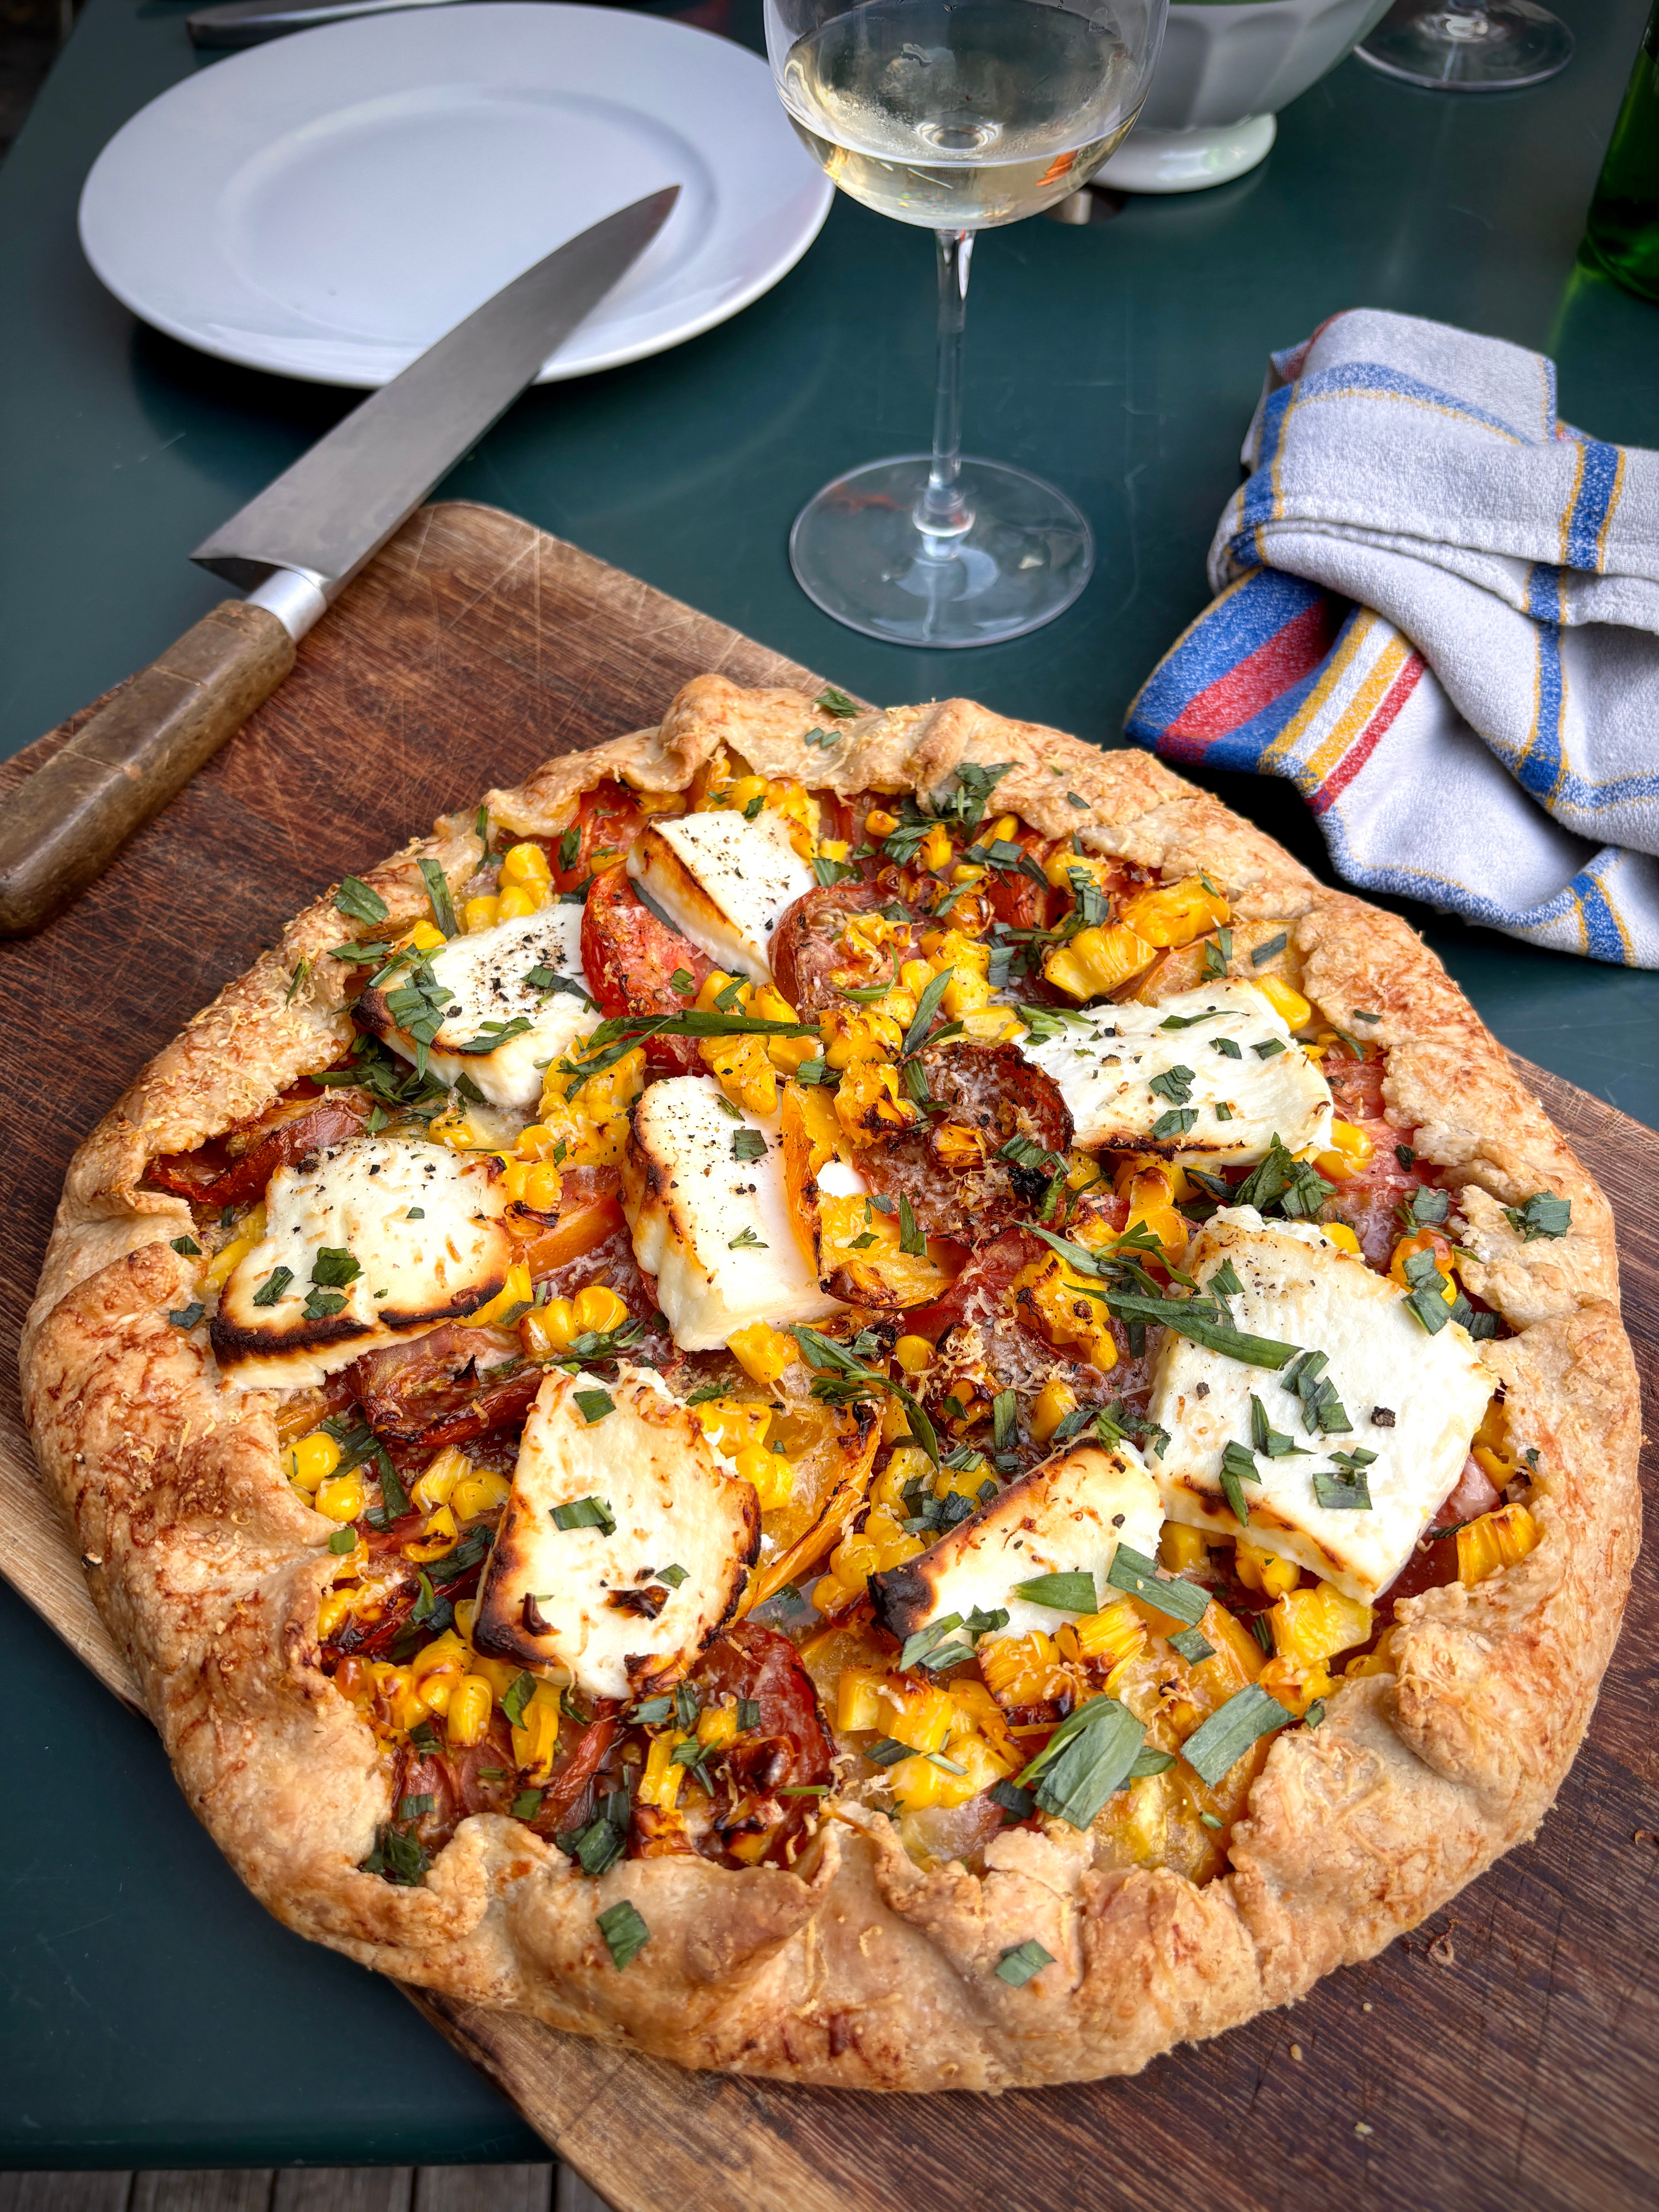
I’m away until the end of the month, traveling, and (fortunately) escaping the heat in Paris. Here’s a summer recipe I thought I’d reshare that’s easy to make, and captures the essence of the season. It’s definitely going on rotation when I get home! - David
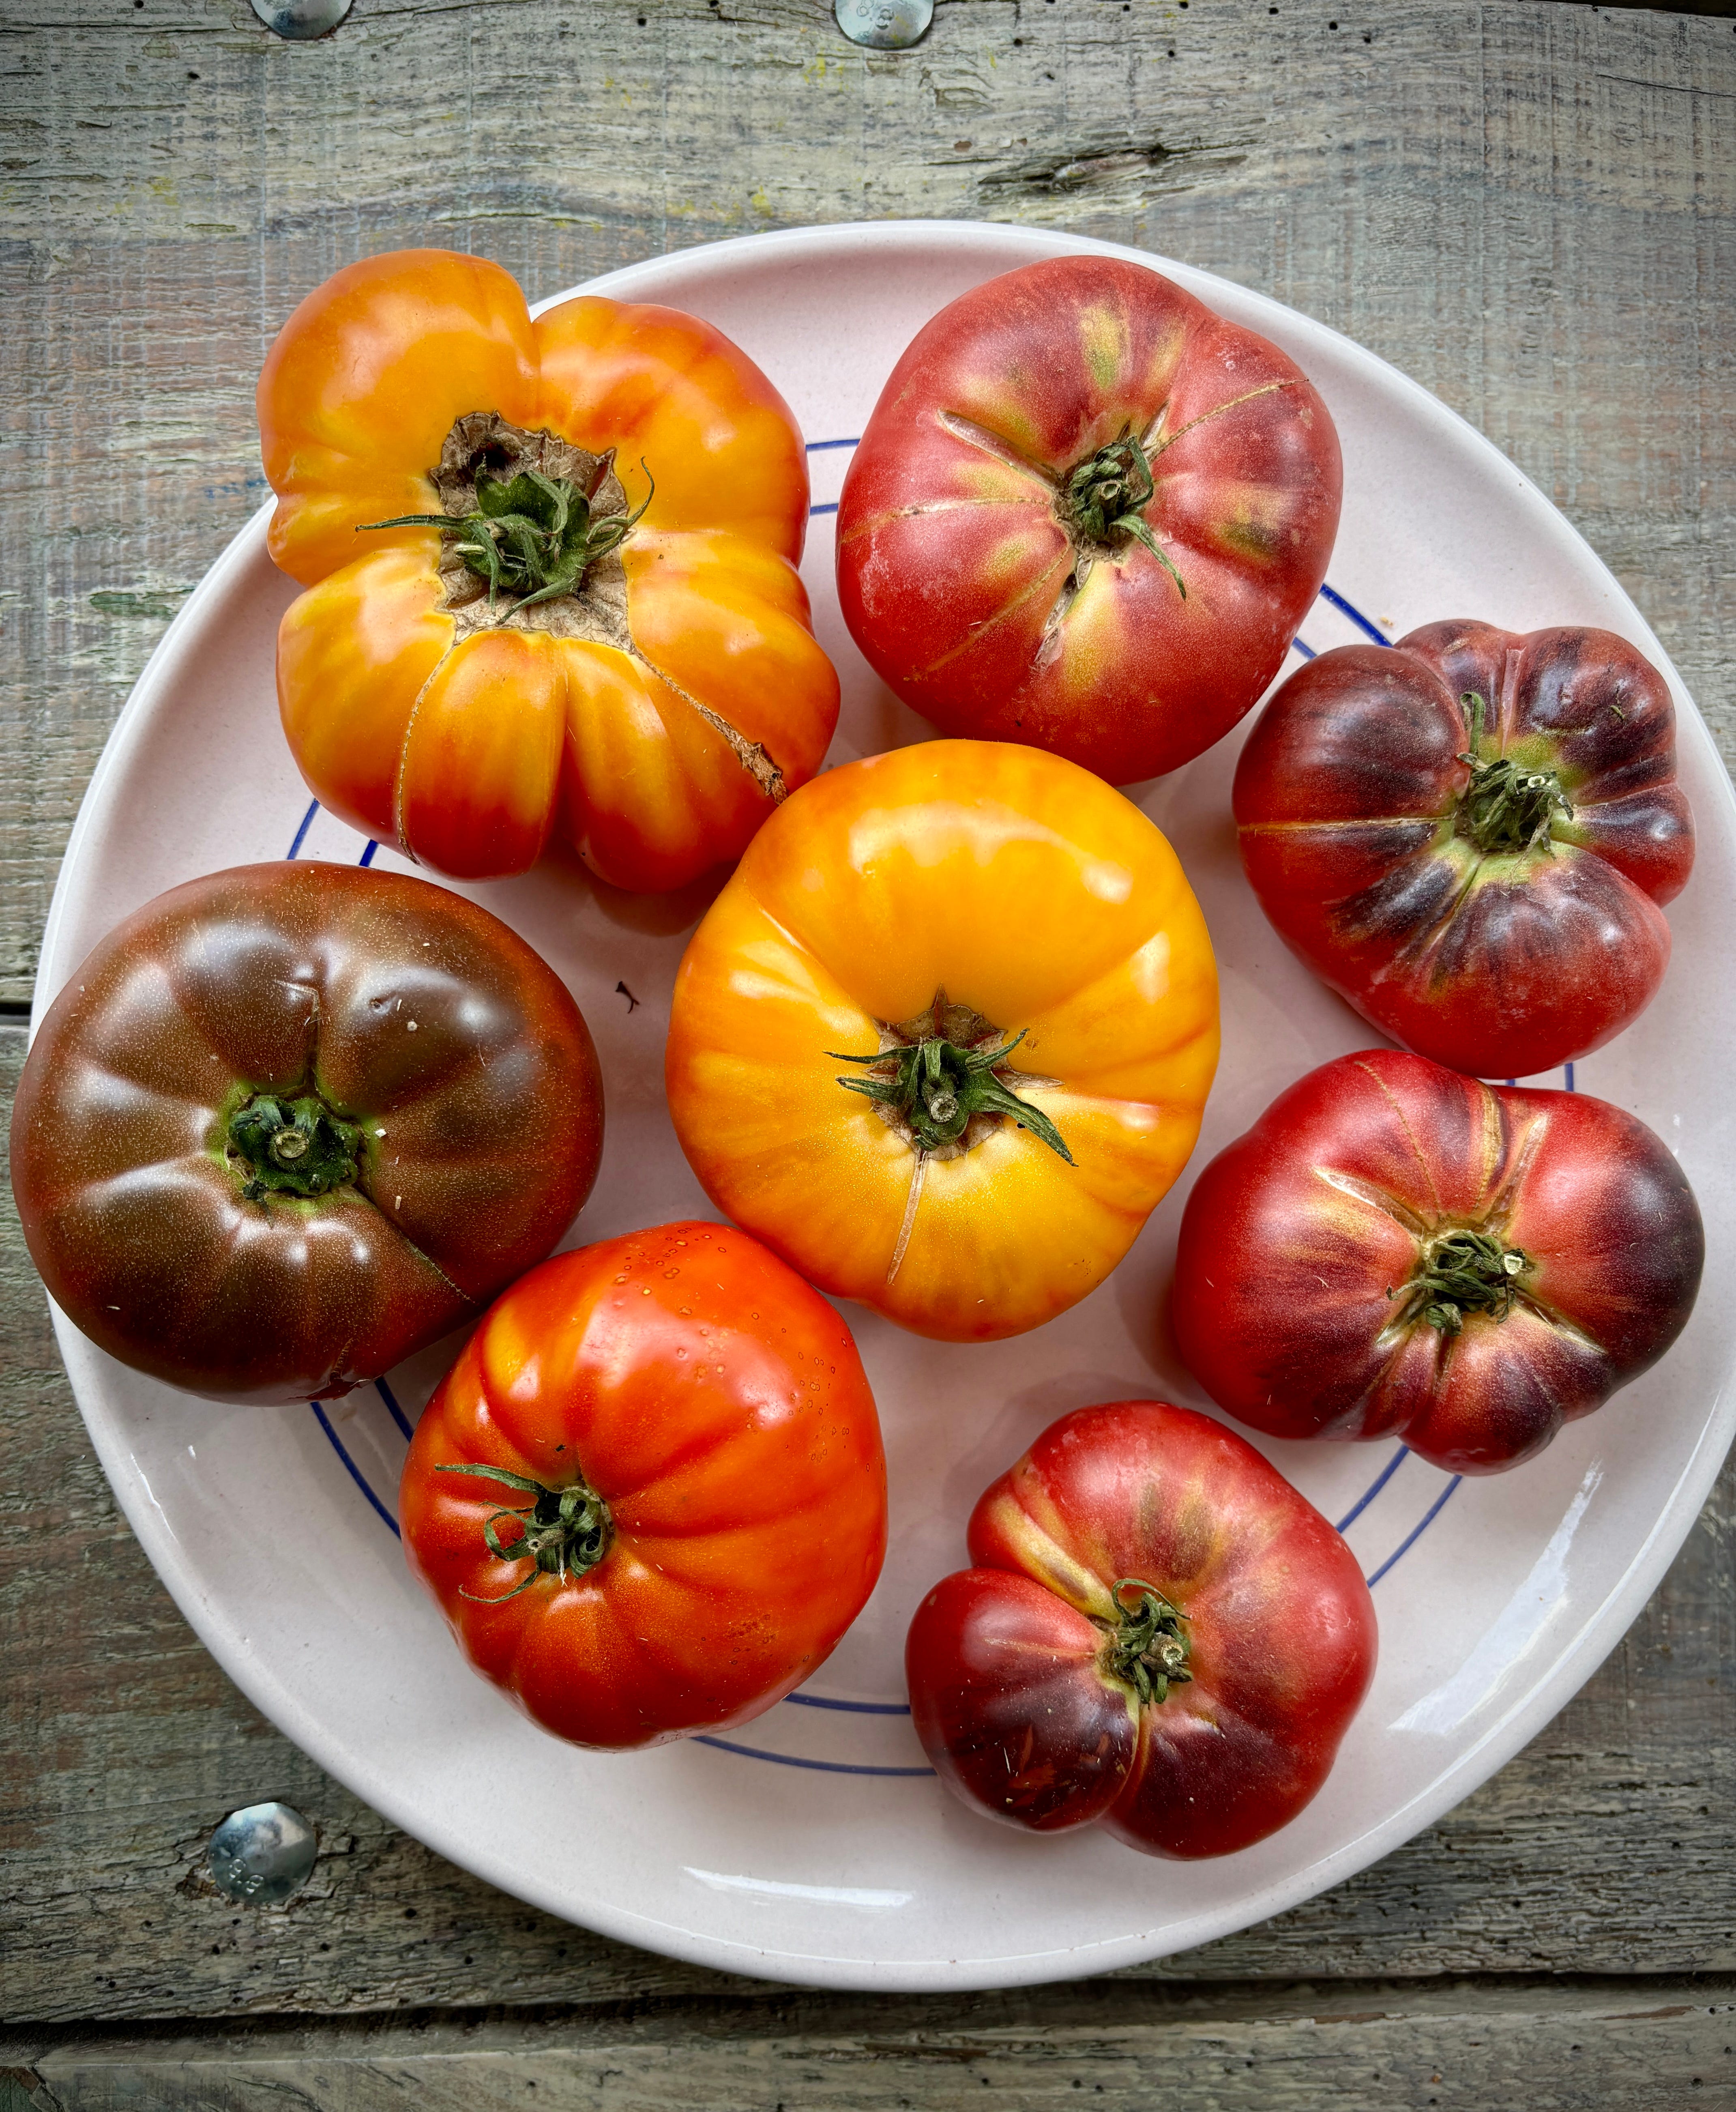
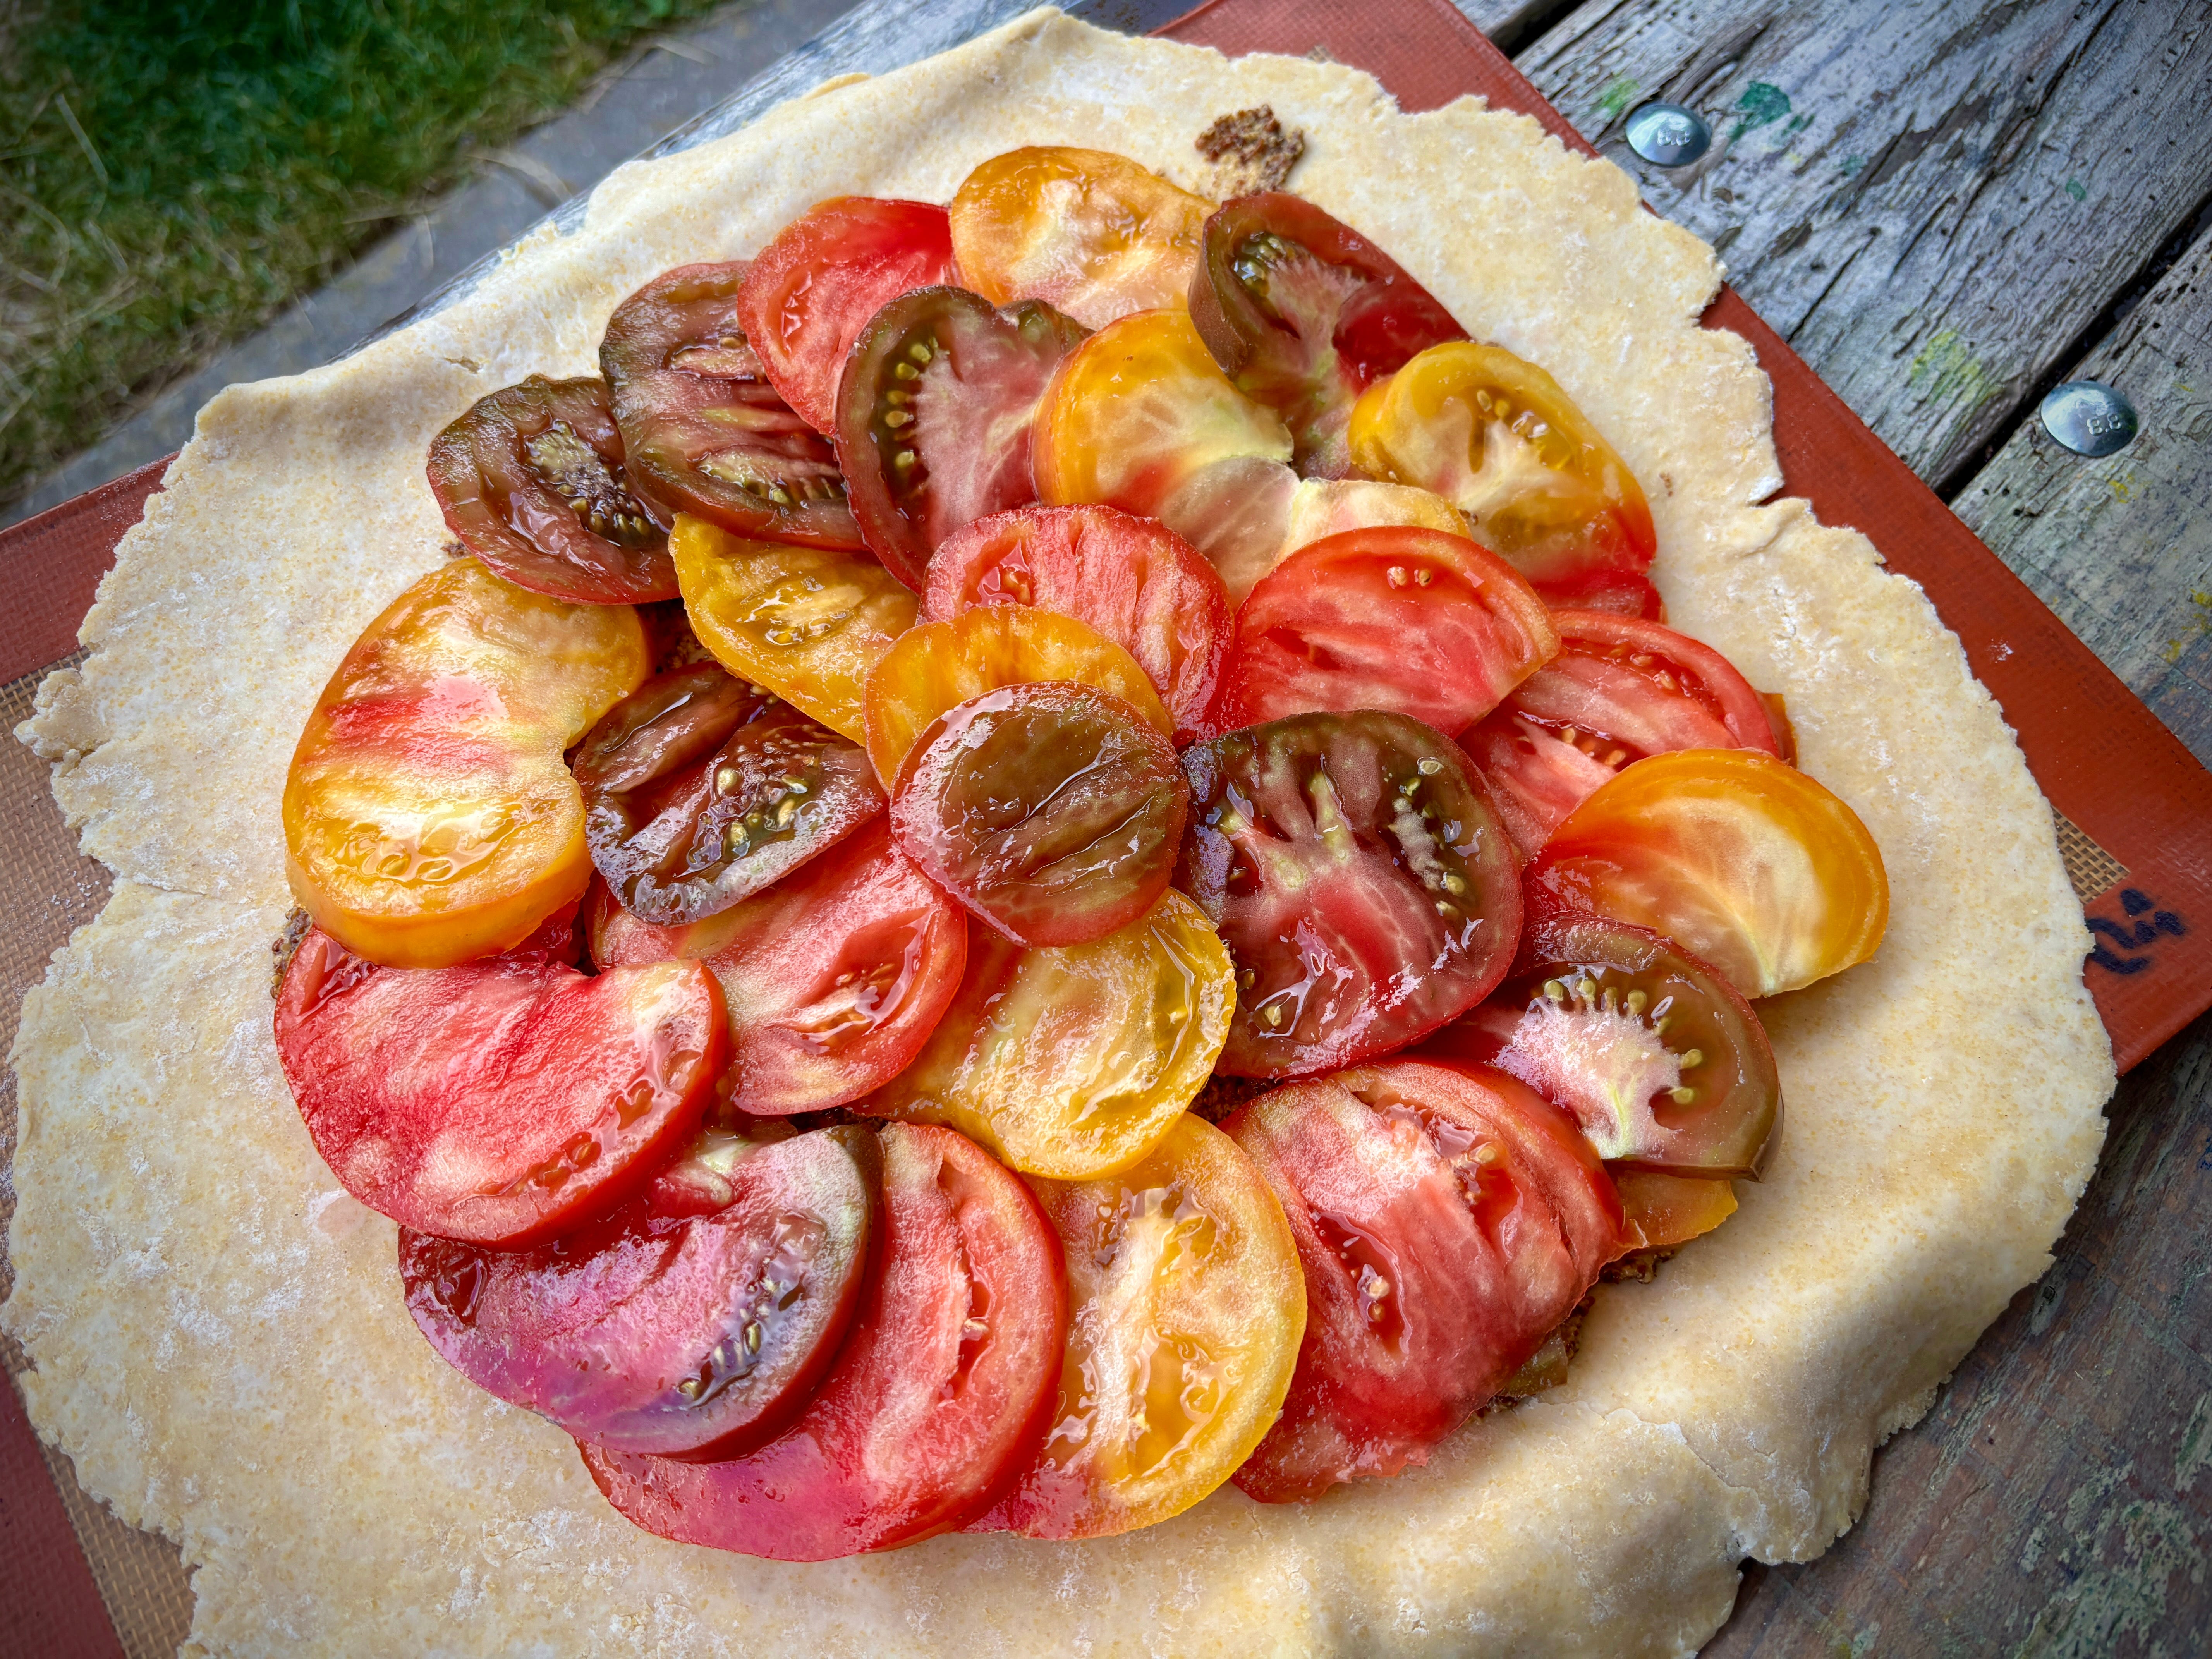
Tarts, or galettes as they’re sometimes called, are a great way to use summer. I know some people are timid about making dough, but this dough couldn’t be simpler, and it’s very hard to screw up.

And if it’s warm where you are, it comes together in a flash. Just be sure to chill the butter and I know sometimes people chill the flour as well, but I’ve never done that. (I actually learned to make puff pastry in a hot restaurant kitchen, in the summer. So making this kind of dough seems to me like a walk in the park…)
Subscribe now

Regarding the mustard, to be honest, I’m more of a fan of Dijon mustard than Romain, who prefers the grainy type. But during the mustard shortage last year, we could only get grainy mustard, so I had a lot of that on hand. But I remain on team Dijon.
Share

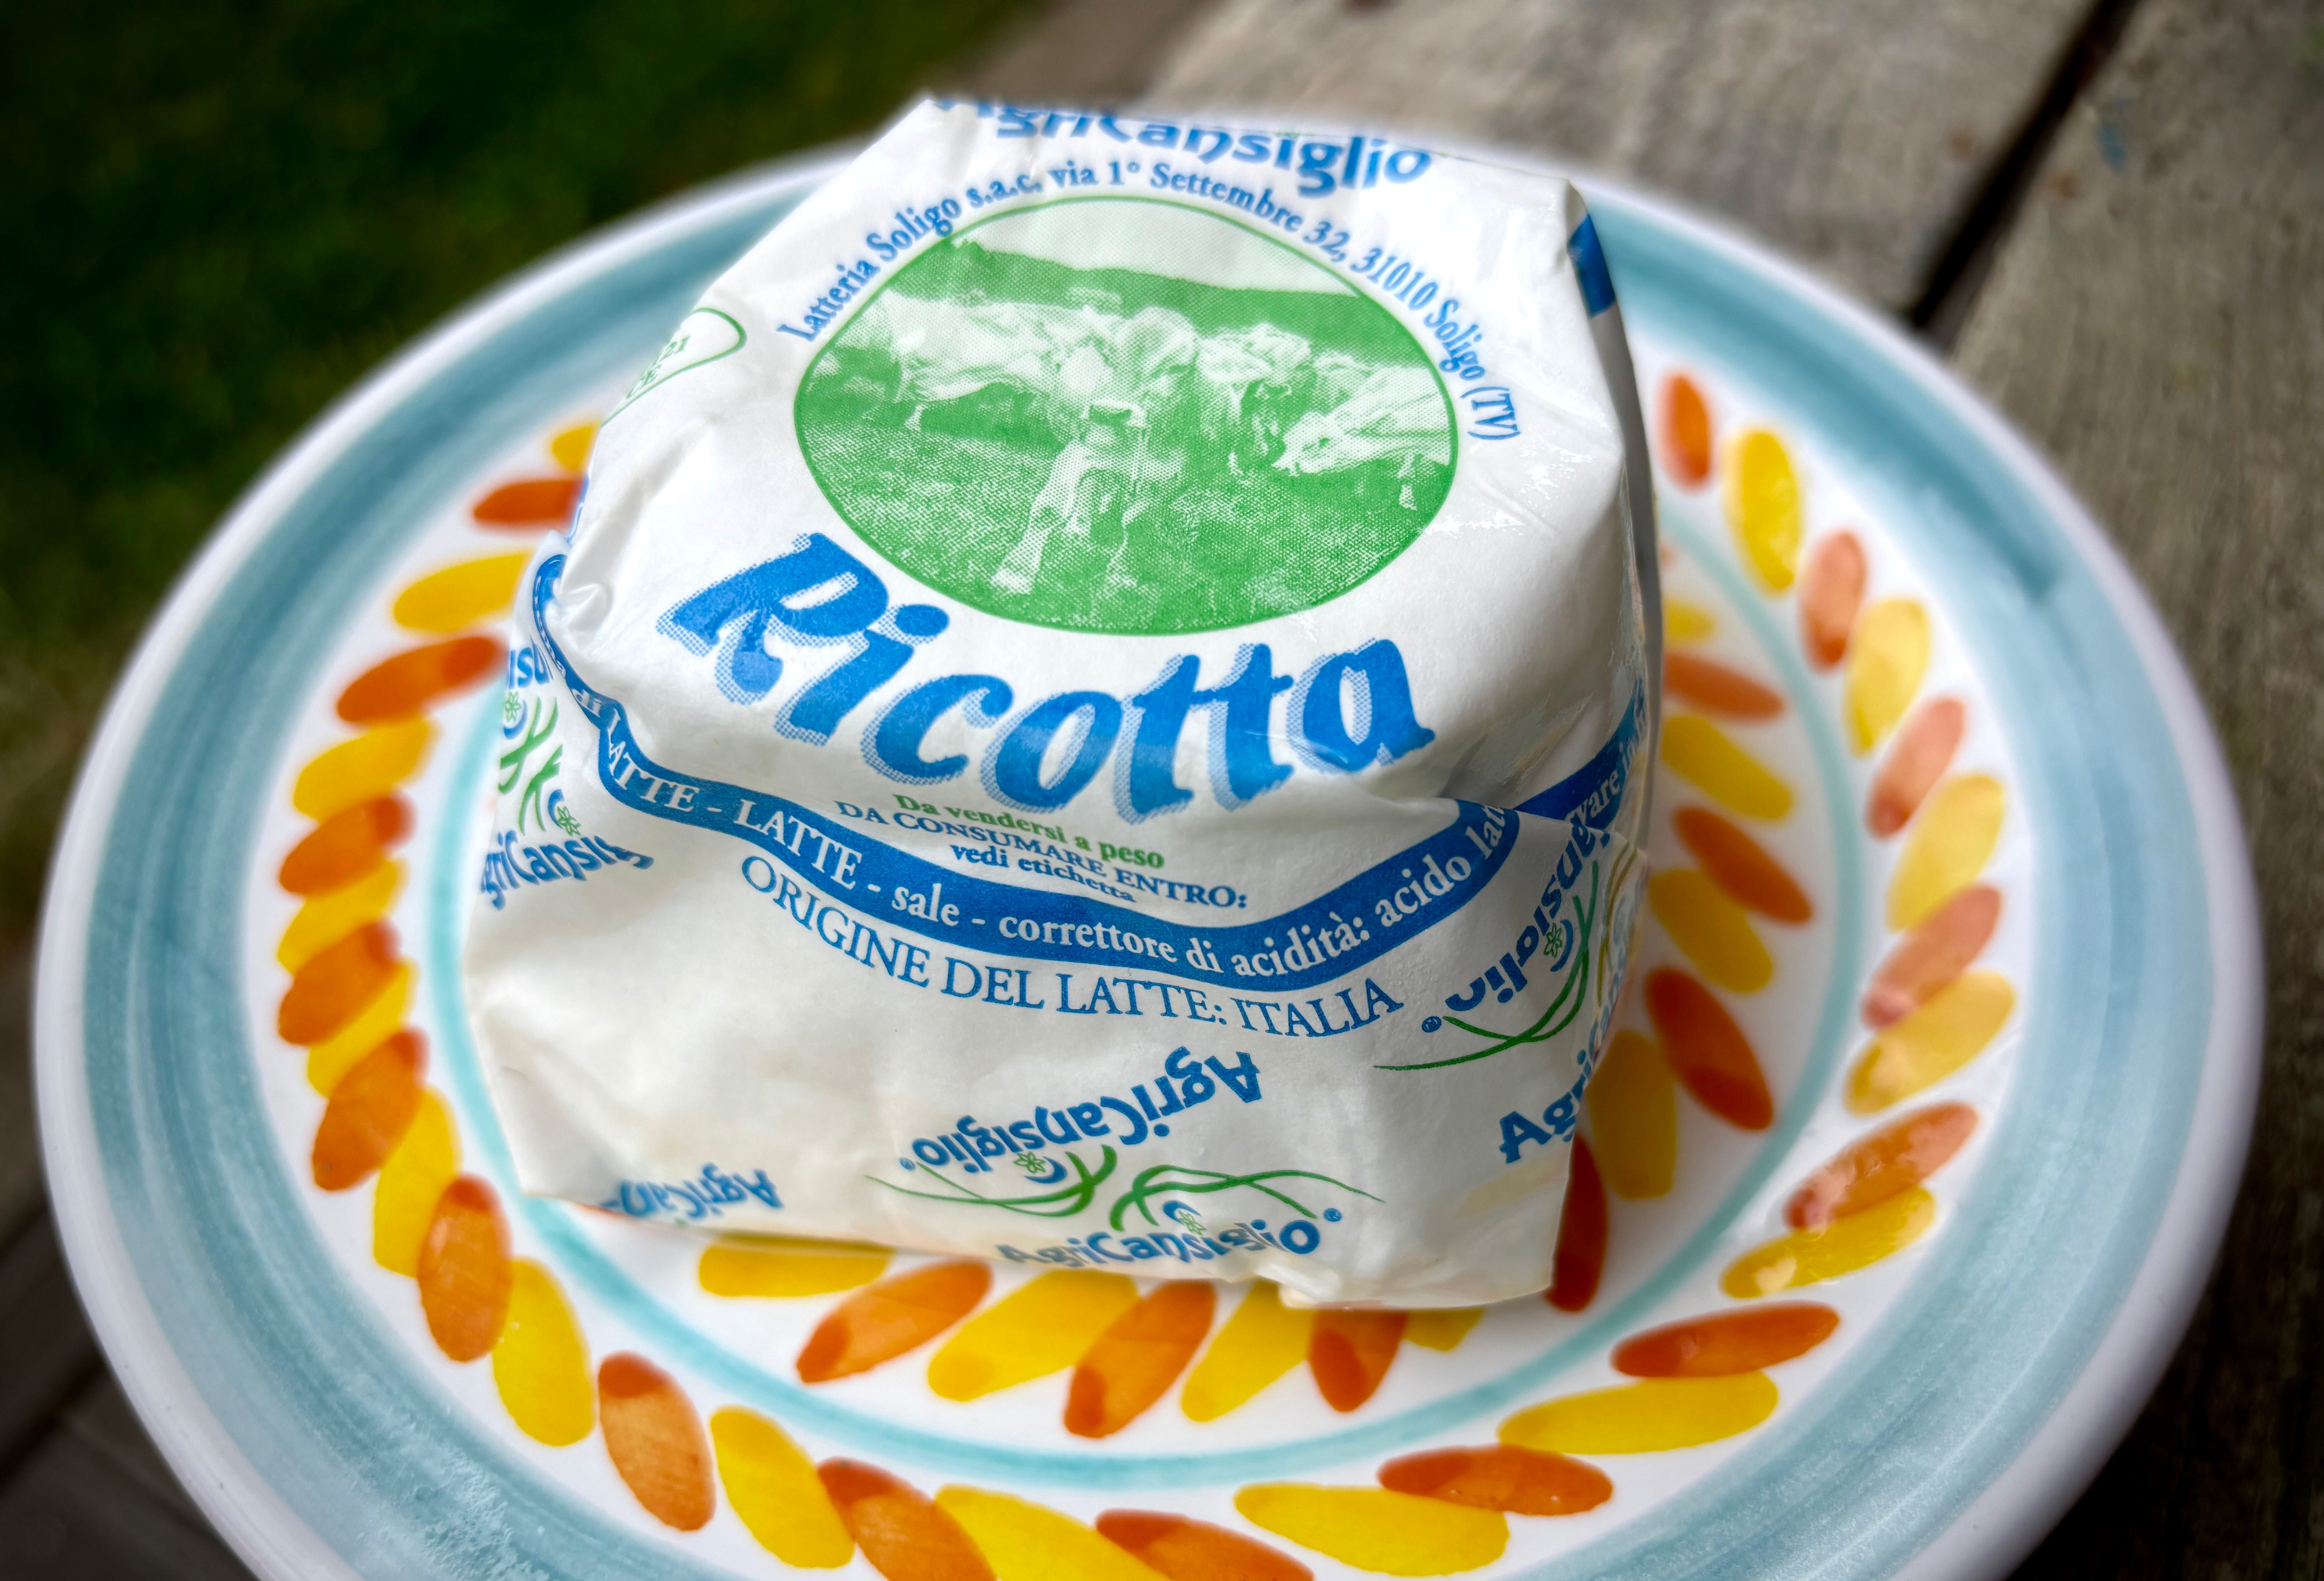
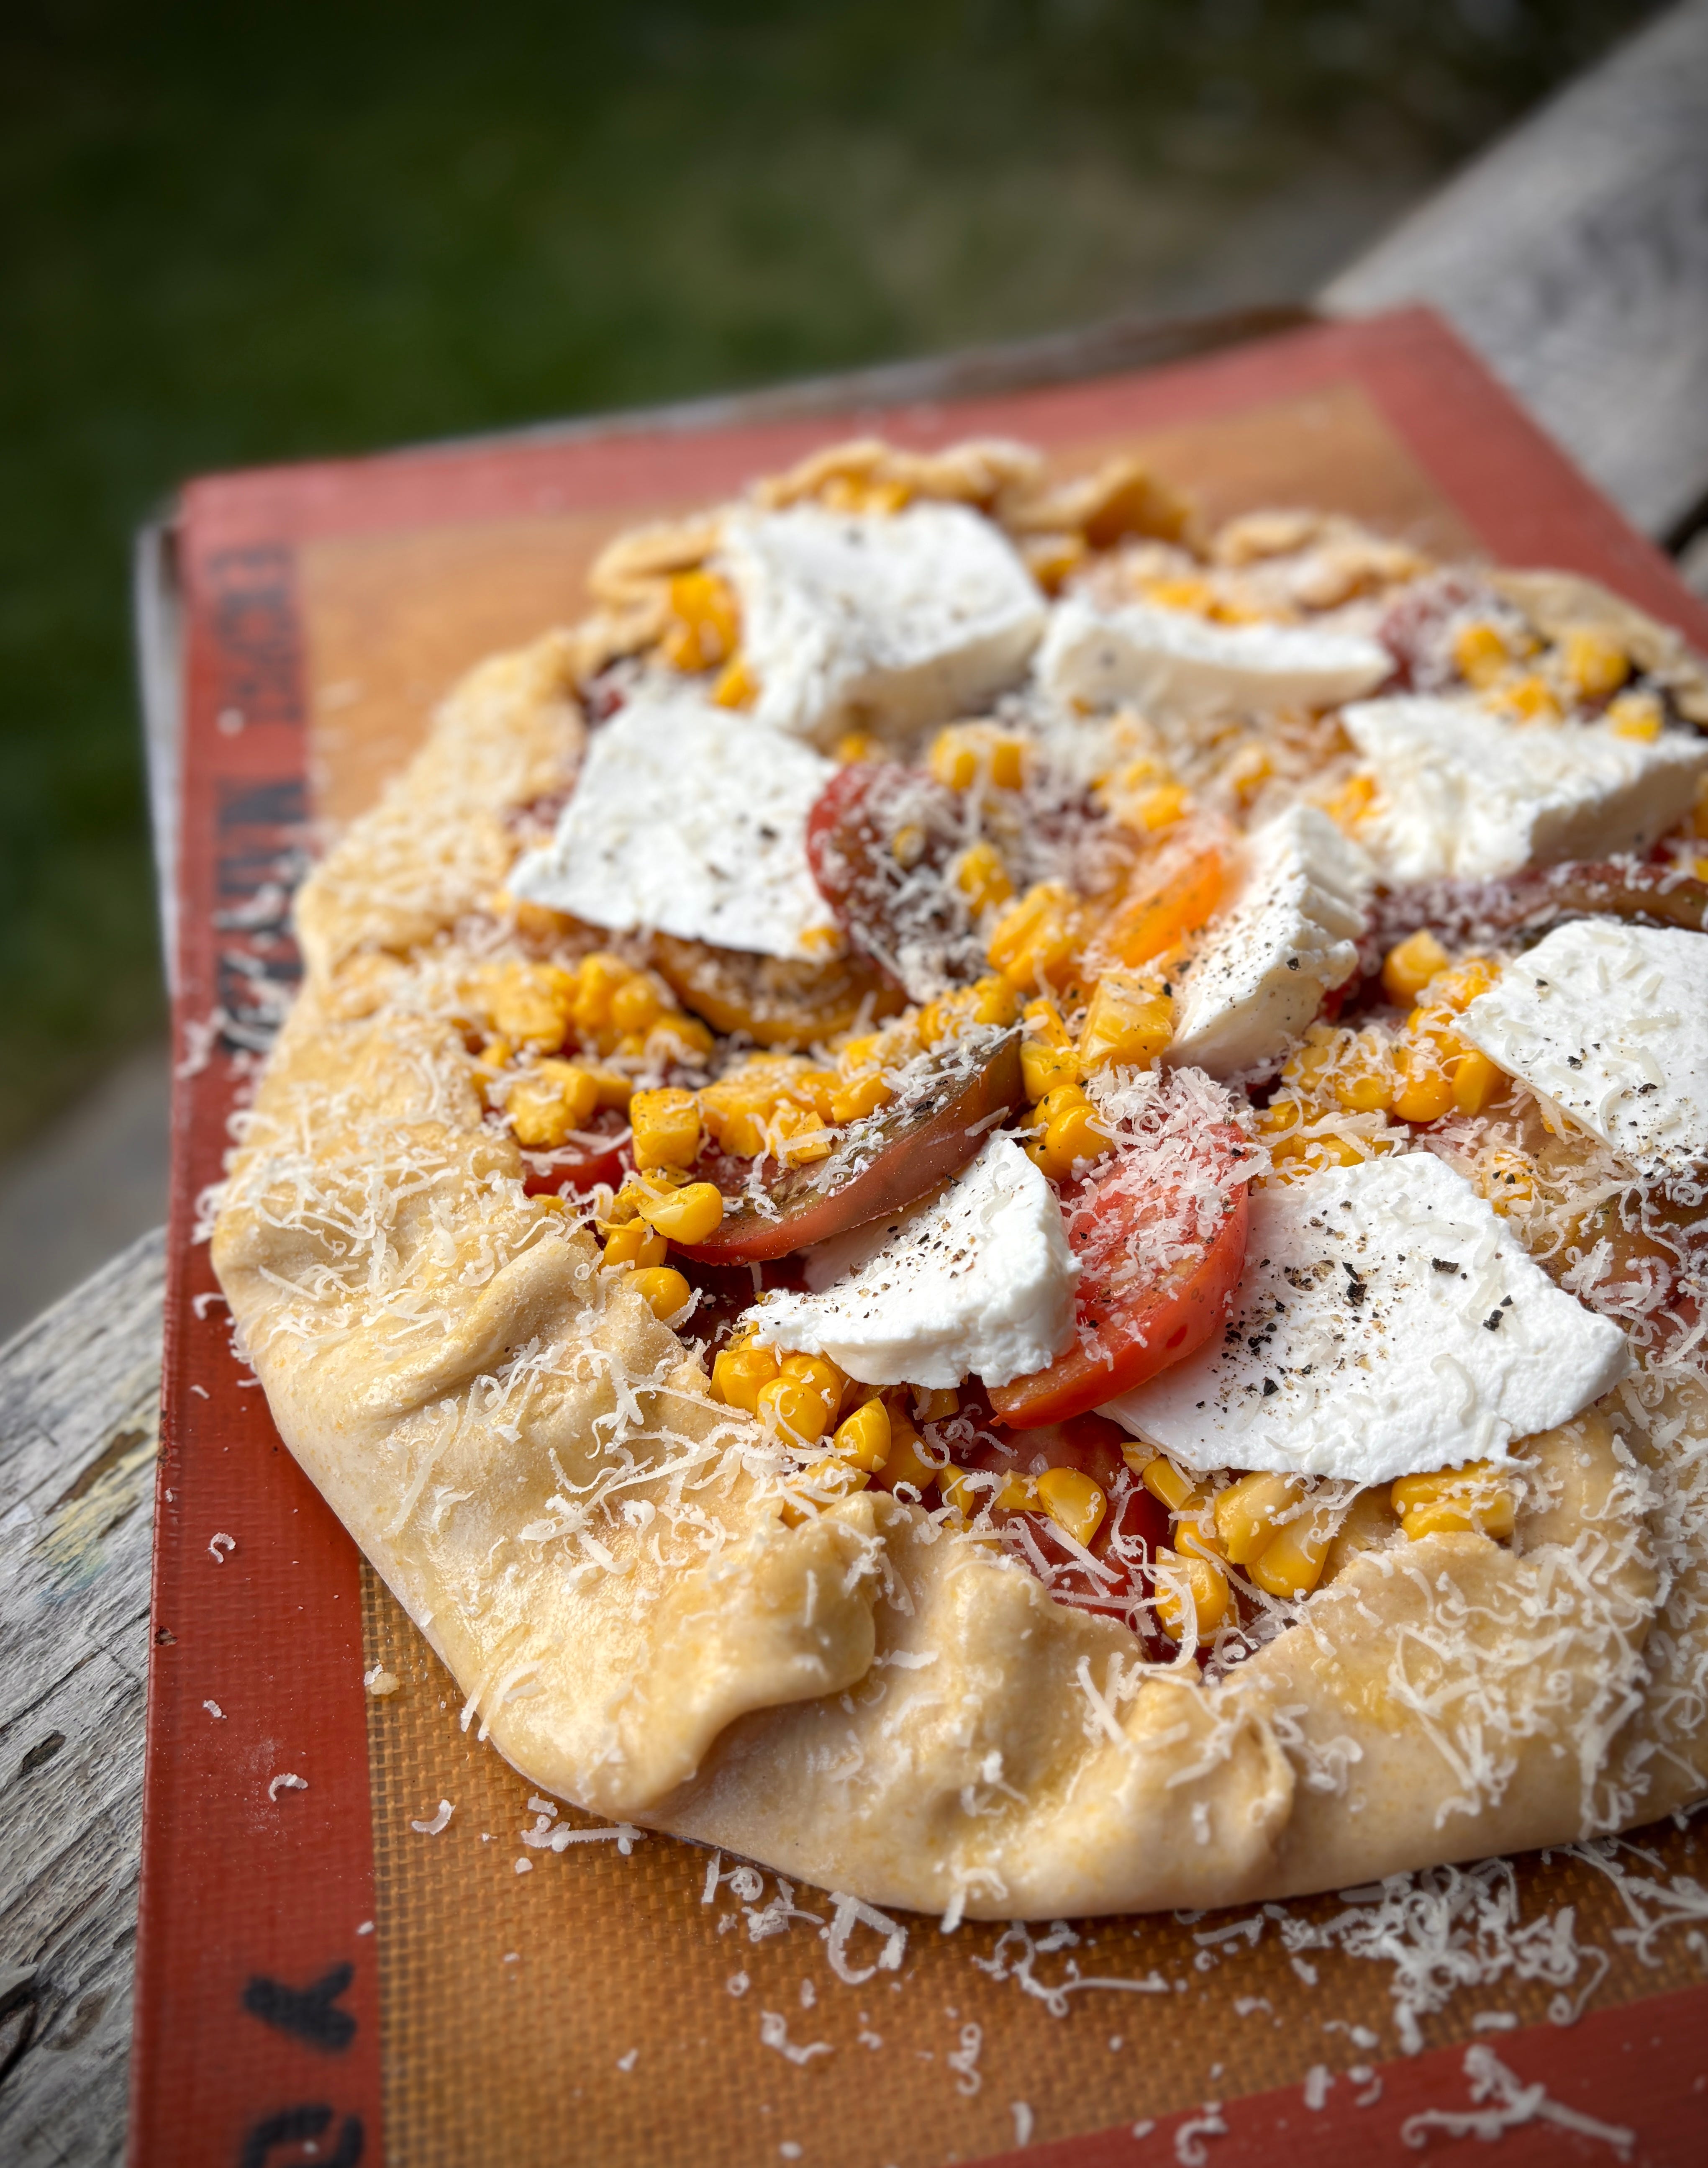
I sometimes top the tart with slices of fresh ricotta before baking, and if you’ve got fresh corn, you can add that as well.

Subscribe now

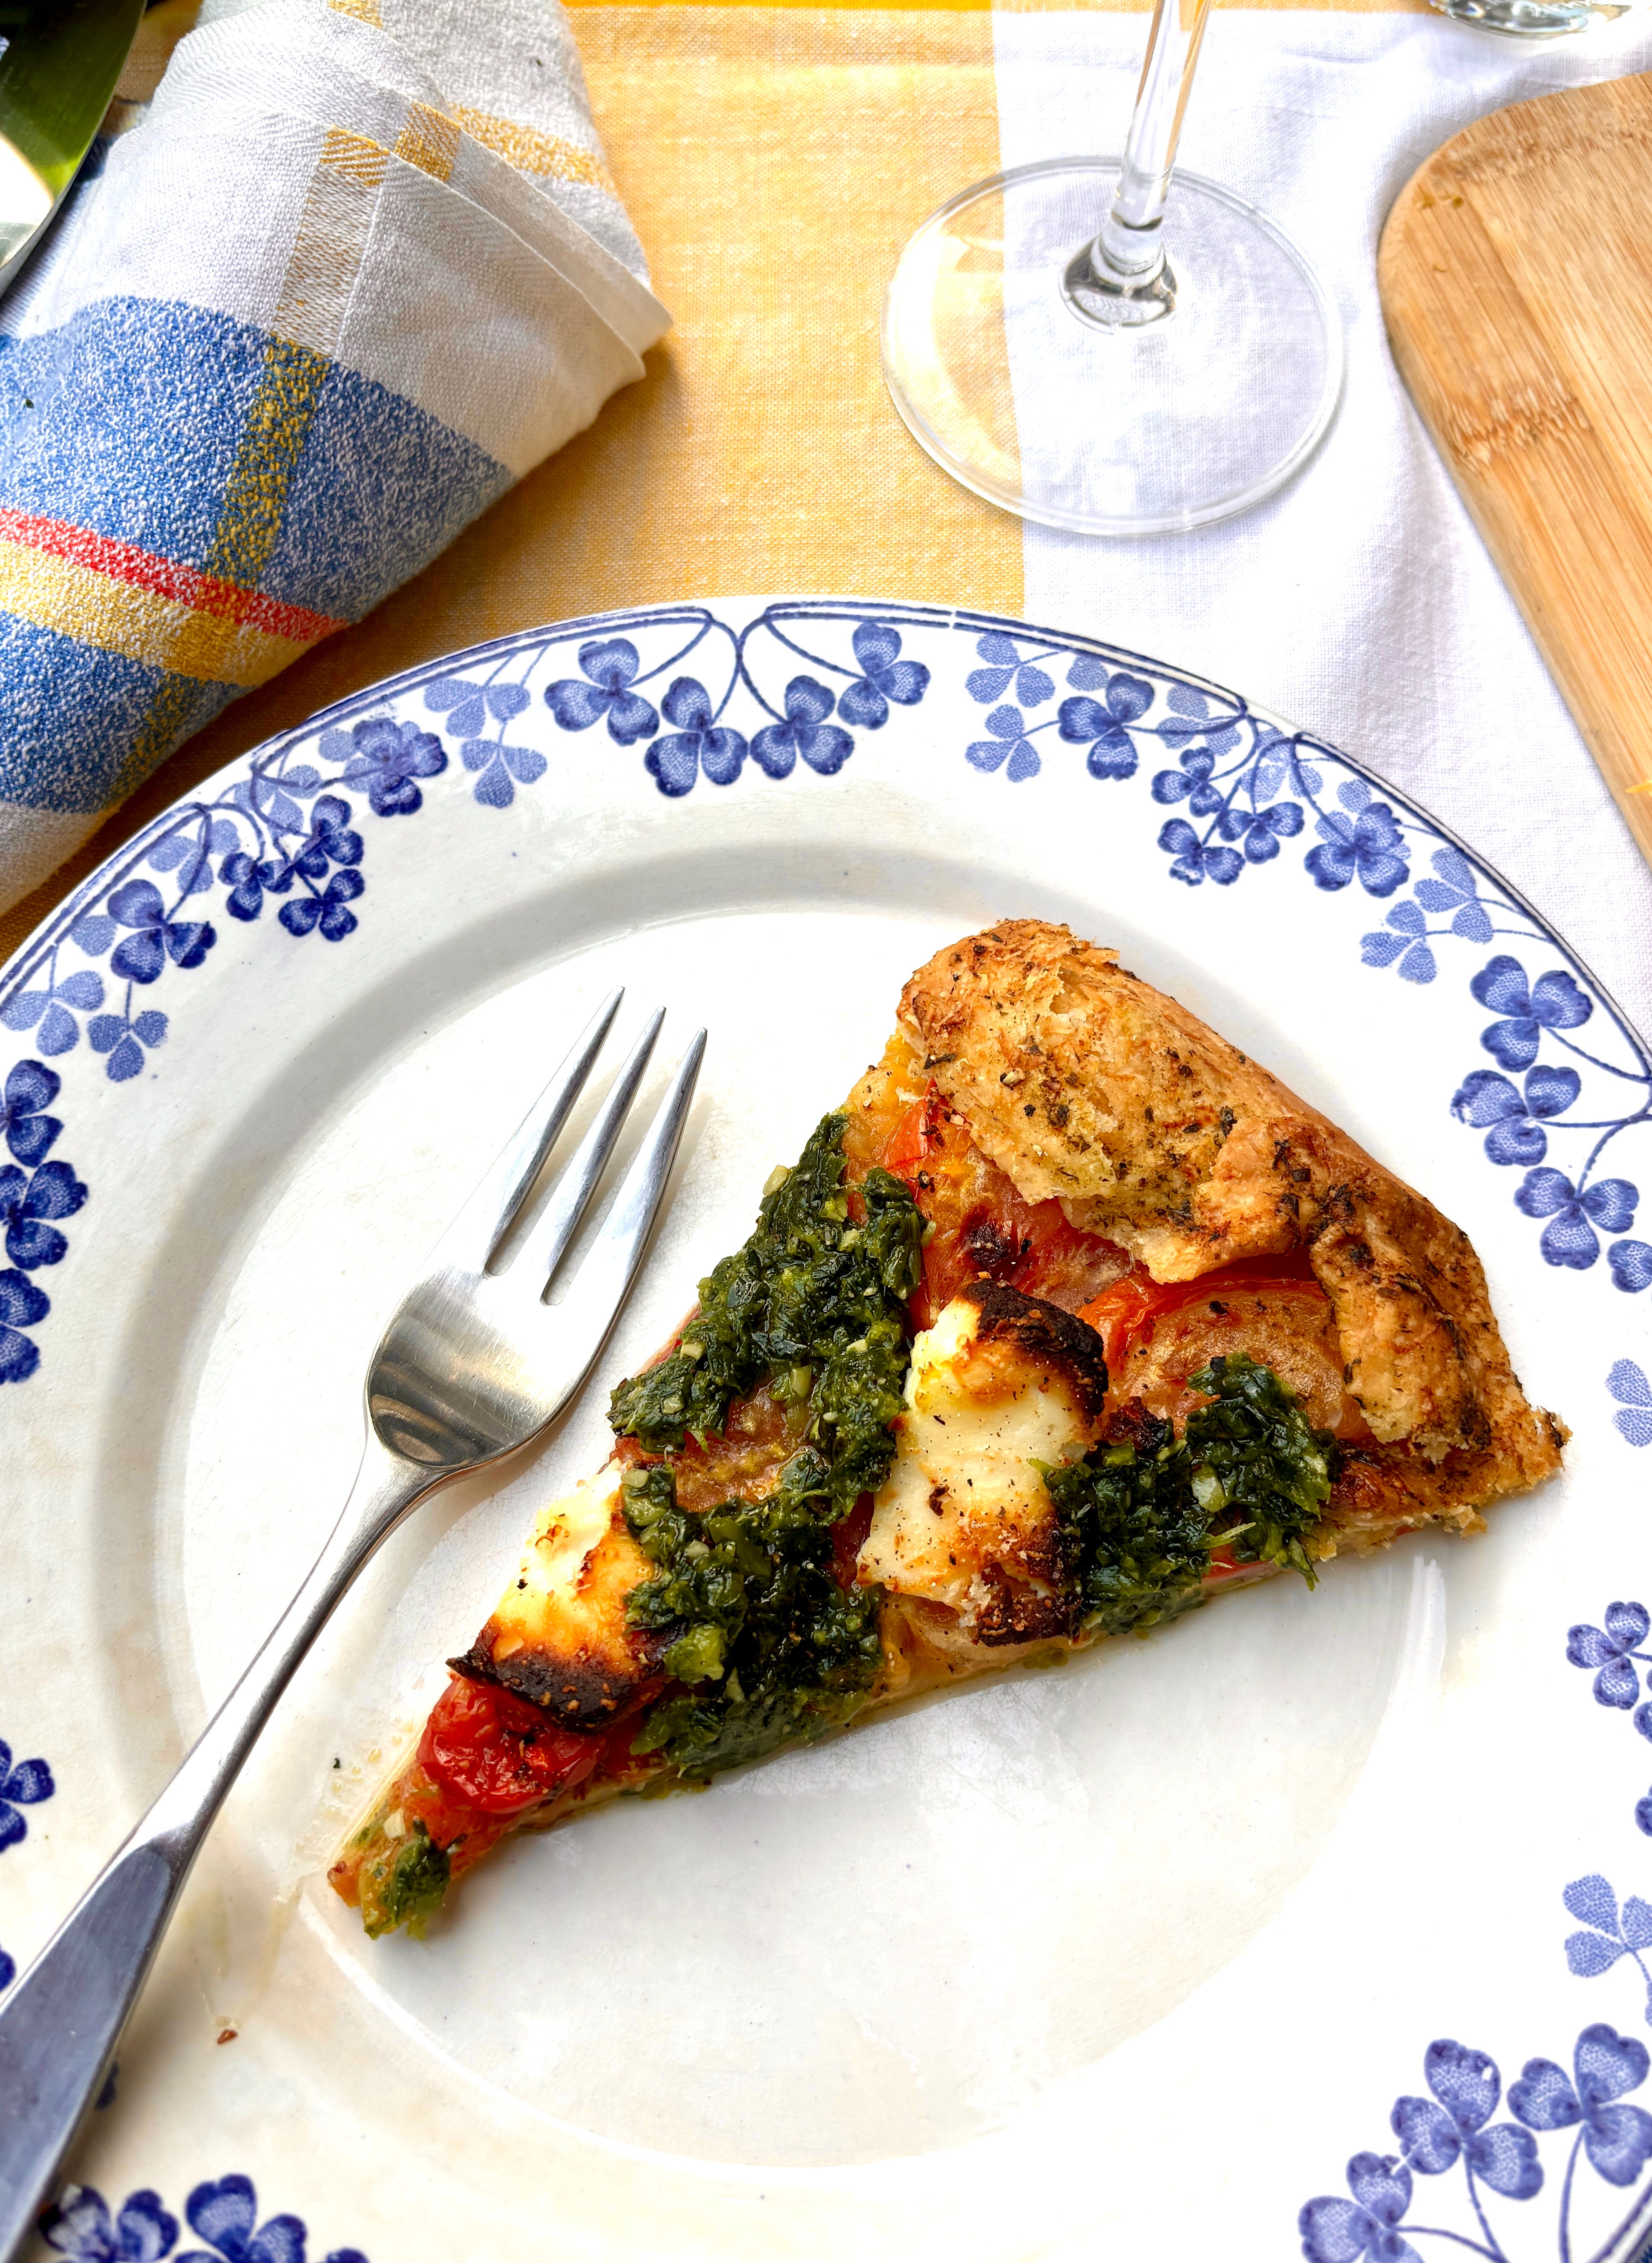
With corn and tarragon

Summer Tomato Tart

Serves 8 (Although everyone always wants a second slice so realistically, it serves 4)

Polenta will make the dough a little less smooth to roll out, but I do like the taste and texture of the coarse bits of ground corn, so it’s worth it for the flavor. You can use fine polenta or cornmeal or additional all-purpose flour (or a whole-grain flour, such as teff or buckwheat) in place of the polenta if you want to leave it out.

I love fresh ricotta with this tart, but you could try it with another cheese that’s relatively moist but won’t melt into a puddle, such as feta or provolone.

I’ve added corn kernels to this tart before baking when I had a hankering for corn. (Fresh or frozen will work.) You can finish the tart with fresh herbs, such as basil, tarragon, savory, or parsley.

For the dough

1 1/4 (175g) cups all-purpose flour

1/4 cup (35g) polenta or cornmeal

2 teaspoons sugar

1/2 teaspoon salt

3 ounces (85g) unsalted butter, chilled and cubed

5 tablespoons (70ml) ice water, plus more if necessary

For the tart

1/4 cup (60g) Dijon or whole-grain mustard

3 medium tomatoes (~1 1/2 pounds)

Salt and freshly ground pepper

6 ounces (170g) whole-milk ricotta

1 1/2 tablespoons melted butter

Parmesan cheese

To make the dough, mix together the flour, polenta, sugar, and salt in the bowl of a stand mixer fitted with the paddle attachment, or make it by hand by putting the dry ingredients in a medium bowl (and use a pastry blender or your fingers to mix the dough). Add the cubed, cold butter and mix until the pieces of butter are the size of large corn kernels. Add the water and continue to mix until the dough starts to come together. Use your hands to gather the dough and shape it into a disk. If the dough feels too dry to do that, add more water, 1/2 tablespoon at a time, until it comes together. Wrap the dough in plastic wrap or your favorite eco-friendly alternative and chill for at least an hour. (The dough can be made up to 3 days in advance.)

To make the tart, remove the dough from the refrigerator. Unwrap it and, holding the disk of dough perpendicular to the counter, rap the sides of the dough on the counter, turning it as you go, to soften the edges, which helps them stay together and not get too ragged when you’re rolling out the dough.

On a lightly floured countertop, roll the dough out to a 14-inch (36cm) circle, turning the dough and sprinkling more flour on the counter and the dough to keep it from sticking as you’re rolling.

Place the dough on a baking sheet lined with parchment paper or a silicone baking mat. Preheat the oven to 400ºF (200ºC) while you assemble the tart.

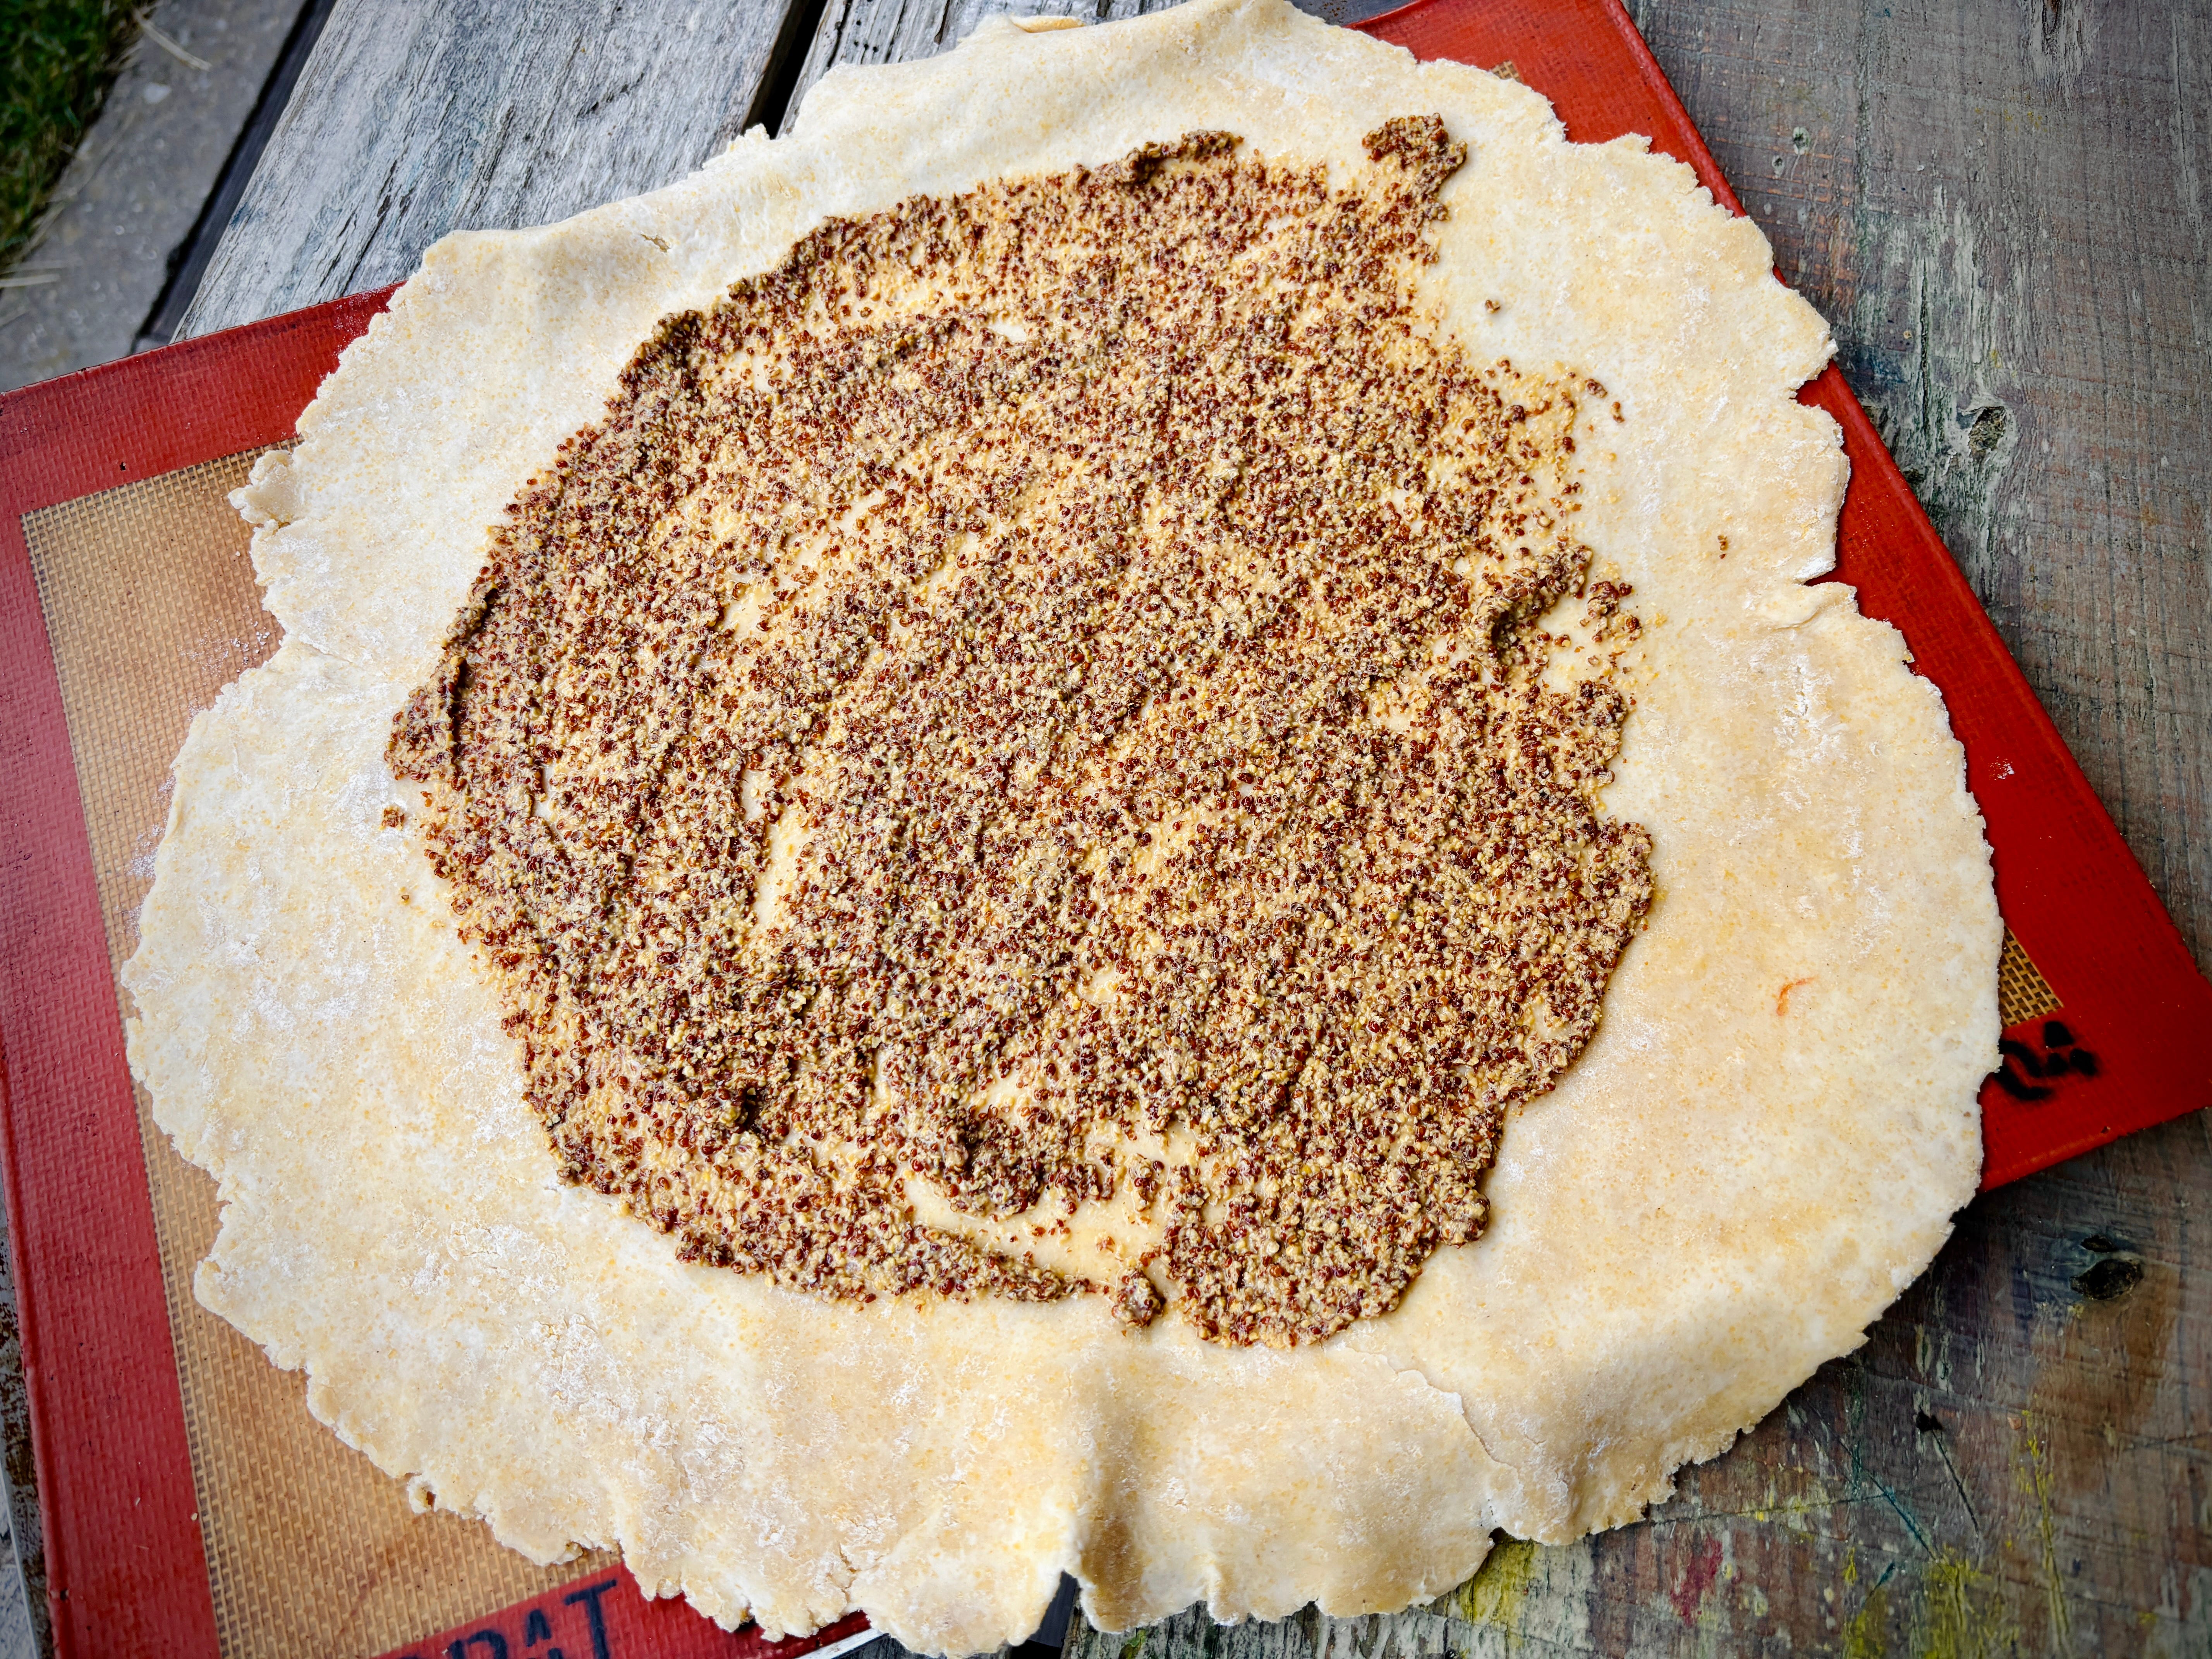
Spread a layer of mustard on the dough, leaving a few inches/centimeters empty around the perimeter, which you’ll fold over the filling later.

Slice the tomatoes about 1/3-inch (1cm) thick and layer them in concentric circles, overlapping them a little, over the mustard. Sprinkle the tomatoes with a little salt and freshly ground pepper. Fold the edges of the dough over the tomatoes to make an outer crust.

Place chunks of ricotta cheese over and, in some places, partially tucked under the tomatoes. Brush the edges of the dough with melted butter and grate Parmesan cheese over the entire tart, including the crust.

Bake until the tomatoes are soft and cooked through and the crust is dark golden brown, about 35-40 minutes. Slide the tart off the pan onto a wire rack and let cool for about ten minutes before serving.

Summer Tomato Tart Recipe
92.5KB ∙ PDF file
Download
Download

Share David Lebovitz Newsletter

Subscribe to my newsletter to get more recipes, stories, and Paris travel tips. Free subscribers get some posts, and paid subscribers get all posts and the ability to participate in the community of commenters!
Spice up Summer with Sichuan Tofu and Peanuts in Hot Bean Sauce

28 June 2026 at 15:35

Hello there!

Wowza — I’m thrilled that so many of you are interested in the July cooking class. I worried that it was summer and you’d not be available. But I was wrong!

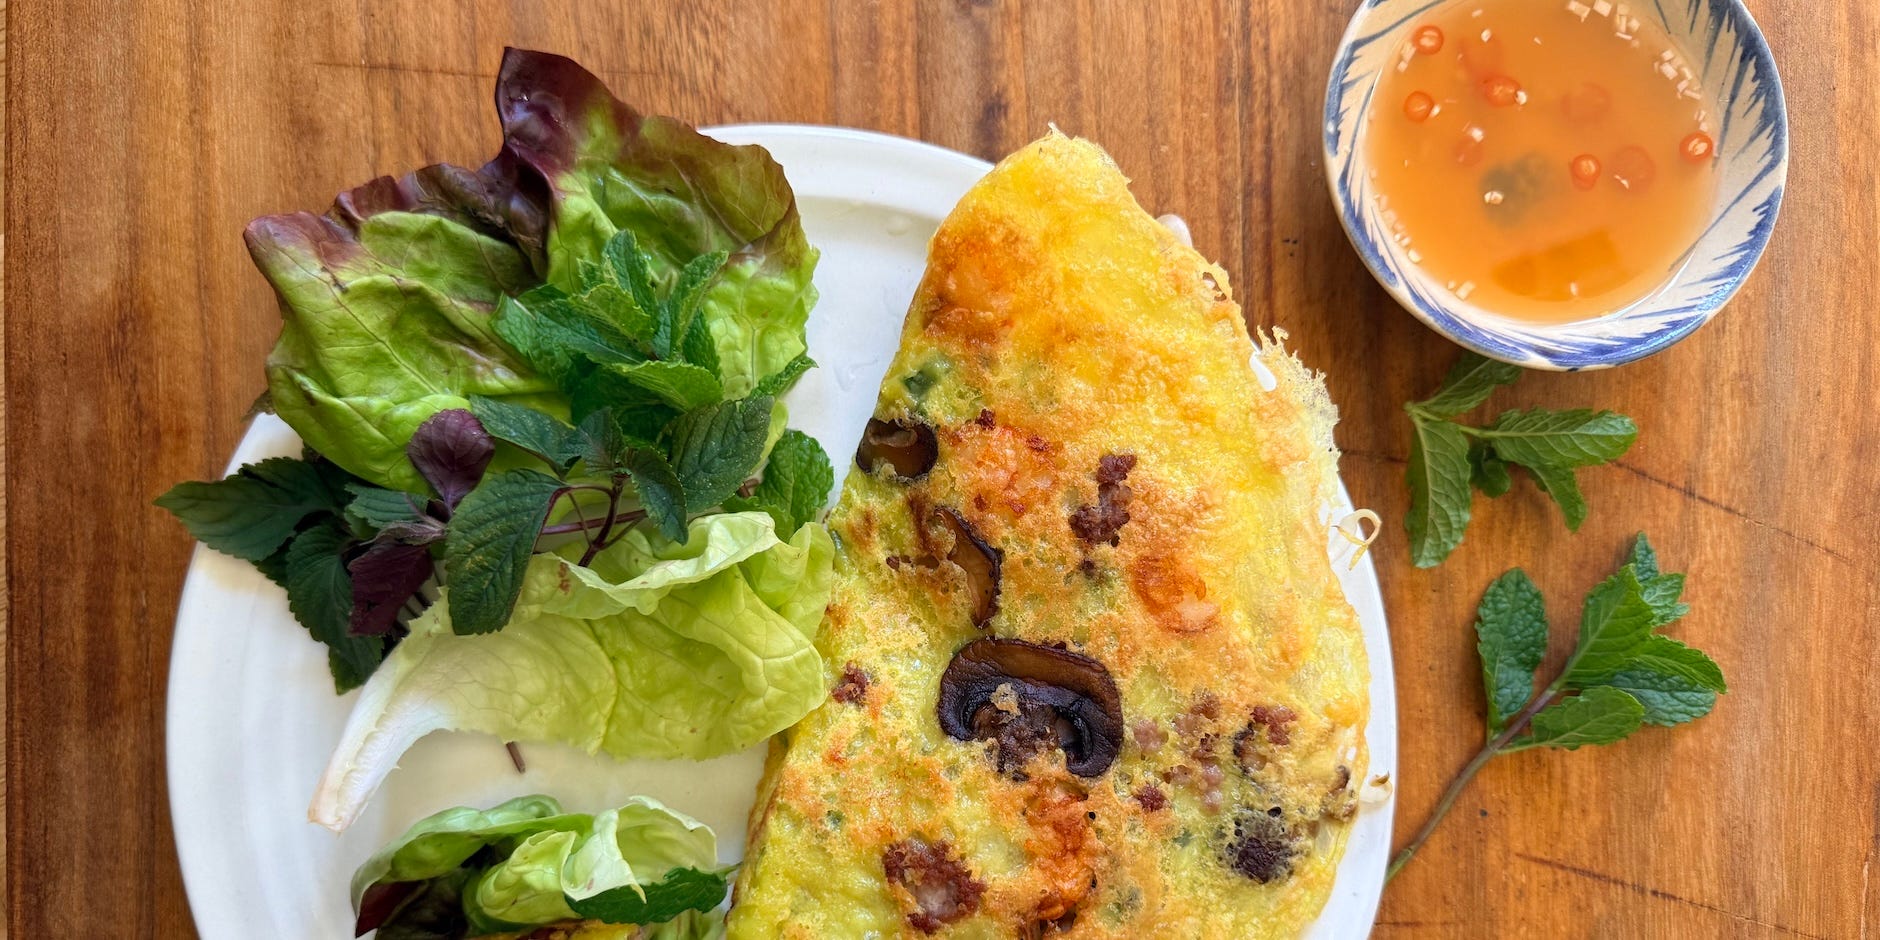
Coincidentally, and I have been chatting about the challenges of making bánh xèo well. He has used my recipe in Vietnamese Food Any Day but hasn’t gotten satisfaction so he signed up for the class! Sometimes you need to watch someone to get all the moves and pointers so you can finesse your own cooking. Also, the VFAD recipe is good but the new one that I’ll be teaching is excellent.

That’s the beauty of taking a cooking class. I’ll be your banh xeo coach.

Joe sent this photo of banh xeo and pho from a Viet restaurant. I assured him that his will be better. 😆

For details on the upcoming cooking class and promo codes, check this dispatch. (You can get the Early Bird deal till 6/30!)

Now for something spicy.

When I researched and developed the versatile only kung pao chicken you need, it dawned upon me that Sichuan cooking has a knack for using peanuts to yield heady dishes. Kung pao is one of them but there’s another popular dish called “second sister rabbit cubes” (èr jiě tù dīng 二姐兔丁 ) that includes peanuts, poached rabbit, fermented chile sauce, and green onions.

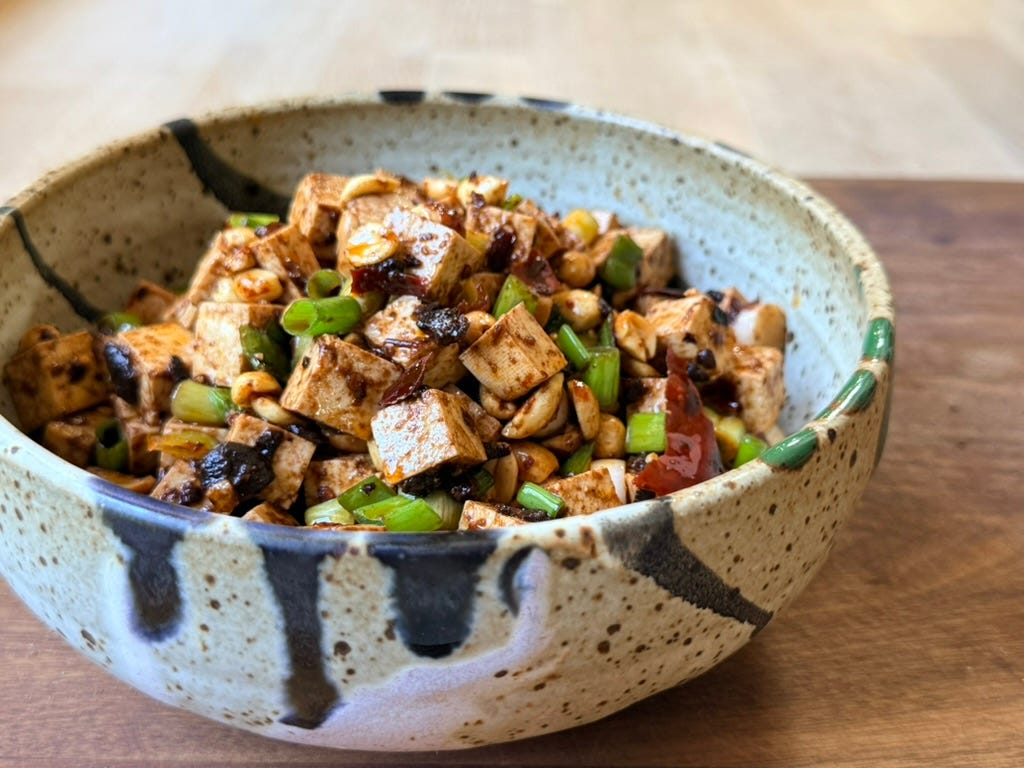
I make a vegan riff with tofu because it’s easier, healthy, and just as rich, spicy and umami laden. Also, the rabbit version is cool weather fare but the tofu version is lighter and great year round. Without a nickname, my take on the Sichuan favorite is simply called “spicy tofu and peanuts” (huā rén dòufu gān 花生豆腐干).

I wish you could take a whiff of the tofu to take in its tantalizing aroma. Yes, tofu dishes can look and smell inviting!

Like kung pao chicken and mapo tofu 🆓, dishes like this one are wickedly addictive. They possess a broad range of flavors — from rich and salty to spicy and pungent. The spectrum of textures span from soft to crunchy to chewy. Stand over the bowl, inhale the tofu’s aromas, and you’ll want to dive right in.

Your nose will tingle just a bit from the chile heat — which you can partly control with homemade chile oil. This condiment is a constant in my kitchen like it is in many Asian kitchens. It’s more useful than chili crisp because it plays with other flavors well without taking over.

Make the 2-ingredient recipe from my 🆓 free chile oil recipe at the website. Dial in the heat and play with the flavors! Aside from using chile oil here and in the Taiwan sesame cold noodles, you can drizzle it onto noodle soup, mix it into dipping sauces, and so much more.

Below you’ll find:

  • Spicy Tofu and Peanuts recipe in text and as a downloadable PDF

  • Pointers on sourcing and using two umami powerhouses — fermented chile bean sauce and fermented black beans

  • Tips for how to choose the “right” tofu and prep it for big flavor

  • Ingredient substitutions (because we all like them!)

  • Serving suggestions so you can make the most of this recipe

And, this tofu dish happens to be vegan. I hope you befriend and make it often.

Curious cooks, readers and eaters fuel this newsletter. The dispatch was created for paid subscribers who sponsor PTFS. To get all the spicy tofu details, fully use the recipe index plus save on my cooking classes, become a paid subscriber. Your support makes a big impact.

Read more

Eggplant Stir-fry with Chicken

28 June 2026 at 07:45
Chicken with Eggplant Stir-fryThis Eggplant Stir-fry with Chicken is in the Cantonese style—the flavor of the eggplant shines through with aromatic garlic, scallions, ginger, and juicy chicken. It’s a delicious one-pan meal and my new favorite way to enjoy Chinese eggplant.  Do I Need to Use Chinese Eggplant?  Chinese eggplants have fewer seeds than the average globe variety […]

The Right Way to Wash Vegetables, According to a Chinese Mom

By: Judy
26 June 2026 at 18:11
washed spinach in bowlToday, I’m sharing how we wash our vegetables. Getting the most out of produce and making sure they’re as clean as possible is very important to me, as I’m sure it is for many of you! We break down how to wash everything from leafy greens to herbs, peppers, and more.  If you’d rather watch […]

July Vietnamese Bánh Xèo Cooking Class!

26 June 2026 at 03:09

One of my 2026 goals was to teach more online cooking classes! It’s taken so long to open a class because I’ve been fine tuning a recipe for bánh xèo — Vietnamese sizzling rice crepes. They are a classic Saigon treat that many people swoon over. To make bánh xèo thin, crispy, and light is a feat normally left to professional street food chefs or tenacious home cooks.

But, you can rival them. I’ve come up with batter options and techniques for you to make them just as good as the pros! After months of tinkering, this recipe is the best I’ve ever made. I’m very happy with the results, which wowed even my mother.

My new bánh xèo recipe is:

  • Doable with supermarket or with Asian market ingredients

  • Consistently crispy with just the right amount of chew

  • Easy to fry up and won’t make a mess of your stove

  • Gluten-free, dairy-free and vegan friendly!

Despite using everyday ingredients, the crepes involve a certain level of finesse. Given that, I built a new online class called “Mastering Bánh Xèo” so you can make the Vietnamese sizzling rice crepes yourself.

The crepe recipes yields a satisfying one-dish meal but to round things out, I developed a fruity 3-color dessert parfait (chè ba màu hoa quả) to go with the crepes!

Take the class and I’ll walk you through making a fabulous menu to celebrate Vietnamese street food at its best. You can entertain and make a party from this menu too!

Bánh Xèo class details

  • Topic: Mastering Bánh Xèo: Make Vietnamese Sizzling Rice Crepes at Home

  • Day and time: Sunday, July 19, 2 to 4pm PST

  • Cost: $42.50 per person (includes all recipes and video playback)

  • How to register: Use this link to buy a ticket at Eventbrite

  • Can’t attend the livestream? Sign up for the class to receive the recipe packet and video playback. You can also email me questions!

Registration discounts

🐦‍⬛ 🌅 Early bird discount: Between now and June 30, save 15% off the ticket price with this special code: sizzle15

✨ 🎁 Paid PTFS subscribers always receive a 25% off discount between now and when ticket sales close. That promo code is in this dispatch for paid subscribers.

If you’ve been on the fence about upgrading, now’s a great time! Save 30% for 1 year. Save on the class ticket too!

Cooking class general information

The low-down on how the classes run:

  • Day and time: Sundays, 2-4pm PST, so you can make something for dinner or for the week ahead. It’s also (hopefully) an unhurried time for you.

  • Class length: 2 hours, including Q&A

  • Online platform: Zoom, with a playback recording for all registrants

  • Ingredients: Most ingredients are available at supermarkets. Asian market shopping is sometimes required. You will get pointers, such as brand suggestions, in class materials.

  • Equipment: Basic home kitchen equipment. Nothing fancy or exotic is required. If there’s something special, it will be flagged in the class materials.

  • Class materials: After registering, you’ll get a confirmation email with a link to a downloadable PDF of class materials which contain all recipes, Zoom link, plus lists and pointers (groceries, equipment, and prep).

  • Zoom class link: The day of class, you will get an email reminder with the link again.

  • Cost: Each ticket is $42.50

  • Refund-ability: Unfortunately, class registrations are not refundable. Student attendees receive the detailed class materials, livestream class, plus access to the recorded playback.

  • Want the class but can’t attend? Just sign up to get the class materials and recording to watch. Whether or not you attend the livestream, you can email me follow-up questions.

I’m so excited about teaching you how to make this new recipe. Join me on July 19.

P.S. Coming this Sunday — a spicy, nutty tofu to keep on hand, take on a picnic or bring to a potluck. It’s deliciously indestructible!

Creamy Basil Sauce

25 June 2026 at 21:15
basil sauce recipe

You’re going to fall in love with this creamy basil sauce! It’s like a super fresh, summertime aioli that brings sandwiches and snacks to life. You can whip this sauce together in just a few minutes with a few ingredients. I make it all the time, and keep finding more uses for it, so I’m highlighting it here today.

It’s not too late to plant some basil this summer. If you have a surplus and you’ve already made all the pesto you can eat, try this creamy basil sauce next. You’ll find lots of ideas to use it up below. Let’s make it a basil sauce summer!

Continue to the recipe...

The post Creamy Basil Sauce appeared first on Cookie and Kate.

6 Types of Soy Sauce Everyone Should Know

By: Sarah
24 June 2026 at 12:13
soy sauces you should knowIf you’ve spent any time cooking from this blog, you’ve probably noticed that in some of our recipes, we call for a couple different types of soy sauce. Most often, it’s light soy sauce and dark soy sauce. But if you’re standing in the Asian grocery store aisle, staring at a wall of bottles, you’ll […]

Tropical Granola

By: Sarah
22 June 2026 at 09:00
Tropical granola with yogurt and fruitClose your eyes, take a bite of this tropical granola, and it’s like you’re halfway to a beach somewhere. Made with toasted oats, golden cashews and/or macadamia nuts, coconut flakes, and sweet chunks of dried papaya and pineapple, this tropical granola recipe makes sunshine in a jar.  Sprinkle it over some plain yogurt with honey, […]

Silky, Spicy, Sweet Vietnamese Dipping Sauces to up Your Grilling Game

21 June 2026 at 15:37

By now, you know Vietnamese nuoc cham dipping sauce, well yes? I shared all my tips and recipes for how to make the versatile sauce in a March PTFS dispatch. I hope you’ve made good use of the recipes👇!

Let’s boost your Viet cooking game with dipping sauces that are sort of an insider’s secret. They’re popular in Vietnam, where people buy them and make them at home too. They require few ingredients and in 2 minutes, you can conjure up a spicy, sweet, tangy, creamy condiment that goes with practically anything!

Originally from Nha Trang, a coastal city in the southern part of central Vietnam with lots of fresh seafood, these sauces involve an unusual combination of ingredients that includes sweetened condensed milk. You can make either a green or reddish-orange sauce depending on your chile preference. The more popular one is green and called Muối Ớt Xanh — literally green chile salt, but in English, it’s often called “Green Seafood Sauce”.

Indeed, there’s truth in advertising — Green Seafood Sauce goes well with seafood. However, it also goes with other animal proteins and veggies too. Ditto for the red version.

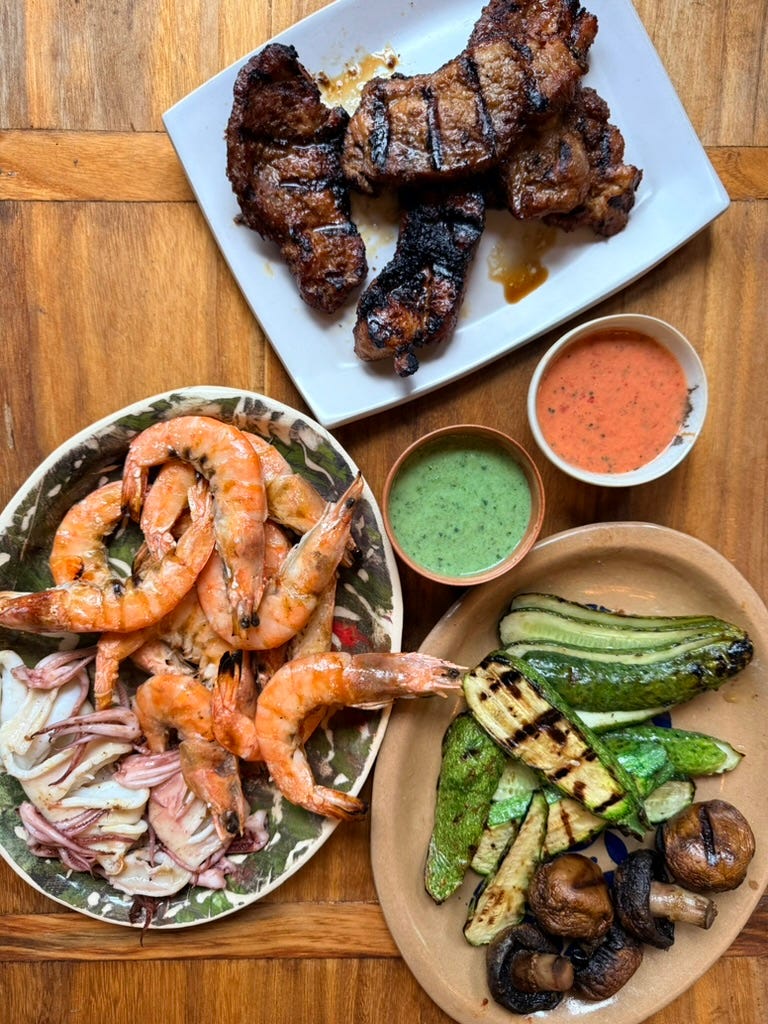
I experimented with the sauces by trying both with a mixed grill this week that included shrimp, squid, veggies, and Viet restaurant-style lemongrass pork (thịt heo nướng sả), a free 🆓 recipe on my website.

The well-seasoned pork has layered flavors and this sauce amplified them, rather than overwhelm. Remarkably, the sauces punched up the flavors of everything. The shrimp was briny sweet, the squid was delicate, and the veggies each had their personal flavor characteristics. (All those items cook up fast so along with cooked rice that was heated up in the microwave, we had dinner in little time.)

The sauce colors are outrageous and all natural, I swear!

So, you should have my versatile formulas for these sauces in your back pocket for grilling season and beyond (they go well with steamed seafood, and roast chicken and steamed chicken, I’ve heard!). While you’re at it, try brushing these sauces on food while they’re grilling. Why not?

Translation note: The green sauce is often translated into English as “Green Seafood Sauce” but the red one is awkwardly called “Red Chile Salt Sauce”. They both go well with seafood so I’m just calling them Green and Red Seafood Sauce. If you want to be 100 percent correct, call them by their Vietnamese names:

❇️ Muối Ớt Xanh (“moo-ee uht sann”)

🅾️ Muối Ớt Đỏ (“moo-ee uht daw”)

Below you’ll find this suite of information for you to enjoy what I prepared and to riff on it!

  • 5 recipes: Green Seafood Sauce + Red Seafood Sauce recipes + guidance on how to make simple Grilled Shrimp + Grilled Squid + Grilled Veggies

  • Recipes are in text and as a downloadable PDF

  • A techniques video on how to trim shell-on, head-on shrimp like a pro

  • Ingredient explainers and strategies for dialing in a heat level to match your taste buds

I’m keeping jars of these sauces in my fridge this summer and so should you!

Curious cooks, readers and eaters fuel this newsletter. The dispatch was created for paid subscribers who sponsor PTFS. To get all the saucy details, fully use the recipe index plus get other benefits, become a paid subscriber. Your support makes a big impact.

Read more

Dakgomtang (Korean Chicken Soup)

Dakgomtang is a comforting Korean chicken soup with tender chicken and a light, slightly milky broth. Served with rice, soy sauce relish, and spicy seasoning paste, it makes a delicious and satisfying meal.

Chocolate Mole Brownies

20 June 2026 at 09:07

I met Carlos Moreno when he was delivering taco kits during the pandemic, when we all wanted to eat “out,” but were stuck eating in. Prior to that period Mexican food wasn’t well represented in Paris. (A lesser-known fact is that France tried to colonize Mexico twice in the mid-1800s.) I loved Carlos’ food and we had a few nice conversations on the sidewalk when he made his deliveries.

Since then he’s gone on to open his own restaurant in Paris, Comer. As I mention in the video, you might not think you want to go to a Mexican restaurant in Paris, but I can assure you that yes, you do. It’s really, really good.

Follow Carlos on Instagram

His cooking is based in traditional Mexican fare with lively moles and amazing salsas, as well as a menu that changes based on the season and what’s available, which includes tostadas with raw tuna crudo, peas and citrus, tacos with pork al pastor, a mille-feuille of fresh tomatoes with housemade salsa macha, and a truly melt-in-your-mouth horneado of beef. One item on the dessert menu that’s a particular favorite are his mole brownies, which are slightly spicy, and served with a vanilla atole sauce and mezcal.

I was happy that when I asked Carlos to stop by and make his famous brownies with me, he said yes. We didn’t make the vanilla atole sauce (you can find my recipe here), which he spikes with mezcal at Comer, but the brownies were delicious all on their own. I hope you enjoy them as much as we did making them!

Comer Paris website

And if you’re in Paris, Comer is some of the best Mexican food you’ll ever have, anywhere.

Comer
96 rue d’Hauteville (10th)
Paris

Leave a comment

Subscribe to my newsletter to get new posts, recipes, videos, Paris travel tips, and more, sent right to your inbox!

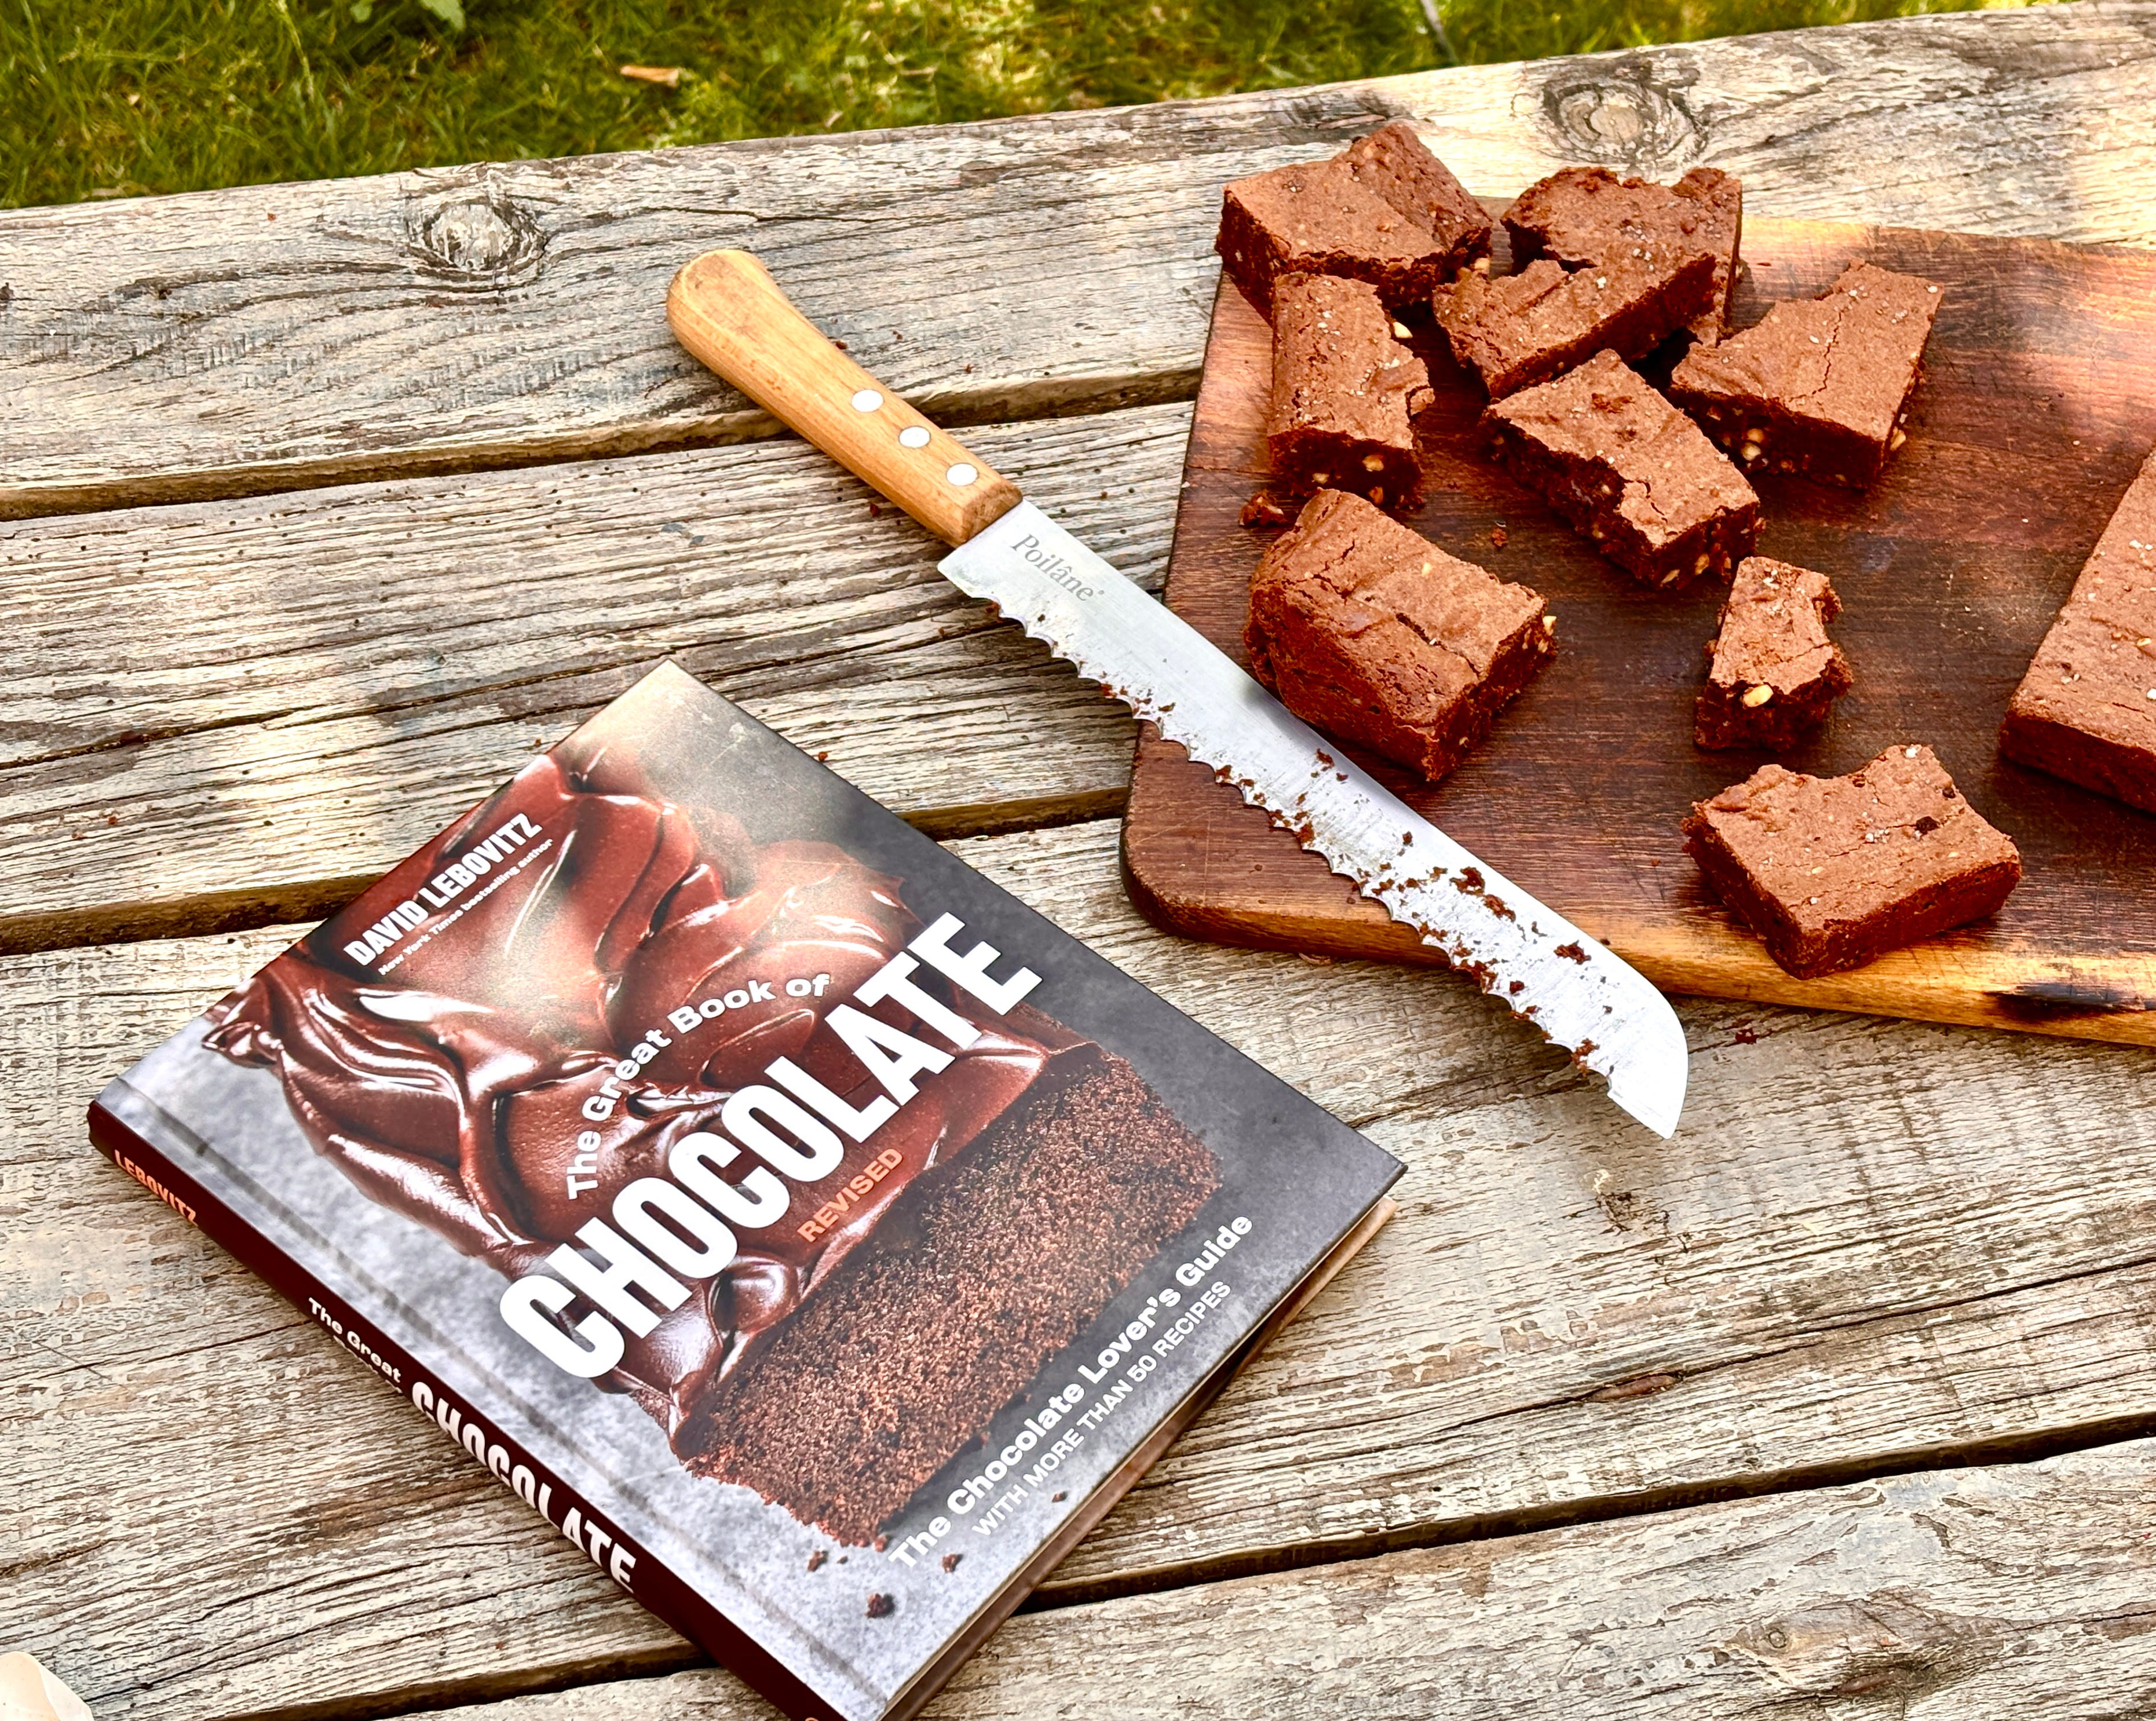
https://www.davidlebovitz.com/book/the-great-book-of-chocolate/

Get The Great Book of Chocolate

💾

Peach and Burrata Salad

18 June 2026 at 23:39
peach burrata salad recipe

This summertime stunner tastes as good as it looks! I had a feeling my Burrata with Tomatoes and Basil would be good with peaches instead of tomatoes, and wow, it’s great. I wholeheartedly recommend it.

The recipe features sliced peaches, fresh arugula and basil, creamy burrata, and toasted pistachios, drizzled with olive oil and balsamic vinegar. It’s a vibrant sweet-and-savory combination that you can serve as a salad or an appetizer.

I love fresh, simple summer recipes like these because they look and taste gourmet but require no cooking at all. This beautiful recipe is ready in 15 minutes!

Continue to the recipe...

The post Peach and Burrata Salad appeared first on Cookie and Kate.

Midweek gems #64: Apricot windfall

18 June 2026 at 17:52

I can’t remember if we had El Nino or La Nina last year but the weather yielded a bumper crop of apricots in Santa Cruz. One of my neighbors is out of the country and I’ve been gleaning the fruit that’s fallen off his trees. Successive windy days knocked lots of the delicate Royal Blenheims off his trees. So far, my windfall ‘harvest” has yielded about 30 pounds of apricots. If I didn’t gather the fruit, the ants would have feasted and I would have cried.😆

At home with the fruit, I sorted them into piles of soft (eat or cook soon) and firm (hold). Blenheims are known for their intense aroma and sweet flavor. They bruise easily so I keep them refrigerated in recycled shoe boxes.

Add to that, another neighbor texted that he was leaving town and I was welcomed to glean what remained on his apricot tree. He even left his picker out for us to grab the fruit at the top of the tree.

We’re eating lots of apricots now to savor their summertime splendor; they’re a delicious, fiber-filled fruit. Plus, I’ve been cooking with them in various recipes. For instance, I’m experimenting with making umeboshi apricots, which will take till July or so to finish. Instead of red shiso, I’m using Vietnamese shiso (tia to), which is garnet and green. This Japanese recipe and this other recipe are serving as my guides.

Here are three other recent apricot projects of mine from this past week that you may be interested in!

Leave a comment

💎 Apricot Ginger Jam

The first time I shared a jar of apricot ginger jam with my dad, he ate it right off the spoon. His eyes widened and a big grin spread across his face. The jam was and is that good. It’s not too sweet and has enough lemony tang and gingery bite to balance the flavors and make it taste super special. It’s one of my favorite ways to preserve apricots for winter when I’m needing some sweet sunny summer cheer.

Use apricots from your tree (or someone else’s!), the farmer’s market (ask for jam-quality fruit to save money), or the supermarket. Make a half batch with just 2 1/2 pounds (1.1kg) of fruit, if you like! The jam makes a great gift too so bank your efforts for the holiday gift giving season. The stellar recipe is 🆓 on my website for you to use!

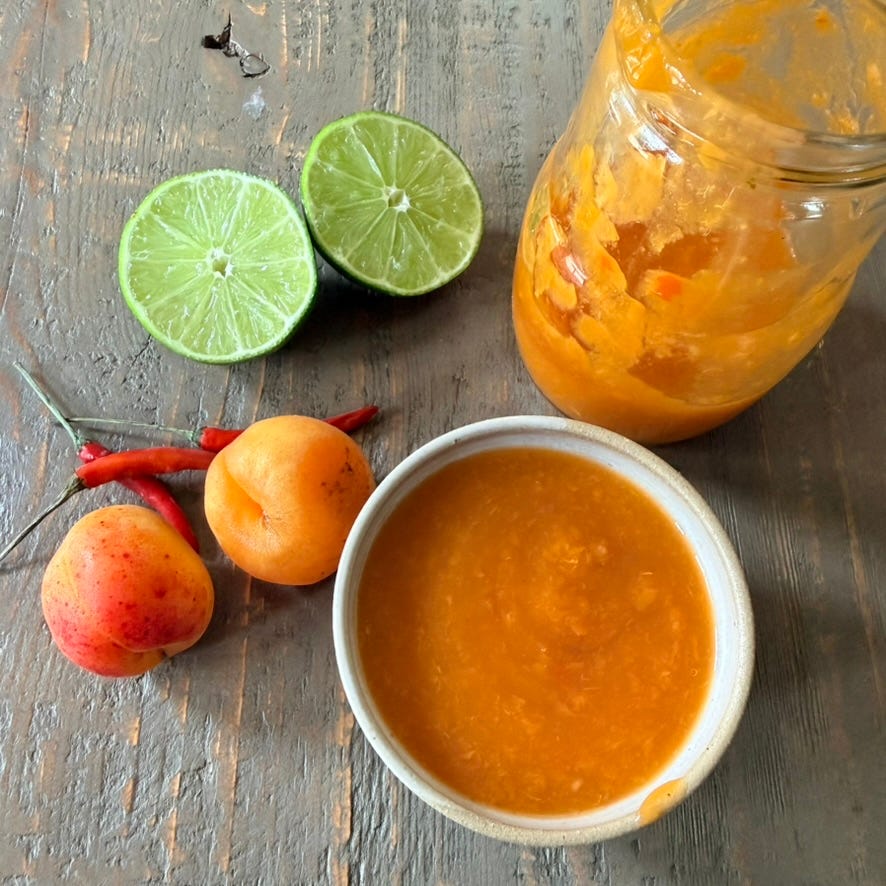
💎 Spicy fresh apricot sauce

Thank for this saucy idea that she suggested on Substack Notes — make a fresh apricot sauce with chile and fish sauce for grilled seafood. I did just that and it was great — even on rice, which reminded me of when my mom used to serve us kids sliced ripe mango with rice and a smidgen of fish sauce. It was Mom’s clever way to get us it to “get the rice to go down.” I’ve adored the fruity-funky combo ever since I was 5 years old! Rory is new to the idea and loved the sauce on rice too.

Enjoy the apricot sauce at room temperature as a dipping sauce or chutney-ish relish. Keep scrolling for the recipe . . .

Spicy Fresh Apricot Sauce Recipe

In a small food processor blend together:

  • 8 ounces (225g) pitted ripe apricots (soft ones are welcomed!)

  • 1 Thai chile, coarsely chopped

  • 2 Tbsp fresh lime juice, plus more to taste

  • 1 Tbsp fish sauce, plus more to taste

  • 1 very small clove garlic, finely chopped

Taste and adjust the flavor with extra lime juice by the to tame sweetness or fish sauce to add savory umami-ness. Incrementally add each by the 1/2 Tbsp (1 1/2 tsp). Use immediately or store in a jar for up to 1 week.

Support Pass the Fish Sauce! Join us for free or upgrade to a become a paid subscriber to enjoy 150+ professionally developed recipes, seed new content, and get future class discounts. Thanks for your enthusiasm!

💎 Almond Apricot Cake (gluten free)

Apricots are from Central Asia and China and almonds may have hailed from those regions too. They are destined to be together in a sweet treat. I wanted an easy cake to combine and celebrate the two ingredients and created this delight. I riffed on ’s almond butter cake recipe from her brilliant Gluten-Free Flavor Flours cookbook, but baked fresh apricots right into the cake, an idea poached from the French moelleux of summer fruits, a cake recipe that wrote about a number of years ago.

One cake serves 8, if you decide to share it.

The fruit sank into the bottom and didn’t turn totally mushy; it added a tangy contrast to the cake that was wonderful to eat. The top baked to a delicate crispness that finished the cake with a truly special crust. (Yes, I think you can make this vegan too!)

I shared some with neighbors, two of whom enjoyed it to celebrate their baby’s 6 month birthday (their baby is also named Rory).

Like the popular PTFS easy lime pound cake recipe, this one is also made in the processor. (I’m a somewhat lazy cake baker.) I’ve just written the 🆓 recipe up at the website for you to bake it up yourself. You can easily play with it too. Make this almond apricot cake recipe your summer go-to!

Coming up for this Sunday Special are ideas for the grilling season that is now upon us!

strawberry chiffon shortcake, perfected

By: deb
17 June 2026 at 18:02

In 2007, when this website was still in its infancy, I shared a recipe for a layered strawberry chiffon shortcake. I’d never made a chiffon cake before, but I brought it to a friend’s rooftop birthday BBQ, correctly assuming that no one would be unhappy with a towering, featherweight cake sandwiched with whipped cream and fresh strawberries, however inexpertly made.

Read more »

Strawberry Jam

By: David
17 June 2026 at 08:22

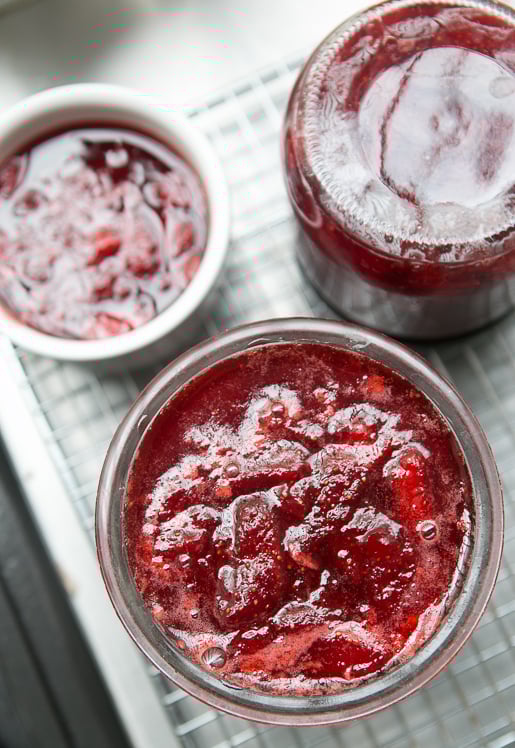
Strawberry Jam recipe

I was recently gifted an overload of strawberries: I bought four baskets from a vendor at the market, whose booth I shop at often, and he threw in two extra baskets for free, the equivalent of a carte de fidelité (loyalty card) in Paris. So I’ve spent the past few days washing, hulling, cutting and cooking my unexpected bounty.

I’ve been making a number of things with the gorgeous strawberries. But I also realized that while I have a Strawberry-Rhubarb Jam recipe on the site, I didn’t have a strawberry jam. So here it is.

Strawberry Jam recipe

Although I’m giving you a recipe for the amount of strawberries that I used, you can use the same proportions if you have just a basket…or a bushel. You’ll just need to do a slight amount of math. Only the cooking time will change, so keep an eye on things.

Jam-making is not something you walk away from and you need to rely more on look and feel, rather than exact times. Another thing about jam-making is that fruit and berry jams are always better made in small batches; the shorter the cooking time, the better the flavor. So if you have more than 2-pounds (900g) of strawberries, consider making jam in a couple of batches rather than one big one.

Frozen zabaglione recipe

Print

Strawberry Jam

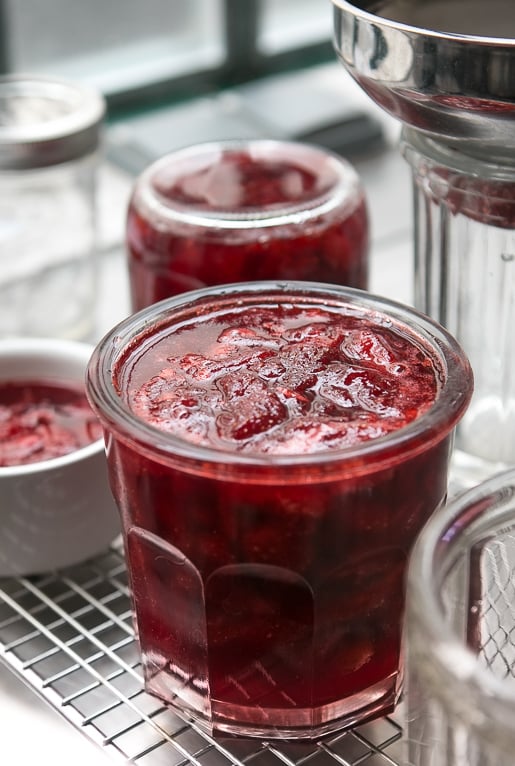
Many traditional recipes use an equal amount of sugar to fruit, by weight, but I find it’s okay to decrease it to these proportions. Sugar is both a thickener and a preservation agent. If you reduce it too much more, your jam may not thicken and won’t keep for a long time. (Which is okay if you want thinner jam, you keep it in the refrigerator, and eat it relatively quickly.) This recipe can be scaled up or down, depending on how many strawberries you have. But if you want to make a lot more, best to make it in a couple of batches. To prepare the jars, pour boiling water into them, as well as into the lids. Let them sit 5-10 minutes, then carefully pour out the hot water and set them upside down on a cooling rack until ready to fill. Since I keep my jams in the refrigerator, I don’t put them up them in a traditional sense. I usually just overturn the jars and let them cool, which provides a reasonable seal, then refrigerate them. I find my jams keep well this way for up to one year. Check the National Center for Home Food Preservation website for instructions on how to can fruit jams. Note: Last season strawberries tend to have less natural pectin than ones that arrive earlier. So your jam may be less jelled. One strategy is the finely grate a green apple into the strawberries before cooking them, which adds pectin. (There are guidelines here for using liquid and powdered pectin.) I don’t mind the slightly runnier jam and it’s terrific on yogurt or served with fresh goat cheese for dessert.

Ingredients

  • 2 pounds (900g) strawberries
  • 1 1/4 pounds (2 2/3 cups, 580g) sugar
  • one lemon organic or unsprayed
  • optional: kirsch (or eau-de-vie, or crème de cassis)

Instructions

  • Wash and hull the strawberries and cut them into quarters. If some are larger or smaller, just make sure the pieces all about the same size.
  • 2. Toss them in a large pot, such as a Dutch oven casserole made of a nonreactive material, with the sugar. Cut the lemon in half, squeeze the juice into the pot, and add the lemon halves to the berries. Stir well, cover, and let sit a couple of hours (up to 8 hours) at room temperature, stirring one or two times while they marinate.
  • Put a small plate in the freezer. Turn the heat on under the strawberries to medium-high and cook the strawberries, stirring occasionally, as they reduce and the juices thicken. If a lot of foam rises to the surface, skim it away. When the syrup is the consistency of warm maple syrup – it will take about 10 to 15 minutes or so, depending on the pot and berries, turn off the heat and put a spoonful of the jam on the frozen plate and return the plate to the freezer. Check it in a few minutes; if it wrinkles when you nudge it, it’s done. If not, return the plate to the freezer and cook the jam a little more, testing it again. It may take a few times before you get it to the right consistency.
  • When the strawberry jam is done, remove the lemon and stir in a few drops of kirsch, if using, then ladle the jam into the prepared jars.

Related Recipes and Links

Apricot Jam

No-Recipe Cherry Jam

Pickled Strawberries

Easy Jam Tart

Eggplant Jam

Baking Ingredients and Substitutions

Shallot Vinaigrette 

15 June 2026 at 14:36
Shallot Vinaigrette RecipeThis Shallot Vinaigrette makes even the most basic pile of mixed greens out of the box taste wonderful. A liberal drizzle of this salad dressing feels like you’re sitting down at a nice restaurant, and it couldn’t be simpler to make!  Our New Go-To Salad Dressing I don’t know about you, but sometimes when I’m […]

Time to wok away: How to choose a good wok, season and re-season it, and use it super well

14 June 2026 at 21:37

Woks were invented in China about two thousand yeas ago but they remain a mystery to many cooks. That’s why my stir-fry recipes specify that you can cook the dish in a large wok or skillet. My recipe developer’s heart is always hoping that you’ll use a wok because that’s how the dish was meant to be cooked. A skillet will do but the explosive action of a good wokked stir-fry fills the kitchen with sizzling sounds, smells and then savors that a skillet cannot provide!

I’ve been spending more time on Substack’s Notes app and chatting with some of you. Earlier this week, remarked that she aspired to having a well-seasoned wok like the one I used in the kung pao chicken recipe video.

That tickled me because I don’t consider myself a master of the wok. Vietnam has being heavily influenced by Chinese culture but wok cooking is not a thing for many Vietnamese cooks. Most people choose skillets over woks, though as reminded me, some Viet pro cooks use woks for making sizzling rice crepes (bánh xèo). In the main, folks use skillets for those crepes and countless other dishes.

As I was growing up, my mom didn’t even have a wok. When you watch a video of me ‘effortlessly’ using mine, that’s the product of didactic practice. Over the years I’ve owned at least a dozen woks, and currently keep three (3) in my kitchen on rotation. Tinker and play with wok cooking to hone your skills.

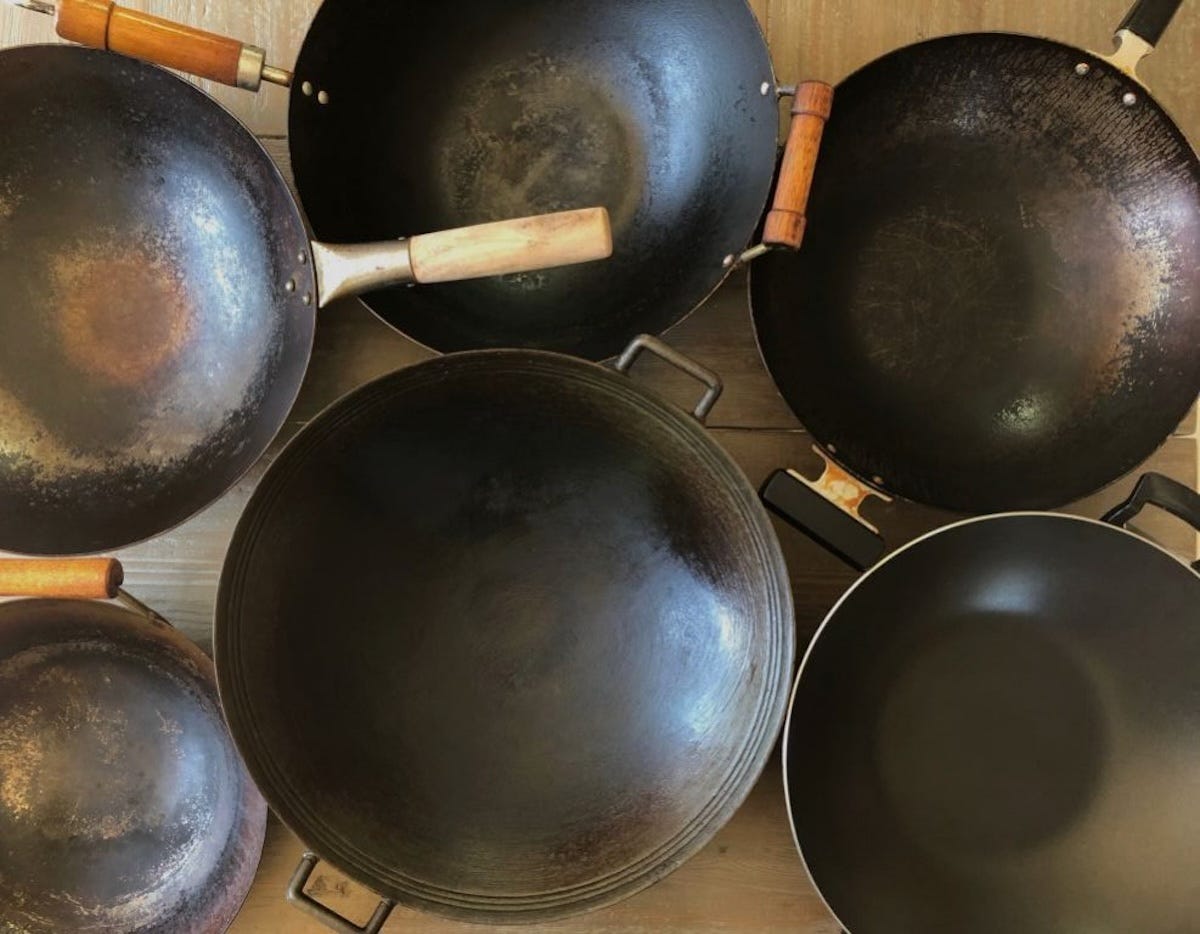
Top, left to right, are carbon steel woks. Bottom left is a carbon steel wok. Center bottom is a lightweight traditional cast iron won. Bottom left is an electric teflon coated wok. I’ve owned and tried these and more!

In this post, I’m going to offer my pointers on:

  • Selecting a good wok

  • Buying pre-seasoned carbon steel woks

  • Seasoning and re-seasoning a wok

  • Wok cooking and cleaning tools

Plus, I have a baker’s dozen (13) wok recipes for you to wok away!

How to choose a good wok

Woks are workhorses in the kitchen. They heat up in a flash and can cook food quickly or be used for braising, frying, smoking, or maybe even steaming, though that will wipe out much of the patina that you’ve built up.

When shopping for a wok, consider:

  • Round or flat-bottom wok? Both round and flat-bottom woks work great on gas stoves. If your stove is electric coil or induction, choose a flat-bottom pan so it will have maximum contact with the heat surface.

  • What is a good wok made of? Choose a metal that can heat up fast and effectively — the bottom and sides of the wok should get hot because you use all that surface area to cook with.

    • Carbon steel woks are king. They’re known for their durability, weight options (light or heavy, more below), and endurance (you can heat it until ripping hot and you can neglect it and it’ll come back to serve you well). BUT, a carbon steel wok often requires maintenance by way of seasoning to maintain a nonstick surface.

    • Coated nonstick woks seem dreamy but the only coated nonstick skillet worth considering is the Joyce Chen Excalibur nonstick wok, which I reviewed on my website (🆓). After using it for nearly five years, I ‘retired’ it to my mom’s house so I can use it when I visit. Carbon steel woks rock. Second to that are old school cast iron woks.

    • Chinese lightweight traditional cast iron woks are thin and lovely to cook with — lots of swooshes and sizzling noises to propel you ahead! Heavy cast iron woks, like those made by Lodge, are unwieldy for tossing food around and take too long to heat. The only cast iron wok I own is a small 9-inch one that I bought to test drive single portion recipes.

  • asked: What about stainless steel woks and why does mine stick so much? Stainless steel pans, like ones by All Clad, require a long preheating until they are super hot (to test: flick water onto the surface and it should literally dance around, not pool). Once sufficiently hot, then you add oil/fat to film and start cooking. There should be minimal sticking (practice by frying an egg.) My mom use a thin, stainless steel wok for deep-frying. I’ve only used her wok for stir-frying greens but it didn’t perform as well as others.

Leave a comment

2026 Pre-seasoned carbon steel wok reviews

I’m nudging you toward carbon steel for a good reason.

For the past two years, I’ve been road testing three carbon steel woks that are impressively good. Though they are are not all labeled as “pre-seasoned” they require very little elbow grease to prepare them for your wokking pleasures.

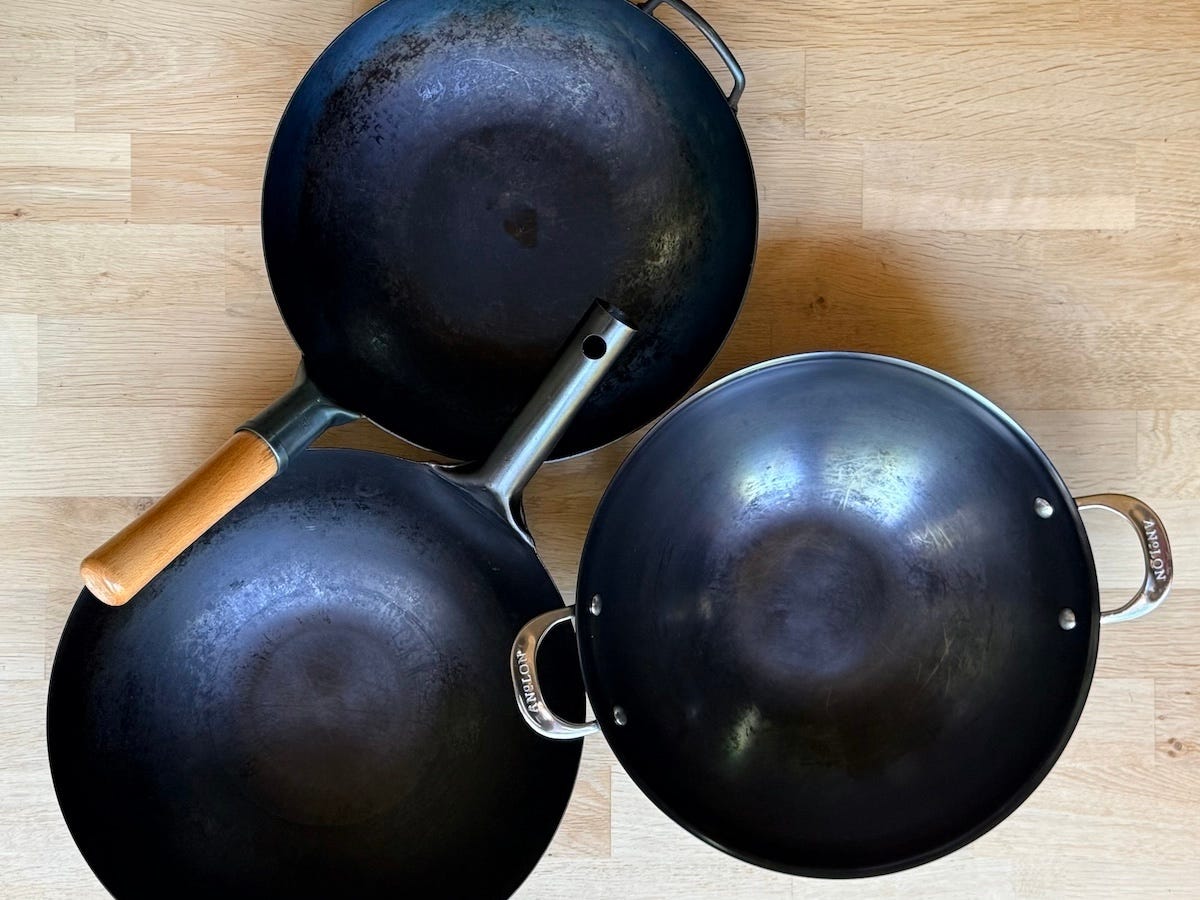
3 pre-seasoned carbon steel woks in rotation these days in my kitchen: the Yosukata (top), Anolon EverLast (bottom right), and a Japan iron wok/Beijing wok (bottom left).

Two are heavy duty and the third is lightweight. The lightweight Japan iron/Beijing wok is perfect for cooks who love to toss and flip food.

asked about a wok for cooks with carpal tunnel. My wrist issues are minimal but if I had wrist or hand pain, I would reach for the light Japan/Beijing carbon steel wok. It’s easier to maneuver than other woks, though it had its disadvantages. I put it to work in this kung pao chicken recipe video.

All three carbon steel woks are joys to cook with. I wrote up my review of each carbon steel wok (it’s 🆓 and at my website). Here’s the down and dirty on how they stack up:

For my reviews and comparison notes, check this free article at my website.

Subscribe now

What is wok seasoning and how to do it

When you’ve found a wok you like, you learn its strengths and identify its quirks. Unless a wok is Teflon coated, it needs to be seasoned. Even if a wok comes “pre-seasoned”, it still requires a little seasoning. It’s like with cast iron — you must maintain and cultivate the metal to ensure a lifetime of good cooking.

What exactly is seasoning a wok? Seasoning a wok involves heating the metal (carbon steel or cast iron) so it expand a bit to receive oil or fat, which gets into the microscopic crevices to form a film. This happens during a purposeful seasoning process as well as through regular usage. Overtime, as oil gets into the metal, a patina develops and the pan surface becomes more slick. As a pan gets seasoned, it may change color, depending on the metal.

To season a wok, I use one of these methods, depending on the pan and needs:

  1. Stir-fry aromatics

  2. Cook potato peels and salt

  3. Bake in the oven

Instructions for each — along with their pros and cons — is detailed in this wok seasoning article 🆓.

Cook with the wok regularly (I do it twice a week, at least) to keep the seasoning going. Aside from stir-frying, fry an egg or better yet — sear beef steaks or cook fish fillet in a wok.

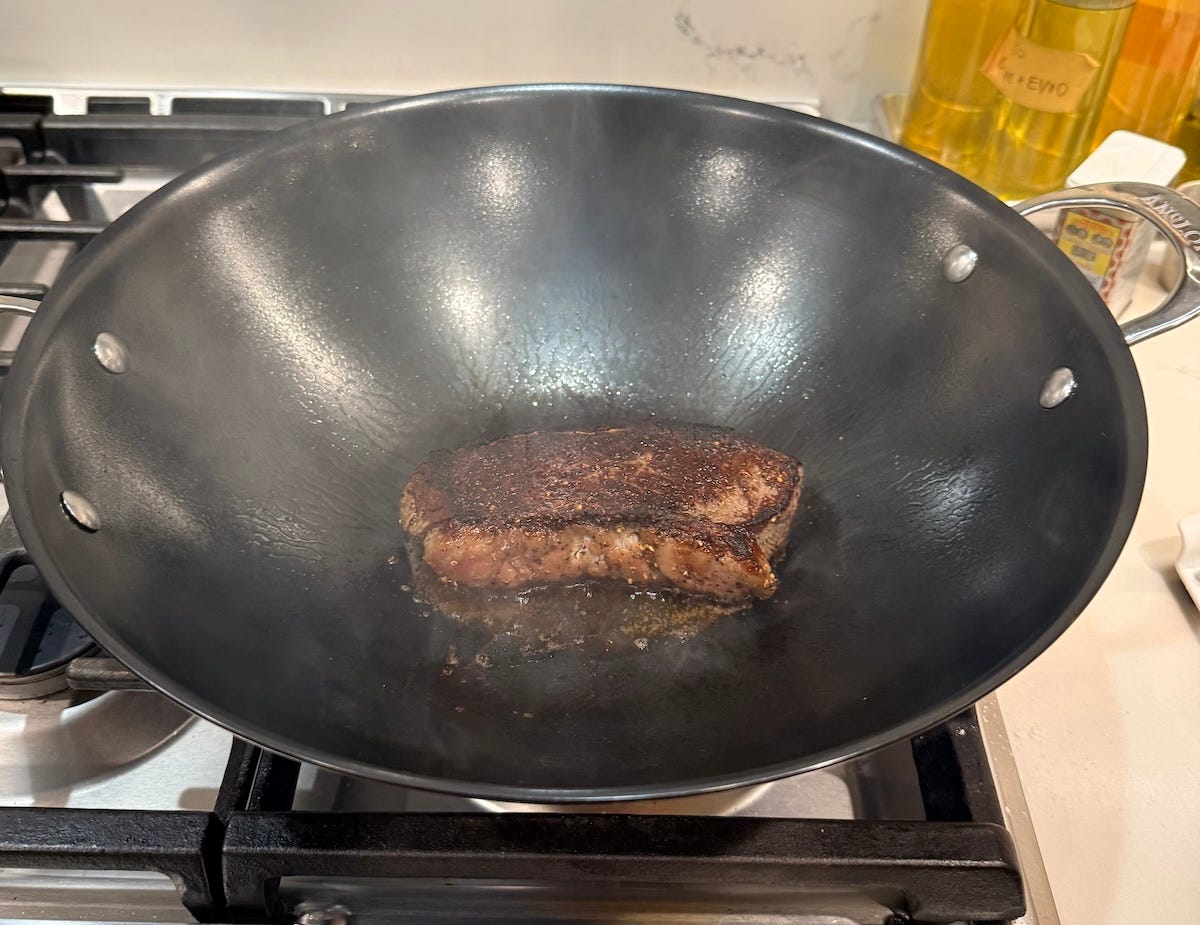
Why sear steaks or fish in the wok? Because (1) the hot heat creates a crisp well browned exterior, (2) you can easily baste the food with butter or another fat that will pool in the bottom and (3) most oil droplets fall back down into the wok so there’s less of a mess to clean up.

I simply salted and peppered this steak well and added a drizzle of soy sauce to promote browning. Then I left it to sit out for about 30 minutes while I cooked other parts of the meal.

When and how to re-season a wok? I think of re-seasoning as refreshing the wok, only you’re not starting from scratch. If a wok looks dry or if food is sticking too much during repeated uses, re-season the wok. When I neglect to wash the wok well and black bits flake off during cooking, it’s time to re-season.

Here’s my quick “oil smear” re-seasoning process: Wash the pan well with coarse salt and soap, then I dry it over medium heat, add a tiny bit of oil, use paper towel to smear it all over, let the pan keep heating up till it smokes, then turn the heat off and leave the wok to cool. This whole process takes literally only a couple of minutes.

If the pan is super gross, then I may boil water and a little vinegar in it to thoroughly remove the gunk. Then I’d do one of the three seasoning methods instead of the oil smear.

A good wok talks to you over its lifetime of service in your kitchen. Sometimes it may need some extra love to perform better for you!

This free article was sponsored by paid newsletter subscribers. Join us to seed new content, fully use the recipe index, get class discounts, and more. I value your support at all levels! Thanks for being here.

Wok cooking and cleaning tools

To wok well, you don’t just need something that matches the shape of the wok to scoop, push, flip, and help you quickly move food around. In the photo below, my metal wok spatula has a gentle edge so it does not scratch or ding the wok much when I’m swiftly cooking. The handle is long so you can stand back from the stove and still cook easily. A broad wood spatula works well too!

For cleaning a wok, I love a good bristle brush. A favorite dish scrub brush works too. The handled brush in the above photo is a bona fide wok cleaning brush purchased from a restaurant supply shop.

How I clean my woks

Let the wok briefly cool after you dish out the food. Then hit it with a spray of hot water, a drop of dish soap, lots of active scrubbing and a good rinse to remove all debris; finish with drying on the stove over a low flame or wiping with a dishtowel, depending on the surface.

When stuff is super stuck on the wok, let the dirty pan soak with some water in it while you’re eating. Clean up will be lots easier. Re-season with the “oil smear” method if needed.

If a wok was used for deep-frying, let the oil cool then strain to reuse; or, stir in oil solidifier while the oil is still hot, let it harden, then discard the oil.

Get wokking with 13 recipes

A wok gets better the more you use it. Yes, food will occasionally stick but you’ll befriend the wok and know how to heat it just enough and how to use its best qualities to make great food. Here is a special collection of favorite recipes on my website (🆓) and this newsletter. Jam packed PTFS recipe dispatches often have multiple recipes so there’s lots of versatility built in.

Viet World Kitchen website recipes

Pass the Fish Sauce newsletter recipes

If I overlooked anything, do not hesitate to let me know via a comment.

Sesame Tofu

13 June 2026 at 09:57
Sesame Tofu RecipeThis Sesame Tofu is deliciously savory and has all the trappings of another takeout favorite,  Sesame Chicken! The tofu is crusted in sesame seeds and pan-fried until crispy and golden, then tossed in a classic sweet sesame sauce!  Our Perfected Sauce The key to a great sesame sauce, whether for sesame tofu or sesame chicken, […]

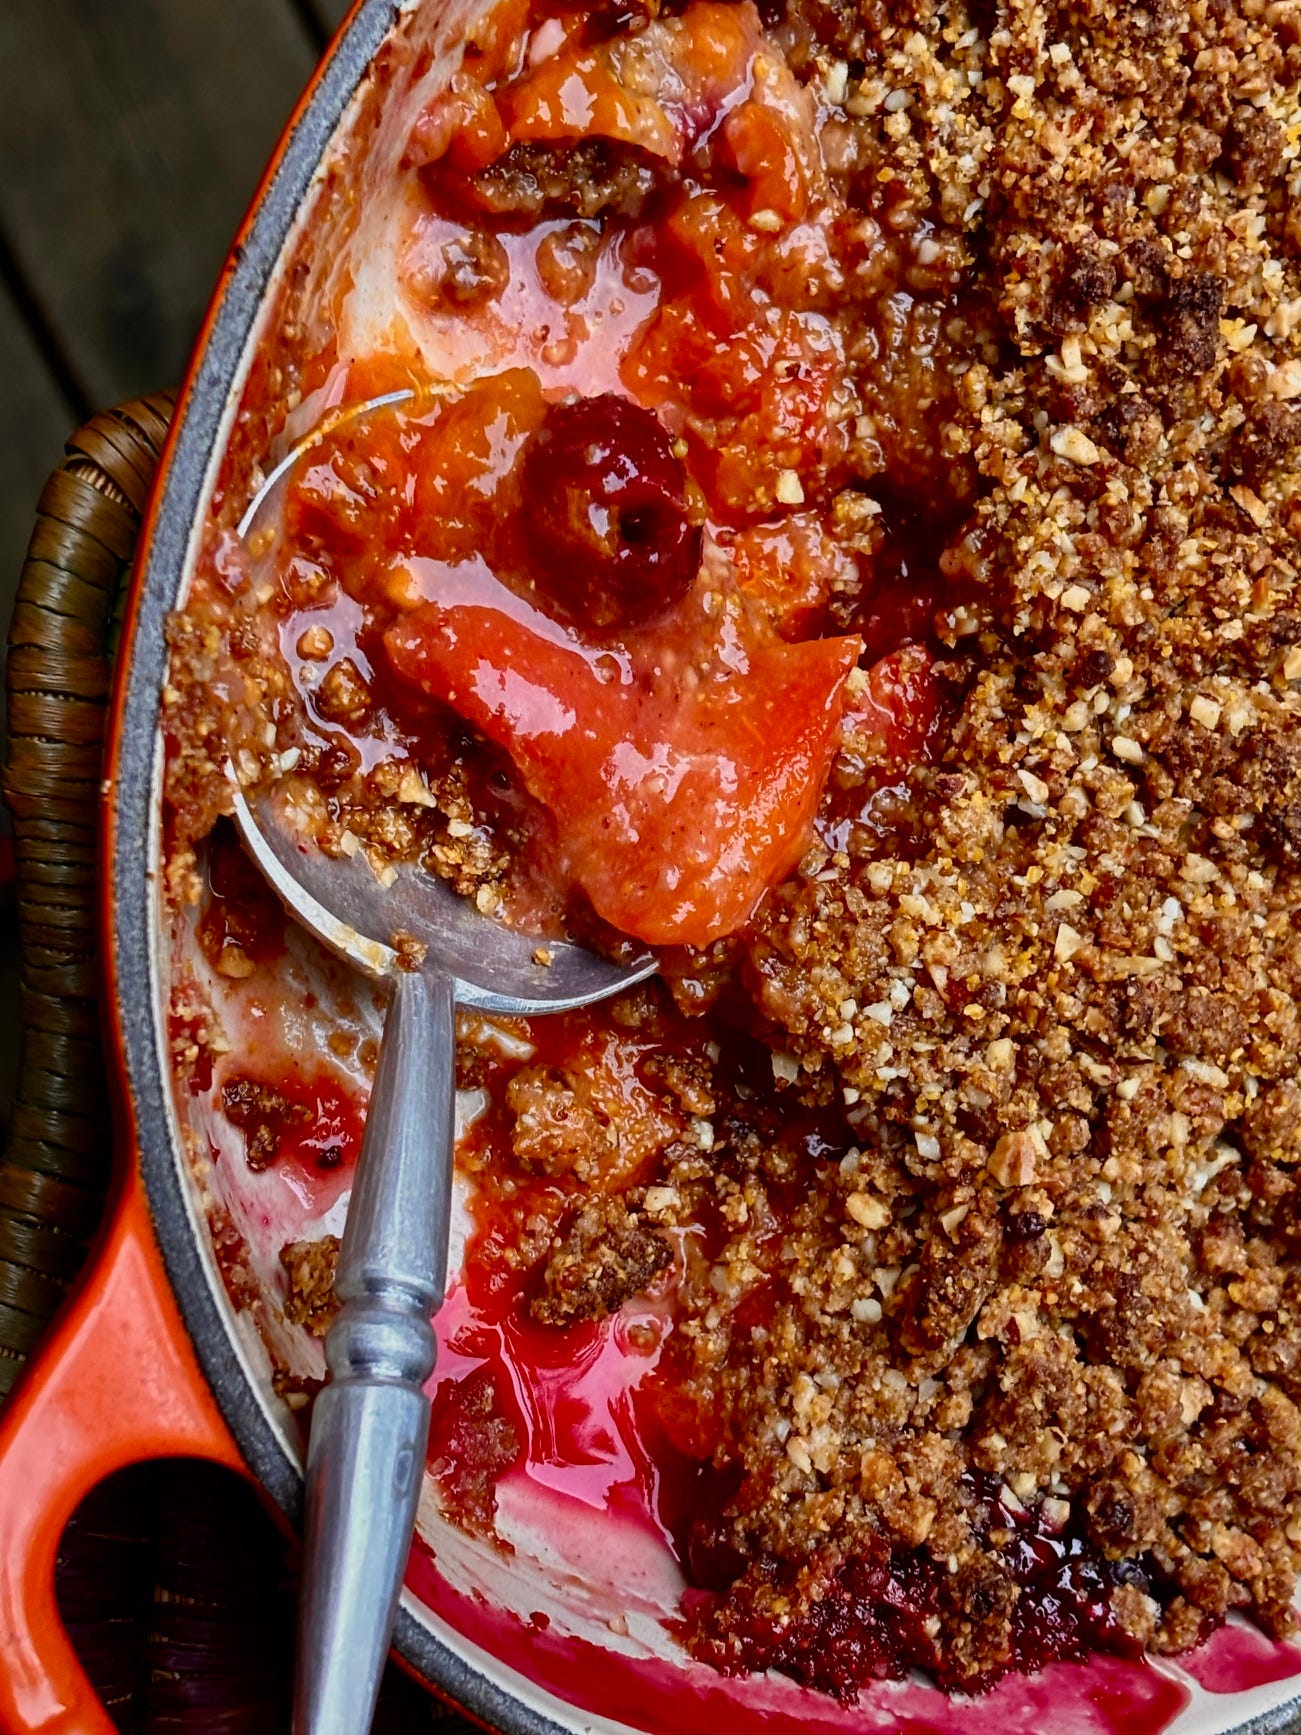
Apricot Cherry Crisp

13 June 2026 at 07:31

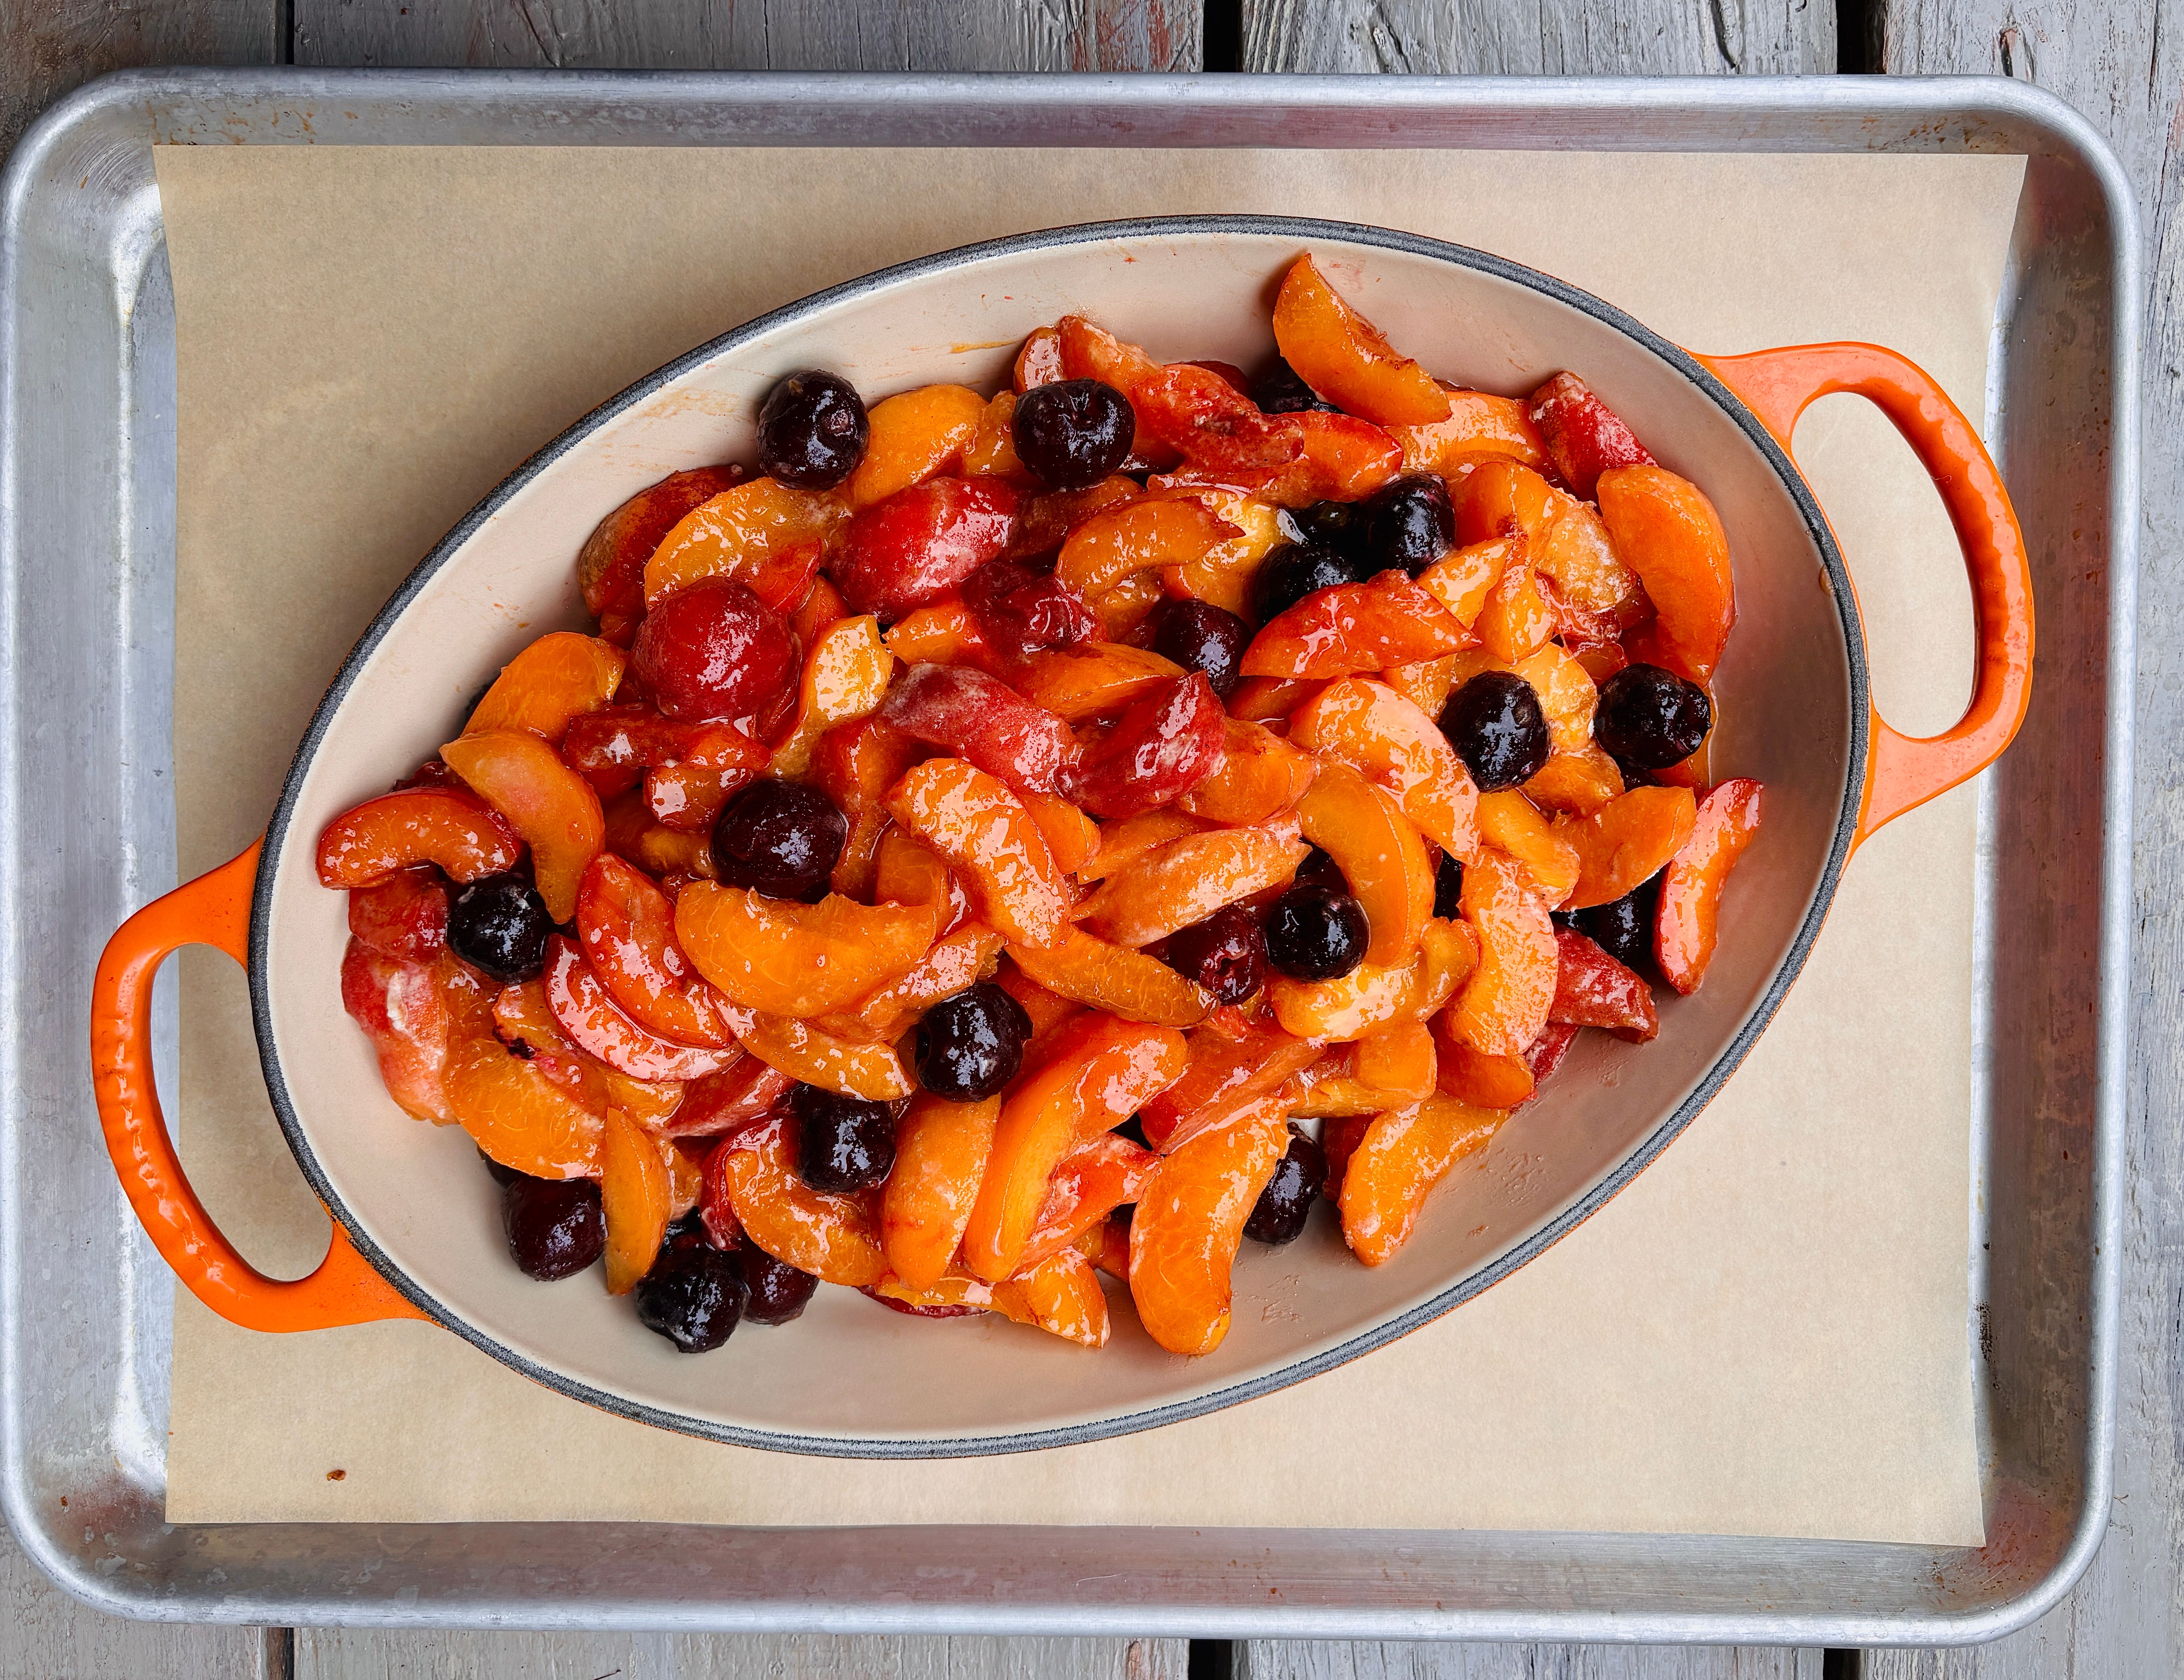
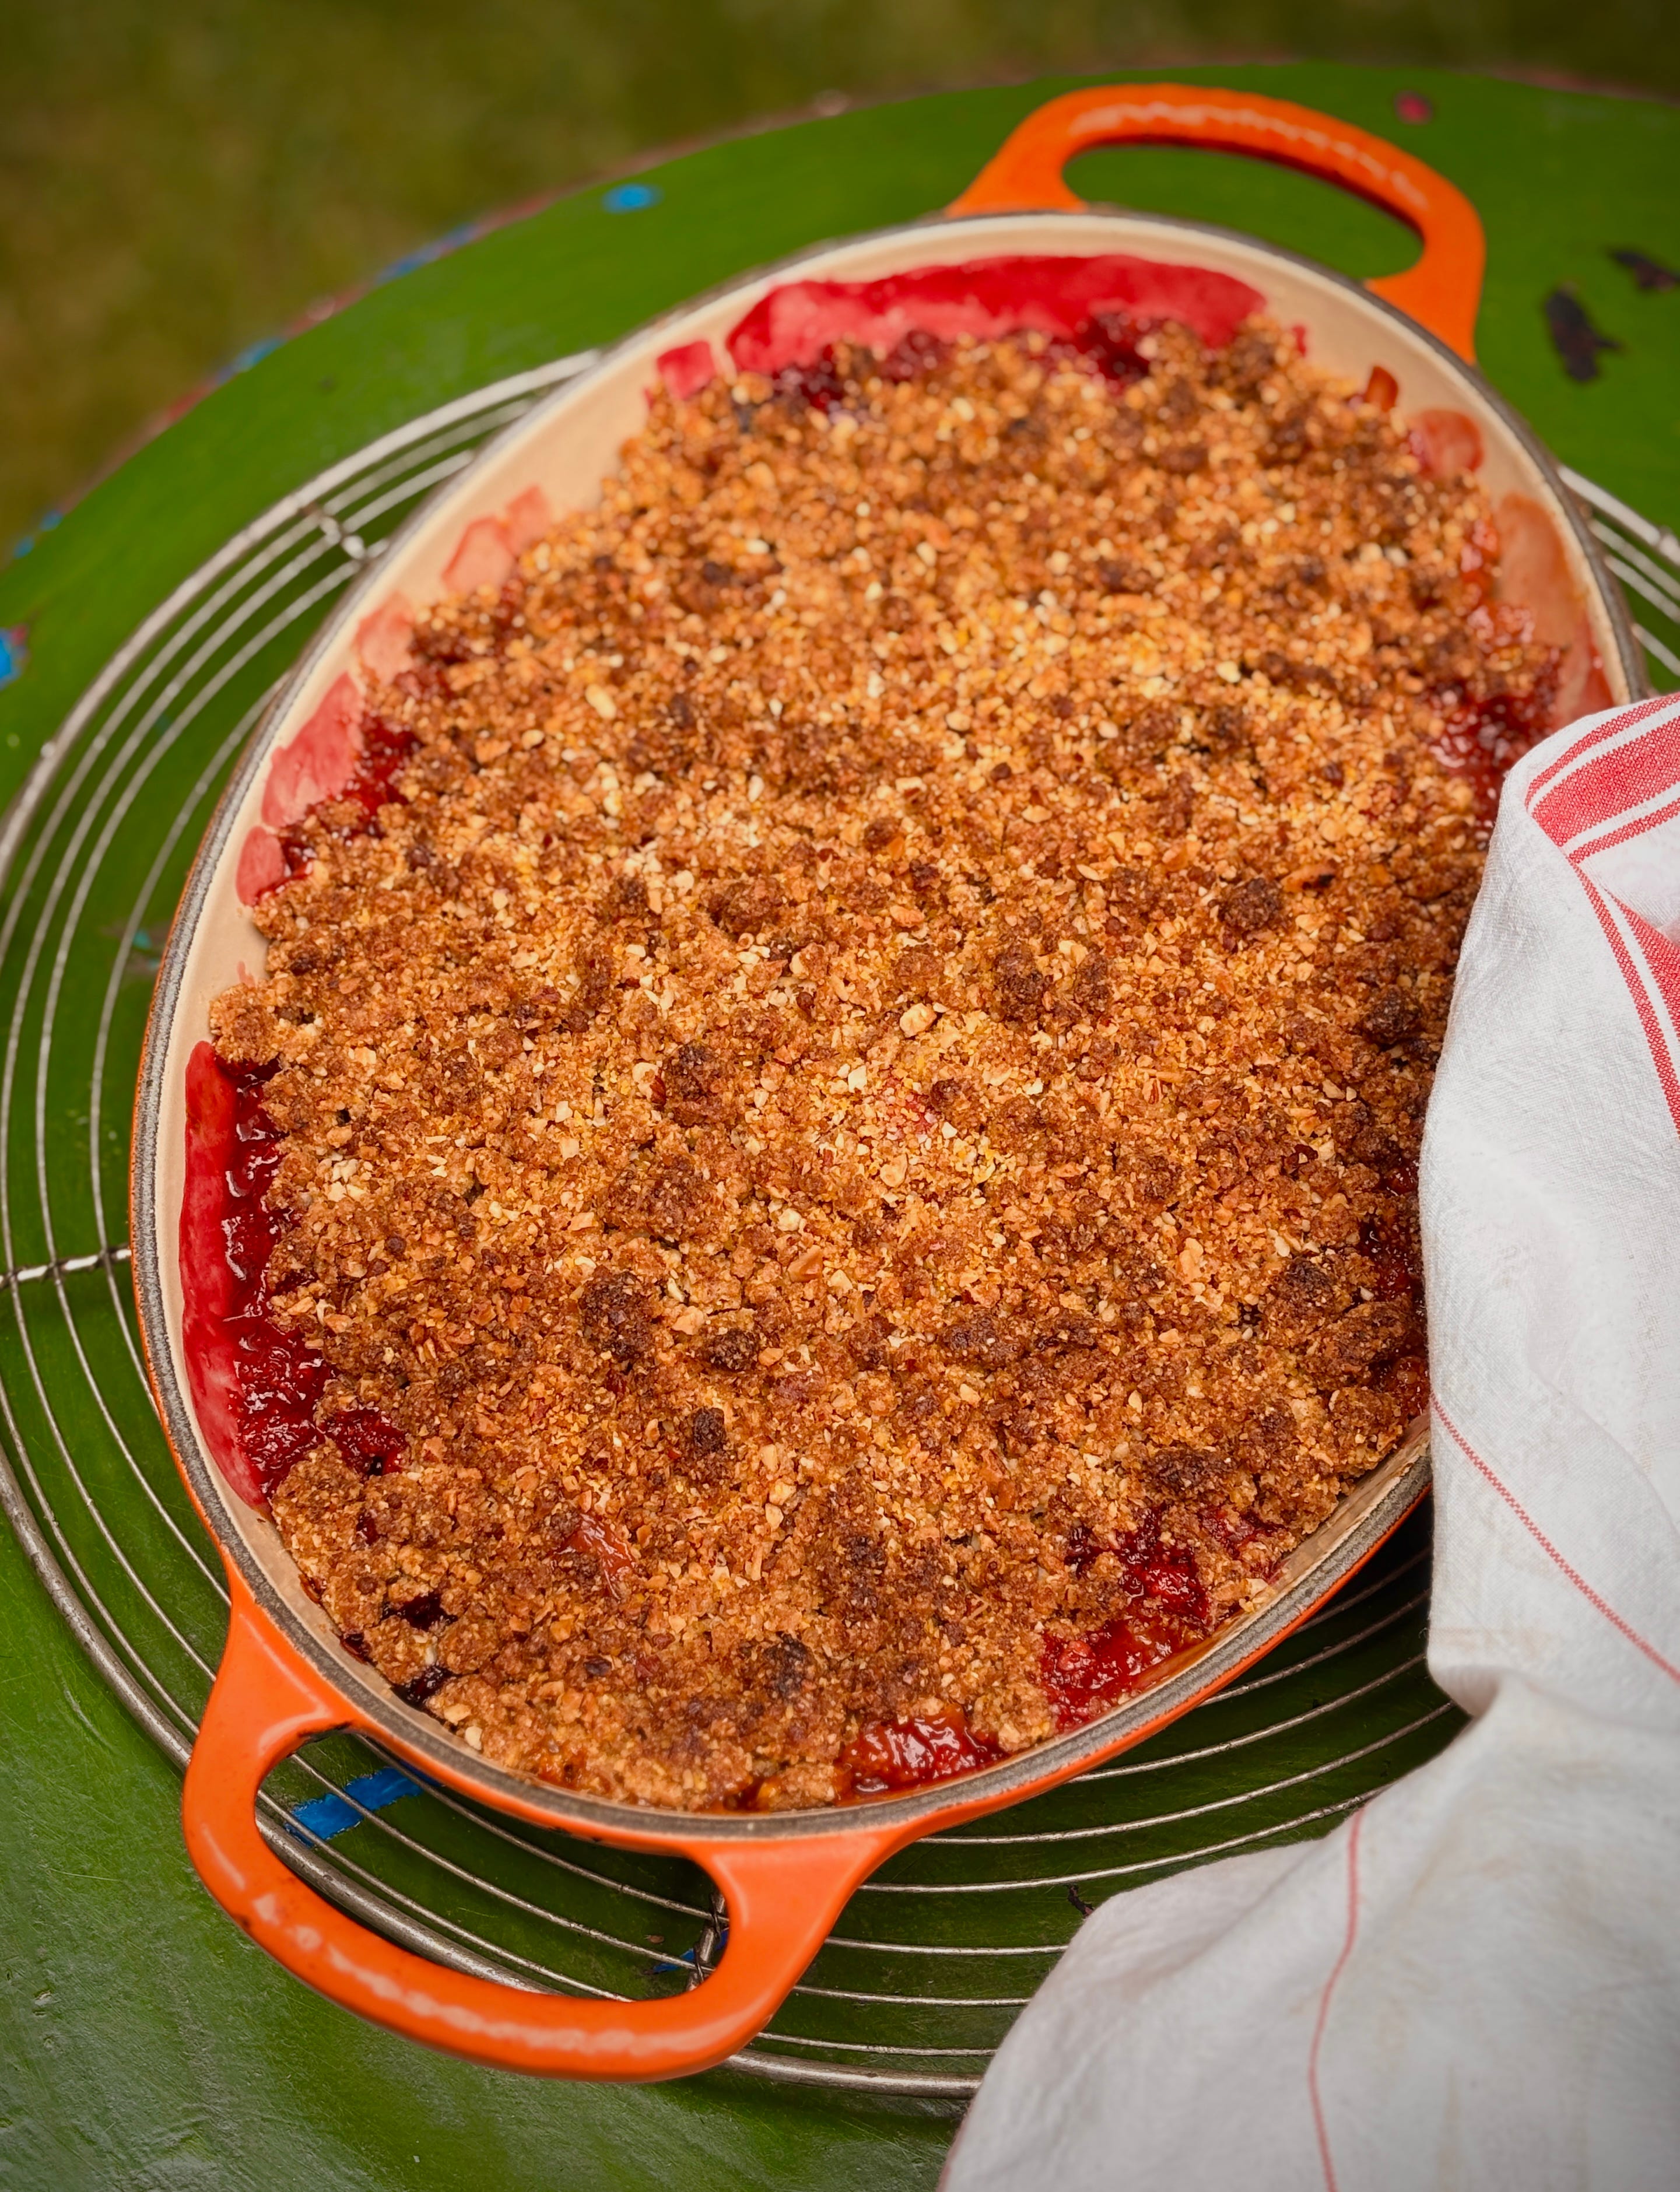
A few days ago I ran into our neighbor, who kindly invited us for dinner this weekend. She was the first neighbor we met in the building, over our shared back wall, and we hit it off, right off the bat. People in Paris can have complicated (or, um…thorny) relationships with neighbors, which I wrote about in my book L’Appart. But we scored with this one. We now trade keys, look after each other’s apartments when one of us goes away, accept packages for each other, and even call on each other if there’s an emergency.

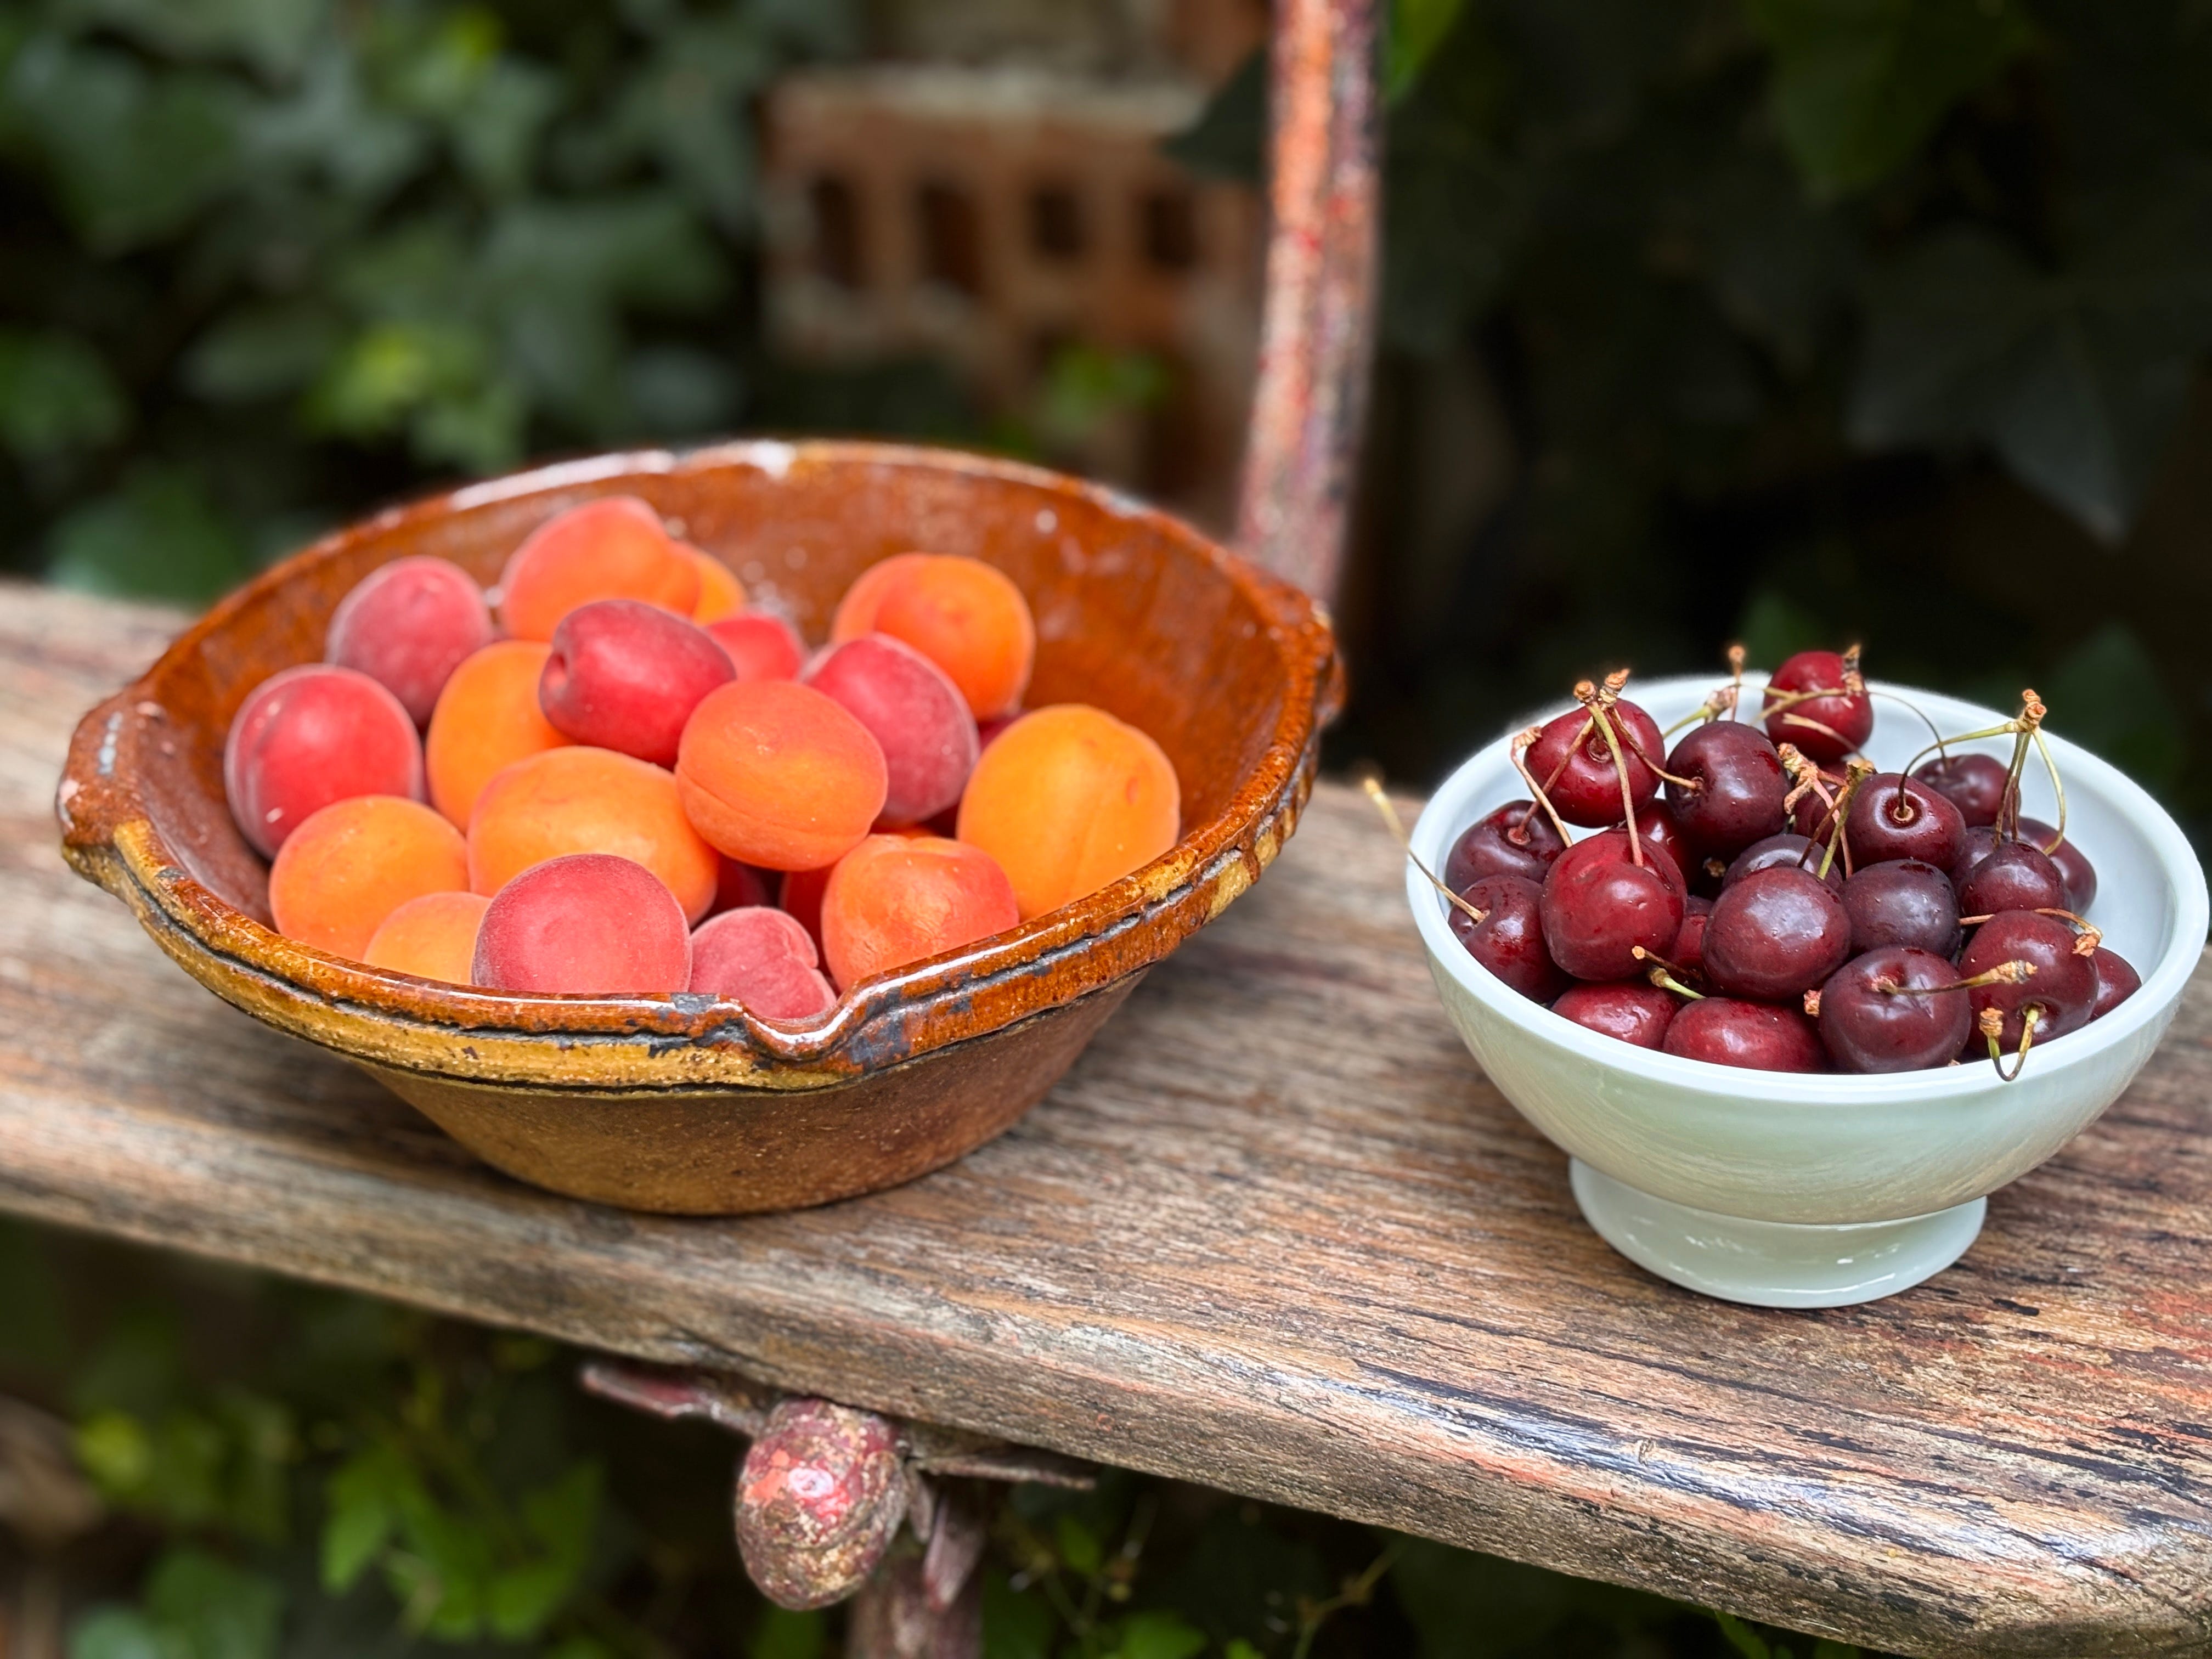
I offered to make dessert and decided to scoop up as many of the beautiful fresh apricots I could find, let them ripen a few days, and turn them into a fruit crisp, which are called crumbles in France. That’s a term picked up from our neighbors in England — un crisp doesn’t come off the tongue as readily as un crumble, but both sound a little funny to me with a French accent. But now that I’m on the 🇫🇷 team here, I call them crumbles, too.

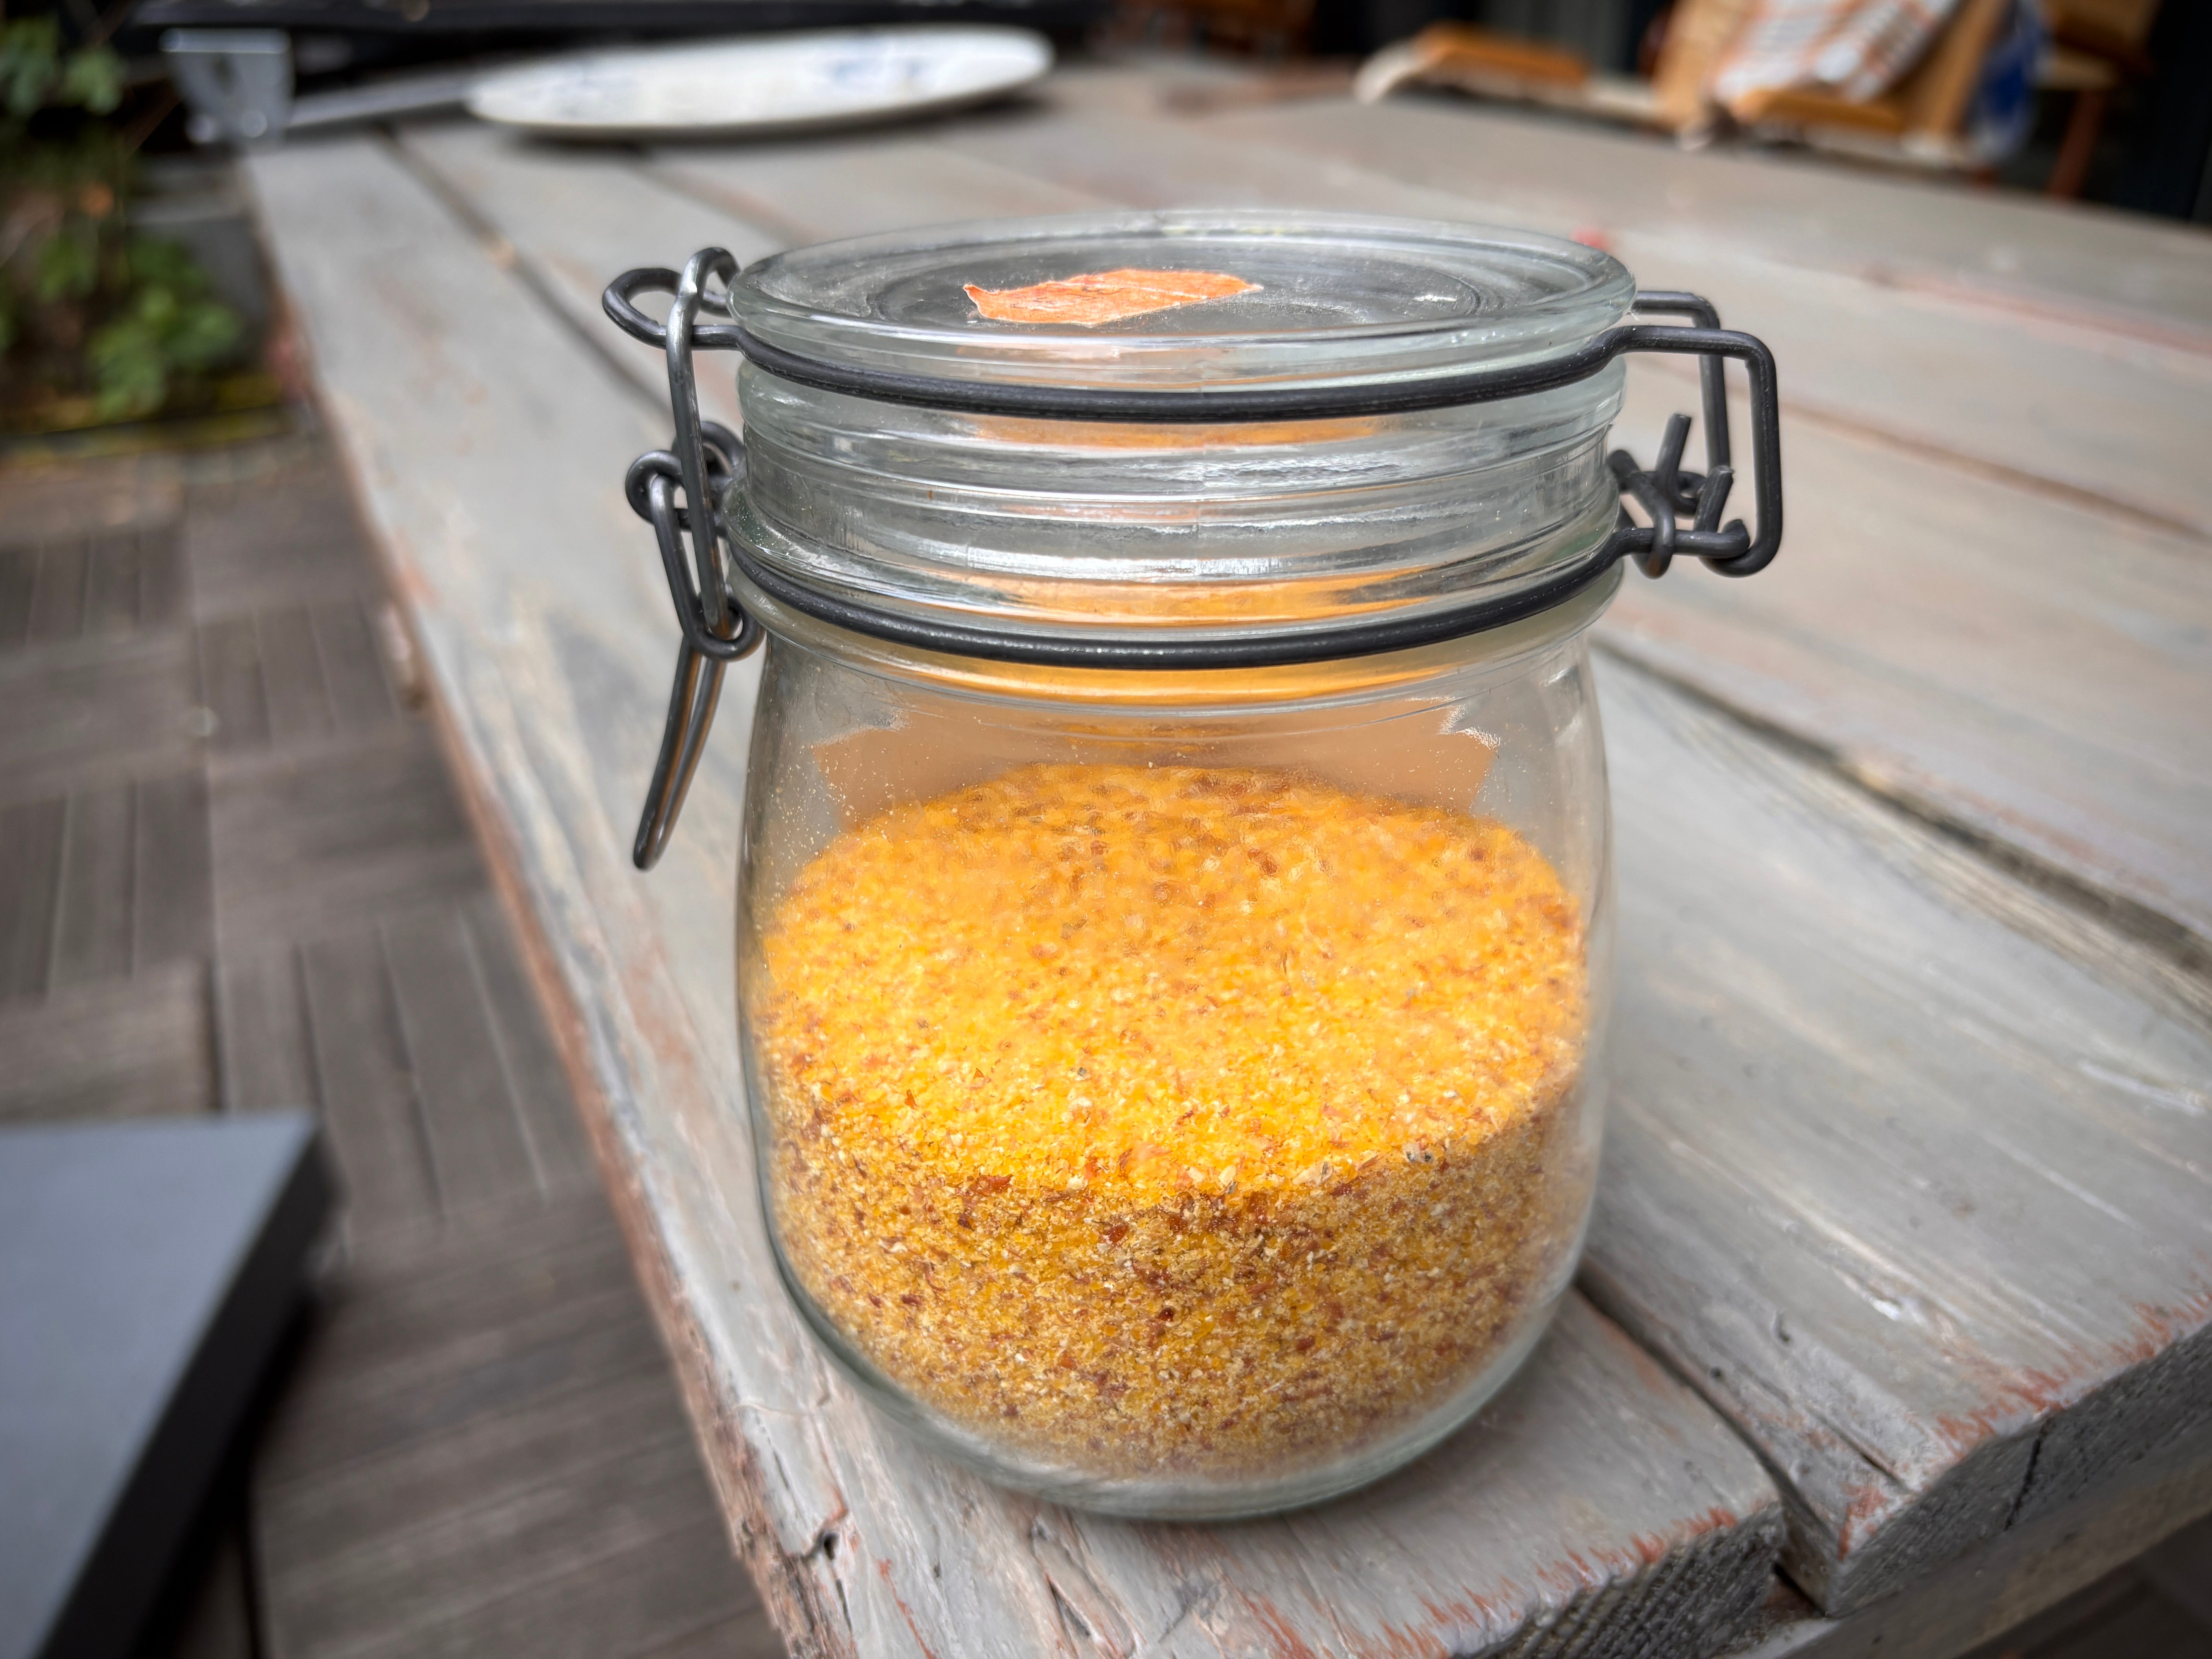
But for now, I’m going to write them as crisps, and this is my favorite, go-to crisp topping. What makes it extra-crisp is the addition of polenta. It’s from my book Ready for Dessert, which is subtitled my “best” recipes, and it really is the best crisp topping, if I do say so myself.

https://www.davidlebovitz.com/book/ready-for-dessert-revised/

Get Ready for Dessert

I use very coarse, stone-ground polenta since that has the most crunch, although regular polenta works well, and while I’m not as much of a fan of instant polenta as others are around here, that works too, as does cornmeal. As for the nuts, I generally go with almonds since they go well with stone fruits, but you can use walnuts or pecans if you prefer.

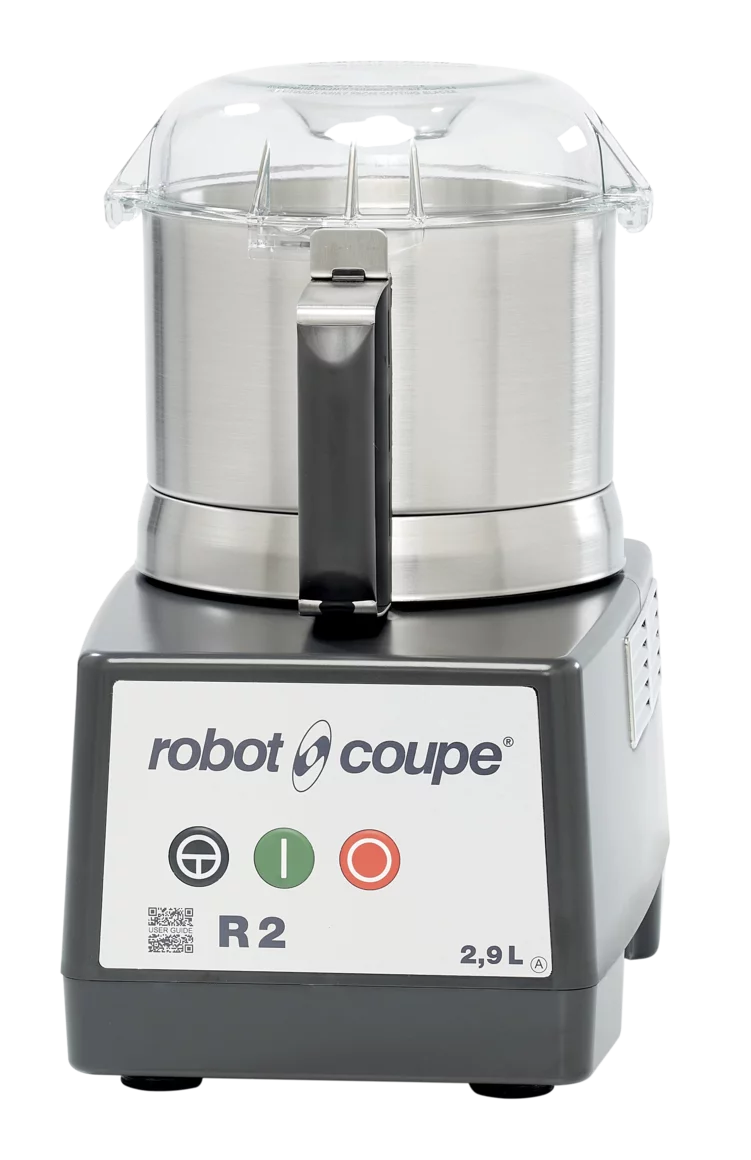
When I wrote my first book, back in 1999, I assumed people didn’t have food processors, although I think they may be more common these days? My KitchenAid food processor* has a broken bowl so the handle is filling with gunk, and they don’t sell replacements. I miss having a classic Cuisinart food processor, which I had in the States, and it was really a workhorse in the kitchen. (Even Wirecutter agrees with me.) But they’re not available in France.

I’m thinking of springing for a Robot-Coupe, although with a starting price of €1200 ($1390) 💸 I’m going to hang on to my food processor until the day dies, then consider my options.

Leave a comment

While I prefer to mix the topping in a food processor, you can also mix it in a stand mixer with the paddle attachment, or by hand if you chop the nuts first. When I make it, I pulse all the dry ingredients until the mixture is sandy, then add the butter and pulse it rapidly a few more times, just until I see small clumps sticking together. I like large, discernible bits of crisp topping in the finished crisp rather than a smooth, sandy texture.

Subscribe to my newsletter and get more recipes, posts, and Paris travel tips, sent right to your Inbox! Paid subscribers get full access to all posts as well as the recipe archives.

Ice cream, of course, is the preferred pairing with a warm fruit crisp. I just happen to have a lot of ice cream in my freezer at the moment, but the one I’m going to bring is the leftover apricot kernel oil ice cream that I made to impress a chef friend who came to make an upcoming video with me.

Ice Cream Recipes

That was one of those recipes I shared back in 2008, when a few companies were making apricot or plum kernel oil, which has become harder to find. Some of it is sold for cosmetic purposes and isn’t intended for food use. I used the last of my bottle, but Vanilla, Cinnamon, White Chocolate-Fresh Ginger, or Malted Milk ice cream are great accompaniments, or just serve the crisp warm with a pitcher of cold heavy cream on the side.

Leave a comment

Apricot Cherry Crisp

Eight servings


We’re fortunate to have a lot of fresh apricots available to us right now, but if you want to swap in slices of nectarines or peeled peaches, reduce the sugar in the filling to 2 tablespoons. In place of the cherries, feel free to swap in blackberries, blueberries, or raspberries, or just use more apricots.

In place of the kirsch and almond extract, you can use 1 teaspoon pure vanilla extract, total. You can make the topping up to one week in advance and refrigerate or freeze it.

Topping

3/4 cup (110g) flour

2/3 cup (100g) polenta

1/2 cup (65g) lightly toasted almonds, walnuts, or pecans

1/2 cup (90g) packed light brown sugar

1 teaspoon ground cinnamon

1/4 teaspoon salt

8 tablespoons (4 ounces, 115g) unsalted butter, cubed and chilled

Filling

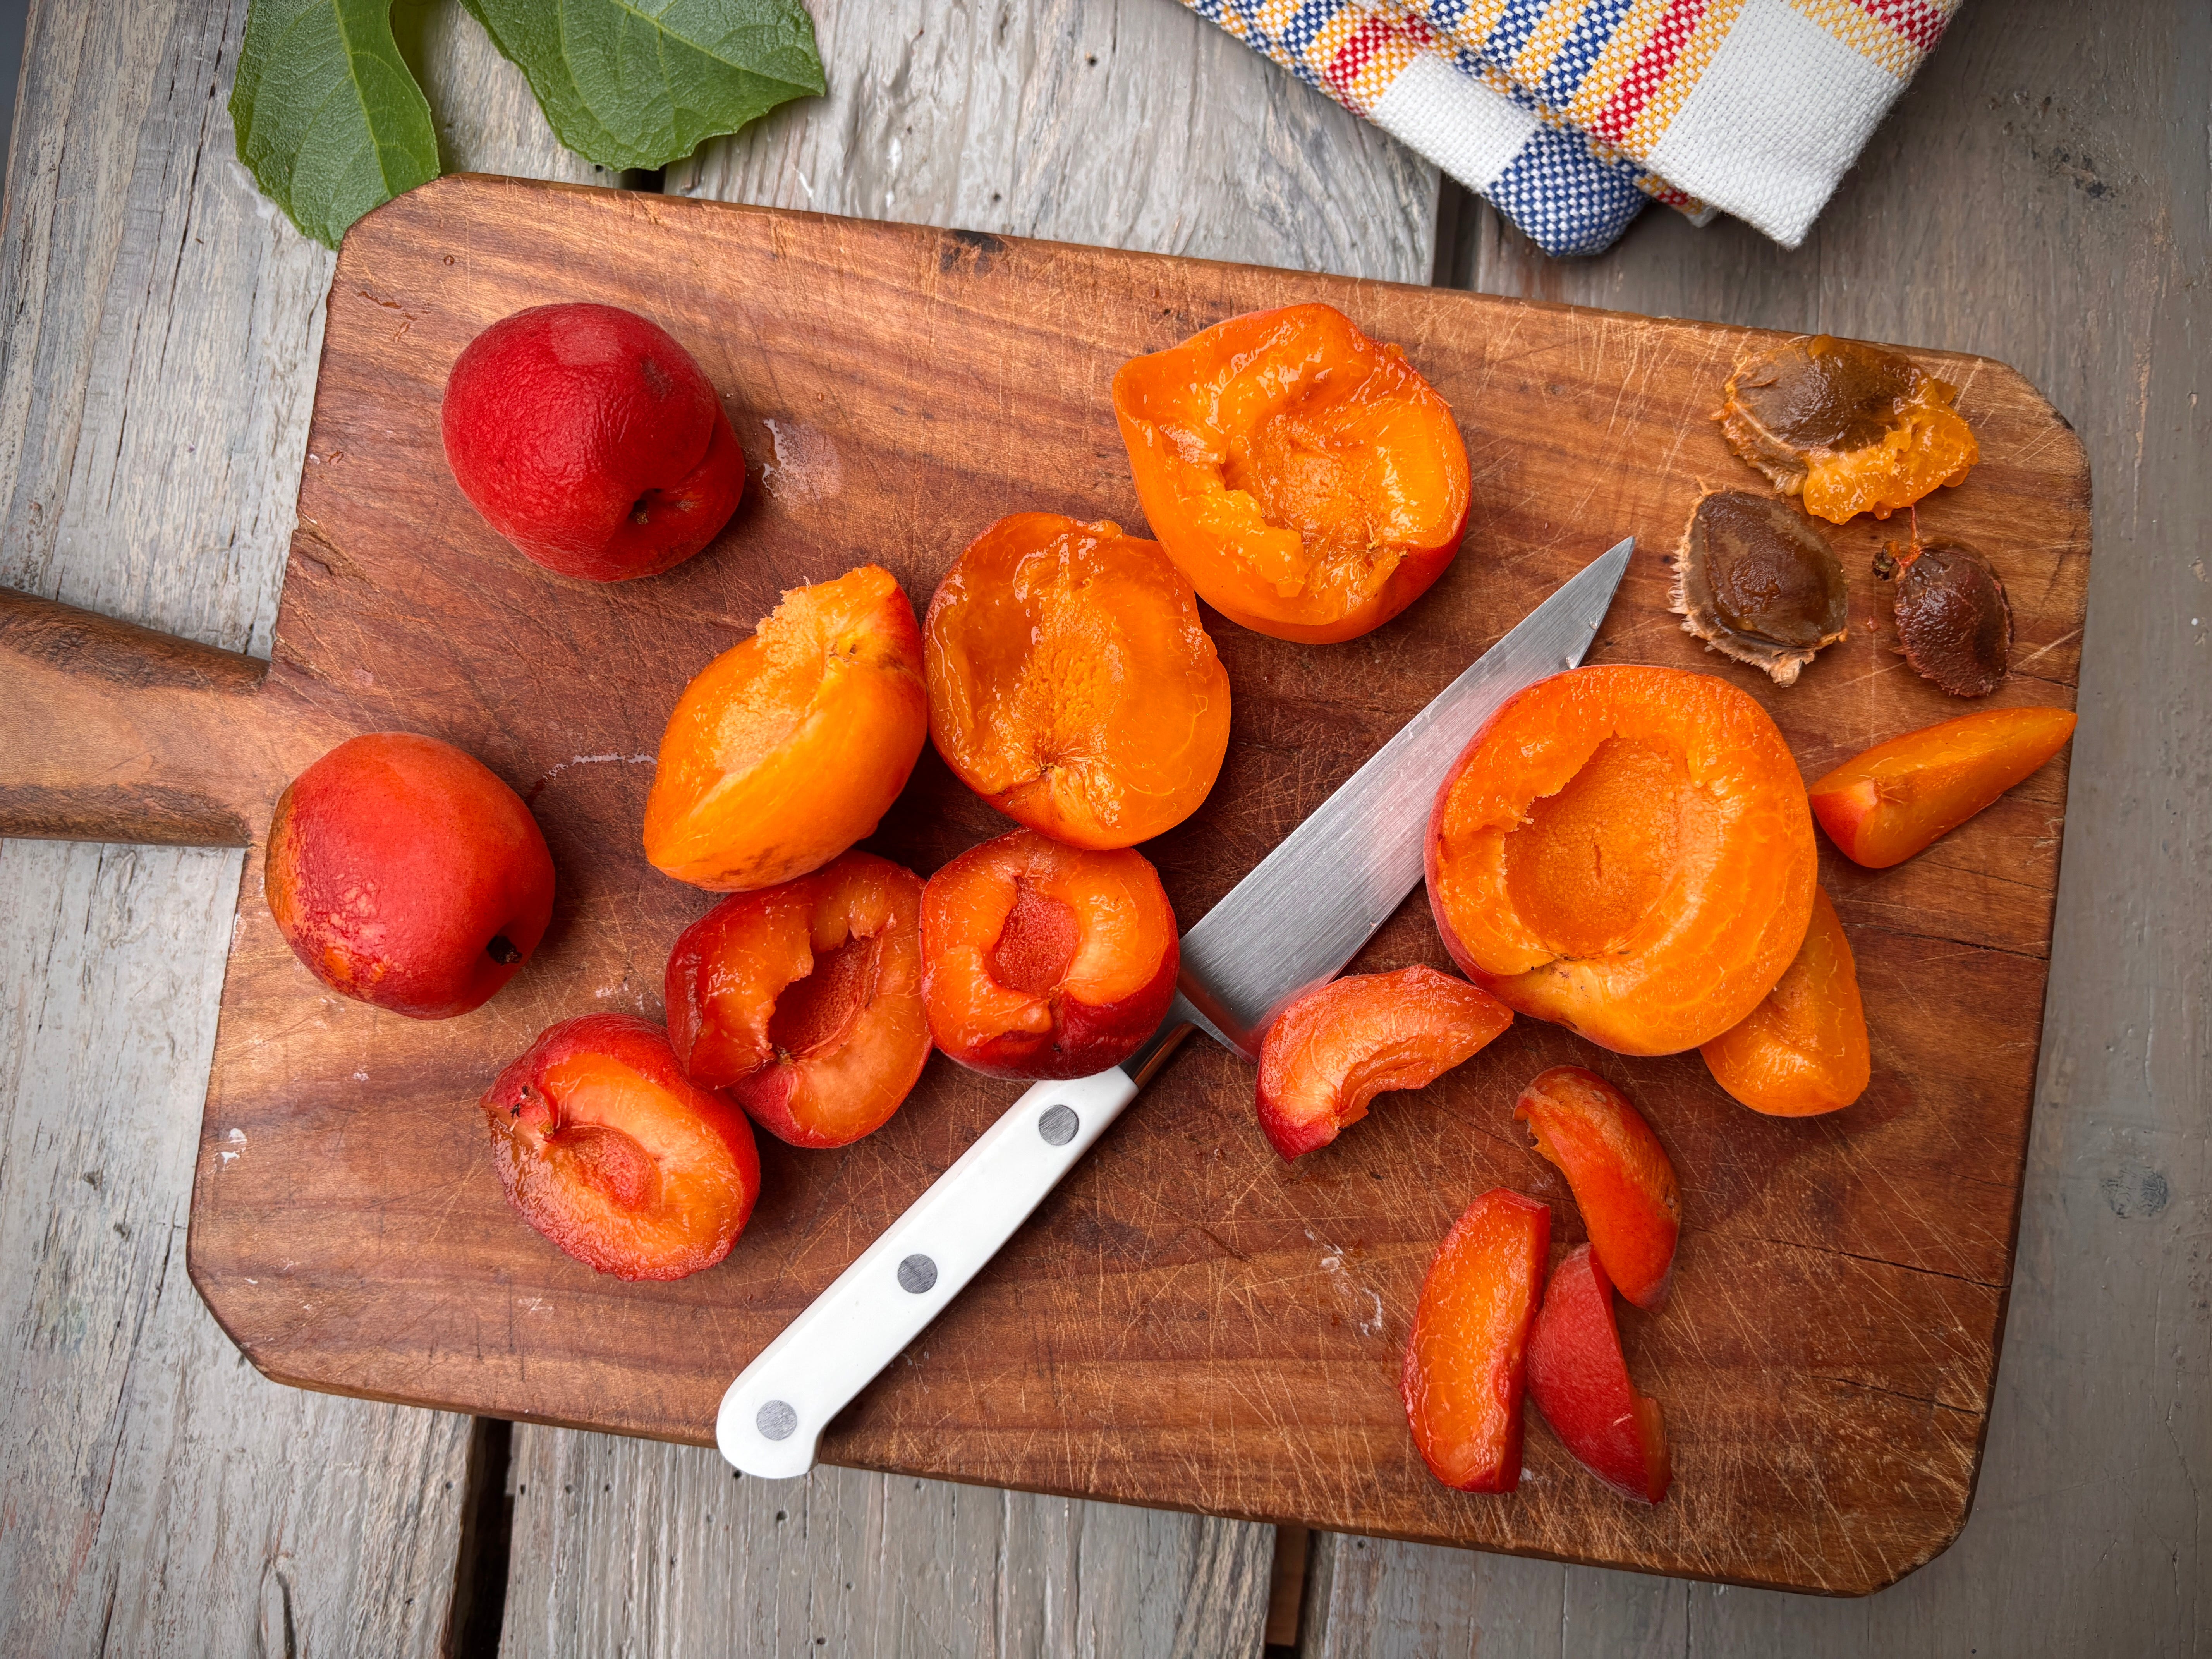
6 cups (3 pounds, 1.4kg) sliced, fresh apricots (cut into 1-inch/3cm) slices

1 cup (200g) pitted fresh cherries, sweet or sour

1/3 cup (65g) granulated sugar

1 1/2 tablespoons flour

2 teaspoons kirsch

1/8 teaspoon almond extract

Ice cream or heavy cream, for serving

Make the topping by pulsing together the flour, polenta, nuts, brown sugar, cinnamon, and salt, just until the nuts are slightly broken up. Add the cubes of cold butter and pulse until the butter is well integrated. Pulse a few more times until little bits of the mixture begin to clump together.

Preheat the oven to 375ºF (190ºC).

To make the filling, in a medium bowl, mix together the sliced apricots, cherries, sugar, flour, kirsch, and almond extract. Spread the fruit into a 2-quart (2L) baking dish, then strew the crisp topping evenly over the fruit. Resist the urge to press it down so it’s completely flat; I think it’s best when it’s a little unevenly baked, so you get lots of crunchy bits here and there.

Place the baking dish on a baking sheet lined with parchment paper or aluminum foil, shiny side down. Bake in the oven until the top is golden brown and there are thick juices bubbling up around the edges. When you poke a paring knife into the center, if it meets no resistance, it’s done. If the topping is getting too dark before the fruit is fully cooked, you can drape a sheet of aluminum foil over the top and finish cooking.

The exact baking time depends a bit on the ripeness of the fruit but will take around 40 minutes to bake. Serve warm or at room temperature, with a scoop of ice cream or heavy cream.

Apricot Cherry Crisp
67.7KB ∙ PDF file
Download
Download

*A number of people chimed in the comments, a few saying Cuisinart makes replacement bowls, but my current food processor is (or was) made by KitchenAid, and I’ve not been able to find a replacement bowl after a considerable amount of searching. (I’ve had mixed results ordering replacement parts online. A few times the item didn’t fit the machine I had, even through the item description said it did.

The model number of my KitchenAid food processor is #5KFPM771EWH0 - if anyone finds one, let me know : )

Thanks for reading my newsletter! Feel free to share it.

Share

Best Ever Zucchini

11 June 2026 at 22:34
sauteed zucchini recipe

Meet the ultimate zucchini side dish. It features caramelized zucchini and red onion with toasted sliced almonds, seasoned with fresh garlic and a squeeze of lemon juice. The flavors are bold, the dish is vibrant, and I’m going to make this sautéed zucchini all summer long.

I don’t always like cooked zucchini, but I love this recipe. Zucchini can be squeaky or mushy, and I often avoid it on restaurant menus for those reasons. Not this recipe! The zucchini is perfectly browned and tender throughout.

The flavors in this recipe remind me of green beans amandine, if you’re familiar—another one of my favorite veggie side dishes. Our friend Erika introduced us to this concept last summer in St. Louis. It paired beautifully with pasta and grilled options on their back porch. I asked her for the recipe afterward, and I’m excited to share it with you today.

Continue to the recipe...

The post Best Ever Zucchini appeared first on Cookie and Kate.

❌