Normal view

Seville Orange Marmalade

By: David
11 March 2026 at 09:02

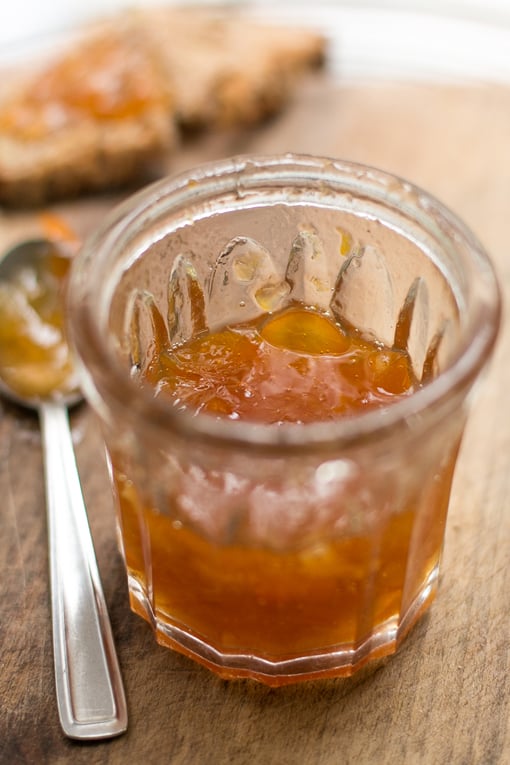
This time of year brings Seville oranges to the markets in Paris. For the past few years, I kept wondering why they were so hard to find since it’s perhaps my favorite of all jams and jellies to make, and eat. But lately, they’ve been everywhere.  And I found myself busy making a lot of marmalade, which was easier since I came up with a brand-new, revolutionary technique which I couldn’t wait to share.

Since Seville oranges are rife with seeds, which makes slicing them difficult since you have to keep moving the seeds around with your slippery fingers, while trying to cut the oranges, then finding more, and fishing around deeper inside to extract more, plucking them out, etc… Each Seville orange has perhaps twenty to thirty inside.

So I thought, what if I was to squeeze the juice and seeds out first, strain them, then pour the juice back in? The seeds are precious commodities in jam-making, and get saved and used since they’re so high in pectin.

They’re wrapped in a sack and cooked with the marmalade giving the marmalade gets a suave, jellied texture. And this simple method, featured in my book Ready for Dessert, makes the whole process much easier.

You might be interested to know that Seville Orange Marmalade was created because of an error. Apparently, an Englishwoman in 1700, the wife of a grocer, was stuck with some sour oranges that were bought cheaply from a boat that was carrying them from Seville.

Since there was a storm, they wanted to get rid of their stock or oranges quickly, so the grocer bought them. But they were inedibly sour so his wife decided to try making jam from them, and viola!…Seville Orange Marmalade was invented.

Print

Seville Orange Marmalade

Adapted from Ready for Dessert (Ten Speed)
In my book, I advise letting the cooked oranges and the seeds rest overnight. That's an optional step. If you want to go ahead and finish the marmalade the same day you start it, you can.
Course Breakfast
Keyword confiture, jam, marmalade, orange

Ingredients

  • 6 Seville oranges (see Note)
  • 1 navel orange
  • 10 cups (2.5L) water
  • pinch of salt
  • 8 cups (1.6 kg) sugar
  • 1 tablespoon Scotch (optional)

Instructions

  • Wash oranges and wipe them dry. Cut each Seville orange in half, crosswise around the equator. Set a non-reactive mesh strainer over a bowl and squeeze the orange halves to remove the seeds, assisting with your fingers to remove any stubborn ones tucked deep within.
  • Tie the seeds up in cheesecloth or muslin very securely.
  • Cut each rind into 3 pieces and use a sharp chef’s knife to cut the rinds into slices or cubes as thin as possible. Each piece shouldn’t be too large (no more than a centimeter, or 1/3-inch in length.) Cut the navel orange into similar-sized pieces.
  • In a large (10-12 quart/liter) stockpot, add the orange slices, seed pouch, water, and salt, as well as the juice from the Seville oranges from step #1. Bring to a boil, then reduce to a simmer, and cook until the peels are translucent, about 20 to 30 minutes. (At this point, sometimes I’ll remove it from the heat after cooking them and let the mixture stand overnight, to help the seeds release any additional pectin. But it's not imperative.)
  • Stir the sugar into the mixture and bring the mixture to a full boil again, then reduce heat to a gentle boil. Stir occasionally while cooking to make sure it does not burn on the bottom. Midway during cooking, remove the seed pouch and discard.
  • Continue cooking until it has reached the jelling point, about 218ºF degrees (103ºC), if using a candy thermometer. I cook this slightly less than other jams and marmalades because the high amount of pectin helps the marmalade set up more stiffly. To test the marmalade, turn off the heat and put a small amount on a plate that has been chilled in the freezer and briefly return it to the freezer. Check it in a few minutes; it should be slightly jelled and will wrinkle just a bit when you slide your finger through it. If not, continue to cook until it is.
  • Remove from heat, then stir in the Scotch (if using), and ladle the mixture into clean jars. Sometimes I bury a piece of vanilla bean in each jar. (Which is a great way to recycle previously-used or dried-out vanilla beans.)

Notes

I don’t process my jams, since I store them in the refrigerator. But if you wish to preserve them by canning, you can read more about the process here.
Note: Sour or Seville oranges are called in French oranges amères and are available mid-winter in many other countries around the world as well.

Orange-Glazed Polenta Cake

By: David
9 January 2026 at 16:28

Orange-glazed polenta cake

Apparently I’m not the only one who loves polenta cake. The Italians like it so much that it’s called Amor Polenta. Which means “Polenta Love.”

Well, at least that’s what I thought it meant, because amour in French means “love.” And I assumed that it was the same in Italian. (Another reason for finally getting on that life-long ambition to live in Italy and learn Italian.) But for now, checking in an Italian dictionary, I found out that “amor” means “sake.” (As in, for the purpose of.) So I’m not sure how it got its name, but this cake makes a pretty good argument for the sake of whisking polenta into a cake.

Orange-glazed polenta cake

I’m one of those people who is completely crazy for anything with cornmeal, from corn bread to even a kind of kooky polenta ice cream that I’m sure no one else has ever made, because I used a completely obscure polenta that very, very few people can get their hands on. But I felt compelled to make it, for the sake of using up a little bag of that polenta that I had.

Orange-glazed polenta cake

Fortunately, polenta is available just about anywhere. I like to buy stone-ground polenta, which has a crunchier flavor. But you could use instant polenta for this cake, normally something I avoid. But I found myself with a bag of it and was looking for ways to use it up. And here’s where the rest of it landed.

Like many Italian cakes, which are unlike American cakes, this is not a buttery bomb of richness. True, there is butter and a few eggs in there. But the great flavor comes from ground almonds, which tend to make the cake much moister the following day as the nut oils soak the crumb, which is one of those baking terms (unlike amor) that pretty much seems to be what it is talking about. The polenta adds a bit of a savory quality to desserts, which draws me to use it a lot when baking.

Orange-glazed polenta cake

This cake is a great snacking cake and I tend to walk around my apartment several times during the day, somehow landing frequently near the cake, where a serrated knife just happens to be stationed alongside. Ready and waiting to lop a slice off.

Orange-glazed polenta cake

In addition to a collection of polentas, I found myself with a collection of eaux-de-vie on hand. Some were gifts, others were picked up on my travels. A few are anise-based, which pair nicely with polenta, and chocolate. I have a ginger one that is great when summer fruits are in season, like peaches, nectarines, and apricots. And the long bottle in the front right, the eau-de-vie of lees that I got in Switzerland, after I found out how good raisins in lie (eau-de-vie made from leftover grape yeast, and other stuff that falls to the bottom of wine vats post fermentation) was, after gorging on cauldrons of fondue.

As astute readers can see from the fill line of the bottle, that project never came to fruition. (I’m too busy trying organize my polentas and eaux-de-vie. And plotting a way to live in both Italy, and France.) But I did add a few shots of orange liqueur (not shown), which gave it a little boost of flavor. Not enough to be perceptible. But like that bag of instant polenta I’ve had for a few months, I was always conscious that it was there. You can use any kind of liqueur that you want – maraschino, limoncello, absinthe, kirsch, or even anise liqueur.

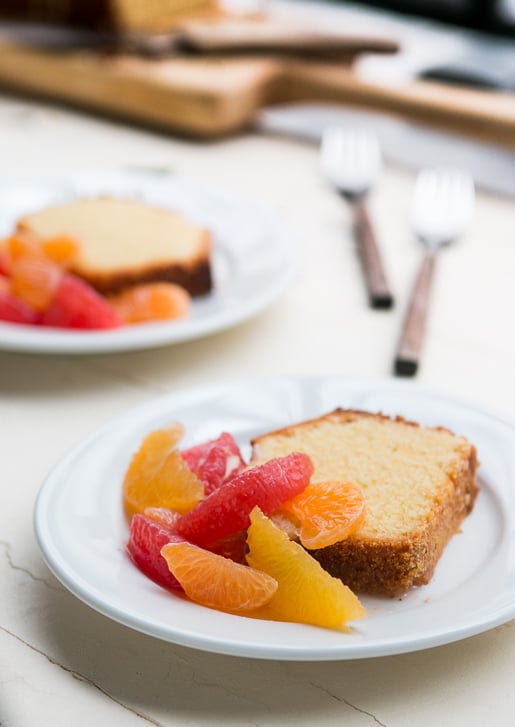
As much as I like this as a snacking cake, it can be dressed up with a fruit compote. I sectioned some tangerines, navel oranges, and pink grapefruits, drizzled a little honey over them, and served them alongside the cake. I had planned to spoon some warm sabayon over the cake and fruit, but decided that I had too many other things to do. Namely, get cracking on using some of those bottles of liqueur that I’ve been hoarding.

Polenta cake recipe

Print

Orange-Glazed Polenta Cake

For this cake, using fine-ground polenta or instant polenta will result in the smoothest texture, although whatever is available will work. I’ve made it with coarse polenta too, and enjoy the crunch. Almond flour is available at specialty stores, Trader Joe’s, and online. If you can’t find it, grind 7 1/2 ounces (215 grams) sliced blanched almonds in a food processor with the flour until the almonds are pulverized. Although cakes like this don’t always need adornment, I did glaze it with a dribbly orange glaze that firms up and gives the top a citrus-scented fruity crunch. For those wanting to skip the liqueur in the cake, you can leave it out and increase the almond extract to 1 1/4 teaspoon. For the glaze, you replace the liqueur with orange juice.

Ingredients

For the cake

  • 8 ounces (225g) unsalted butter cubed, at room temperature
  • scant 1 cup (180g) sugar
  • zest of 1 lemon
  • 3 large eggs at room temperature
  • 2 tablespoons liqueur or eau-de-vie such as orange liqueur (Grand Marnier or Cointreau), kirsch or grappa
  • 3/4 teaspoon pure almond extract
  • 3/4 cup (125g) finely ground polenta plus additional for preparing the pan
  • 2 cups (215g) almond flour
  • 6 tablespoons (55g) all-purpose flour
  • 1 1/2 teaspoons baking powder preferably aluminium-free
  • 1/2 teaspoon salt

For the glaze

  • 1 1/4 cups (170g) powdered sugar
  • 1 tablespoon orange juice
  • 4 teaspoons orange liqueur (such as Grand Marnier or Cointreau)

Instructions

  • Butter a 9-inch (23cm) loaf pan. Dust the inside with polenta, and tap out any excess. (Note: The pan I used has a nonstick finish. If you want to make sure the cake comes out nicely you may want to cut a rectangle of parchment paper and fit it into the bottom of the pan after you prepare it, especially if using an unfinished loaf pan.) Preheat the oven to 350ºF (180ºC).
  • In the bowl of a stand mixer fitted with the paddle attachment, beat the butter, sugar and lemon zest at medium-high speed, until it’s light and fluffy, about 3 minutes. (You can also make this in a large bowl, beating the butter and sugar by hand.)
  • Add the eggs one at a time, stopping the mixer after each addition to scrape down the sides of the bowl. Mix in the liqueur and almond extract.
  • In a medium bowl, whisk together the polenta, ground almonds, flour, baking powder, and salt, until there are no lumps. Gradually mix the dry ingredients into the creamed butter mixture, just until well-combined. Do not overmix.
  • Scrape the batter into the pan, smooth the top, and bake the cake until it is golden brown on top and a toothpick inserted into the center comes out almost clean, perhaps with just a few crumbs attached, 45 to 50 minutes. Let cool on a rack for about 30 minutes, then run a knife along the outside of the cake to loosen it from the pan and tip the cake onto the rack. Let the cake cool completely before icing.
  • To glaze the cake, mix the powdered sugar with the orange juice and orange liqueur until the glaze is thick, but still runny – not too watery, but as thick as a milkshake. If necessary, add a bit more sugar if it’s too thin, or add a bit more liquid if it’s too thick. You can try smoothing a bit over the cake to see if it’s the right consistency for drizzling and dripping down the sides before glazing the entire cake.
  • Spoon the glaze over the cake, encouraging the glaze to run down the sides by nudging it towards the edges with the back of the spoon or a metal spatula.

Notes

Serving: When the glaze has firmed up, serve slices of the cake with a favorite fruit compote, such as fresh citrus segments, caramelized pineapple, poached pears, or sliced and sugared peach slices (peeled) or nectarines.
Storage: The cake will keep for up to five days, if well wrapped, at room temperature. The cake will be noticeably moister the day after baking due to the oil in the nuts. It can be frozen for up to two months.

Related Recipes and Posts

Baking Ingredients and Substitutions

Cornbread with Harissa Butter

Polenta Crisp Topping

Simple Polenta

Cornmeal Cookies

Cornmeal Biscotti

Tarte au citron: Lemon Tart Recipe

By: David
9 January 2026 at 16:27

Not everyone thinks of citrus fruits as “winter fruits.” But that’s when oranges, grapefruits, tangerines, tangy lemons, and enticing limes are often at their peak. And that’s a good thing because there’s nothing that brightens up any season – but especially winter – better than a classic French lemon tart.

French lemon tart recipe

Any bakery in Paris will have a Tarte au citron on offer. Some are on the sweet side, others tart. I like my lemon tart, well…tart, for sure and when I search for lemons at my market, I choose the plumpest, juiciest ones I can find. Fortunately, good lemons are available just about anywhere, so anyone can make this tart. Most of us don’t even have to wait until winter!

https://www.davidlebovitz.com/2009/05/tart-au-citron-french-lemon-tart/

I juiced my lemons, cracked some eggs, and got to work on the tart.

For the base, I used Paule’s pastry dough, which is so easy to make and hasn’t failed me yet. It’s delicious and buttery, and goes particularly well with the delicious lemon topping.

https://www.davidlebovitz.com/2009/05/tart-au-citron-french-lemon-tart/

I cooked the filling, a sunny, luscious lemon curd, on the stovetop with the fragrant zest of the lemons, then poured the warm filling through a strainer to make it as smooth as possible.

https://www.davidlebovitz.com/2009/05/tart-au-citron-french-lemon-tart/ One could pipe whipped cream on it or top it with meringue. To do so, let it cool and spread or pipe whipped cream over the top or serve a dollop alongside. If you want to give a go at meringue, check out my Lime Meringue Tart recipe or the marshmallow topping that I use on my Pumpkin Pie with Marshmallow Topping.

https://www.davidlebovitz.com/2009/05/tart-au-citron-french-lemon-tart/

Both are delicious, but just as it is – or as the French say, nature – is just fine with me.

French lemon tart

Print

Lemon Tart

I recently updated this recipe to increase the amount of filling and I dialed down the sugar a bit due to frequent questions about reducing sugar in recipes. You can taste the filling in step 3 and if you'd like it sweeter, add up to 1/4 cup (50g) more sugar If you find that you have a bit too much filling for your tart shell (they seem to vary), any remaining lemon filling that you don’t use can be spread on toast, fresh biscuits, or scones. You could substitute fresh lime juice for the lemon, and if you have Meyer lemons, reduce the sugar to 1/2 cup (100g). You can use a favorite tart dough recipe, or the one I’ve linked to.

Ingredients

  • 1 cup (250ml) freshly-squeezed lemon juice
  • grated zest of two lemons preferably unsprayed
  • 3/4 cup (150g) sugar
  • 12 tablespoons (170g) butter salted or unsalted, cut into cubes
  • 4 large eggs
  • 4 large egg yolks
  • One pre-baked 9-inch (23cm) tart shell

Instructions

  • Preheat the oven to 350ºF (180ºC).
  • In a medium-sized non-reactive saucepan, heat the lemon juice, zest, sugar, butter, eggs and egg yolks. Have a mesh strainer nearby.
  • Stir until the butter is melted, then whisk the mixture continuously until the mixture thickens and holds its shape when you lift some of it up with the whisk and it visibly mounds up when dropped back down over the rest of the mixture in the saucepan. It should just take a few minute.
  • Pour the warm lemon curd though a strainer into a bowl (or directly into the tart shell), scraping with a rubber spatula to press it through.
  • Smooth the lemon filling in the prebaked tart shell and pop it in the oven until the curd is just set. It’ll take about 5 to 6 minutes.
  • Remove from the oven and let cool before slicing and serving.

Related Links

Recipes to Use Up Leftover Egg Whites

Lemon Verbena Ice Cream

Moroccan Preserved Lemons

Tips for Freezing Eggs

What is non-reactive cookware?

French lemon tart recipe-13

ready for dessert: behind-the-scenes, baking tips, and errata

By: David
19 October 2025 at 16:47

There’s a lot going on when you write a cookbook. You begin with an idea, then spend a year or two testing and developing recipes. Once the first draft is done, it goes through a developmental edit where the editor gives feedback on what you’ve done so far and offers up changes, ideas, or things to reconsider.

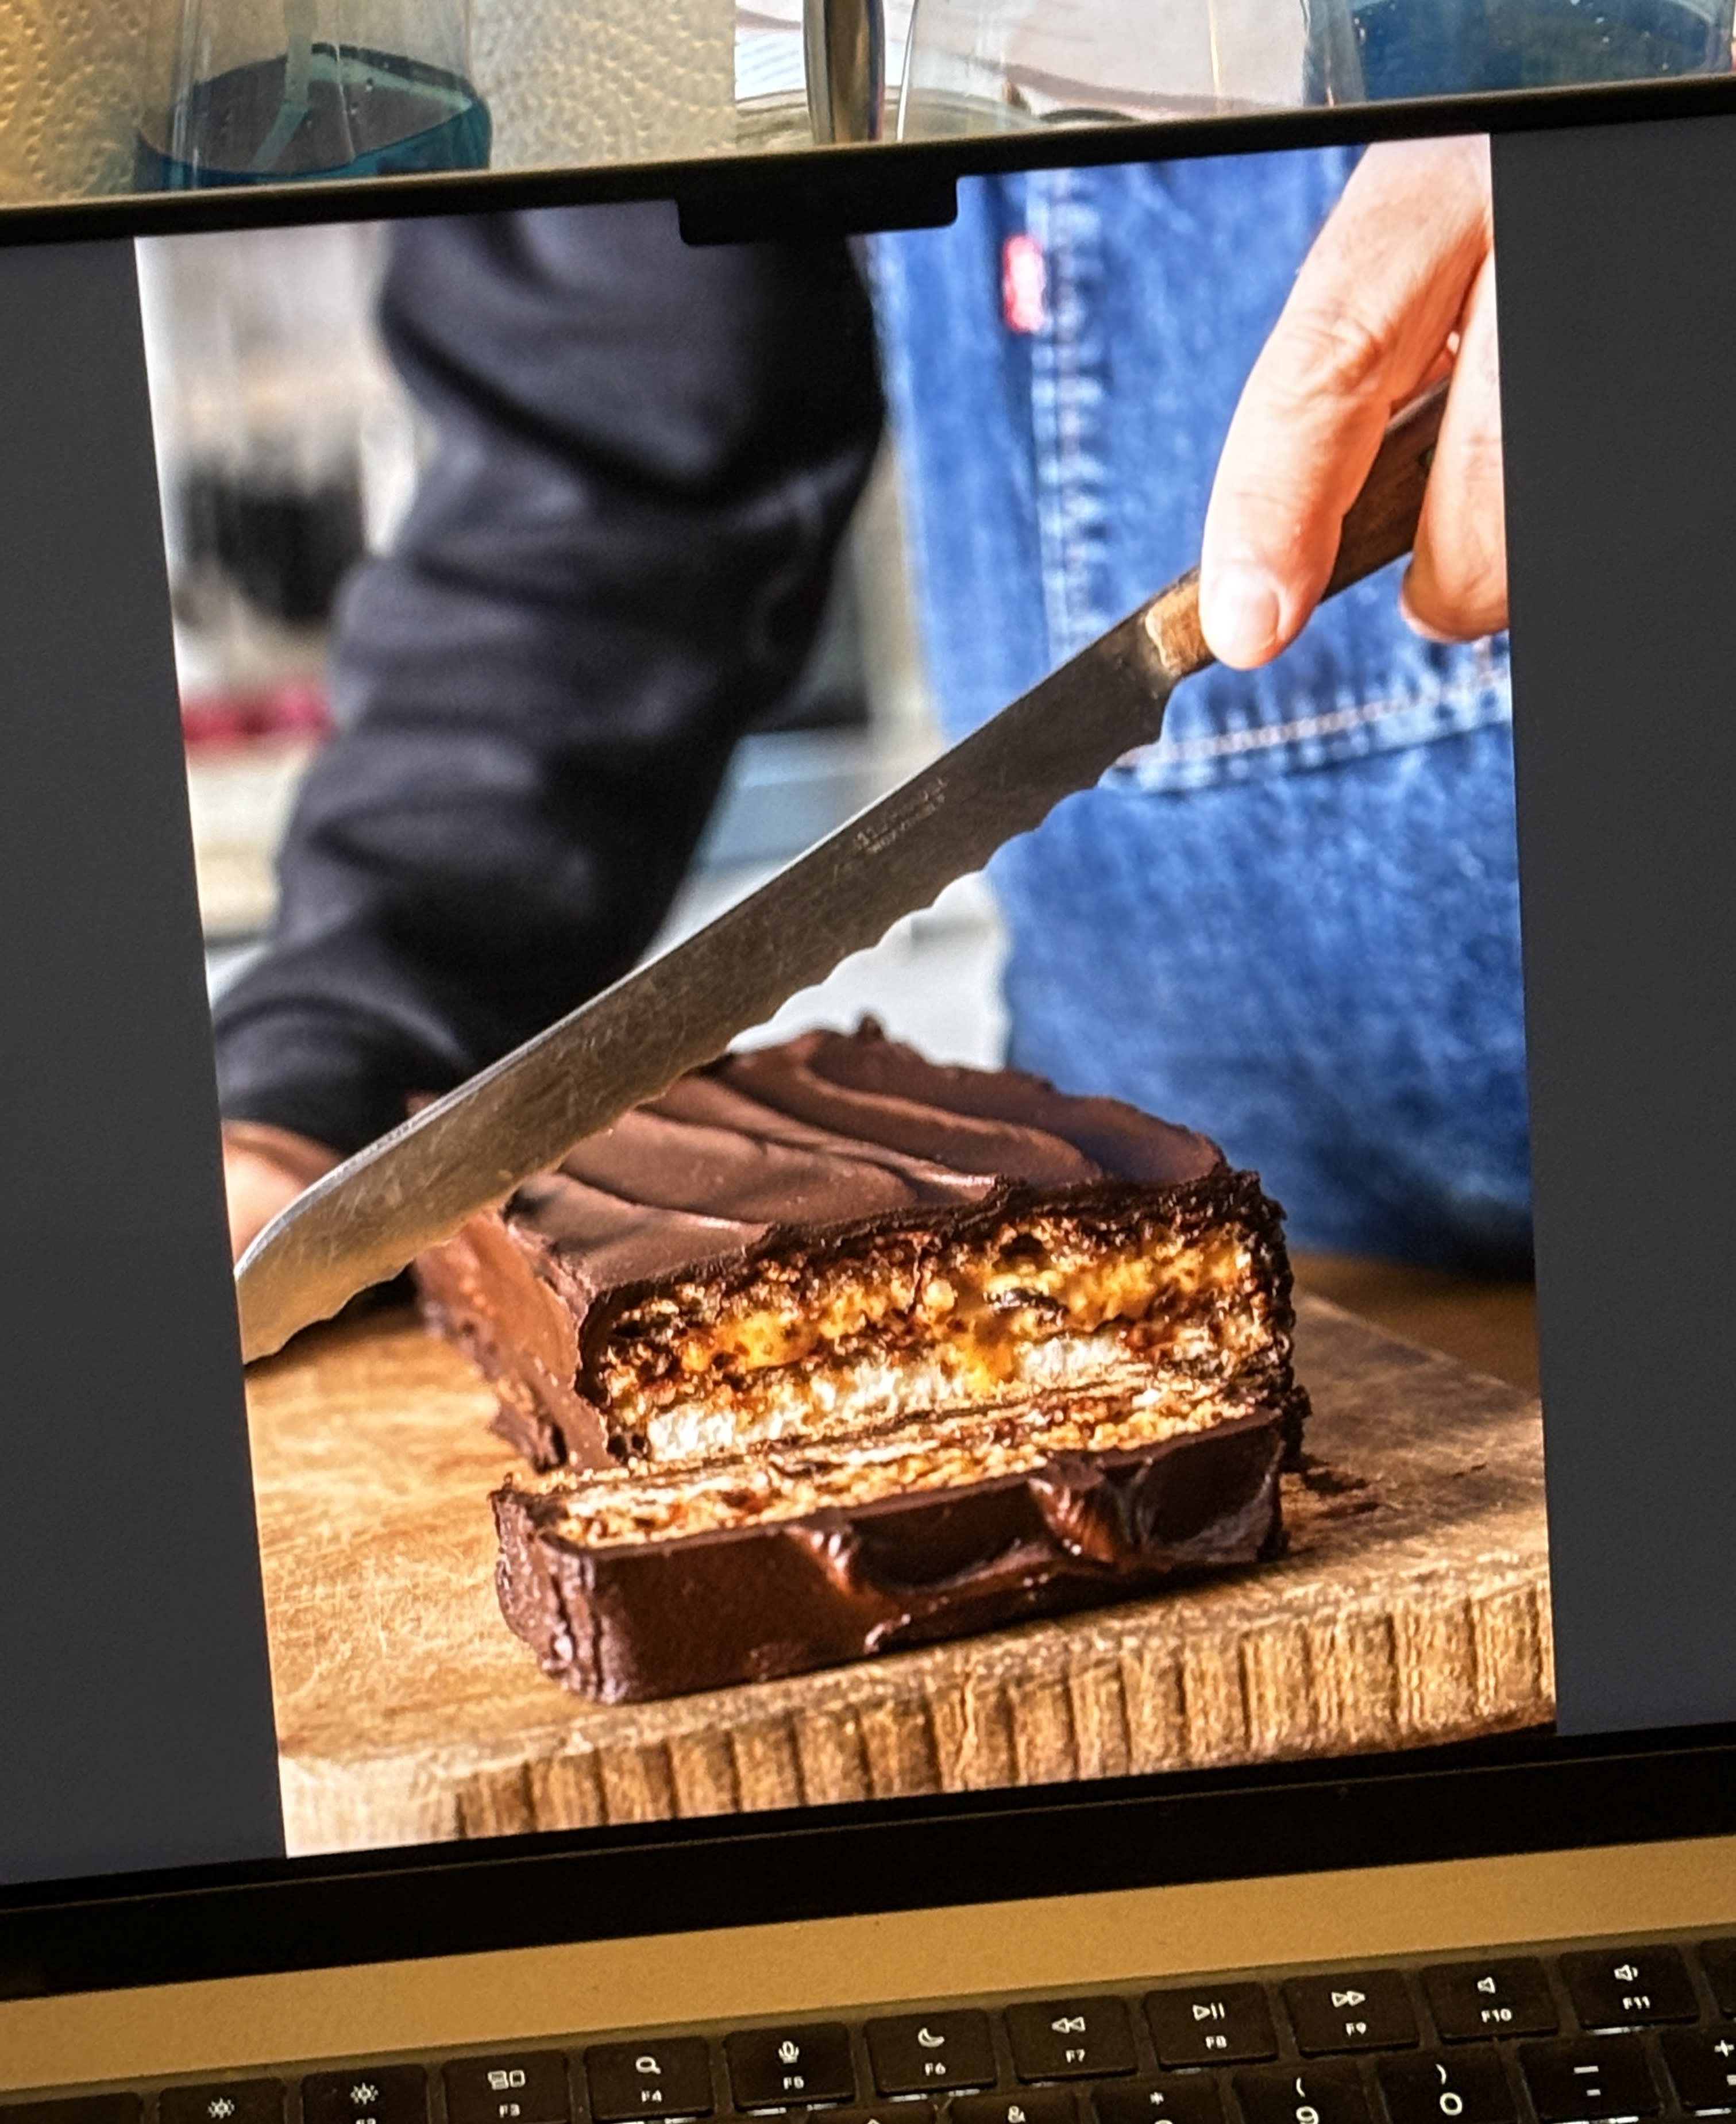
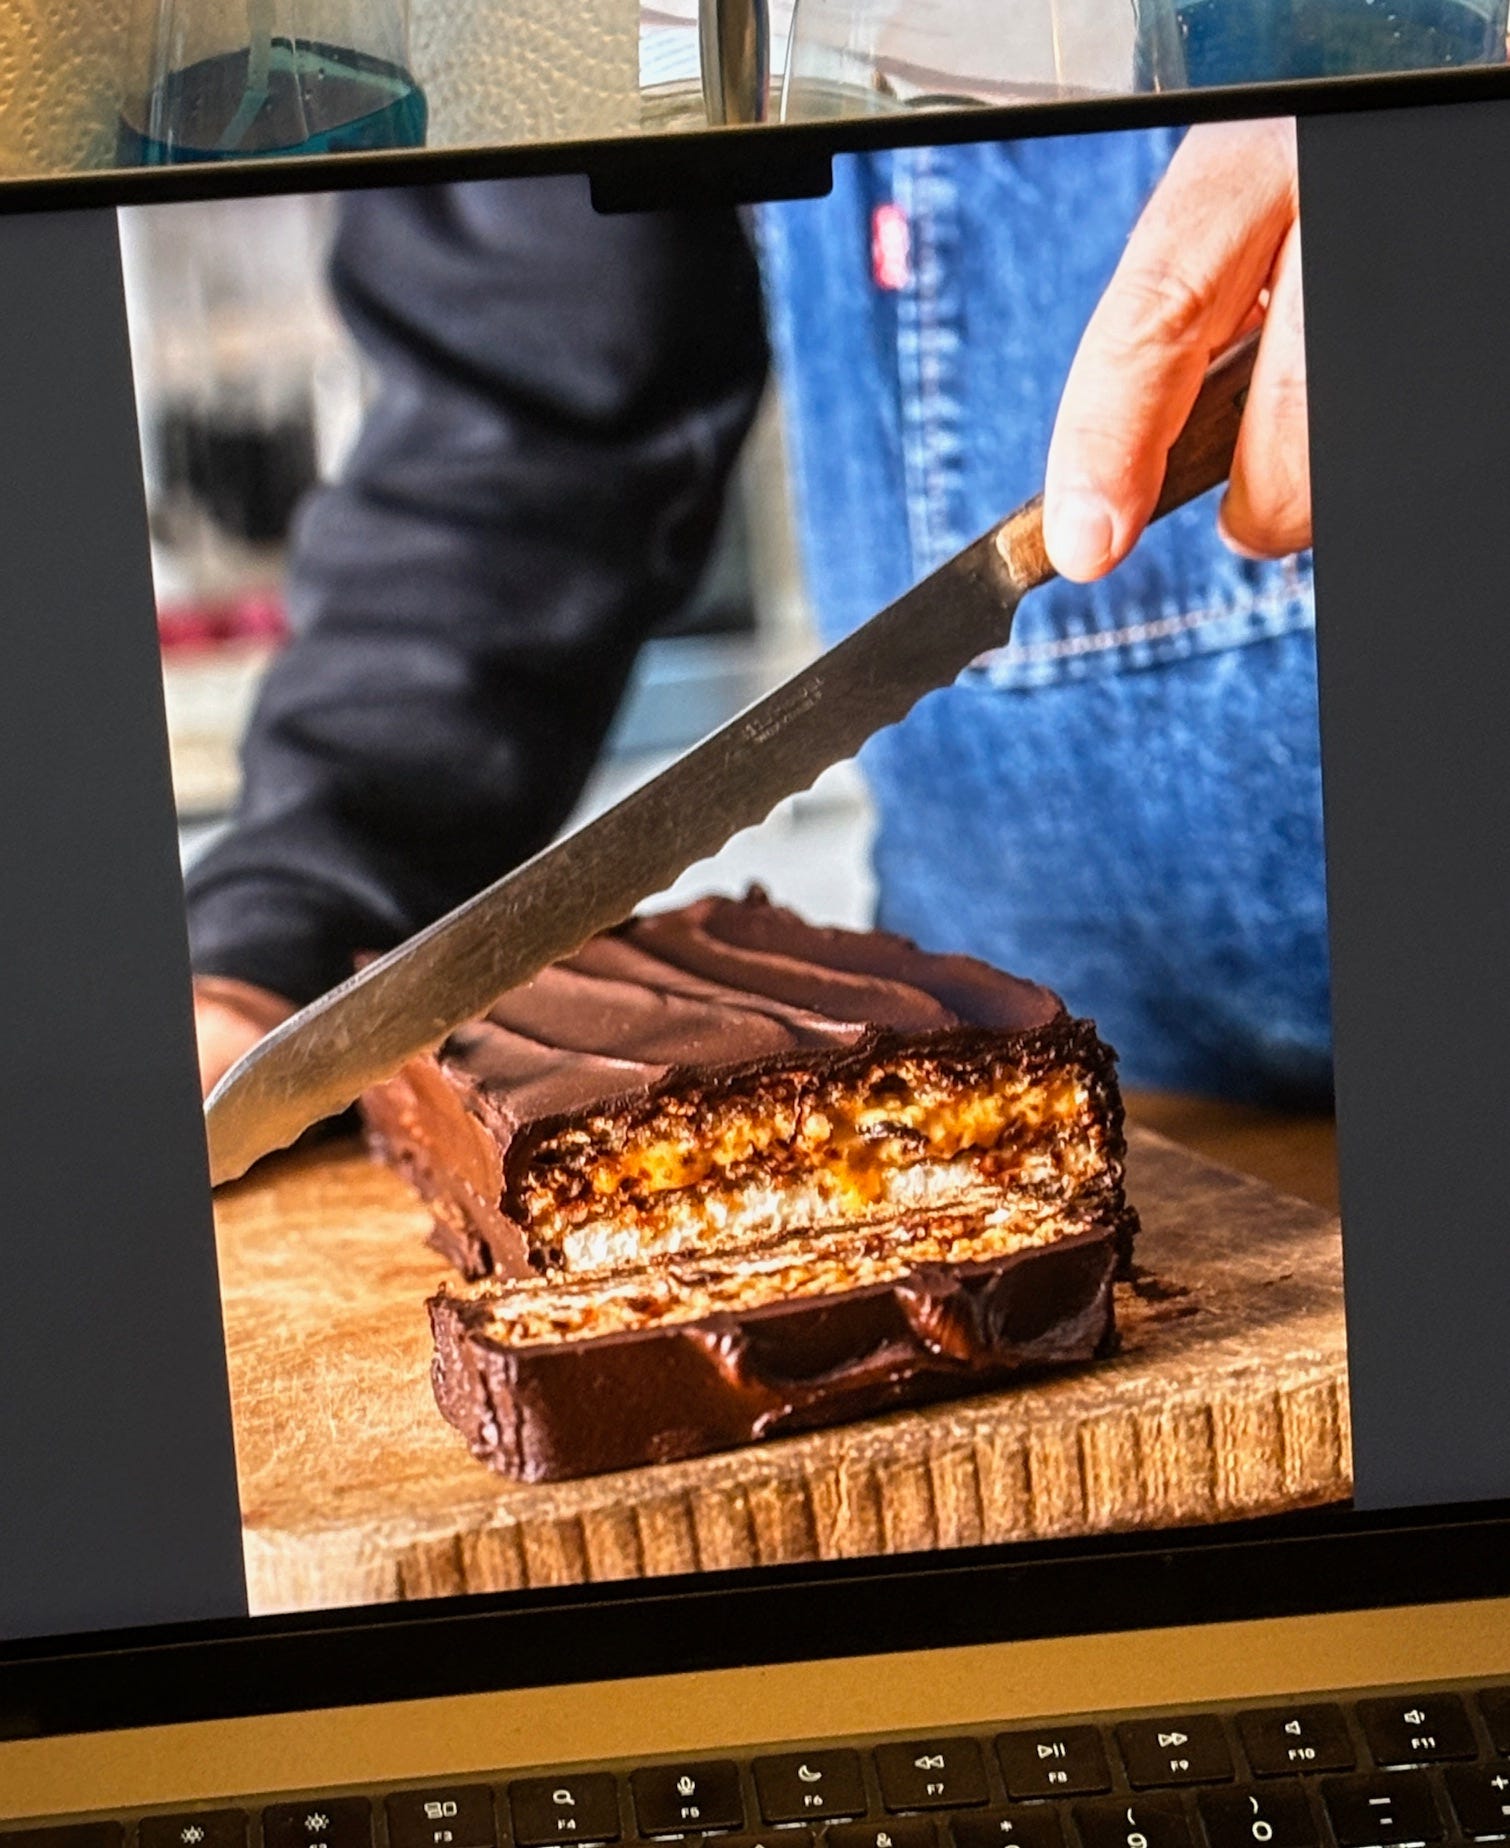
One of my favorite pictures from Ready for Dessert: Slicing the Marjolaine, which is also one of my favorite recipes in the book. (Photo by Ed Anderson)

After you’ve implemented those (or not), it then goes to a copy editor who checks grammar and spelling, as well as scans the recipes for omissions or gaffes, such as forgetting to say when to add an ingredient, and checks your metric conversions. I’ve seen more and more books lately that also credit an “Americanizer,” who presumably takes on that last task, since conversions are a big lift. I kid you not. I’m pretty sure I could write two cookbooks a year if we all used the same system of measurement.

The book then goes to a production editor, who makes sure everything is in the right place, then to a proofreader. (Not all publishers do all these steps. Mine does.) During the process, cookbook authors often send recipes to testers to give the recipes a go and get feedback. Some authors have people develop recipes but I give a tester the finished recipe and get feedback on that.

Shooting some of the desserts in our backyard.

If the book is going to be photographed, food stylists generally make the recipes for the photos, although in some cases, the author does. (Which I’ve done.) But it’s a very big job organizing and planning the shoot, then gathering all the ingredients and making everything, which is especially challenging if you plan to shoot five different photos a day. Then there’s the cleanup afterward.

I was fortunate to have George Dolese and Elisabet der Nederlanden working as a team on my book since there were a lot of photos to shoot in 2 1/2 weeks. That’s a very long shoot, but my publisher wanted a lot of photos so we, along with photographer Ed Anderson, delivered.

George arrived with a 7-inch (18cm) thick notebook, and I was startled to see how organized he was. We’d corresponded a lot before he came to Paris, and he asked me what he should bring from the U.S. I said parchment paper circles, natural cocoa powder, Lazzaroni amaretti cookies (why can’t we get those here? Romain has been devouring the leftovers…), almond paste, and chocolate chips — among other things.

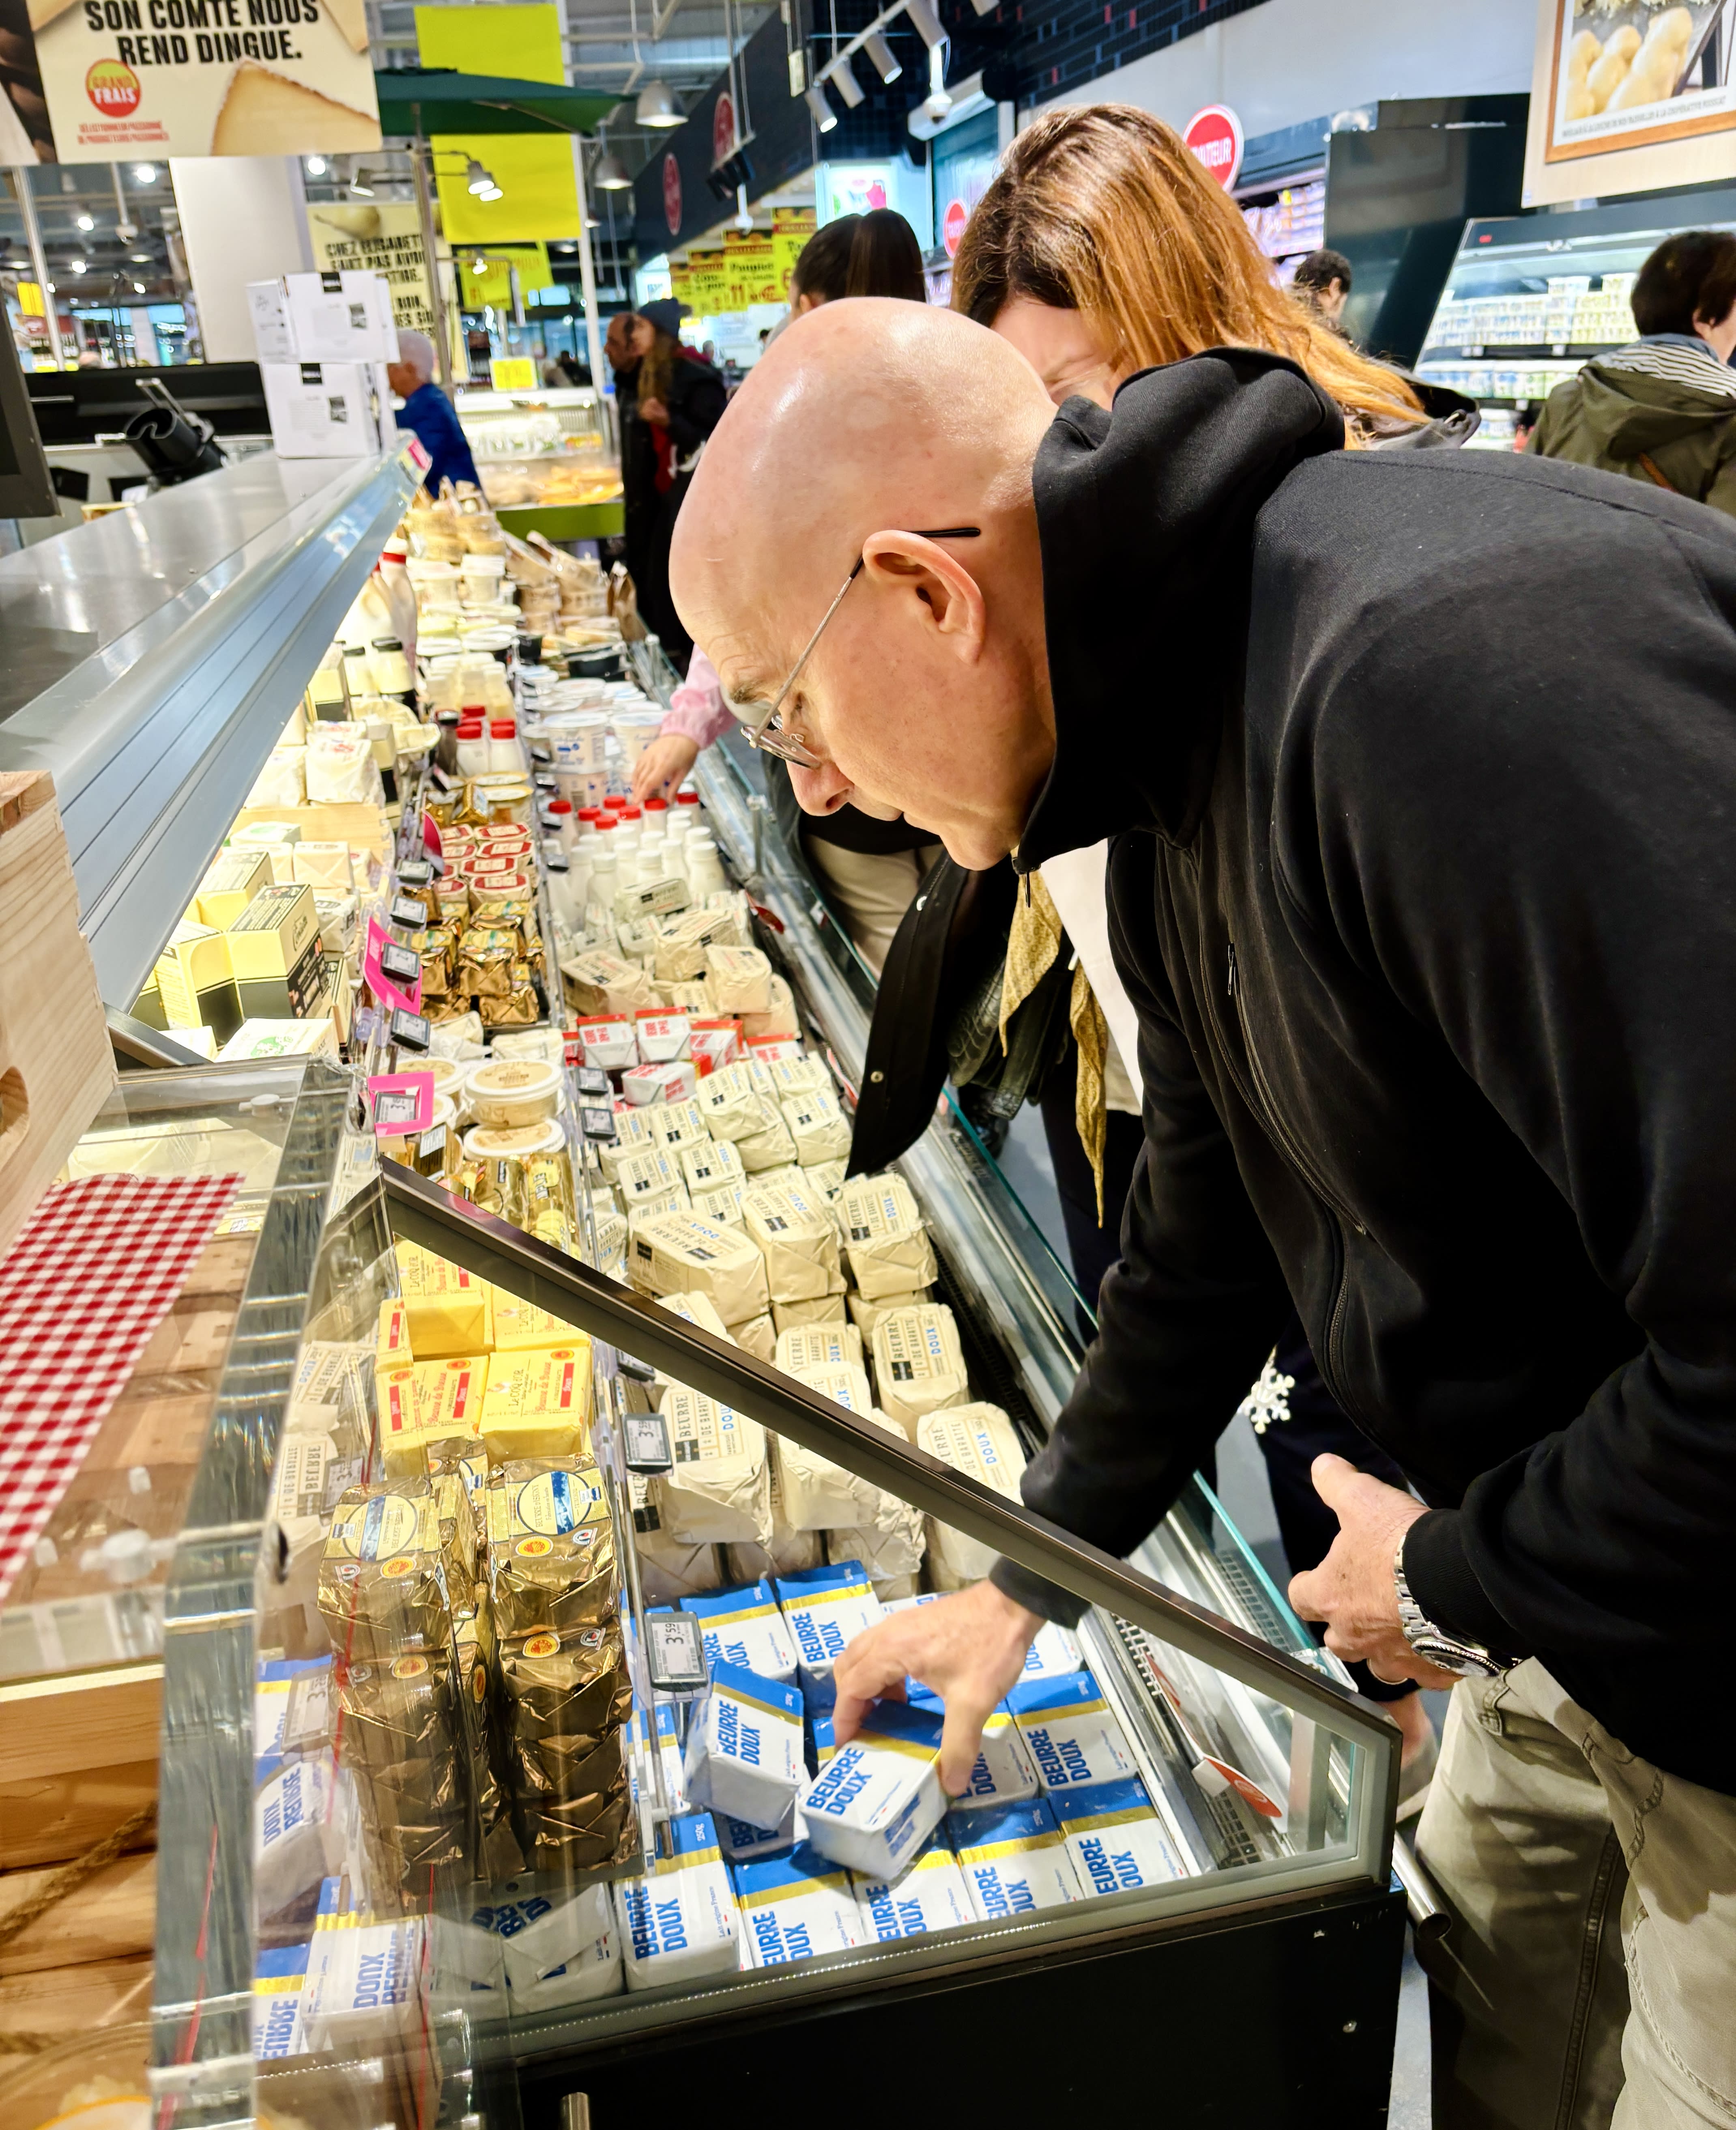
When George and Elisabet arrived, armed with massive shopping lists, I took them to a Grand Frais supermarket outside of Paris. For some reason there are no Grand Frais supermarkets in Paris, but they have a remarkable selection of everything, including aisles and aisles of every kind of fruit you can imagine, as well as a massive cheese aisle, a butcher, and shelves of nuts and baking ingredients.

Buying (lots of) butter at Grand Frais.

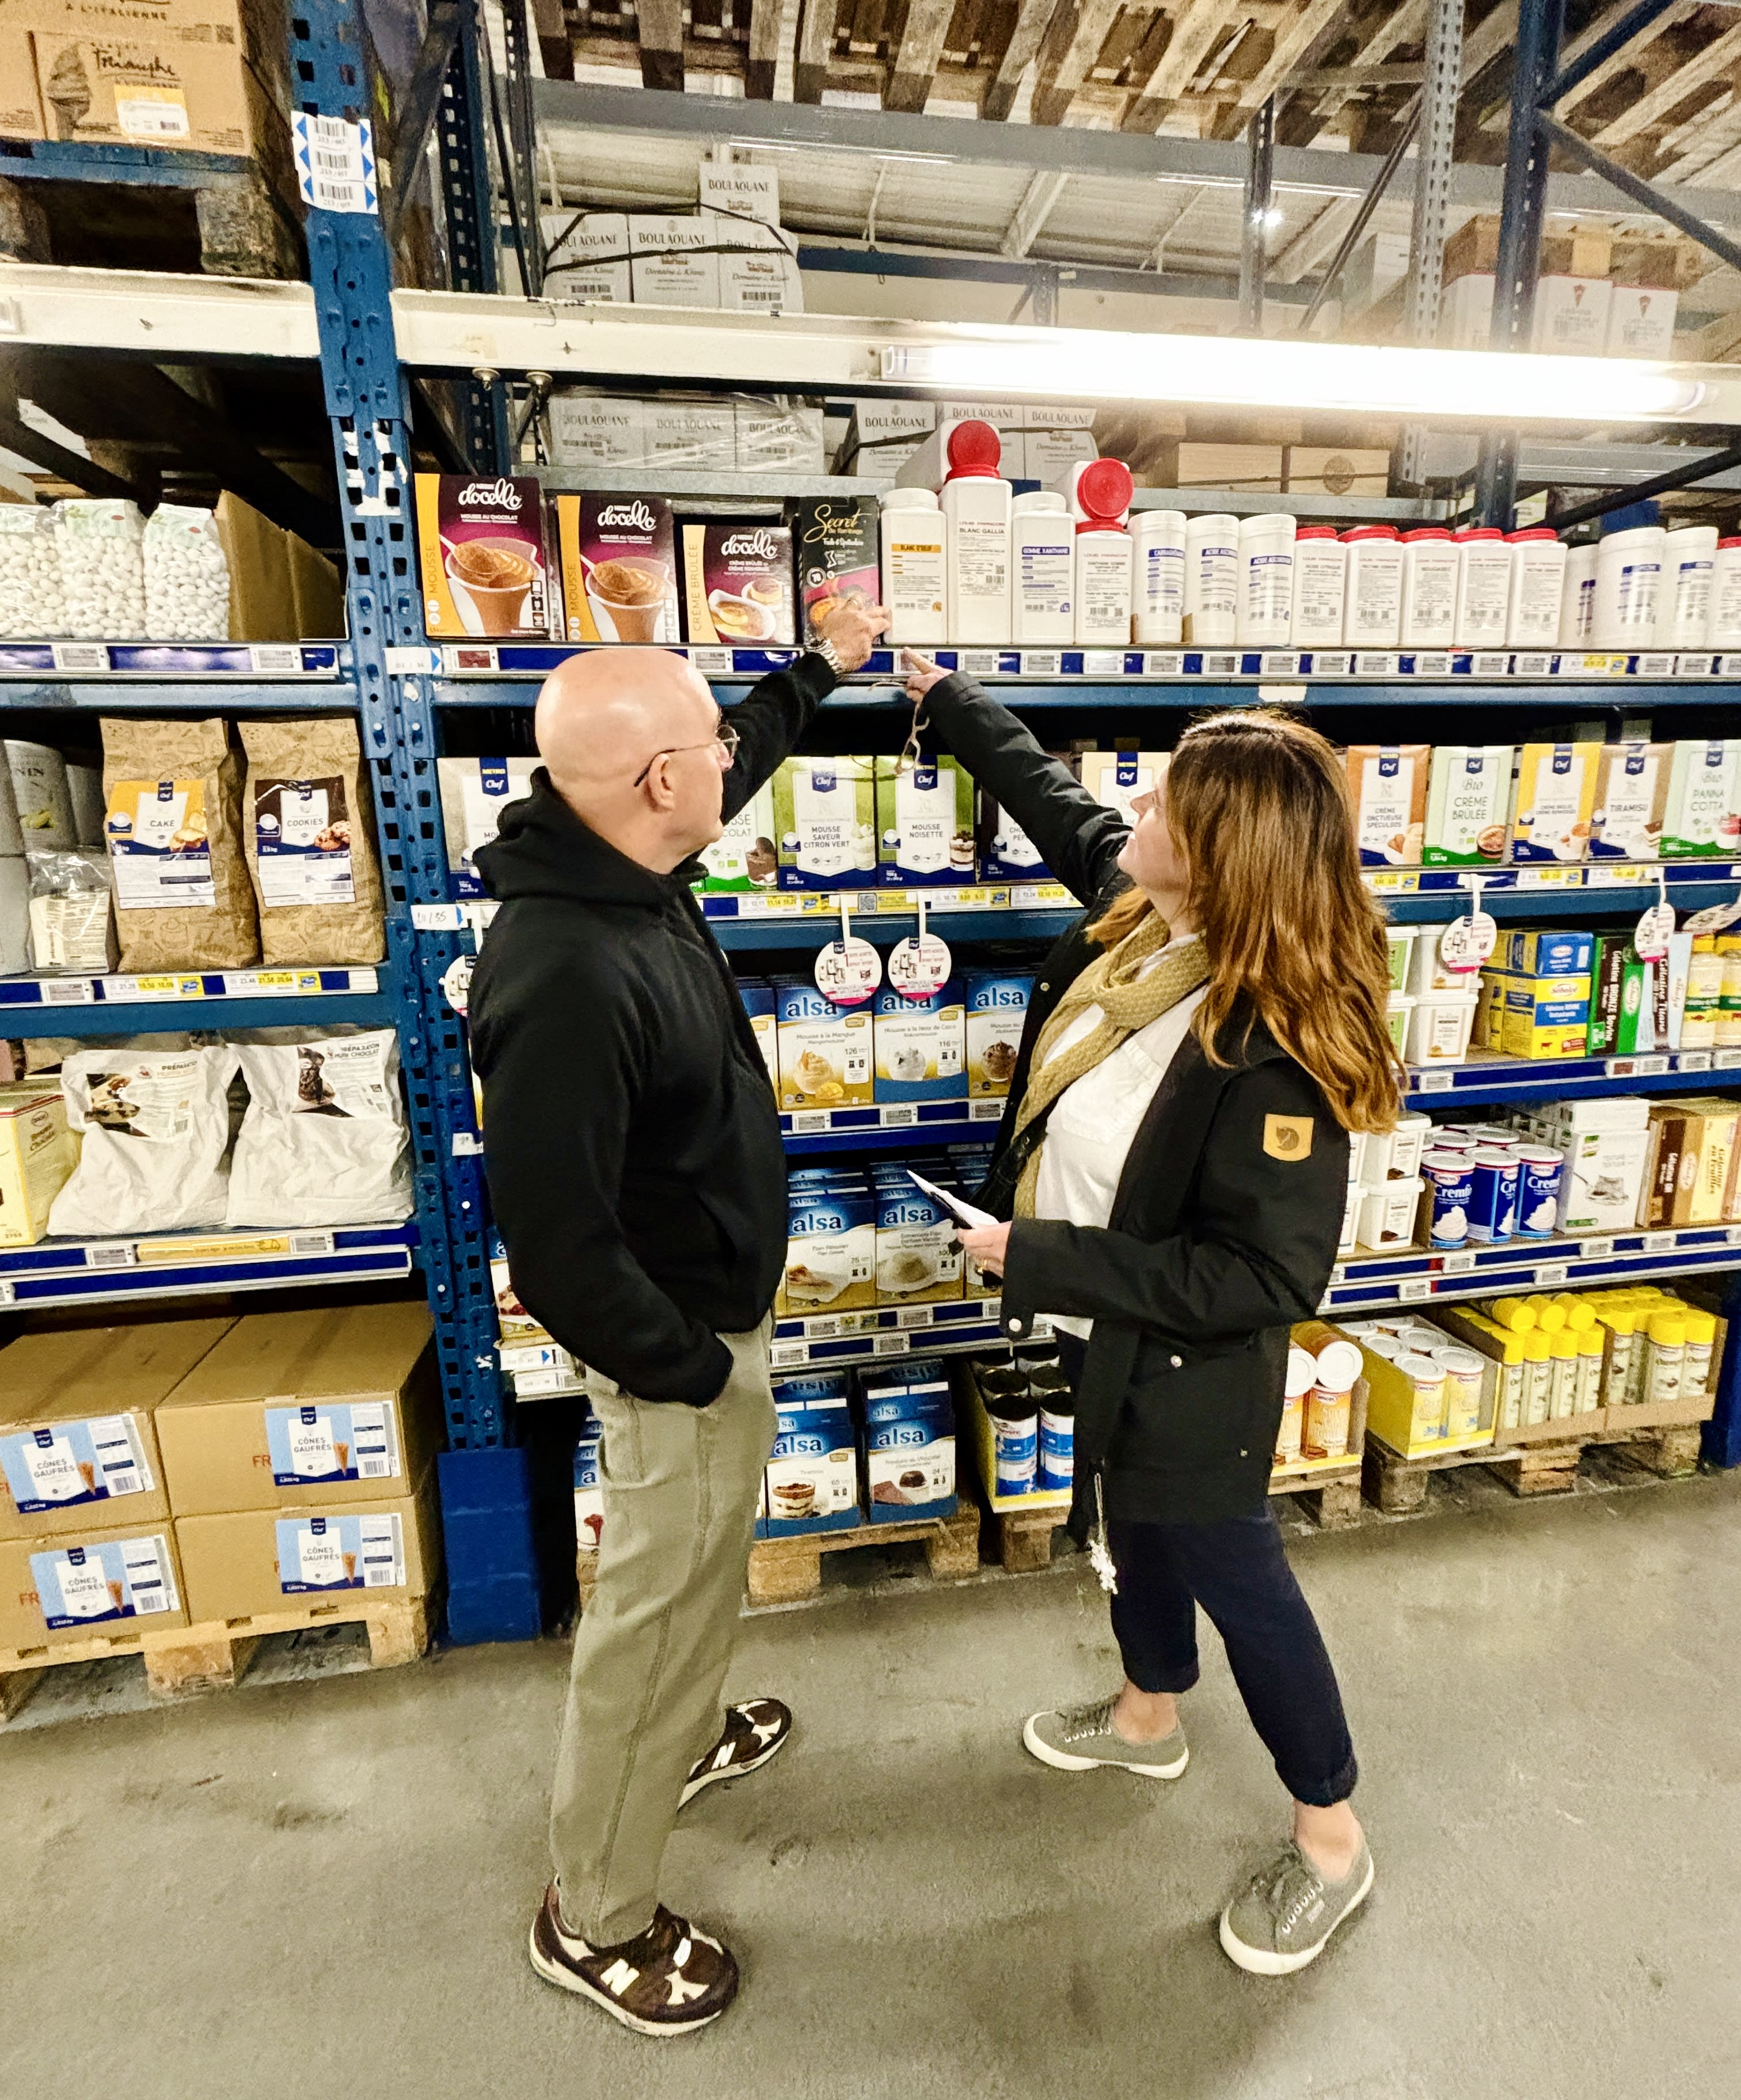
I also took them to Metro, a membership-only store that requires you to have a resale license. Elisabet is a particularly avid baker and went a little nuts in the baking aisles. She was especially wowed by all the various sugars available in France, from dark, moist cassonade (cane sugar) to crunchy pearl sugar.

Food stylists are invariably pros at cooking and often give valuable feedback if they run into any issues with the recipes. To be honest, food stylists do a better job than most of us can to make food look good for the camera. No one working on cookbooks uses fake food or anything like that, although when shooting pictures for the first edition of Room for Dessert (I was the food stylist on it), which became Ready for Dessert, I couldn’t find Concord grapes for the pie since it wasn’t grape season. A food stylist friend suggested that since it was only for a photo, I should use black olives. I used regular grapes instead and zhuzhed them up with some grape jelly for color.

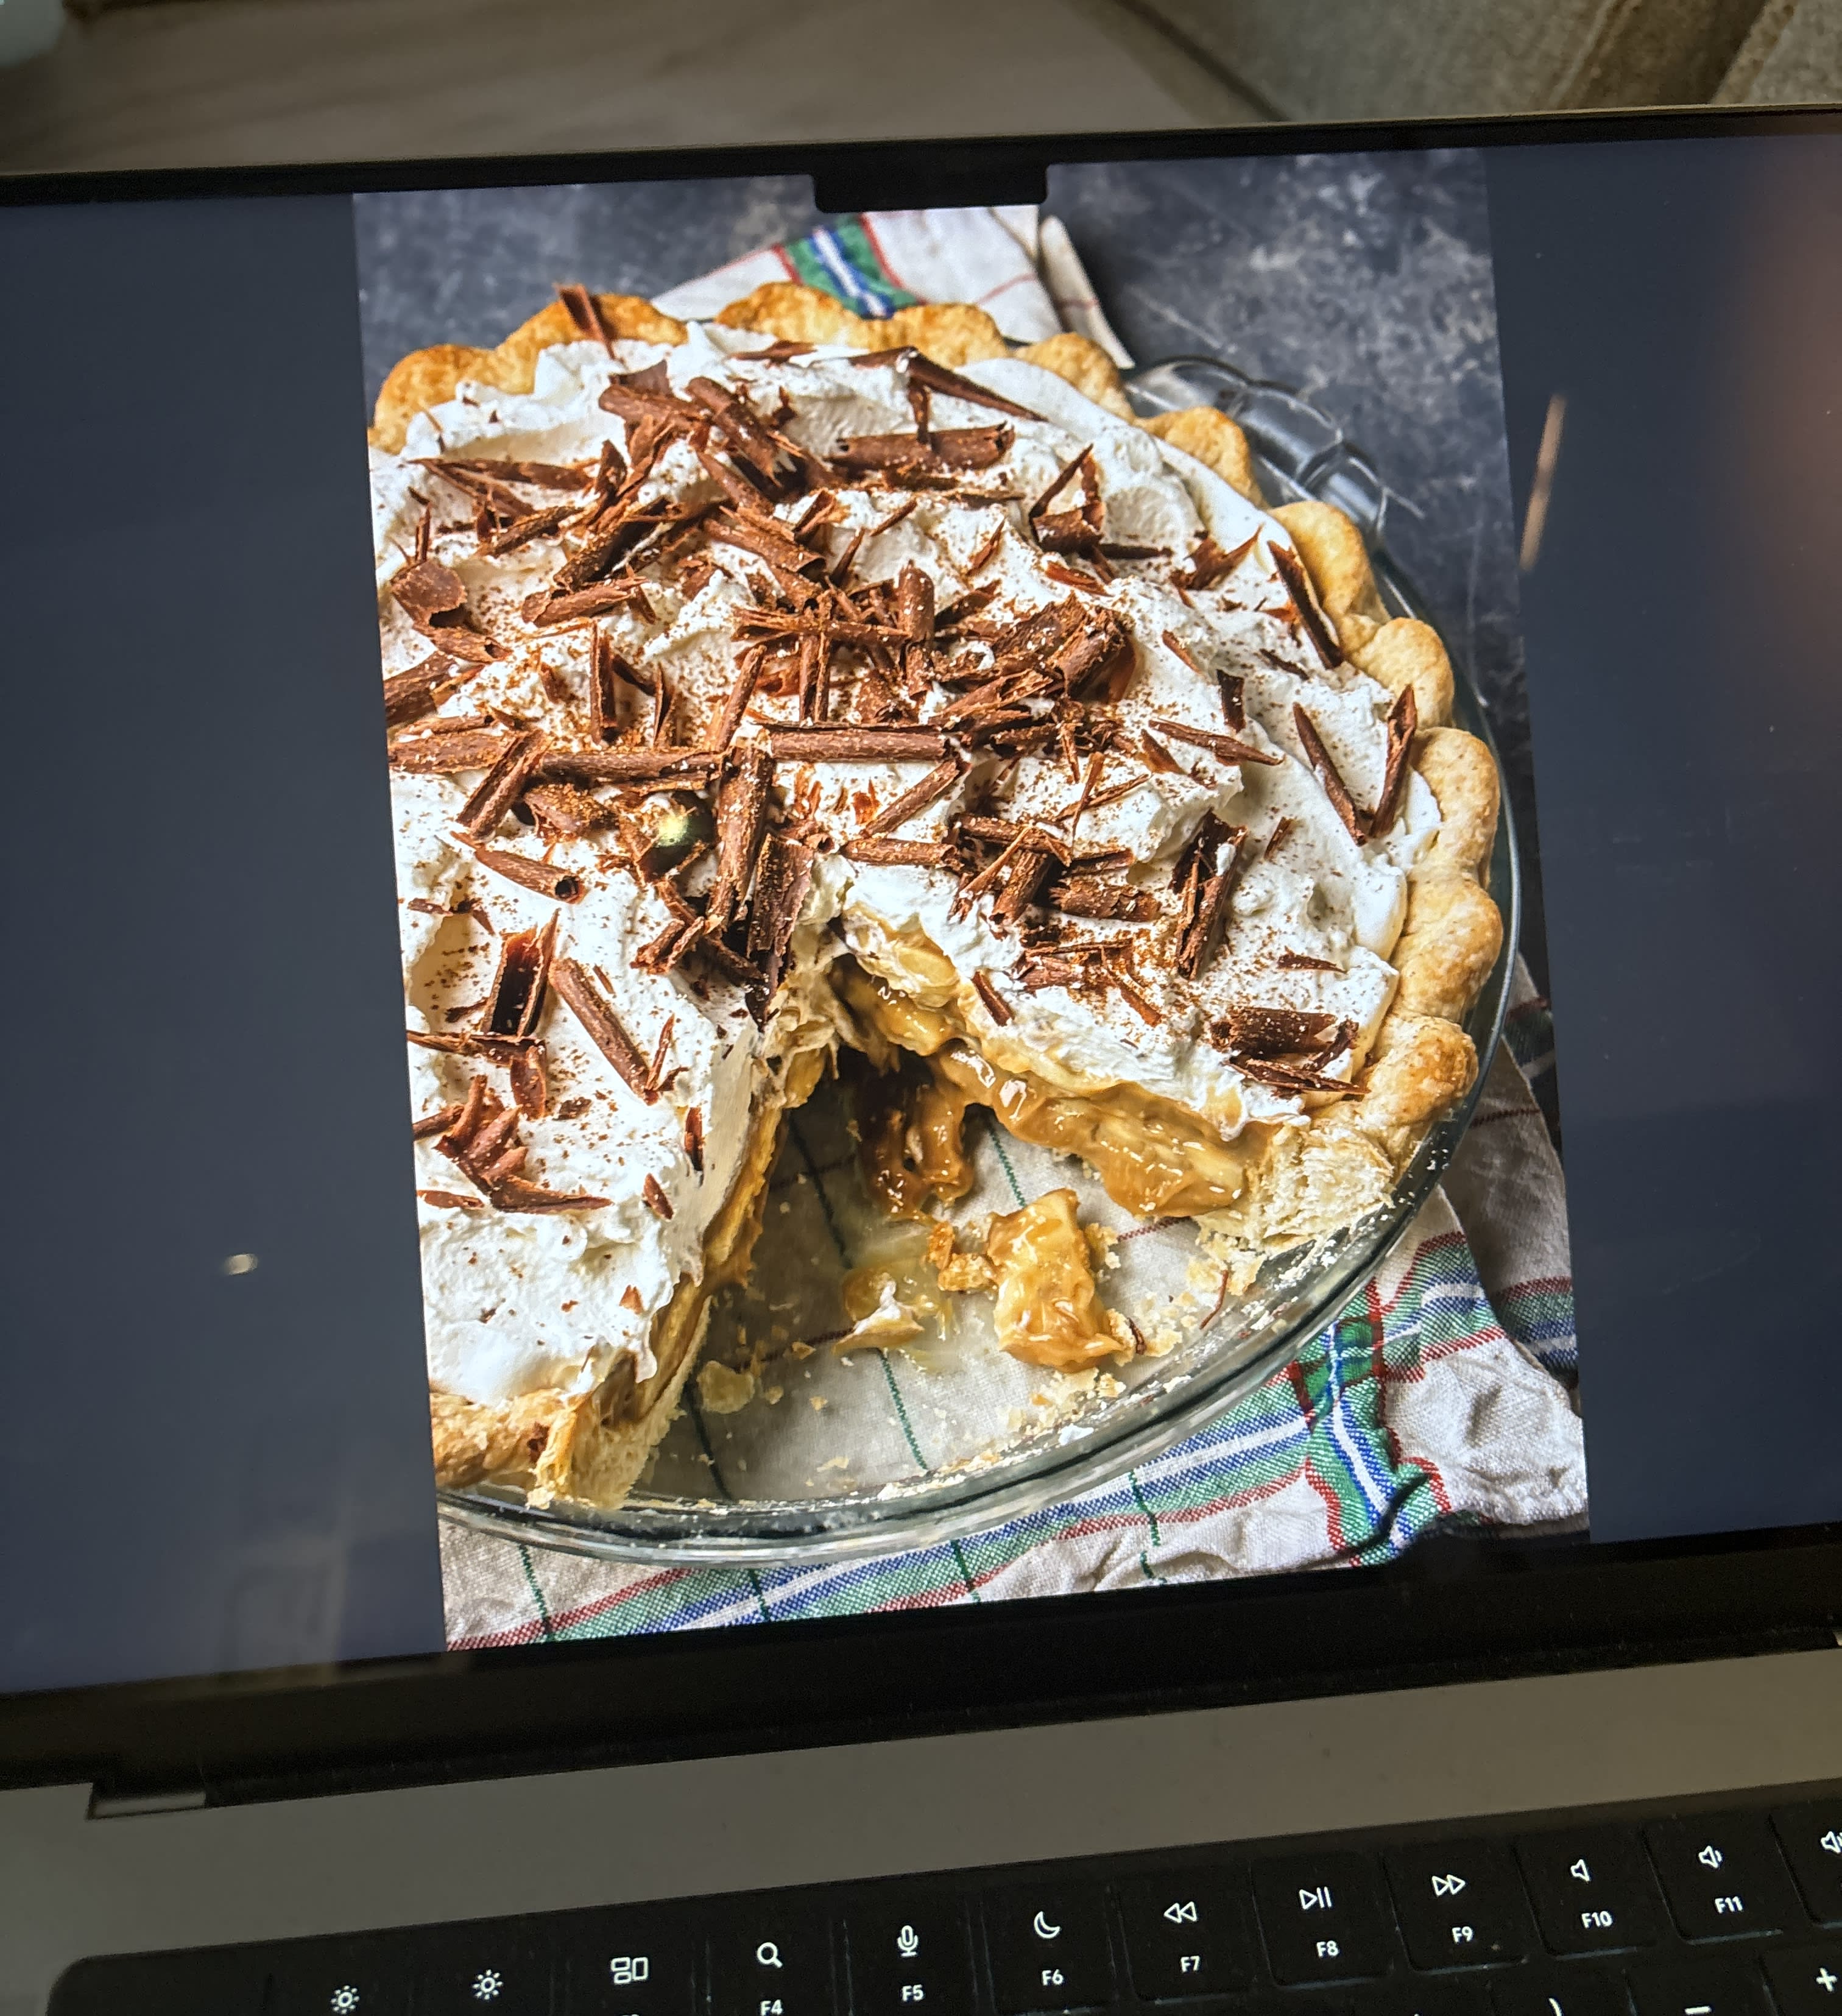
Banana butterscotch cream pie, page 100. (Photo by Ed Anderson)

Once the book is laid out and designed, with everything in place, the publisher sends a PDF of the book to the author to check and make sure everything’s A-OK. Then it’s off to the printer, and when you get the final book in your hands, you notice that tablespoon in one recipe is spelled “tablespooon.” (Which happened to me in another book.)

Photographer Ed Anderson and I took a coffee break when shooting out and about in Paris, here in the Place des Vosges. I had hot chocolate!

As the great Maida Heatter called them, “gremlins” get into cookbooks, no matter how hard you try to keep them out. Also, as someone who likes to tinker with recipes, I sometimes find different ways to make them. Books also have limited space, so it’s nice we have the internet to fill things in, as I’m doing here.

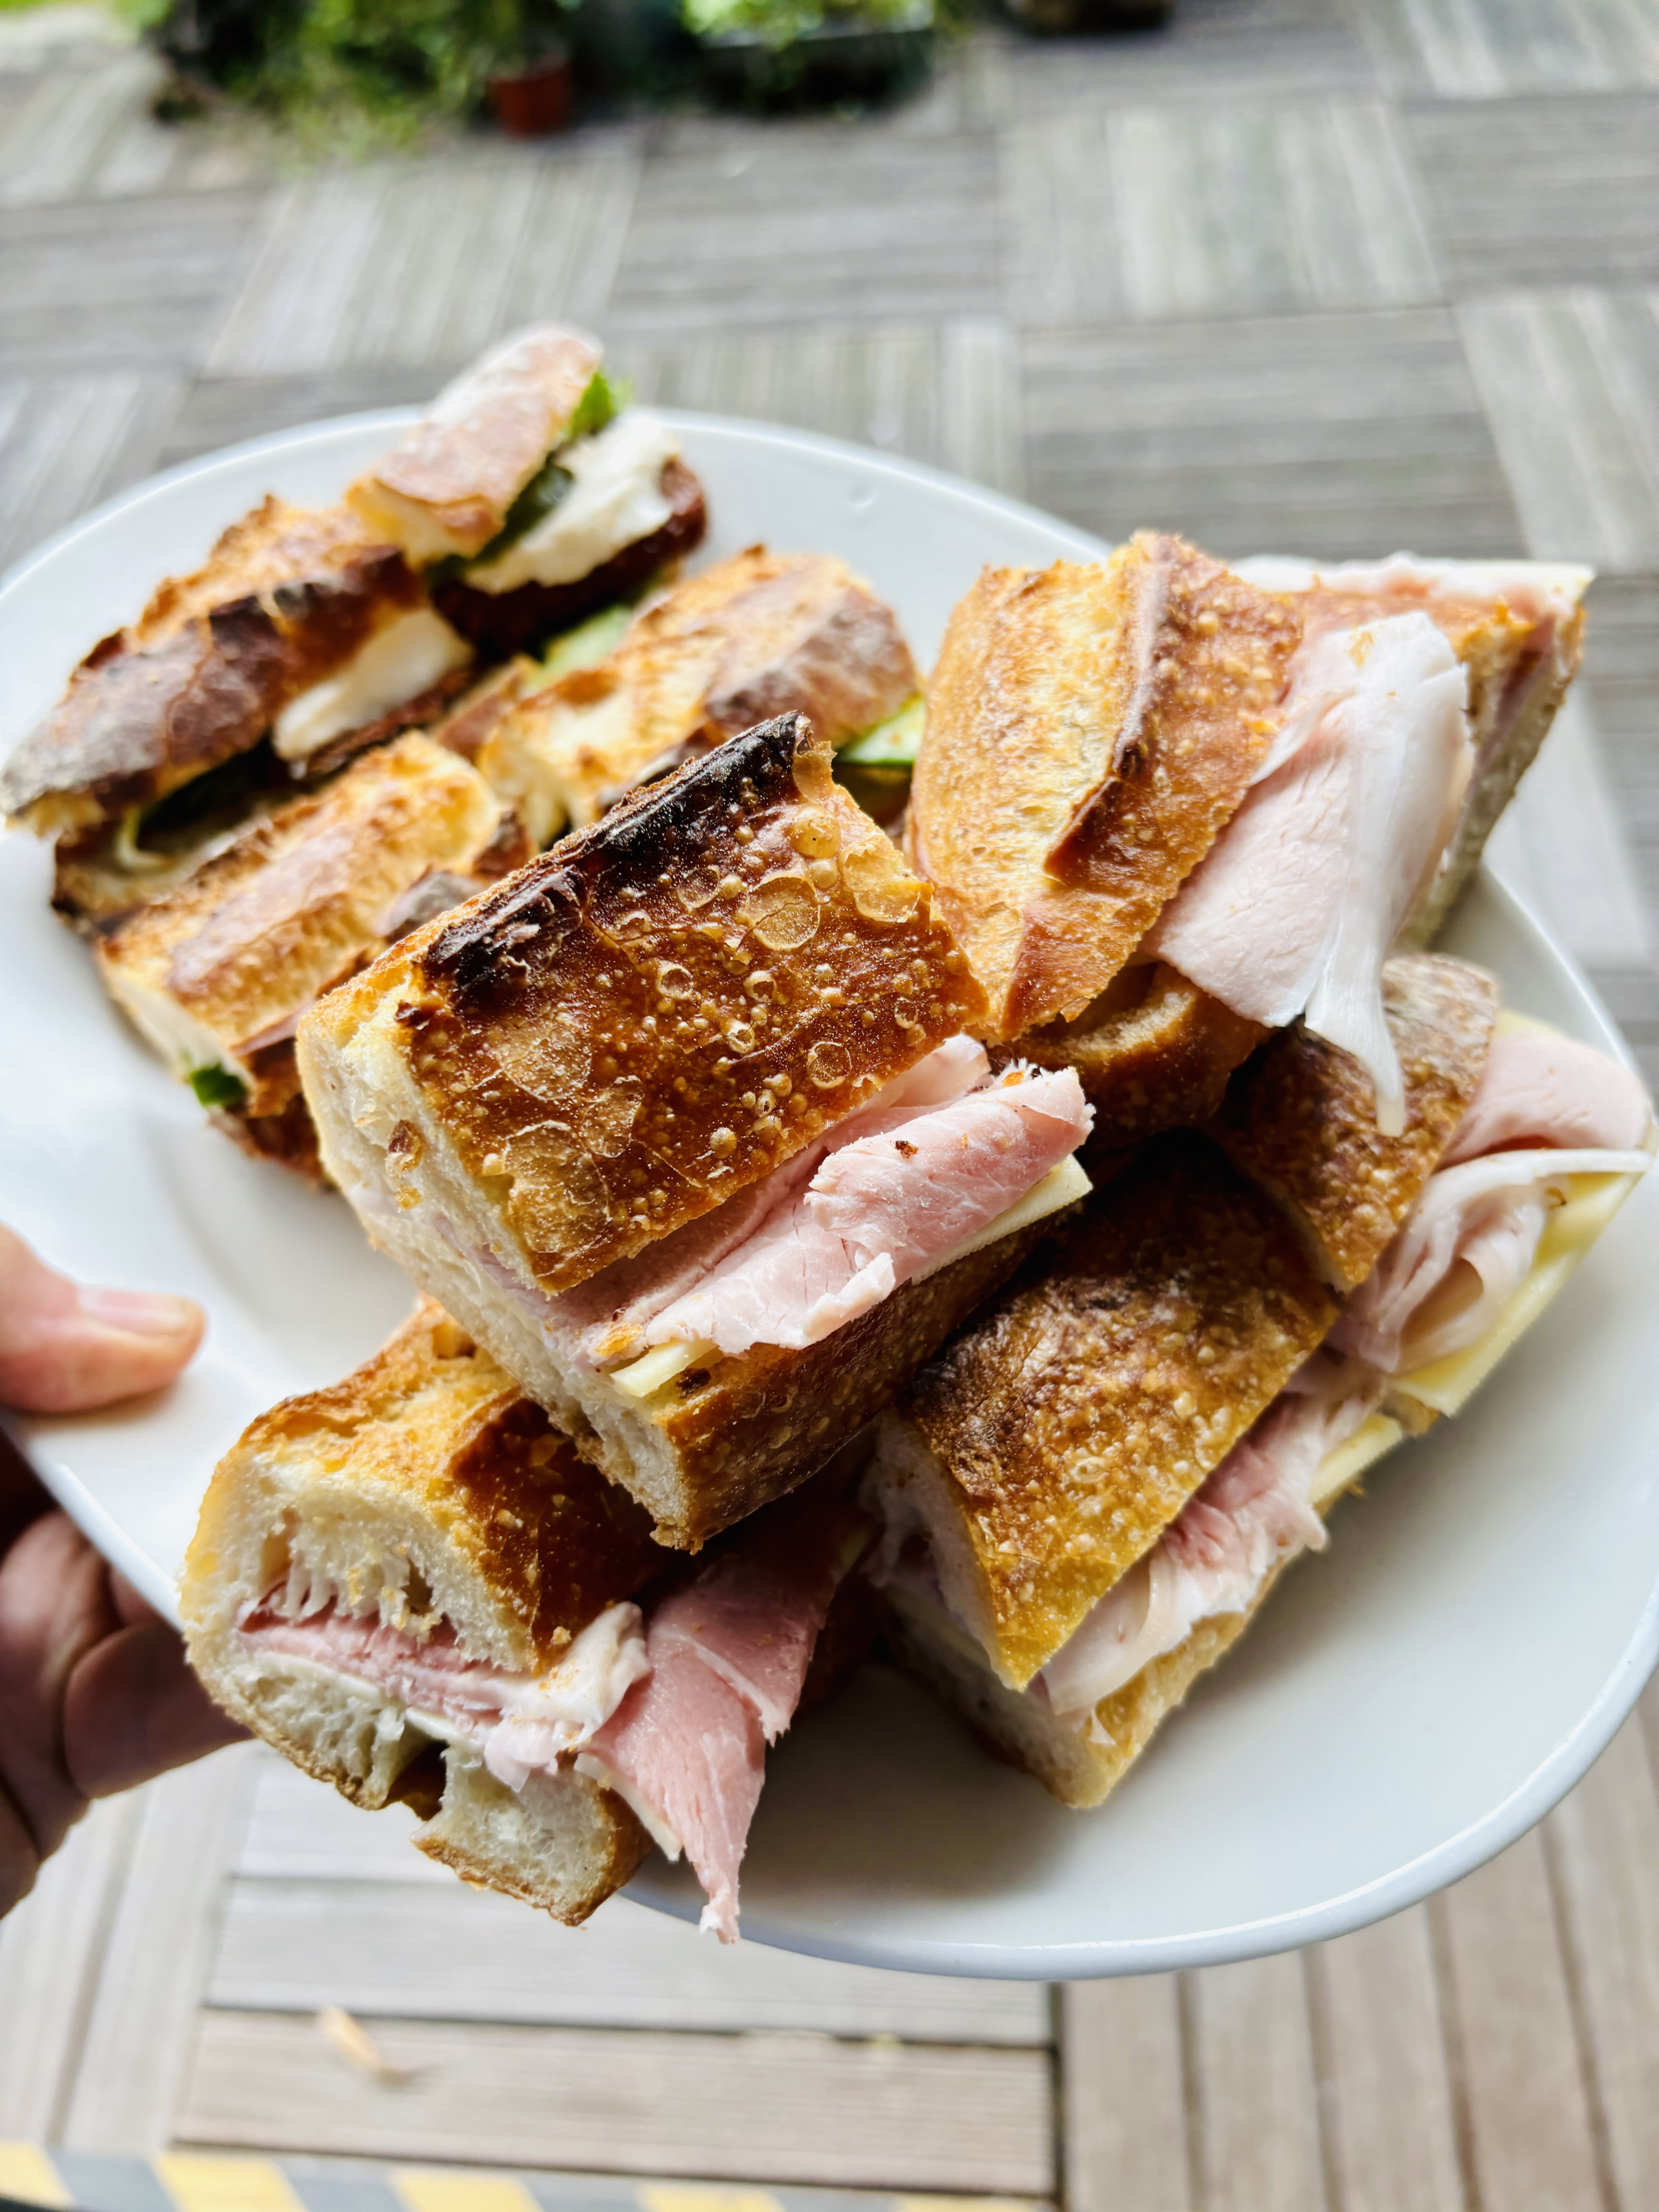
During the photo shoots, I was sometimes tasked with “staff meal.” I kept things pretty French for the crew, and jambon-beurre (ham and butter) sandwiches became the most requested meal…and I was happy to oblige.


Ready for Dessert Recipe Notes & Errata

Here are some additional notes about the recipes, including a few tips on baking times, a little errata the thickness of a cookie recipe, and an bonus recipe, that’s on the cover of the book.

– For the Easy jam tart (page 121), if the dough is a bit too sticky to press into the pan, put the pan with the pastry in it in the refrigerator or freezer for a few minutes to firm the pastry up.

– When making the Peanut butter and jelly linzertorte (page 103), if the ropes that you’re rolling by hand to place over the top break, it’s ok to place the pieces on top of the tart and simply pinch them together. They’ll bake up beautifully. While a lattice topping is traditional on linzertorte (which is really a tart), baker Jessie Sheehan suggested that the dough could be crumbled over the top of the tart, which I’m going to try the next time I make it.

– For the Panna cotta recipe (page 161) you can reduce the amount of sugar to 1/4 cup (50g), and you can omit the cinnamon and lemon zest if you want them with those flavorings in them.

– For the Croquants (page 251), yes, the batter is measured out in teaspoons, one per cookie, which is the measurement in the book. It makes cookies the size they are in France, the cookies in the photo on the left. (It doesn’t seem like a lot of batter when you are making the cookies, but the batter spreads as it bakes.) You are welcome to make them larger, like the cookies on the right. You may need to increase the baking time another minute or so, until they’re toasty brown across the top.

– For the Pâte à choux recipe (page 276), the yield will vary depending on the size you pipe the dough. You may get twenty puffs if you pipe them larger, which is fine!

I also like to play with the temperature of the oven, depending on how I feel that day. Life isn’t always cut-and-dry, and neither is pastry dough. And as I’ve said before, recipes aren’t set in stone. If they were, cookbooks would be very, very heavy.

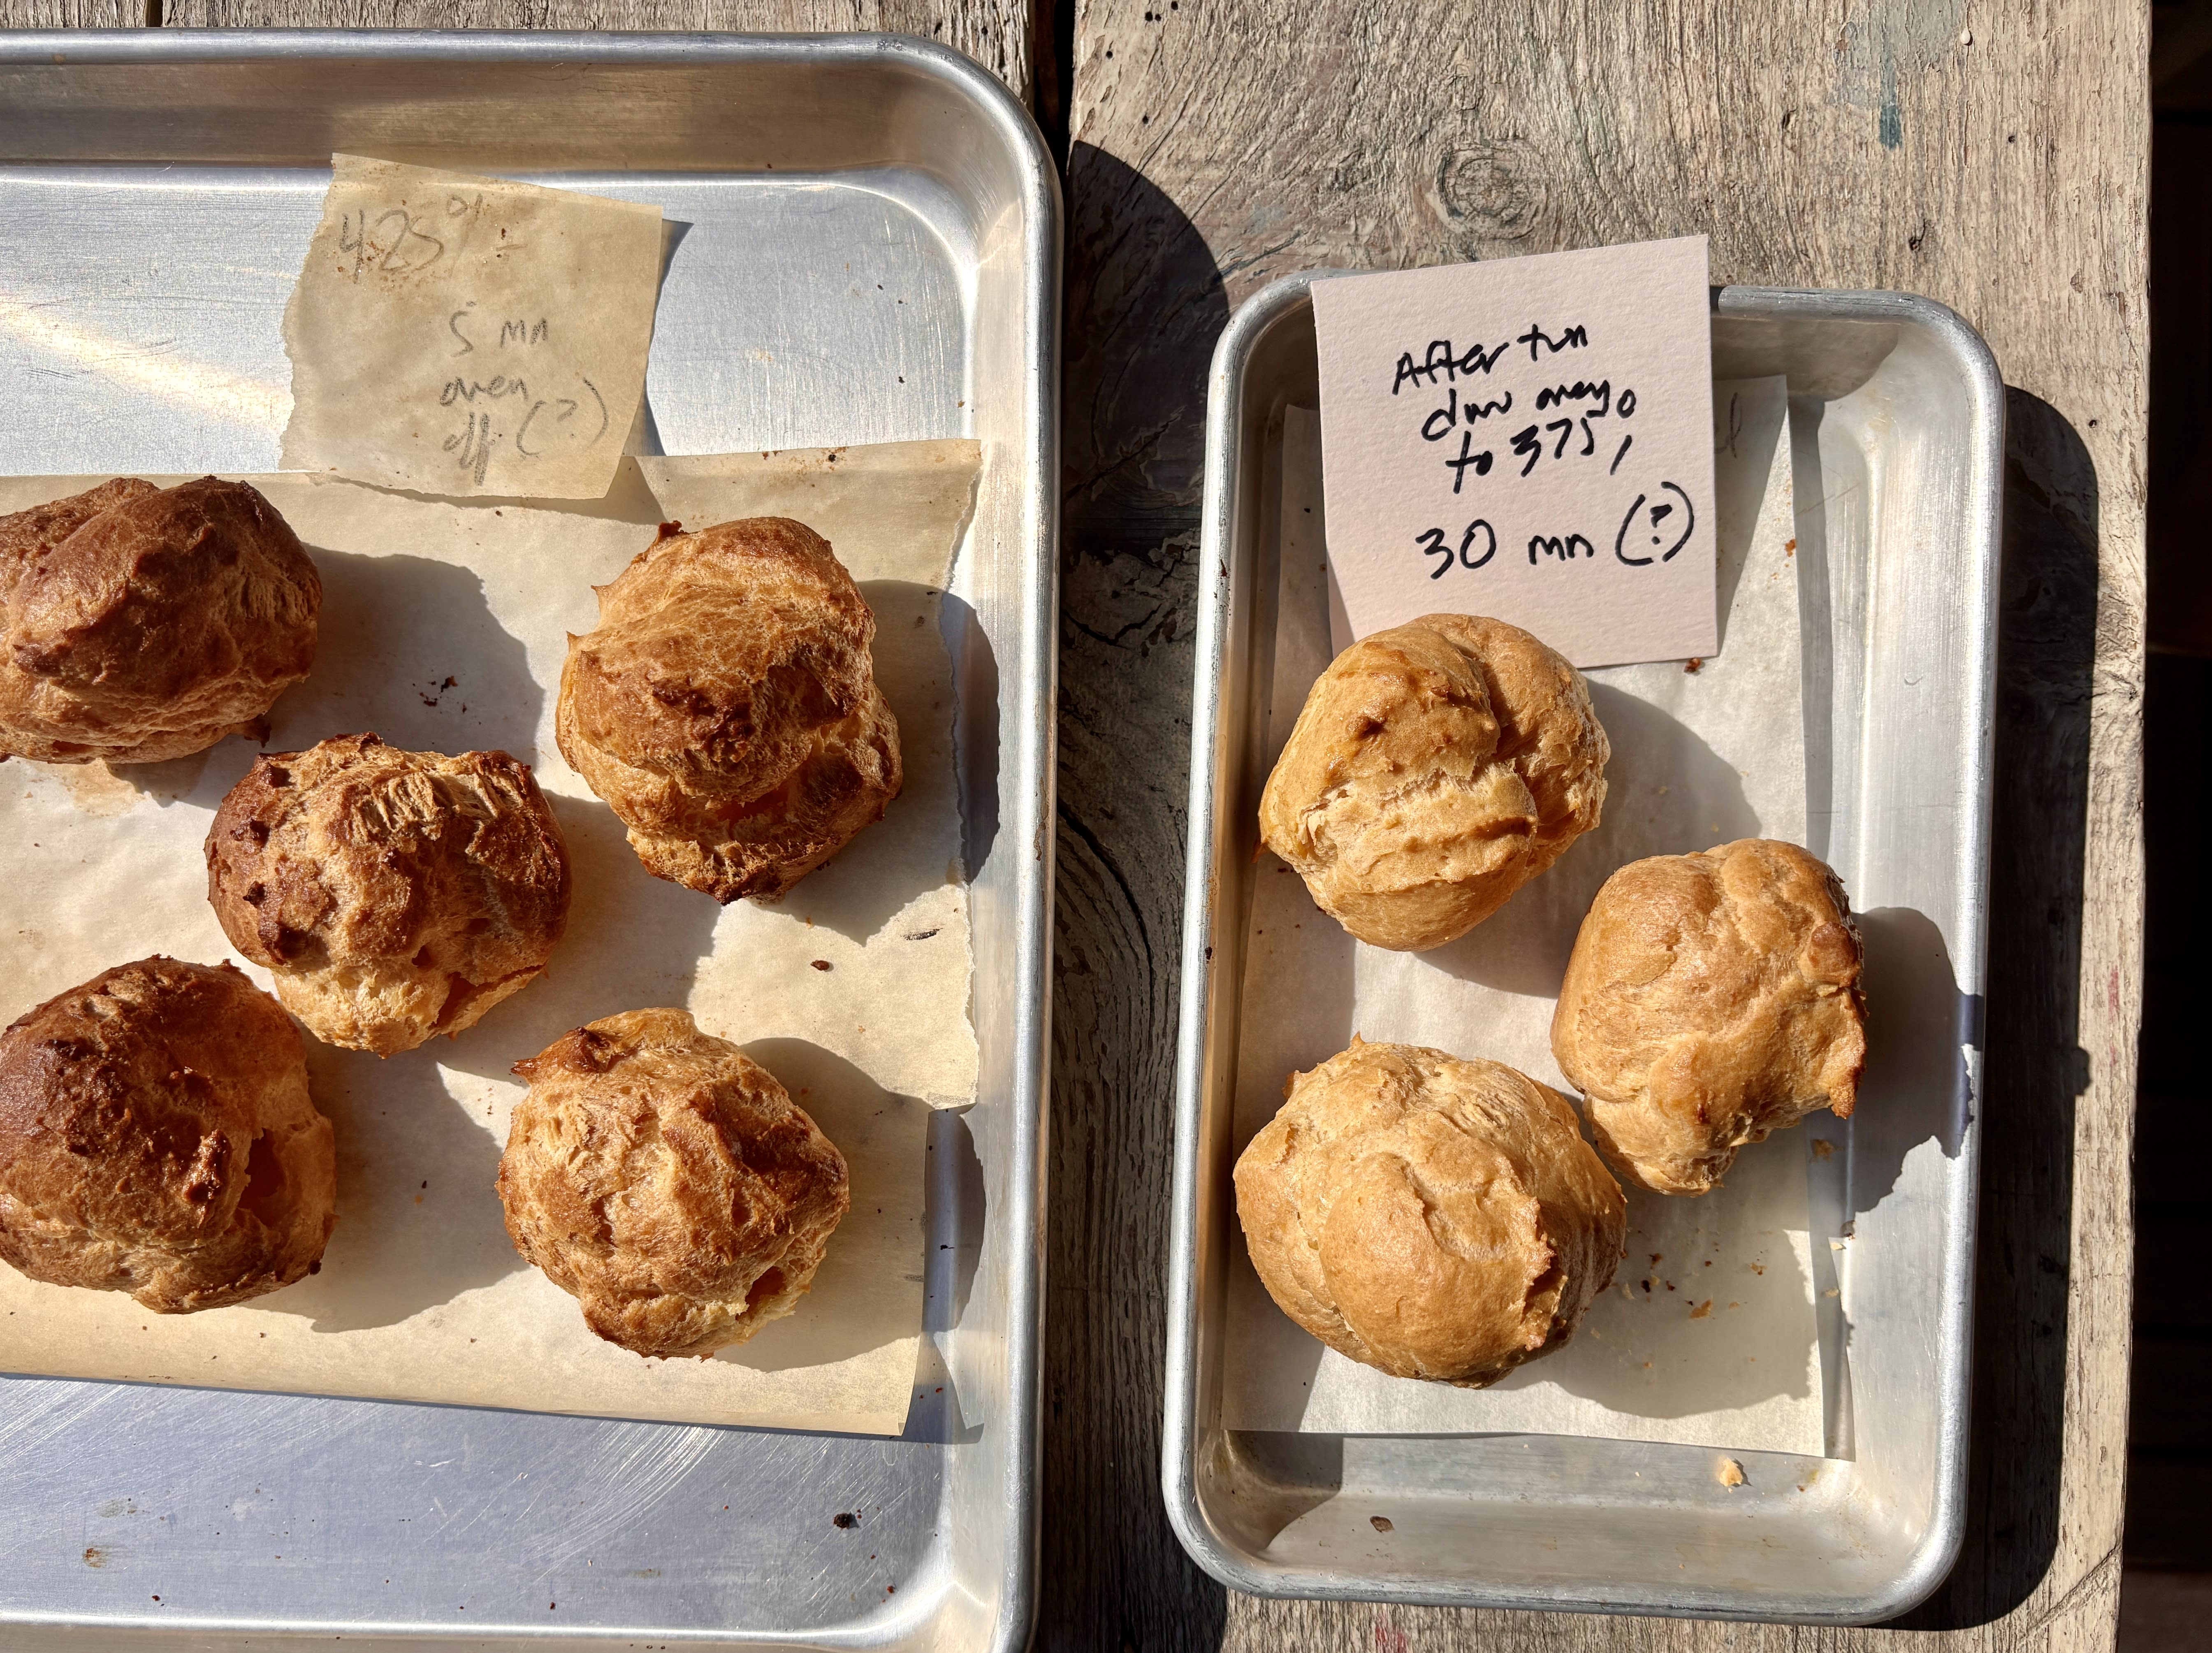
While the baking temperature in the first printing of the book has you baking the puffs at 425ºF (220ºC), I’m wondering if that’s too high for people? I like my puffs very crispy so that’s fine with me. But if yours are getting too dark for your taste, you can take them out before the recommended baking time. Similarly, you don’t need to keep them in the turned-off oven for 5 minutes after baking.

Another way I prepare pâte à choux puffs is to bake them in a 425ºF (220ºC) oven for 5 minutes, then turn the oven down to 375ºF (190ºC) and bake them until they’re golden brown. You can see the difference here:

On the left, baked at 425ºF/220ºC only (as the recipe appears in the book). On the right, puffs that were baked for 5 minutes in a 425ºF/220ºC oven, then turned down to 375ºF/190ºC.

When baking, always use visual clues to check for doneness, rather than strictly adhering to a baking time. When I baked professionally, we used a timer to remind us that something was in the oven. We never relied on it to tell us when something was done.

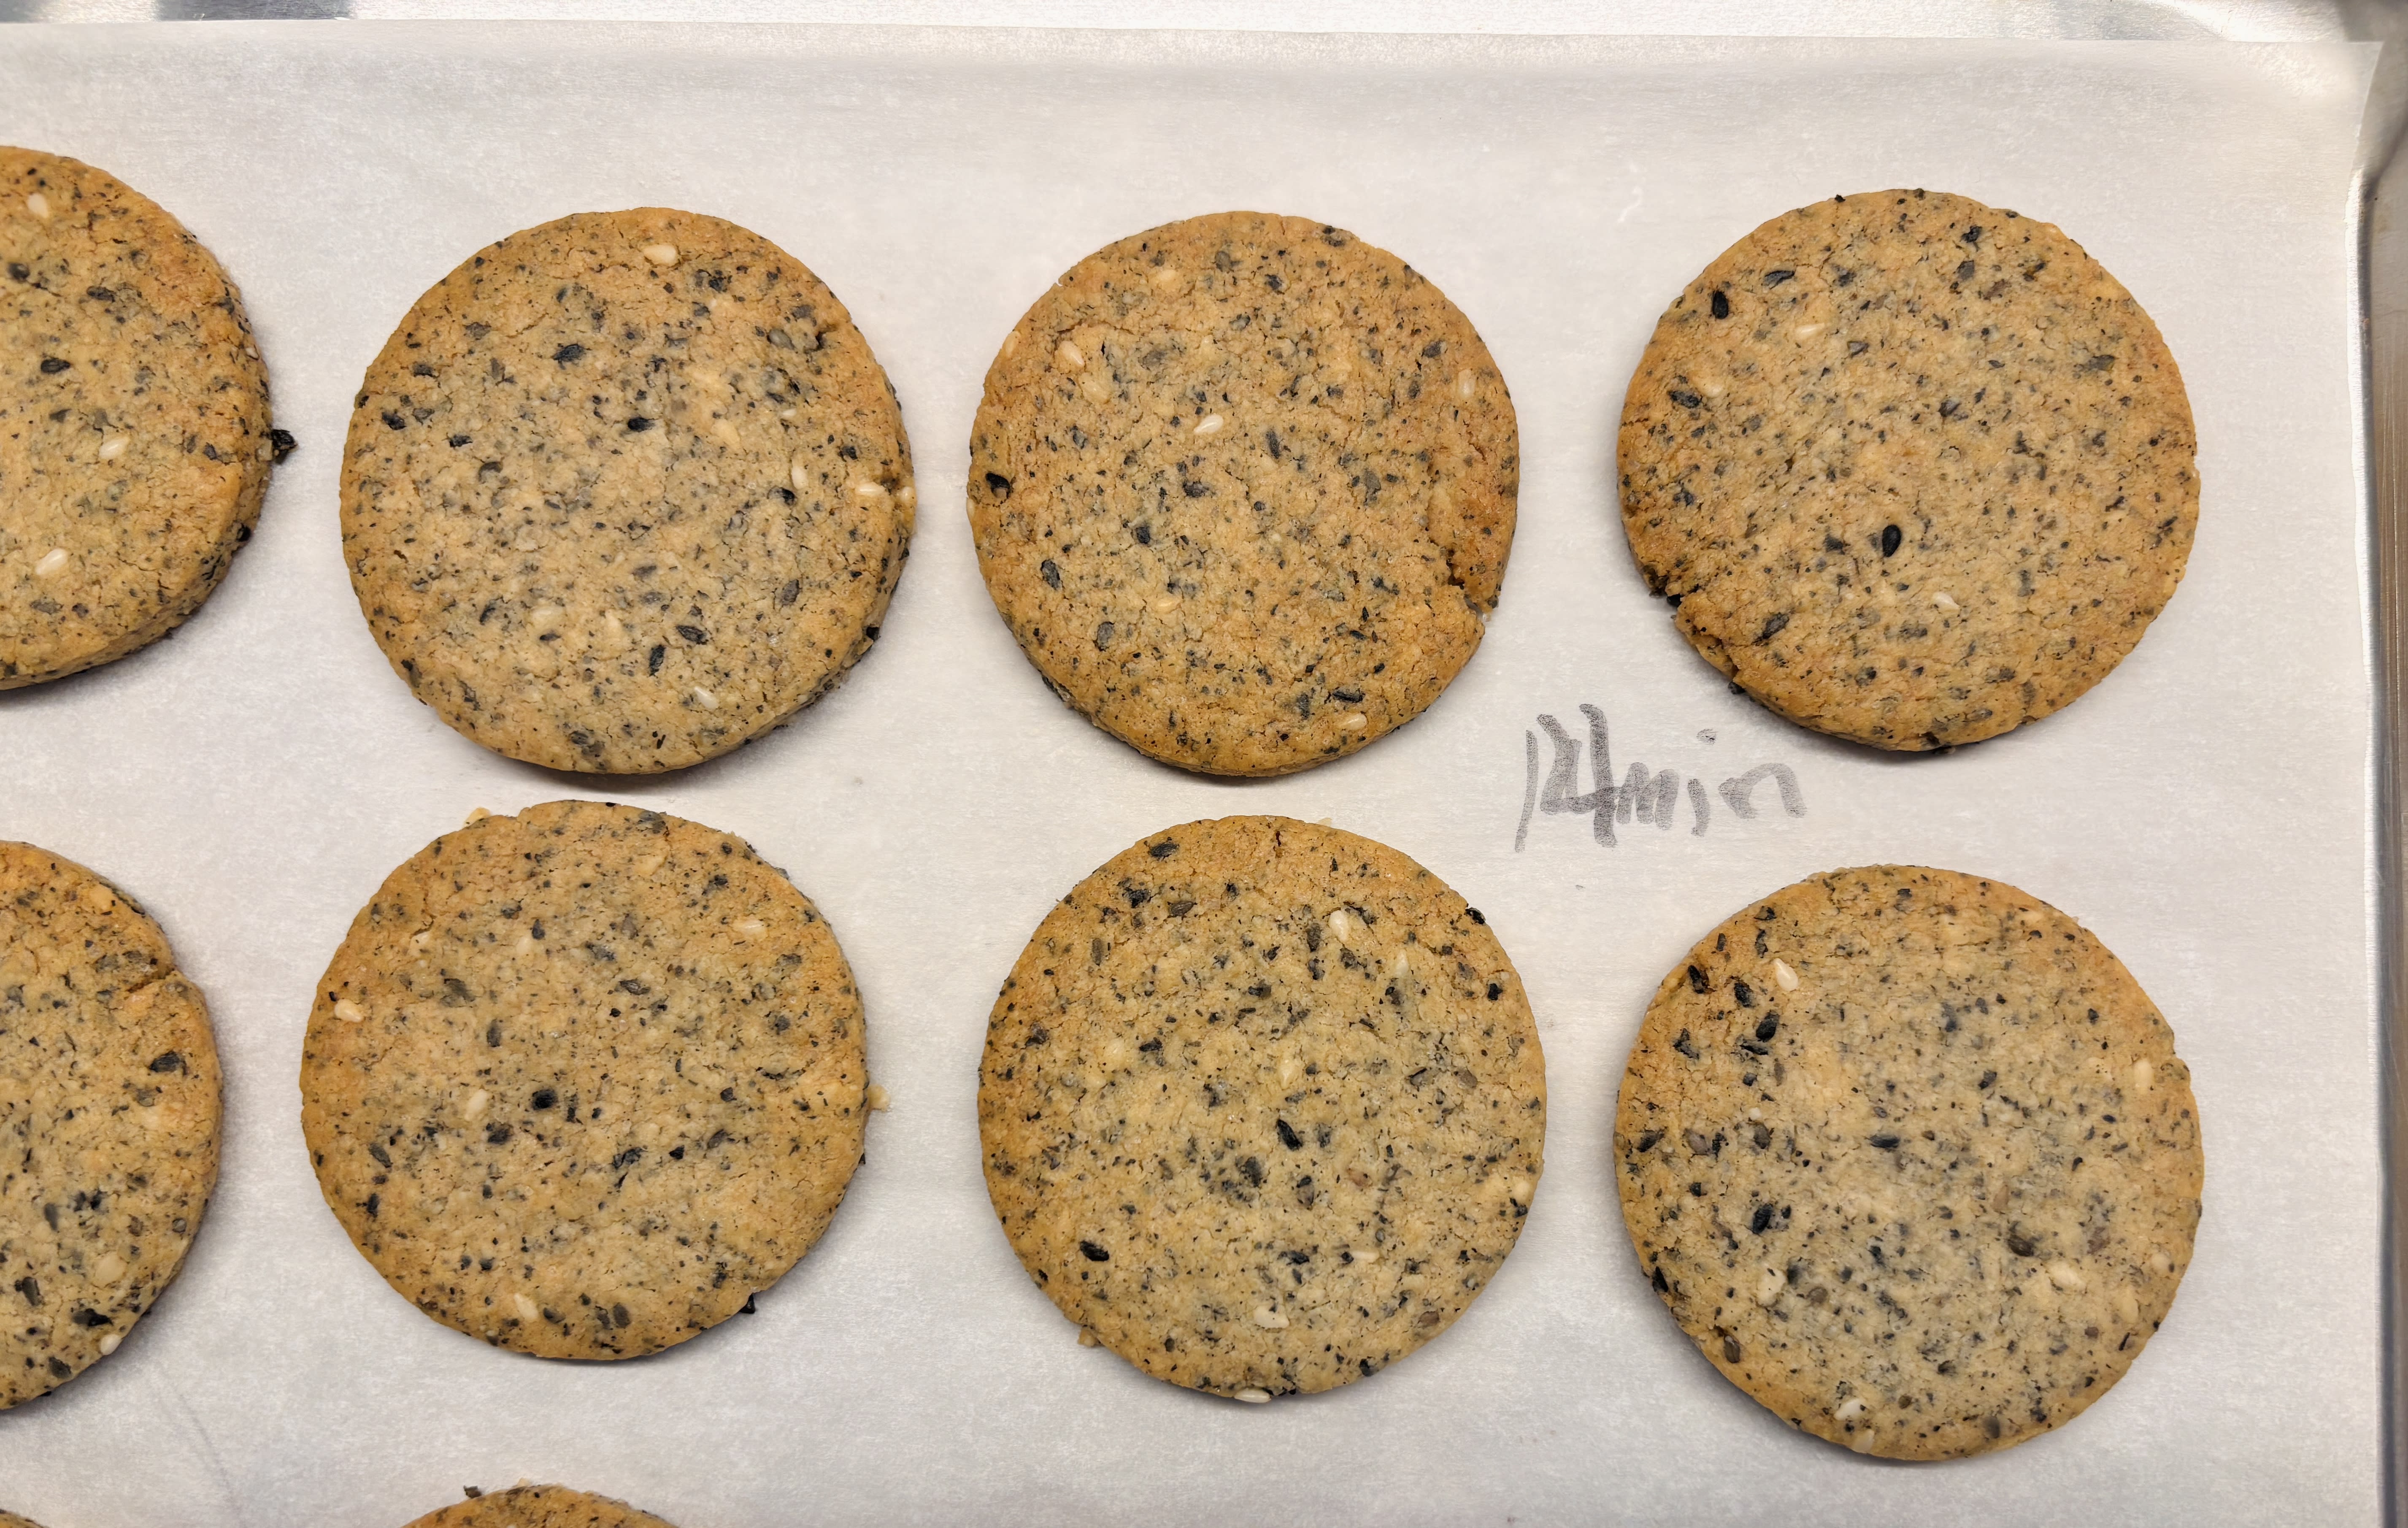
– When rolling out the dough for the Orange poppyseed sandwich cookies (page 246), the dough should be rolled 1/4 inch (6mm) thick, rather than the 1/2 inch in the book. I find the baking time of 12 minutes is just right for me, but if you like the cookies a little darker, I did a test at 14 minutes, shown below:

These were baked for 14 minutes; at 12 minutes, they’ll be lighter. The darker ones are crispier but the lighter ones meld more smoothly with the filling.

In the book, I gave a chocolate and chocolate-hazelnut options for filling the cookies, if you’d prefer to do that instead of using jam. But you can also fill them with Salted butter caramel sauce (page 283) that’s cooled until it’s thick and spreadable. And in place of poppyseeds, you can use very coarsely ground black or white sesame seeds instead. Or leave them whole! You’ve got options.

Poppyseed cookies filled with salted butter caramel.

-For the Palets Bretons (page 243), a magazine published the recipe with a baking time of “25-35 minutes.” After I developed the recipe, they were tested (again) here in my kitchen when the food stylists made them for the photo in the book. After the magazine published the recipe, one of the food stylists retested them in his kitchen in California and found the baking time in the book to be correct (see above.) But if your oven is different, just bake them until they’re golden brown across the top.

-The yield on the Seville Marmalade recipe (page 299) says it makes 8 cups but depending on various factors, you may get less. Also you don’t necessarily need to let the oranges rest overnight in the liquid. It does help the pectin work its magic, but it’s not obligatory.

– I’ve been playing with the Butternut squash pie (page 96), which is a great holiday treat. Some have said that it makes a bit too much filling for the dough. I recast the recipe so there’s no leftover filling, and you can get that here.

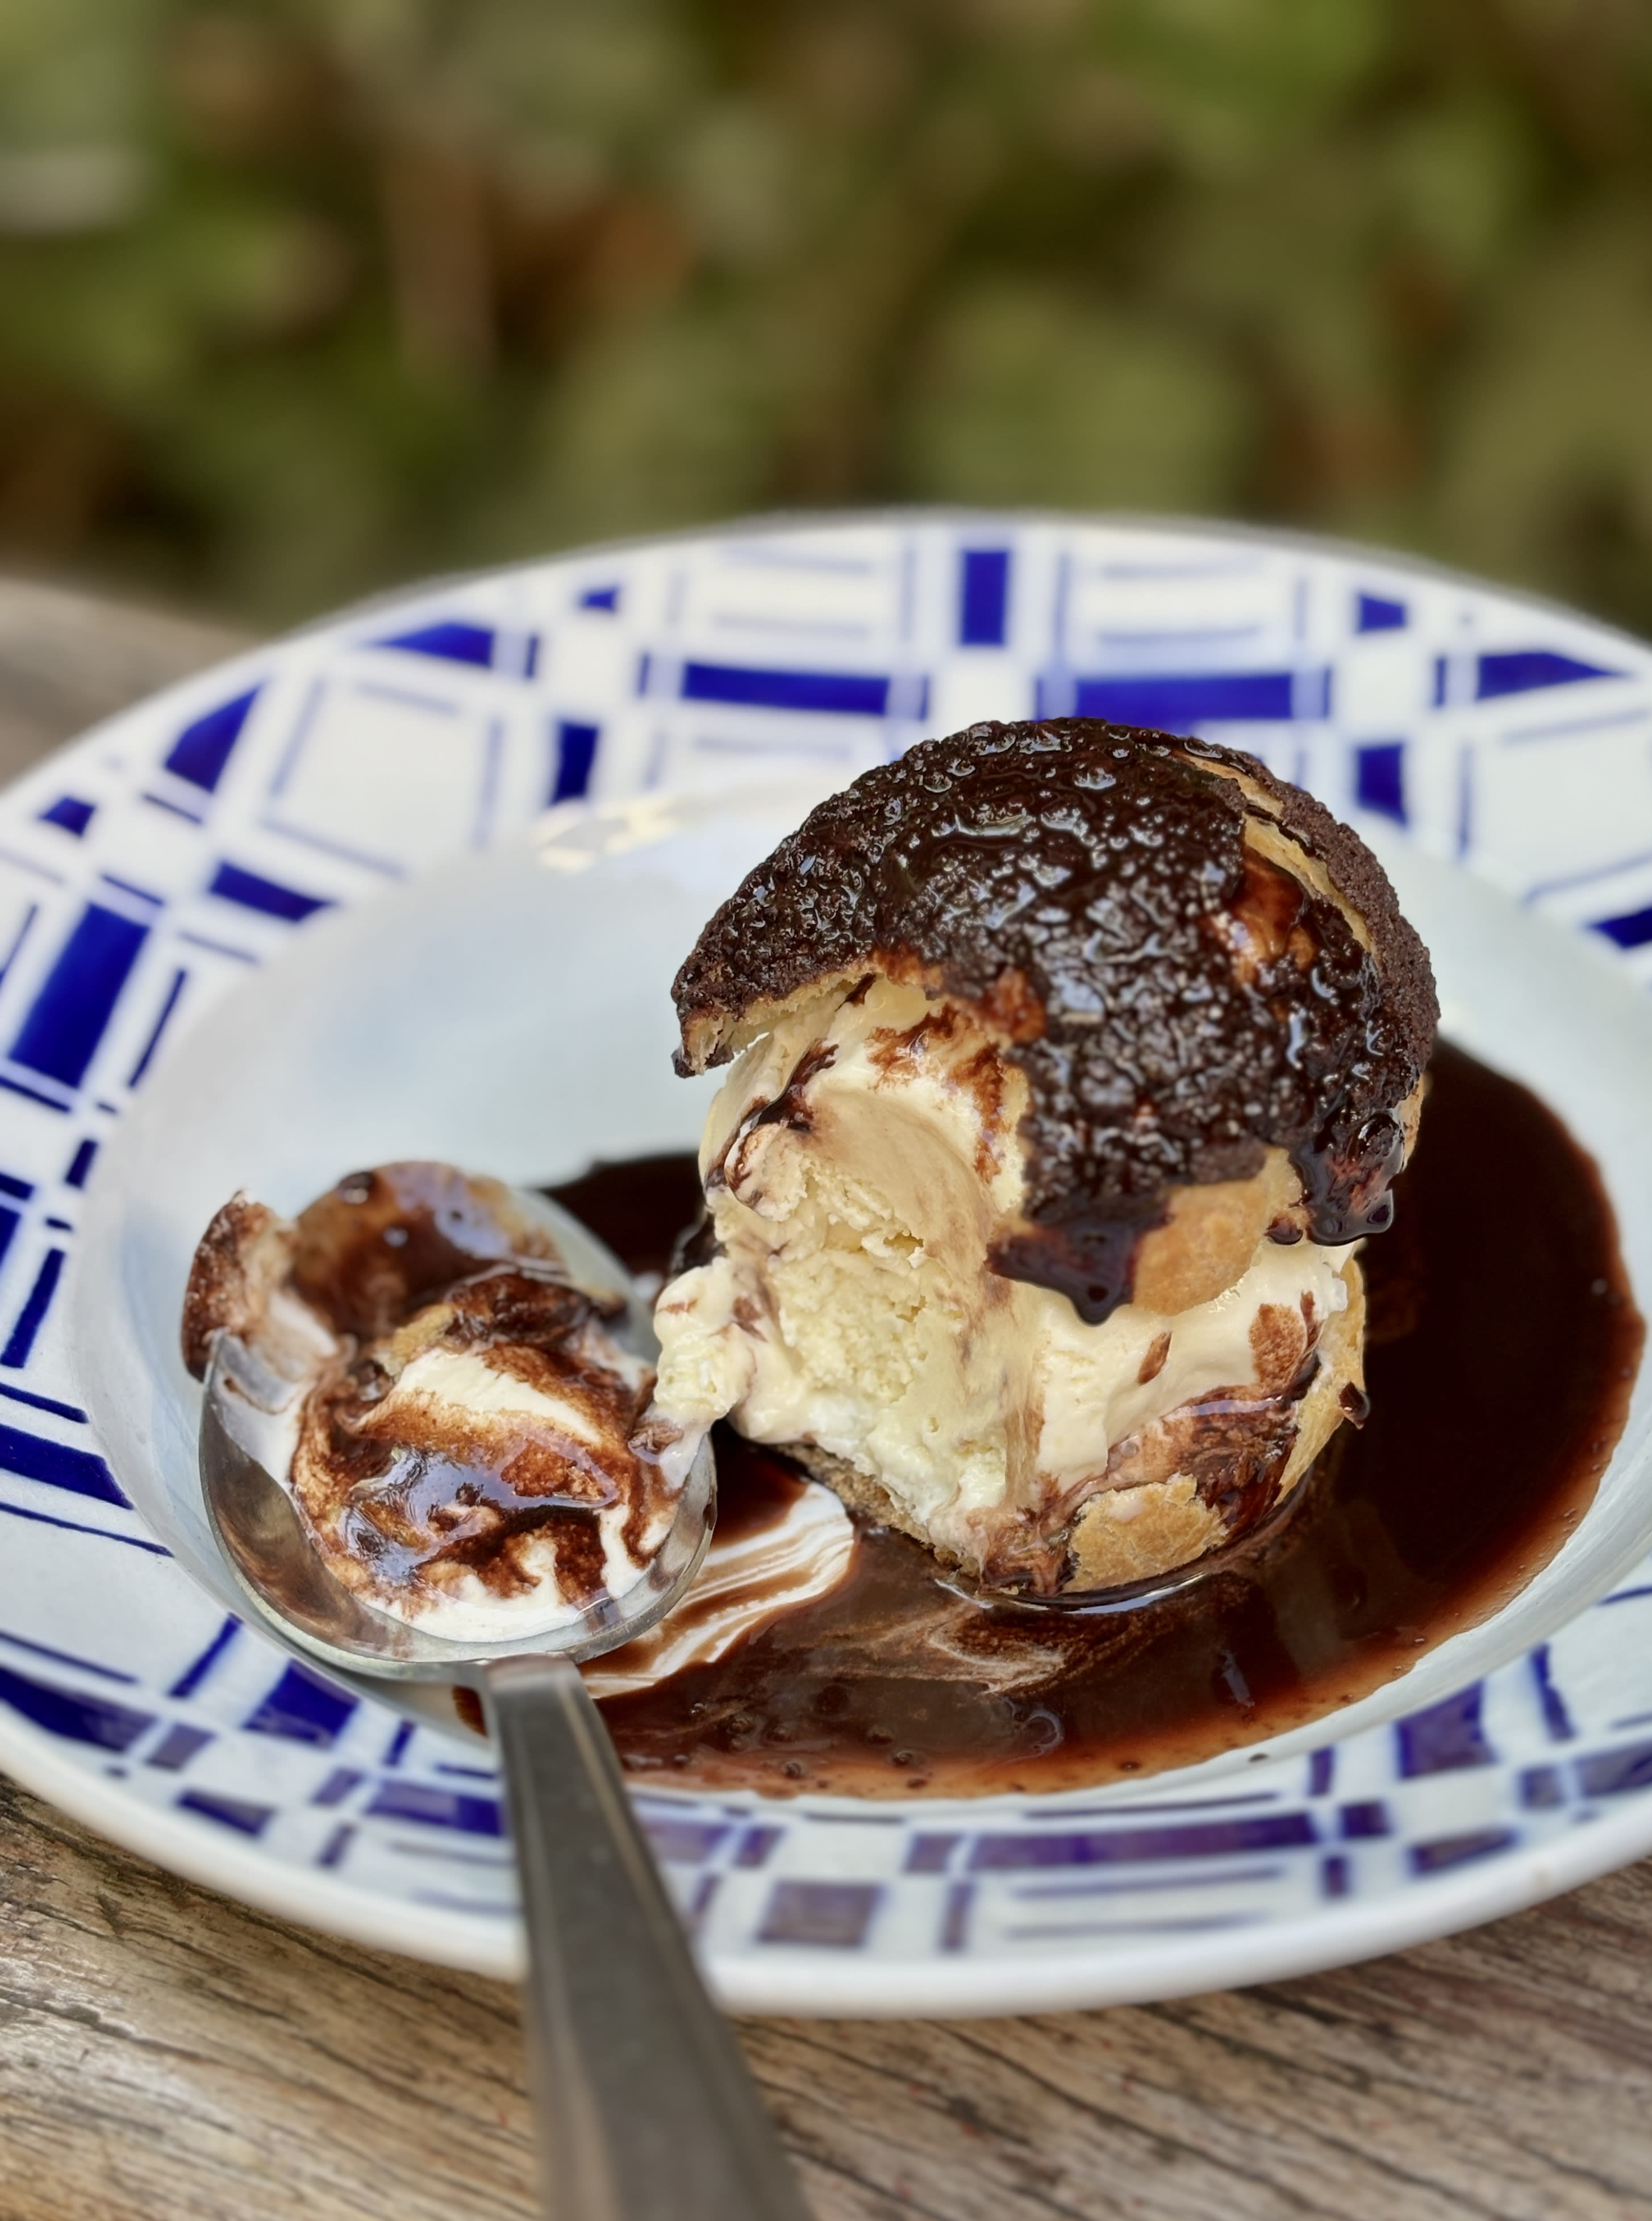
Sharp-eyed readers might notice the profiteroles on the cover of the book, from Grand Brasserie in Paris, have a layer of craquelin over the top. So I thought I’d share a recipe for chocolate craquelin.

This recipe is based on my craquelin recipe, which I retoggled to make them chocolate. You can get the chocolate craquelin recipe here.

Enjoy!

Maple Pecan Sticky Buns

By: David
16 October 2025 at 14:16

Maple Pecan Sticky Buns

I’ve never been a huge fan of sticky buns because I find many of them teeth-screamingly sweet. That said, these dial down the sweetness in favor of flavor, courtesy of two of my favorite things: pecans and maple syrup. And having the two swaddled in a butterscotch-like caramel seems to make each one taste even better than they do on their own.

Maple Pecan Sticky Buns

I was intrigued by a new baking book, The New Sugar & Spice by Samantha Seneviratne, whose subtitle promises recipes for “bolder baking,” which immediately caught my interest. I don’t need to wow me with innovation – tweaking classics is often good enough. The wheel can only be reinvented so many times and no need to repair something that doesn’t need fixing.

Maple Pecan Sticky Buns

It’s unfortunate that I am hooked on both, and like other expats, maple syrup and pecans are two things that we tend to hoard. Sirop d’érable (maple syrup) is available in Paris, the best bottles are sold at natural food stores, and pecans are around, although I often find them not quite at their freshest by the time they’ve hit the store shelves. So I lug those back with me. Fortunately, on occasion, I’m treated to bags by visiting friends and guests. Thank goodness I now have an American-sized freezer.

Maple Pecan Sticky Buns

Well…to be honest, I used to hide them in the freezer, but since I’m a compulsive nibbler, I was getting tired of teething on frozen pecans. So I gave up and started keeping them in a drawer, which means easier access to these precious beauties.

Maple Pecan Sticky Buns

Sticky buns are very easy to make. You start with a simple yeasted dough, softened with milk. Once it rises, you strew the rolled out dough with a mixture of brown sugar and cinnamon. Then comes the fun part: Rolling them up!

The doughy roll then gets sliced into spiraled wheels. Watching them rise in the pan – then rise even further in the oven, is one of the great joys in life. Eating them, of course, is the best part. But if you’ve got kids (or even a middle-aged man, like me), this is a really fun project for a weekend or during a holiday break.

Maple Pecan Sticky Buns

While I was making these, I posted a live video on Snapchat, which is a fun way to share short videos that I’ve been playing around with. The downside is that I got so involved with shooting and sharing that I neglected to chop the pecans before using them, as you can see in the pictures. On Snapchat, posts and videos disappear after twenty-four hours – so when it’s gone, it’s gone! But you can follow me on Snapchat for other tips, future videos and a soupçon of occasional goofiness at davidlebovitz.

Maple Pecan Sticky Buns

As much as I’m freaked out by new technologies, the old ones tend to vex people, too. Folks get freaked out by candy thermometers, but if you use one, you can get your caramel precisely to where it should be. I “went rogue” and didn’t use one, and my sticky buns got a touch too dark, which I liked for the “on the edge” flavor, but resulted in a sticky bun glaze that was less-runny that what some might be used to. So if you have one, you should put that candy thermometer to use when making these sticky buns.

Maple Pecan Sticky Buns

The result of my morning of baking was a tray full of sticky buns that were great for a mid-morning snack but not bad for bringing to a meeting later that evening, which I did. The next day, people raved about them. I’ve got a few other “bold” recipes bookmarked from Samantha’s gorgeous book. And I’m going to make sure my stock of pecans doesn’t run too low, because I’ll be making these again in the near future.

Maple Pecan Sticky Buns

Print

Maple Pecan Sticky Buns

Adapted from The New Sugar & Spice by Samantha Seneviratne
The original recipe calls for baking eight spirals in a 9-inch (23cm) round pan, but I wanted to get nine smaller ones, so used an 8-inch (20cm) square pan and cut the rolled up dough into nine disks. You can do either. Note: Do not use a springform pan for this recipe. Because of the maple caramel, the pan may leak. Even if you wrap it well with foil, caramel may seep out and you don’t want the lovely maple-accented glaze on foil. You want it on your sticky buns.The original recipe also called for a mix of walnuts and pecans, and I opted for all pecans since they’re one of life’s great luxuries to me. But you can swap out any nuts as you wish. There was also 1/2 cup (80g) of raisins added to the caramel along with the pecans, which I omitted as well, although you’re welcome to add them, or another dried fruit, like cranberries or sour cherries.You’ll also note the recipe calls for bread flour. Its higher protein content means that you’ll have better gluten formation and sturdier bread, or buns, as in this case. Most well-stocked supermarkets carry it or you can buy it
. You can replicate it by replacing 1 1/2 teaspoons of all-purpose flour with 1 1/2 teaspoons of vital wheat gluten, per cup, or 140g, of all-purpose flour. (In France, I use T65 organic flour and add vital wheat gluten, which is available in natural food stores.)
Course Snack

Ingredients

For the dough

  • 6 tablespoons unsalted butter cubed
  • 2/3 cups (160ml) whole or lowfat milk
  • 3 tablespoons granulated sugar
  • 1 3/4 teaspoon active dry yeast
  • 1 large egg
  • 2 1/2 cups (320g) bread flour
  • 1/2 teaspoon kosher or sea salt

For the topping

  • 6 tablespoons (3 ounces, 85g) unsalted butter
  • 1/4 cup (45g) dark brown sugar
  • 1/4 cup (60ml) maple syrup (dark amber)
  • 1/2 teaspoon kosher or sea salt
  • 1 cup (140g) pecans lightly toasted and coarsely chopped

For the filling

  • 1/4 cup (45g) dark brown sugar
  • 2 tablespoons ground cinnamon
  • 1/2 teaspoon kosher or sea salt
  • 3 tablespoons (1 1/2 ounces, 42g) butter salted or unsalted, at room temperature

Instructions

  • To make the dough, warm the butter, milk and sugar in a small saucepan. Pour into the bowl of a stand mixer and let stand until slightly tepid. (You can make this without a stand mixer. If so, pour the milk mixture into a medium bowl.) Sprinkle the yeast over the milk, stir gently, and let sit in a warm place until it starts to bubble, about 10 to 15 minutes.
  • Mix in the egg, flour, and salt, and knead with the paddle or dough hook at low-to-medium speed until smooth and elastic, about 5 minutes. (If kneading by hand, it may take a bit longer.) Knead the dough a few times with your hand until it’s a smooth ball, place it back in the bowl and cover the bowl with a kitchen towel. Let rise in a warm place until doubled, about 1 to 1 ½ hours. Time can vary, and it may take longer, or less time.
  • While the dough is rising, make the topping. Lightly butter a 9-inch (23cm) round or 8-inch (20cm) square cake pan. Heat the butter, brown sugar, maple syrup and salt in a small saucepan fitted with a candy thermometer and cook over medium heat until the mixture comes to a boil. When it gets foamy, after a minute or so, when a few of the bubbles start to get larger, remove from heat. (Samantha notes in her book that if using a thermometer, the temperature should read 212ºF (100ºC).
  • Pour the maple caramel into the prepared cake pan and strew the pecans over the caramel. Set aside.
  • To make the filling, mix the brown sugar, cinnamon and salt in a small bowl. Set aside.
  • When the dough has risen, knead the dough a couple of times on a lightly floured countertop and roll it into a 10-inch (25cm) square. Spread the softened butter over the dough and sprinkle evenly with the filling mixture. Roll up the dough as tightly as possible and using a serrated knife, cut the dough into 8 or 9 slices. If using a square pan, cut into 9. If using a round pan, cut into 8. Place them in the pan with the cut side up. Cover loosely with plastic wrap or a clean, lint-free kitchen towel, and let rise until almost doubled, about 1 hour.
  • Ten minutes before you’re ready to bake the sticky buns, preheat the oven to 375ºF (190ºC). Place the pan of sticky buns on a baking sheet lined with foil (to catch any overflow drips or spill) and bake until the center roll is lightly browned on top and it doesn’t feel soft when you press it with your finger, 25 to 30 minutes.
  • Remove the rolls from the oven. Let cool for 5 minutes then run a knife around the outside (if possible, as the buns may have overtaken the rims), then tip the sticky buns out onto a cooling rack or serving platter.

Notes

Serving and storage: Sticky buns are always best served warm, and the day they are made but are fine the next day. If you wish, you can keep them well-wrapped for a few days, rewarming them in a low oven, wrapped in foil until heated through. They can be frozen for up to two months.

Related Posts

Ingredients for American Baking in Paris

Ingredient Ingredients and Substitutions

Vegan Sticky Buns (Minimalist Baker)

Gluten-Free Sticky Buns (Faithfully Gluten-Free)

Apple Jelly

By: David
25 September 2025 at 21:49

I was recently reunited with something I miss very much – a loaded apple tree! Friends of mine who had a house in the French countryside had a tree that, come fall, had so many apples, the limbs threatened to break off. Not wanting to be an accomplice in apple-cide, I decided to do my part to save the tree, and the apples, and make Apple Jelly.

Ten years later, my friends sold their house, which ended my bounty of apples (and medlars.) So how happy was I when some other friends bought a house in Brittany, which had not one, not two…but four apple trees. Score!

The varieties were Reine de Reinette, Canada, and Boskop, which I found out when a concerned neighbor saw someone (me) swiping apples off the trees, and the ground, loading up sacks of them. I think he figured I was pilfering the pommes, but was reassured when I told him I was friends with the owner of the mini-orchard.

After talking with him a few minutes, I realized he was an expert on the apples and not only knew about the varieties of apples, but also what to do with them and nodded in approval when I told him I was going to make Apple Jelly. He was happy to help me fill some bags, which included green varieties, which are high in pectin and help the jelly set, and are more acidic than other apples, which make the jelly well-balanced and delicious. (Calvados, the famed apple brandy from Normany, use very acidic apples since the flavor is more pronounced once cooked.)

To make Apple Jelly, it’s probably a good idea to either a friend with an apple tree (with an explanation ready in case a neighbor comes by…) or get apples from a source where they might sell you apples that are dented or dinged, which are called pommes à cuire (cooking apples) in France, and are quite popular. At the markets, those apples are usually the first to get sold as people use the bargain beauties to make compotes and tarts with. And French bakers like to use a variety of apples in dessert, like Apple Cake, as the flavor is more interesting than if using just one variety.

In the end, I came home with over 50 pounds (23kg) of apples in all shapes, colors, and conditions. And all went to a good cause. This recipe uses a good deal of apples but makes a half-dozen jars, which is good if you’re anything like me and need to reward your friends, and perhaps a local apple expert, with a jar of jelly.

Print

Apple Jelly

While some sources say to National Center for Food Preservation cook the apple jelly to 220ºF (104ºC), every time I've made this, it jelled at around 230ºF (110ºC). So it’s best to use a thermometer but also to test your jelly by dropping a dab on a chilled plate, putting it in the freezer for a few minutes, then checking to see if the mixture has jelled by nudging it and seeing if it mounds and wrinkles, as shown in the post. If you don’t have a candy thermometer, you can use the "nudge" method to test your jelly. One pound (450g) of apples cooked will yield about 1 cup (250ml) strained juice from the cooked apples. So if you have fewer apples, or you get a different yield (since all apples are different), you can use that as a guideline and add 3/4 cup (150g) sugar and 1 1/2 teaspoons of lemon juice per cup of strained apple juice. You can easily halve this recipe, too. Note that in step #3 depending on the size of your strainer or colander, you may need to use two, as I do. One tip is when putting the apples in the strainers if you can't get them all in, after filling them up, let the mixture sit 5 to 10 minutes; it'll settle down and compress, and you should be able to add the rest after that.
Servings 6 jars, 1 cup (250ml) each

Ingredients

  • 8 pounds (3.75kg) apples
  • 10 cups (2.25L) water
  • 6 cups (1,2kg) sugar
  • 1/4 cup (60ml) freshly squeezed lemon juice
  • 2 teaspoons Calvados brandy, or Cognac

Instructions

  • Rinse the apples and cut them coarsely into chunks, then put them and the cores and seeds, into a very large stockpot.
  • Add the water, cover, and bring to a boil. When bubbling, reduce the heat a bit, leave the lid askew, and cook for 20 to 30 minutes, until the apples are tender and cooked through.
  • Line a mesh colander with a piece of muslin cloth or a few folds of cheesecloth (or use a jelly bag and stand) and set it over a deep bowl, then ladle the apples and the liquid into the colanders. (I use two lined colanders since it was quite a bit of apples.)
  • Let stand or at least 3 hours (but you'll get more juice if you let the apples drain around ~8 hours), and during that time, no matter how tempting it looks,
    do not press down
    at any time on the apples to extract more juice or the jelly will get cloudy.
  • The next day, measure out the juice. You should have about 8 cups (2L) but may get a little more. Pour the juice into a large, non-reactive pot fitted with a candy thermometer, add the sugar and lemon juice, and bring to a boil. During cooking, as any white foam forms on the surface while the jelly is cooking, gently skim it off with a ladle. (See Note at the end of the recipe for some idea about repurposing the apples and the foam.)
  • Cook until the temperature reaches 220ºF (104ºC). At that point, turn off the heat and begin testing the jelly on a chilled plate in the freezer, using the method mentioned in the headnote. When it wrinkles and holds its shape, it’s done. If not, continue to cook and re-test it at intervals. This batch set at 230ºF (110ºC).
  • Remove from heat, stir in the liquor, and ladle into clean jars, then cap tightly.

Notes

Storage: I don’t preserve my jelly or jams in heat-treated jars because I eat them quickly, but store mine in the refrigerator where they’ll keep for several months. If you wish to preserve them, you can find instructions for canning at the University of Georgia website.
Notes: The cooked apples can be passed through a food mill and used as applesauce, or for Chewy Oatmeal Raisin Cookies, Nonfat Gingersnaps, or my favorite Granola recipe.
Any foam scraped off the top of the jelly while cooking can be refrigerated or frozen, and added to your next batch of jam. It's especially great used in jams made with low-pectin fruit, such as strawberries, apricots, peaches, pineapple, or cherries.

apple jelly

Related Recipes and Links

Les Jars

Apricot Jam

Seville Orange Marmalade

Easy Jam Tart

Bergamot Marmalade

No-Recipe Cherry Jam

Rhubarb-Berry Jam

Beer, Shallot, and Cocoa Nib Marmalade

Paris book launch and booksigning of ready for dessert!

By: David
24 September 2025 at 17:29

I’ll be at AXS design, one of my favorite shops in Paris, celebrating the release of Ready for Dessert on Sept 30th from 5:30 to 7pm.

AXS is filled with treasures, including French dinnerware, glasses and linens, and lots more. They were kind enough to lend me some of their beautiful items for the photos in book, so I’m thrilled they’re hosting the book launch and signing. Books will be available for purchase and I’ll be on hand to personalize them for you.

Thanks to Comté for providing samples of French cheese for the event.

See you there!

Received — 1 June 2025 David Lebovitz

paris book event – june 29, 2025

By: David
1 June 2025 at 18:10
The Sweet Life in Paris

Join me and my friend Jane Bertch in Paris on Sunday, June 29th, for a booksigning event from 3pm to 4:30pm at La Cuisine Paris at 78 Quai de l’Hôtel de Ville (4th).

I’ll be signing paperback copies of my books L’Appart and The Sweet Life in Paris, and Jane will be signing copies of her memoir of opening a cooking school in Paris, The French Ingredient.

Note that books are in limited supply and you are welcome to bring books you’ve purchased elsewhere. Please note that the venue is not able to take credit card payments on-site.

Stop by and say hi!

Get my new book ready for dessert…now available!

By: David
8 April 2025 at 16:03

It’s almost ready!

Coming this Fall is the new, completely revised edition of Ready for Dessert: My Best Recipes.

[It’s now available at ==> Bookshop, Amazon, Barnes & Noble and at the links below.]

When my publisher told me they wanted a new edition of the book, I decided to revise the book completely, from top to bottom. Ready for Dessert is a compilation of my favorite recipes, so I knew that I wanted to keep my signature Chocolate chip cookies, the Chocolate-cherry biscotti accented with black pepper, and classic Black & white cookies, along with everyone’s favorite, the Fresh ginger cake, as well as a tangy Lemon semifreddo, and the recipe for the Coconut layer cake I made for Alice Waters’ father on his birthday every year.

Order Ready for Dessert now!

To sweeten the pot, I added brand-new recipes to Ready for Dessert, favorites culled from my kitchen in Paris, including Île flottante (inspired by the version I always order at a favorite local bistro), a very special Riz au lait (rice pudding) topped with crunchy, candied nuts and salted butter caramel sauce, buttery Palets Breton cookies, and my version of the iconic, and irresistible (truly!), Maple tart from Tapisserie in Paris, the pastry shop of the highly-regarded restaurant Septime, so you can make it at home.

One of my favorite pictures (and recipes) from the new edition of Ready for Dessert is the Marjolaine cake. We made several of these cakes for the photo shoot and gave leftovers to the local butcher shop – and now I’m their favorite customer.

Award-winning photographer Ed Anderson, who photographed my books, My Paris Kitchen, Drinking French, and The Perfect Scoop, returned to Paris to shoot the pictures for the book, in my kitchen and backyard, as well as out-and-about in the city. Another bonus was that I got to work with two of my favorite food stylists, Elisabet der Nederlanden and George Dolese. We had a blast shopping in Paris for ingredients, and making the recipes in my kitchen, then eating them as well.

When the food stylists end up devouring your recipes during a photo shoot, that’s the highest compliment a cookbook author can have. They bake and cook food all day long, so are picky about what they eat. (And boy, did they eat!) I also invited friends to come by and join us, so you’ll find guests shots in the book as well.

The all-new edition of Ready for Dessert is now available at your local independent bookseller and online.

Below are some bookstores and online retailers where you can order the book:

| Amazon | Bookshop.org | Now Serving | Barnes & Noble | Omnivore | Book Larder | Kitchen Arts & Letters | Bold Fork | Books are Magic | Amazon France | Powell’s
| RJ Julia | Strand | Smith & Son Paris | Amazon UK | Archestratus | Politics and Prose | Vivienne Culinary Books | Book Passage | Elliot Bay | Village Books | East End Books | Indigo Canada | Amazon Australia | Shakespeare and Company Paris |

Chouquettes: French Cream Puff Recipe

By: David
17 February 2025 at 17:01
chouquettes - French cream puffs recipe-5

Dinner in Paris generally starts at 8 pm, especially in restaurants, and I get ravenously hungry between lunch and dinner.

chouquettes - French cream puffs dough

Parisians do dine rather late – often not until 9:30 pm or later, and that’s an awfully long stretch. So French people visit their local pâtisserie for an afternoon snack, known as le goûter, although nowadays Parisians often call it le snack.

chouquettes - French cream puffs

Le snack is often nothing more than a buttery financier or a tender madeleine. At home, French children at home are often given a split piece of baguette with a bar of dark chocolate tucked inside to keep them happy until dinner.

But my snack of choice is invariably les chouquettes: Cream puffs covered with crunchy nuggets of sugar, then baked until golden-brown. The eggy, pillowy puffs are piled uneventfully behind the counter and sold in crisp little paper sacks, each one holding about 100 grams, or about 10. I found that engaging the counter person in a few words of niceties will often mean that before the ends of the bag are twisted shut, an extra puff will be tossed in as a little gift for l’américain.

chouquettes - French cream puffs dough

Nothing is easier to make than chouquettes and you can bake them right with ingredients you likely already have on hand. The only thing you’ll need to find is pearl sugar, which gives the puffs their signature crunch. Some tell me you can buy it at Ikea stores, or you can find it at King Arthur or on Amazon. If you have sugar cubes, you can crush those up into rough chunks and use those, although they’re not quite the same. And if you’re like me, and like chocolate, you could press some chocolate chips into a few of the puffs before baking.

This is one of my favorite of all French snacks and I can polish away a whole bag, or tray, in no time. These are best made and eaten right away, or later the same day – if they last that long!

chouquettes - French cream puffs

Print

Chouquettes

From The Sweet Life in Paris
Shaping the mounds of dough is easiest to do with a pastry bag, although you can use two spoons or a spring-loaded ice cream scoop.
Pearl sugar is available in the U.S .from King Arthur and at G. Detou in Paris, and is also available from French companies such as Daddy (called perles de sucre) and Vahiné (sucre chouquettes). You can approximate pearl sugar by crushing sugar cubes in a sturdy zip-top freezer bag with a rolling pin or hammer.
Course Dessert
Cuisine French
Servings 6 servings

Ingredients

  • 1 cup (250ml) water
  • 1/2 teaspoon salt
  • 2 teaspoons sugar
  • 6 tablespoons (90g) unsalted butter cut into small chunks
  • 1 cup (140g) flour
  • 4 large eggs at room temperature
  • Glaze: 1 egg yolk mixed with 1 teaspoon milk
  • Pearl sugar

Instructions

  • Preheat the oven to 425 degrees (220 C.) Line a baking sheet with parchment paper or a silicone baking mat. (Depending on the size of your baking sheets, it may take two.)
  • Heat the water, salt, sugar, and butter in a small saucepan, stirring, until the butter is melted. Remove from heat and dump all the flour in at once. Put the pan back on the heat and stir rapidly until the mixture is smooth and pulls away from the sides of the pan.
  • Allow dough to cool for two minutes, then briskly beat in the eggs, one at a time, until smooth and shiny.
  • Using two spoons, scoop up a mound of dough with one spoon roughly the size of an unshelled walnut, and scrape it off with the other spoon onto the baking sheet. You can also use a pastry bag fitted with a plain 1/2-inch tip and pipe them.
  • Place the mounds evenly-spaced apart on the baking sheet(s). Brush the top of each mound with some of the egg glaze then press the pearl sugar over the top and sides of each mound. Use a lot. Once the puffs expand rise, you’ll appreciate the extra effort (and sugar.)
  • Bake the cream puffs until puffed and well-browned, about 25 to 30 minutes. If they get too dark midway through baking, lower the heat of the oven to 375ºF (190ºC) and continue baking. (If you want to make them crispier, you can poke a hole in the side with a knife after you take them out of the oven to let the steam escape.)

Notes

Storage: The cream puffs are best eaten the same day they’re made. Once cooled, they can be frozen in a zip-top freezer bag for up to one month. Defrost at room temperature, then warm briefly on a baking sheet in a moderate oven, until crisp.

egg substitutes

By: David
4 February 2025 at 09:58

In some places, eggs are in short supply. For bakers, that may present a problem for us. But the folks at King Arthur Baking have provided an excellent guidelines to using egg substitutes, with tips for using everything from seltzer and flax seeds, to chickpea liquid and fruit puree, so you can keep on baking.

Check out their detailed guide to egg substitutions guide here!

Kumquat Marmalade

By: David
19 January 2025 at 15:41

kumquat marmalade recipe

I’ve been on a marmalade bender lately. Well, it’s actually been for the last few weeks. Winter, of course, is marmalade season and the markets in Paris are heaped with citrus: Corsican clementines, pretty yellow bergamots, hefty pink grapefruits from Florida (although some infer appellations from elsewhere – namely, the Louvre), leafy lemons from Nice, and lots and lots of oranges.

Kumquat marmalade

The stands are so piled up that it’s not uncommon to be walking down the aisle and have an orange roll off of the piles and land on your foot. (Which is why it is a good idea to wash any fruit before you use it.) This means I’ve got so many jars of marmalade, that when my friend Luisa stopped by and saw the jars piled on top of a shelf in my bedroom, she said “I’ve doing the same thing ” at her apartment in Berlin. Sometimes I think jam-making could be classified as an epidemic and if so, there’s ample evidence that I’m ready for an intervention.

kumquat marmalade recipe

While kumquats were once classified with their look-alike citrus brethren and sistern (admittedly, it can be hard to tell as it’s difficult to get a look under their navels), they are now placed in another genus category (Fortunella), even though they share many characteristics of citrus fruits.

Kumquat marmalade

One of those characteristics is that they are winter fruits. And another is that they are très bon pour la santé (good for your health), containing lots of vitamin C. And they also make you feel happier, since not only does their tangy-bitter flavor brighten up even the darkest of winter day, nothing makes me happier than to wake up in the morning and gaze at my shelf of marmalade first thing in the morning.

Kumquat marmalade

I was especially happy when I was doing my shopping at the outdoor market and came across a big bin of kumquats. I scooped up a nice-sized bag of them and brought them home, where they patiently waited in the refrigerator until I decided what to do with them.

Originally I’d considered giving them a quick-candying and strewing them over poached prunes with a scoop of ice cream. But I ended up sticking my fingers into the bowl of prunes a few too many times during the week and ended up with a small puddle of cinnamon-spiced dark syrup pooled in the bottom of a container in my refrigerator, which I didn’t think would go with anything.

Kumquat marmalade

So I decided to get out my little serrated knife, slice up my Fortunella fruits, and make marmalade. I added a couple of lemons not just to bulk it up, but because I thought with the added sugar, the marmalade would benefit from some extra acidity.

Kumquat marmalade

I normally spoon my marmalades on morning toast, but after I made this batch, I had cleaned up the kitchen and was going to reward myself to a nice bowl of split pea soup for lunch with some Comté cheese and – like most good ideas (and a few of the bad ones) – it suddenly occurred to me that the tart marmalade might be nice with the nutty cheese I was cutting into batons.

Kumquat marmalade

And sure enough, it was. Fortunately I have three nice jars of marmalade to add to my collection. So far this year I’ve made Seville orange marmalade (eight jars) and four jars of mixed marmalade, using the bergamots and citron that were plucked off a tree in Sicily. After all that slicing, seeding, and simmering, the last pot of marmalade has been jarred and stored; they’ll last me through the winter. And if I am prudent, a number of spring and summer mornings as well.

Kumquat marmalade

Print

Kumquat Marmalade

Many of the little rings of kumquats will, unfortunately, come apart as you cook the marmalade. The reward, however, is gorgeous jars of tangy marmalade that you’ll be happy to spread on your morning toast or serve with a bit of cheese after dinner. I served mine with Comté, but a nice goat cheese or another nutty mountain cheese, like Gruyère, would pair nicely with it. It takes a bit of patience to slice and pluck out all the seeds from the kumquats, but you can get 2 to 3 jars of marmalade for your efforts. I use a small serrated knife to slice off the stem end, then start slicing the kumquats crosswise, until I get close to the center. Finally, I stick the tip of the knife into the area where the seeds are and slip them into a small bowl. Because the seeds are rather large, any that you miss you can usually find just by doing a little scanning of your pile of sliced kumquats. I use oval Nagami kumquats, which are more puckery than the round Meiwi kumquats, which you sometimes come across. Do try to get organic or unsprayed fruit from your local market or natural food store. The kirsch is optional, but it does nicely round out the flavor of the marmalade. You can substitute another liquor, such as gin, Grand Marnier or Cointreau, light rum, or a dash of brandy. Or it can be omitted, if you wish.

Ingredients

  • 2 lemons stemmed, halved lengthwise, seeded, and very thinly sliced
  • 1 pound (450g) kumquats stemmed, seeded, and sliced
  • Reserve the seeds from the lemon and kumquats
  • 5 1/2 cups (1.3L) water
  • 2 cups (400g) sugar
  • pinch of salt
  • Optional: 1/2 teaspoon kirsch or other liquor

Instructions

  • Put the lemon slices in a large non-reactive pot. Cover with cold water and bring to a boil. Reduce the heat and simmer until the lemons are translucent, about 5 minutes. Drain. (Discard the water.)
  • Put the blanched lemons back in the pot. Tie the seeds from the lemons and kumquats securely in a piece of cheesecloth and add the seed sack to the pot along with the sliced kumquats and water. Bring to a boil; remove from heat, cover, and let stand 24 hours.
  • The next day, put a small plate in the freezer.
  • Add the sugar and salt to the pot, and cook the marmalade for 30 to 45 minutes over medium heat. Remove the bag of seeds and when it’s cool enough to handle, squeeze the seeds in the cheesecloth using your hands or place it in a ladle and press it with the back of a soup spoon (being careful not to break the fabric and release the seeds) over the jam pot to so the pectin goes directly into the marmalade mixture.
  • Continue cooking until it has reached the jelling point, about 220ºF (104ºC) degrees, if using a candy thermometer. To test the marmalade, turn off the heat and put a small amount on the plate that has been chilled in the freezer and briefly return it to the freezer. Check it in a few minutes; it should be slightly jelled and will wrinkle a bit when you slide your finger through it. If not, continue to cook until it wrinkles slightly on the chilled plate when you nudge it.
  • Remove from heat, then stir in the kirsch (if using), and ladle the mixture into clean jars.

Notes

Note: I store my jams and marmalades in a cool place, often the refrigerator if not planning to use them within a few weeks. if you wish to can or preserve them, you can check out these canning tips.

Related Recipes

Kumquat Marmalade (Recipe Girl)

Kumquat Marmalade with Star Anise (Drizzle & Dip)

Sunday Morning Kumquat Jam (Amateur Gourmet)

Small Batch Kumquat Marmalade (Food in Jars)

Maple Kumquat Marmalade (A Bloggable Feast)

Salted Chocolate Chip Tahini Cookies

By: David
6 January 2025 at 15:48

Whenever I mention “Chocolate Chip Cookies,” this recipe seems to come up in the conversation. I’ve been making chocolate chip cookies all of my life, and am always happy to add new ones to my repertoire. I’ve made them with various kinds of flours, different types (and sizes) of chocolate, some with nuts (or cocoa nibs), and others without. In some cases, the salt in the chocolate chip cookies may be in the butter, or sprinkled on top. Or there might be a double-dose of chocolate in them.

But I haven’t done too much tinkering with the butter, because to me, that’s one thing that’s non-negotiable in chocolate chip cookies. But when I heard about tahini, my loyalty to butter was put into question.

You (and I) can relax, because these chocolate chip cookies do use butter, but get an underlying richness from sesame paste, a common ingredient in Middle Eastern cooking that I always keep on hand. So although I thought I’d done everything possible that a man could do to a chocolate chip cookie, and then some, I was finally ready to tackle a batch of these chocolate chip cookies.

The recipe is adapted from Modern Israeli Cooking by Danielle Oron, that also was in the New York Times. In addition to having everything on hand, they were easy to mix up, and the soft sesame paste made a dough that was hard not to snack on before the cookies went into the oven.

I prefer to chop chocolate for chocolate chip cookies, rather than use conventional chocolate chips. I have nothing against chocolate chips, but most are made of what’s called baking-resistant chocolate, which is designed to hold their shape once baked. I like big, oozing chunks of chocolate in my chocolate chip cookies, and I don’t care so much what they look like, so much as how they taste.

So I took a knife to a block of chocolate and made my own. Some makers are now producing what are called chocolate “chunks” which may or may not have similar qualities, but chopping a block of chocolate, while a bit messy, puts me in one of my happy places. And I’m happy to make my own chips, or chunks, I should say.

These cookies were some of the best chocolate chip cookies that have ever come out of my oven, and I don’t say that lightly. The tahini gives them a gentle savory taste, with a faint musky flavor that pairs remarkably well with dark chocolate and a touch of salt, so don’t be afraid to use a very strongly flavored chocolate. I futzed with the original recipe a little, to make them chewier, and couldn’t resist adding even more chocolate. But can you blame me?

Print

Salted Chocolate Chip Tahini Cookies

Adapted from Modern Israeli Cooking: 100 New Recipes for Traditional Classicsby Danielle Oron
I used chopped chocolate, rather than chocolate chips, for these cookies since I wanted large chunks of oozing chocolate rather than little bits of chocolate here and there. (But feel free to use chips if you'd like.) Normally when I chop chocolate for cookies, I add any small bits and pieces on the cutting board along with the bigger chunks. But for these, I wanted distinct, more assertive pieces of chocolate, so I sorted through and just used large chunks, saving the smaller bits for another baking project. I baked these cookies in a larger size, then tried them in smaller portions, and give baking times for each. Whichever size you bake them in, since everyone's oven is different, it's important to use visual clues rather than rely on precise minutes and numbers to tell when they're done. Keep an eye on them during the final minutes of baking; the cookies are done when quite pale in the center and browned around the edges. Note that the dough is best when it rests in the refrigerator overnight. You could bake them sooner, if you just can't wait.
Servings 18

Ingredients

  • 8 tablespoons (115g, 4 ounces) unsalted butter at room temperature
  • 1/2 cup (120ml) tahini well stirred
  • 1/2 cup (100g) granulated sugar
  • 1/2 cup (90g) packed light brown sugar
  • 1 large egg at room temperature
  • 1 large egg yolk
  • 1 teaspoon vanilla extract
  • 1 cup plus 2 tablespoons (150g) flour
  • 3/4 teaspoon baking soda
  • 1 teaspoon kosher or sea salt
  • 2 cups (280g) bittersweet or semisweet chocolate chunks or chocolate chips
  • flaky sea salt such as Maldon or fleur de sel

Instructions

  • In the bowl of a stand mixer, beat the butter, tahini, granulated sugar and brown sugar on medium speed for 2 to 3 minutes, until fluffy. (The dough can also be made in a large mixing bowl, stirred with a spatula.)
  • Stop the mixer and scrape down the sides. Add the egg, the yolk, and vanilla, and continue to mix for another minute, stopping the mixer to scrape down the sides of the bowl during mixing, to make sure the eggs are getting incorporated.
  • In a small bowl, whisk together the flour, baking soda, and kosher or sea salt. With the mixer on low speed, add the dry ingredients until just combined, then add the chocolate chips. Do not overmix. Cover the dough and refrigerate overnight.
  • Preheat the oven to 325ºF (160ºC). Line two baking sheets with parchment paper or silicone baking mats.
  • Form the cookies into rounds using an ice cream scoop, or your hands. For small cookies make each 1 1/2-inch (3,5cm), for larger cookies, make them 2-inches (5cm) round. Place them evenly spaced on the baking sheets, 3-inches (8cm) apart). Bake one sheet at a time, so you can keep an eye on them, in the middle rack of the oven.
  • Bake the cookies, turning the baking sheet in the oven midway during baking, until the cookies are golden brown around the edges but still pale in the center. For small cookies, about 12 minutes, for larger cookies, about 14 to 15 minutes. Remove from the oven, sprinkle cookies with a bit of flaky sea salt, and let the cookies cool on the baking sheet. Bake the remaining cookies the same way.

Notes

Storage: These cookies will keep for two or three days at room temperature, but are definitely better the same day they're baked. The unbaked dough can be refrigerated for up to one week, and frozen for up to two months.
Notes: Nut and seeds butters, such as peanut and almond, have different oil content than tahini, and I don't think they could be swapped out. (If you do try it with another nut or seed butter, let us know how they come out in the comments.) For those looking for a chocolate chip cookie without tahini, check out these Salted Butter Chocolate Chip Cookies or my recipe for Chocolate Chip Cookies in Ready for Dessert.


Related Posts and Recipes

Salted Chocolate Chip Cookies

Tahini and Almond Cookies

Baking Ingredients and Substitutions

How to Make Tahini

Ingredients for American Baking in Paris

Soom Tahini (Amazon)

Gluten-free baking and Substitutions

Pumpkin Cheesecake with Pecan Praline Sauce

By: David
16 November 2024 at 21:56

It’s that time of year again. And that only means one thing: time to start thinking about the holiday baking. In Paris, bakery windows fill up with Bûches de Noël (Yule log cakes) and bourriches (wooden crates) of oysters are piled up at the markets. The chocolate shops are crammed with people, buying multiple boxes as gifts, and people splurge on caviar and Champagne, one of the few things that go on sale in France during the holidays.

One thing you don’t see is the use of pumpkin in desserts. A tart or pie (or ice cream) made of squash might sound funny, especially to non-Americans, but helps to remember that pumpkins, and other squash, are technically fruit. One could also point out the classic Swiss Chard Tart from Provence (which is in a whole other category), and Melanzane al cioccolato, eggplant with chocolate sauce, which I like. (Which one could argue is good because it’s smothered in dark chocolate.) But I don’t think everything goes with chocolate: A friend tried the hot chocolate with oysters at a famed chocolate shop in Paris, and after her description, I wasn’t rushing over there to try a cup.

To get that last image out of your mind, I present pumpkin cheesecake with a pecan praline sauce, that has nothing not to like about it. Cream cheese and sour cream, a buttery cookie crust, and a brown sugar and bourbon-tinged sauce loaded with crunchy pecans. I’m in.

DIYers may raise an eyebrow at using canned pumpkin. I’ve got a few reasons for using it. (And as many of you perhaps know, it’s not made from pumpkin, but a variety of squash similar to butternut squash.) One, is that when writing a recipe, it’s easy to get consistent, similar results when we’re all using the same ingredient. And two, it’s a heckuva lot easier, which is appreciated around the holidays when all of us have enough on our plates, and in our ovens, and it’s  fewer dishes to wash to boot.

If you want to go the other route, you can also make your own cream cheese and Graham crackers, grow your own pecans, churn up your own butter, and make your own cake pan. If you do go that route, let me know when your cheesecake is done ; )

In the meantime, I’m standing over my stove, stirring warm, just-toasted pecans into my praline sauce before lacing it with a dash of bourbon.

The praline sauce is decidedly on the sweet side. But that didn’t stop me (like, at all…) from dipping my spoon into it over and over and over again. Be sure to toast the pecans before using them. My pet-peeve in restaurants is when they don’t toast nuts. Toasting any nut usually improves it by at least 99%, if not more, so if you’re not consistently toasting your nuts before using them on salads, sauces, and in ice creams, start doing it now. It’s not too late.

But I can’t imagine this cheesecake being served without it. Although I could imagine eating the sauce without the cheesecake. And if you’re anything like me, you might find yourself spooning it over ice cream, ladling it over pumpkin pie (without the marshmallow topping), or even spooning it right into your mouth, like I do.

Print

Pumpkin Cheesecake with Pecan Praline Sauce

If using canned pumpkin, make sure that you don't use canned pumpkin pie 'filling' (which is sweetened and spiced); use canned pumpkin that is 100% pumpkin puree. If you want to make sugar pumpkin puree yourself, you can split a sugar pumpkin (or butternut squash) in half and scrape out the seeds. Butter the cut side of the pumpkin and bake cut side down on a parchment-lined baking sheet in a 375ºF/190ºC oven until very tender, about 35 to 45 minutes. When cool enough to handle, scoop out the flesh and puree in a blender or food processor, or pass it through a food mill. If you want to balance the sweetness of the sauce, you could add a scant teaspoon of apple cider vinegar or lemon juice to it, or to taste. Conversely, adding more liquor will take the edge off as well. Outside of the U.S., I often use speculoos cookies in place of the Graham crackers for the crust. If you go that route, you might want to reduce the butter in the crust by about 20% since speculoos cookies tend to be more buttery than Graham crackers. I use a glass-bottom springform pan for cheesecakes, which makes serving them much easier.
Servings 12 servings

Ingredients

For the crust

  • 1 1/2 cups (180g) Graham cracker crumbs
  • 4 tablespoons (60g) melted butter
  • 2 tablespoons sugar
  • 1/4 teaspoon ground cinnamon

For the pumpkin cheesecake filling

  • Three 8-ounce (680g) packages cream cheese at room temperature
  • 1 1/4 cups (250g) sugar
  • grated zest one lemon preferably unsprayed
  • 4 large eggs at room temperature
  • One 15-ounce (425g) canned pumpkin puree
  • 1/2 cup (125g) sour cream or whole-milk plain yogurt
  • 1 tablespoon cornstarch or 2 tablespoons flour
  • 1 teaspoon vanilla extract
  • 1 teaspoon ground cinnamon
  • 3/4 teaspoon dried ground ginger
  • 1/4 teaspoon ground nutmeg
  • 1/4 teaspoon ground cloves
  • pinch of salt

Pecan praline sauce

  • 3/4 cup (105g) packed light or dark brown sugar
  • 1/2 cup (125ml) heavy cream
  • 6 tablespoons (85g) unsalted butter
  • 1/4 cup (60ml) maple syrup
  • 1/2 teaspoon kosher or sea salt
  • 1/4 cup (60ml) bourbon
  • 1 1/2 cups (160g) pecans toasted and coarsely chopped
  • 1/2 teaspoon vanilla extract

Instructions

  • To make the crust, in a medium bowl, mix the Graham cracker crumbs together with the melted butter, sugar, and cinnamon until the crumbs are thoroughly moistened. Butter a 9-inch (23cm) springform pan then press the crumbs evenly across the bottom of the pan. Refrigerate until ready to bake.
  • Preheat the oven to 350ºF (180ºC). Bake the crust until it feels set in the center, 10 to 12 minutes. Let cool on a wire rack. Turn the oven down to 325ºF (165ºC).
  • To make the filling, in the bowl of stand mixer fitted with the paddle attachment (or by hand, in a large bowl), beat together the cream cheese, sugar, and lemon zest, until smooth. Add the eggs one at a time, stopping the mixer between each addition to scrape down the sides of the mixing bowl, then add the pumpkin puree, sour cream, cornstarch or flour, and vanilla extract, along with the spices and salt.
  • Line the outside bottom of the springform pan with foil so it reaches all the way up to the top of the outside of the pan. If you have to use several pieces, I recommend triple-wrapping it to prevent leaking or water getting in the cake pan. (Better yet, use extra-wide foil, so you only need one sheet.) Scrape the mixture into the prepared springform pan and smooth the top. Place the cheesecake in a larger pan, such as a roasting pan, then add very warm water to the larger pan until it reaches halfway up the outside of the cake pan.
  • Bake the cheesecake in the oven until the center looks just slightly set, but not wet and sloshy in the center when you jiggle the pan. I start checking the cheesecake at the 50 minute mark, as it usually takes about 50 minutes to 1 hour, but may take up to 1 hour and 15 minutes. Remove the cake from the oven, then remove the cake from the water bath and let cool completely on a wire rack. Refrigerate for at least 4 hours before serving.
  • Make the pecan praline sauce by heating the brown sugar, cream, butter, maple syrup and salt in a medium saucepan over medium-high heat, until it comes to a boil, stirring frequently. Let boil for 1 minute without stirring. Remove from heat and add the bourbon, pecans, and vanilla.

Notes

Serving: Run a sharp knife around the outside of the cheesecake to release it from the springform pan, then remove the sides of the pan. Dip the knife in warm water, wipe it dry, and use it to cut clean slices from the cheesecake. Serve with a ladleful of warm sauce poured over it. If the sauce gets too thick upon standing, you can thin it with milk or water.
Storage: The baked or unbaked crust can be made up to three days ahead and stored at room temperature (if baked), or refrigerated (unbaked). It can also be frozen either baked or unbaked for 2-3 months. The baked cheesecake will keep for up to 4 days in the refrigerator.

Related Recipes and Links

Dulce de leche cheesecake

Ingredients for American Baking in Paris

Pumpkin Ice Cream

Cheesecake

Maple Pumpkin Flan

Homemade Graham Crackers (Smitten Kitchen)

Homemade bourbon (Bourbon of the Day)

Homemade salt (Ruhlman)

Cranberry Sauce with Candied Oranges

By: David
16 November 2024 at 21:55

Cranberry Sauce recipe-6

It’s easy to forget about Thanksgiving in Paris. There are no bags of stuffing mix clogging the aisles in the supermarkets. If you asked a clerk where is the canned pumpkin, they would look at you like you were fou (crazy). And if you open the newspaper, you won’t come across any sales on whole turkeys. In fact, it’s quite the opposite; a friend saw a 5 kilo turkey, an 11 pound bird, at the market the other day for €68kg, or €340 ($424).

(Although I think if you spent over four hundred dollars on a turkey, you wouldn’t forget it for a long, long time.)

Cranberry Sauce with Candied Oranges

I suggested that the turkey vendor perhaps forgot a comma because whole turkeys are, indeed, available in Paris, and they actually excellent since most are fermier, not the plump whoppers you see in the states. The only thing you have to be careful about is that one turkey might not be enough if you’re feeding a large crowd, say, a group of over six people.

Savvy Americans know to order a whole turkey in advance from their butcher and – get this: You can ask them to cook it for you. Yes, since the butchers usually have spits with roasting chickens on them, it’s usually not a problem for them to slide a turkey on there. That’s especially nice because most people in Paris just have one oven and it’s hard to tie it up for the entire day with just a bird roasting in it when you’ve got so many other things to bake and cook off.

Cranberry Sauce with Candied Oranges

The reason I am sharing this recipe today, rather than days ago when everyone was in a tizzy posting recipes, shopping and preparing their menus, is that I kind of forgot that it’s Thanksgiving. Actually, I didn’t quite forget, but wasn’t swept up in the frenzy because this week, and today, are just like any other week or day in Paris.

People go to work and school, banks and stores are open, and no one is setting their alarms for le vendredi noir (Black Friday), although that’s starting to happen in France ever since the government loosened their restrictions on allowing sales more than the government mandated twice-yearly ones, as they did before the economy took a dip. (Tomorrow, I suspect at least one vendor selling an expensive turkey in Paris is going to have to offer a serious mark-down if he wants to sell that bird.)

Cranberry Sauce with Candied Oranges

So we’re celebrating tomorrow night with some friends who are making dinner. I’m pitching in and doing some baking, as well as bringing a nice bottle of Sauternes. I also happened to have a few cans of cranberry sauce that I had brought back from the states, that I was planning to bring, just for fun.

I sent my hostess a photo and she wrote back right away, threatening to blackmail me by making my canned contraband photo public. I beat her to the punch, posting it on Instagram. But when I noticed that of the four ingredients in the can, two were industrial sweeteners, I decided to take matters into my own hands.

Cranberry Sauce with Candied Oranges

Fortunately I had a stash of fresh cranberries in my freezer, since if a turkey was €68 a pound, I’d have to dig deeper into my pockets if I was going to have to buy fresh cranberries in Paris on Thanksgiving Day.

Cranberry Sauce with Candied Oranges

I candied some organic orange slices (which were normally priced), simmered up a syrup with the sharpness of cider vinegar and a hit of dark rum, then added my precious canneberges, cooking them ’til they popped. I stirred in the candied oranges, then packed it up, ready to go – getting a recipe in just under the wire.

Happy Thanksgiving!

Print

Cranberry Sauce with Candied Oranges

Note that the orange slices may fall apart as they get close to being done. Not to worry; they’re just going to be chopped up later. If you want, you can substitute 3/4 cup (180ml) orange juice for the water that you cook the cranberries in. I use dark rum, but whiskey, bourbon, or an orange-flavored liqueur, such as Grand Marnier or Cointreau, would work nicely in its place. You can double or triple the recipe if you wish.

Ingredients

  • 1 large naval orange preferably unsprayed, or another variety, with seeds removed
  • 3/4 cup (180ml) water, plus 3/4 cup (180ml) water
  • 1/2 cup (100g) granulated sugar
  • 1/2 cup, packed (90g) light brown sugar
  • 2 tablespoons dark rum
  • 1 stick cinnamon
  • 1 1/2 tablespoons cider vinegar
  • 1/8 teaspoon ground allspice
  • 1 cup (110g) fresh or frozen cranberries

Instructions

  • Lop off the two ends of the orange. With a sharp, serrated knife, cut the orange into 1/3-inch (1cm) slices.
  • In a medium-sized nonreactive saucepan, cover the orange slices with cold water. Bring to a boil, reduce heat, and cook at a low boil for 10 minutes. Drain. Return the oranges to the saucepan. Cover with water again, bring to a boil, and cook for another 10 minutes. Drain and rinse with cold water.
  • Return the orange slices to the saucepan, add 3/4 cup of water and granulated sugar. Bring to a boil then reduce the heat to a low boil and cook until the liquid is reduced to a thick syrup. During cooking, turn the oranges a few times in the reducing syrup so that they candy evenly.
  • As the liquid cooks down, close to when there is very little in the saucepan, monitor them closely turning them frequently to avoid burning them. Remove from heat once most of the liquid is evaporated. Tilt the oranges into a colander and let cool.
  • In the same saucepan, add the other 3/4 cup water, brown sugar, rum, cinnamon stick, vinegar, and allspice. Bring to a boil, add the cranberries, then reduce the heat slightly and cook until the cranberries pop and just start to fall apart. Chop the candied oranges into little pieces about the size of peas and add the candied oranges to the cranberries. Cook for about a minute, then remove from heat.

Notes

Serving: Pluck out the cinnamon stick and serve the sauce warm or at room temperature.
Storage: The sauce can be made up to one week in advance and refrigerated. Bring to room temperature before serving.

Related Recipes

Cranberry Sauce with Red Wine and Figs

Chocolate Pecan Pie

Mom’s Roast Turkey (Simply Recipes)

Thanksgiving Recipes

By: David
22 July 2025 at 21:54

It’s that time of the year again. When bakers, cooks, and even bartenders, are baking, roasting, and shaking things up for the holidays. Here’s a round-up of recipes from my blog, my personal favorites, that are great for Thanksgiving and winter holiday fêtes. There are cakes, cocktails, spreads, dips, candied nuts, cheesecake, ice cream…and more!

Pecan Pie with Bourbon and Ginger

What’s more traditional than pecan pie for the holidays? (That wasn’t really a question, because most of us already know the answer.) I love this zippy variation, with a triple dose of ginger and a belt of bourbon to boot. It’s especially good with a scoop of white chocolate-fresh ginger ice cream.

Pumpkin Marshmallow Pie

Swoops of billowy marshmallows over a custard-like pumpkin filling. For those vexed by weeping meringues, this stable, silky topping is the answer to your pastry prayers!

S’mores Pie with Salted Butter Chocolate Sauce

Speaking of marshmallows, if you’re looking for the ultimate do-ahead dessert, it’s hard to beat this marshmallow-topped beauty. Even if you’re not planning to make the pie, the Salted Butter Chocolate Sauce makes anything you put it on a thing of beauty.

Manhattans

Manhattans are my go-to cocktail. The foundation is just two ingredients, so they’re hard to screw up, which is easy to do with so many other holiday distractions. Even better, they do the job, coming together in a great, no-nonsense, high-performance cocktail. To dial ’em up for the holidays, add a few dashes of cardamom bitters or pumpkin bitters to the mix.

Cranberry Sauce with Candied Orange

Bits of homemade candied oranges provide a sweet/tart counterpoint to tangy cranberries. I stock up on cranberries for the holidays when I see them in Paris, but those stateside will want to get extra to make this sauce again and again. It’s good with ham, turkey, lamb, and a nice counterpoint to roasted root vegetables. You can also use it when building yourself a hefty turkey sandwich out of leftovers the next day.

Cranberry Sauce with Figs and Red Wine

Use some of that leftover wine to ramp up this holiday sauce, marrying two fall favorites; cranberries and figs. No leftover wine? Pas de problème: open a bottle. (I’m sure you’ll find something else to do with the rest…)

Cranberry Upside Down Cake

A buttery base holds up a toffee-like topping of cranberries. This cake is oh-so-good on its own, but a dollop of whipped cream (perhaps flavored with cinnamon or with lemon curd folded into it?) takes it to the next level. It’s also good with a scoop of cinnamon or vanilla ice cream, melting on top or alongside.

Pumpkin Cheesecake with Pecan Praline Sauce

I’ve been making it for well over a decade and can’t resist the praline sauce that accompanies it. It’s spiked with – yup – a belt of bourbon, and loaded with toasted pecans. Cheers!

Pumpkin Maple Flan

One of my favorite people, Ina Garten, provided the inspiration for this flan, a layer of creamy pumpkin custard bathed in a slick layer of dark caramel.

Cranberry Shrub and Cocktail

Start the holidays off right with this tangy shrub, a vinegar-berry elixir that’s great mixed with sparkling water for a non-boozy libation, or as a base for a bourbon-fueled cocktail. I’ve given options for both, which should please everybody at your holiday fête.

Pumpkin Jam

If the idea of pumpkin jam sounds funny to you, it helps to remember that pumpkins are actually fruits. And if that doesn’t do it, take a taste of this jam with just a hint of vanilla. It won over my Frenchman, who is my toughest critic. (And boy, do I have stories!)

If you’re the kind of person who sets out a plate of cheese (and those are the only kinds of people that I want to dine with), guests will love a swipe of this over a cracker smeared with chèvre (goat cheese) or cream cheese, or paired with slabs of nutty Jarlsberg, Comté or Gruyère as part of a cheese board. Don’t forget the nuts and dried fruit, too.

Chocolate Orbit Cake

This cake got its name because it launches chocolate-lovers into orbit. But it’s also an amazing do-ahead dessert, and keeps for quite a while in the refrigerator, which gives harried hosts and hostesses some time to enjoy an extra Manhattan, or two…  ; )

Pumpkin Ice Cream

It’s that time of year when you may want to keep your ice cream maker handy at all times, so you can churn and scoop up your favorite flavors. (If you’re a fan of The Perfect Scoop, this year marks the ten-year anniversary of the book, and there’s an updated edition with all-new photos and a bunch of new ice cream recipes.)

To reimagine the classic profiteroles for the holidays, swap out the vanilla ice cream with pumpkin ice cream, and replacing the chocolate sauce with the pecan praline sauce I noted above (that goes with the pumpkin cheesecake), or another favorite creamy caramel. Top them off with the French almonds from The Perfect Scoop; Heat 2 tablespoons of water with 2 tablespoons of sugar in a skillet, stirring until dissolved. Remove from heat and mix in 2 cups (160g) sliced almonds. Spread the coated nuts on a nonstick baking sheet, or one covered with a silicone mat, sprinkle with flaky sea salt, and bake in a 350ºF/175ºC oven, stirring once or twice while baking, until golden brown and crisp, about 20 minutes.

Persimmon Bread

What to do with all those persimmons? This loaf cake is moist and packed with flavor, with a hint of spices. It’s a favorite from James Beard, considered the dean of American cooking, and I think it’s time to upgrade his status to include baking.

Sweet Potato and Apricot Cake

This light cake comes from my friend Alice Medrich, and is low fat, but if you’d like, you can take it in another direction and top it with cream cheese frosting. Either way, this is a great cake.

Red Wine Pear Tart

I’m always amazed when I turn out this tart. The glistening, ruby-colored pears are so pretty I almost hate to cut it. But moments later, I’m glad that I did. Along with a spoonful of nutty crème fraîche, this riff of the classic tarte Tatin will get no arguments from traditionalists. And if it does, find less judgmental dining companions.

French Apple Cake

For the love of Dorie Greenspan comes this French apple cake, which relies on a mèlange of apples for its fruit-forward flavor.

German Apple Almond Cake

Our friends in Germany are mighty fine bakers as well and this cake from Luisa Weiss provides a generous wallop of apple flavor to any dessert buffet in each moist wedge. Almond paste is the secret to this cake and it’s worth stocking up on a tube or tin of it now – or several – so you’ll have them handy later.

Chocolate Pecan Pie

Circling back to pecan pie, this is another favorite recipe on mine, loaded with big chunks of bittersweet chocolate, who hold their own in a crowd of pecans.

Cranberry Raisin Pie

I reached deep into my past to find this pie, which was a favorite of the late Marion Cunningham. If you don’t have time to peel a bushel of apples, simply mix up a sack of cranberries and raisins, and voilà…you’ve got a fruit pie that will be just as memorable as Marion.

Quick Mincemeat

Traditional mincemeat has a dubious reputation, but this one will change your mind. I promise. Bits of candied orange, dried fruits, and festive spices meld together into a tasty mixture that can be added to apple pie or pear crisp, making it go from ho-hum…to oh boy!

Israeli Couscous with Butternut Squash and Preserved Lemons

Hitting the savory side, this side dish is one of the most popular in my repertoire. The squash is a no-brainer for the winter, but swap out dried cranberries for the raisins and you’ve got a holiday-friendly side dish that’s a break from the usual mash-up of carbs. Another bonus: This can be made in advance and rewarmed before serving.

Cheese Ball

Proving it’s not too late to get on the ball, I tackled this cheese ball made with several kinds of cheeses, along with chives, dates, and a dash of hot sauce, rolled in buttered and salted pecans. If you’re too high up on your horse to consider a cheese ball, Fromage forte is the way the French use up all those scraps of cheese, whipped up with plenty of garlic. It’s great to spread on slices of baguette, or even crisp apples.

Gougères

The French do have their version of cheese “balls.” These puffs are lighter-than-air and baked to a crisp. No one can resist nibbling on these, especially if you serve them warm.

Spicy Pretzel and Nut Mix

I cast a skeptical eye over recipe titles that promise something to be “the best,” but in this case, I’m going there. This is The Best Cocktail Snack Ever. A crunchy mix of salty pretzels and lots of nuts, baked in a maple syrup, brown sugar, and butter mixture until crisp. You’ll want to print this recipe out and put it at the top of your appetizer recipe roster.

Artichoke Tapenade

In a hurry? Don’t worry, who isn’t? I don’t mind opening a can of artichoke hearts and putting my food processor into service, for this Provençal-inspired spread. Do-ahead types will appreciate that it holds well in the refrigerator (ditto with the next tapenade recipe), and guests will appreciate how good it tastes spread on croutons or crackers, along with a glass of sparkling wine or Chablis.

Olive Fig Tapenade

This olive-based tapenade isn’t the pits. In fact, it’s even better than the usual tapenade because there’s less pitting involved, getting an extra boost from dried figs, whose natural sweetness compliments the salty olives and capers. I was inspired by this one from Carrie Brown of the famous Jimtown Store in Northern California.

Candied Peanuts

Looking for the perfect hostess gift? Instead of tying a bow around a bottle, make a batch of these candied peanuts and give them instead. I keep a stack of cellophane bags and raffia ready, to tie ’em up and give them out. Someone once told me that anyone can buy a gift; it’s the homemade ones that really show that you care. If that’s the case, feel free to make a batch for yourself as well. Sharing may be caring, but being selfish has its rewards, too.

French Apple Cake

By: David
11 November 2024 at 15:42

It’s interesting how many views of Paris there are, which you notice if you follow the variety of voices that write about life in the City of Lights. (A mistake some writers make is to call it the City of Light, and ‘lights’ in actually plural.) I tend to find all the quirks and report on the sardonic side of things, which for some reason, always find their way into my life. But the main reason is that I live in Paris full time and don’t just get to sampe my way through the lovely pastry shops and meet chocolatiers, but like most Parisians, I also spend a fair amount of time wrestling with perplexing bureaucracy and other idioms of life in the City of Fight Light.

For example, last week I went to the largest fabric store in Paris where I always buy étamine (cotton gauze), which I couldn’t locate so I asked a salesperson to direct me there. He was having a nice chat with his co-workers but was kind enough to take a moment to tell me “Non”, they didn’t carry it…and went back to his conversation. After I raised an eyebrow and asked a few more times, just be sure, he and all the others in the group shook their heads, confirming with absolute certainty that they definitely did not have that in stock.

Because I was absolutely certain that they did, I went down one level and, of course, found a huge bolt of it right on top of the pile of other rolls of fabric. C’est comme ça

Having a French partner helps, and he also helps me in the kitchen, like when Romain arrived with a bag of apples from a friend’s farm in Burgundy. Some were dinged up a bit, as they weren’t from the supermarché, but French apples are delicious for baking, where bumps and bruises magically disappear.

So to keep things in perspective (as best I can…) I like to read other voices from Paris, such as Dorie Greenspan, whose book, Around My French Table, is a hefty collection of her favorite recipes and stories about Paris. She lives on the opposite side of the city, in a different neighborhood. And where I am sometimes defeated by city life, as a “part-time Parisian,” as she often calls herself, she manages to see the good in everything.

This is a very typique French recipe for home cooks, made with not a lot of ingredients, relying on no special techniques or hard-to-find equipment, and loved by all. The cake is easily mixed up in a bowl, scraped into a cake pan, and in less than the time it takes to run to the pâtisserie for a store-bought cake—or a seemingly simple length of fabric—you can have an authentic French cake…right from your own oven.

When a journalist interviewed me for an article about her, she ended the interview with; “So David, what is it like to sit around Dorie’s French table?”

I sat there for a few moments scratching my head to remember, then not sure of what to say, I finally replied, “I’ve not sat around Dorie’s French table.” Which was true. When she comes to Paris, we generally go out exploring. The idea of sitting indoors while Paris awaits just isn’t as interesting to me as sharing pastries on a park bench or hitting an outdoor market with her.

If you want to sit at Dorie’s table, the line starts here. However while you wait, you can feast on her recipes, just as I’m doing.

Print

French Apple Cake

Adapted from Around My French Table by Dorie Greenspan
Dorie doesn’t specify any type of apple but instead advises that you should use a mix of them. I don’t know what kind mine were since Romain brought them to me. The rum is really a great flavor in this cake, but if you’re avoiding alcohol, you could double or triple the vanilla to compensate. I also like this recipe because you can make it with ingredients easily on hand. Being American, I was tempted to add a dusting of ground cinnamon to the apples, but then it wouldn’t be authentically French. Hence I often decide to add a dollop of crème fraîche alongside, but it's wonderful just as it is.
The original recipe uses a springform pan but if you don't have one, you can use an 8-inch (20cm) cake pan, buttering it well and lining the bottom with a circle of parchment paper before adding the batter. I've also make it in a 9-inch (23cm) cake pan and it works well, although it won't be a high.
Course Dessert
Cuisine French
Servings 8 cake

Ingredients

  • 3/4 cup (110g) flour
  • 3/4 teaspoon baking powder
  • pinch of salt
  • 4 (about 2 pounds, 1kg) large apples a mix of varieties
  • 2 large eggs at room temperature
  • 3/4 cup (150g) sugar
  • 3 tablespoons dark rum
  • 1/2 teaspoon vanilla extract
  • 8 tablespoons (115g) butter salted or unsalted, melted and cooled to room temperature

Instructions

  • Preheat the oven to 350ºF (180ºC) and adjust the oven rack to the center of the oven.
  • Heavily butter an 8-inch (20cm) springform pan and place it on a baking sheet.
  • In a small bowl, whisk together the flour, baking powder, and salt.
  • Peel and core the apples, then dice them into 1-inch (3cm) pieces.
  • In a large bowl, beat the eggs until foamy then whisk in the sugar, then rum and vanilla. Whisk in half of the flour mixture, then gently stir in half of the melted butter
  • Stir in the remaining flour mixture, then the rest of the butter.
  • Fold in the apple cubes until they’re well-coated with the batter and scrape them into the prepared cake pan and smooth the top a little with a spatula.
  • Bake the cake for 50 minute to 1 hour, or until a knife inserted into the center comes out clean. It may take less time, depending on the apples, so check the cake 5 or so minutes before the recommended baking time. Let the cake cool for 5 minutes, then run a knife around the edge to loosen the cake from the pan and carefully remove the sides of the cake pan, making sure no apples are stuck to it.

Notes

Serving: Serve wedges of the cake just by itself, or with crème fraîche or vanilla ice cream.
Storage: The cake will keep for up to three days covered. Since the top is very moist, it’s best to store it under a cake dome or overturned bowl.

Related Posts and Recipes

Sauce Gribiche, Au Pif

Tuesdays with Dorie

WTF

French Tart Dough

American Baking Ingredients in Paris

Apple Spice Cake

L’enfer

Apple Jelly

Received — 4 July 2024 David Lebovitz

Summer Fruit Recipes

By: David
17 June 2026 at 08:20

It’s summer! Whether you’re in or outdoors, hopefully for all of you there are beautiful summer fruits and berries to be had, and I hope that you’re able to get your hands on as many of them as you can. I am loading (actually, overloading…) myself up at the market. While a good portion on the fresh fruit gets eaten just as-is, some of it goes into the following dessert recipes that I continue to make year after year. Others go into jam, which is a great way to preserve all those summer fruits and berries, and make them last through fall and winter.

Cherry season is behind most of us (sniff…sniff…), but if they are still lingering where you live, you can type “cherry” or “cherries” into the search engine at the top right corner of the page to find cherry recipes. (And we don’t get a bountiful array of fresh raspberries and blackberries here, so I don’t have many recipes that use them on the blog.) But for nectarines, strawberries, peaches, plums and other summer fruits, here are some of my favorite recipes on the blog…

Summer Fruit Galette with Frangipane

I’ve seen so many galettes this year on social media, that it’s tempting to already call galettes The Dessert of the Year. (Okay, there were plenty of Banana Breads as well. And it’s hard to knock Banana Bread, even my low(er) fat one.) But for the bang-for-the-buck, it’s hard to beat the silly-easy galette, made with a fail-safe dough that gets rolled out, topped with fresh fruit, and baked until ripe ‘n ready. Mine has a layer of frangipane under the fruit to keep some of those juices away from the bottom crust, so it stays crisp. It also tastes good, too! Apricots work especially well in this one but you can use nectarines, plums, peaches, or…

Strawberry Rhubarb Galette

…rhubarb and strawberries! Yes, the classic combo works well as a galette, too. But don’t let tradition stand in the way of deliciousness and you can swap out cherries, raspberries, or blackberries for the strawberries.

Apricot Jam

When I was a cook in upstate New York back in the 1980s (!) I remember someone brought us a (as in 1) basket of fresh apricots from California, which I’d never seen before. I made a simple tart with them and only eight lucky customers could get a taste of it. (Or maybe I cut it into ten?) Fast-forward to today, summer brings a cavalcade of fresh apricots to the markets and toward the end of the season, I don’t have time to shed any tears as I’m piling apricot jam into pots, to save them for the coming months. It’s Romain’s favorite jam so I make sure there’s enough to keep him happy, because I’ve learned what happens when I don’t : 0

Summer Fruit Tart (with frangipane)

Another summer fruit favorite, yes, with more almond cream than the galettes above, this is that classic French tart that you’ll find in many pastry shops all year round, using everything from pears to pineapple. Don’t love almonds, or want to take it in a different direction? Replace the almonds with hazelnuts for a special treat.

Plum-Strawberry Jam

While apricots are Romain’s favorite for jam, I am 100% on team plum. The luscious tang of juicy plum, and the high natural pectin content, makes this one of the easiest jams to make. And it’s not too difficult to eat, either.

Plum Sorbet

While I miss the purple Santa Rose and Elephant Heart plums we got in California, France has its own special selection of delectable plums, including Mirabelles, quetsches, and even wild plums. While the wild plum trees that we used to pick/glean from have been pruned by the absentee owners (phooey!) we found another source last summer. And the only thing better than free plums is free wild plums, which come in an array of snazzy colors and are extra tangy, perfect for those of us that like some pucker in our pastries.

Plum Flaugnarde

The cousin of clafoutis, this flaugnarde features a jumble of plums baked in a silky custard. They’re so pretty I almost hate to bake them. But then, when I pull it out of the oven, I’m happy to have a beautiful baked gratin dish of custardy plums for dessert on a warm summer night.

Plum-Rhubarb Crisp

Two tart fruits come together, baked under a buttery blanket of streusel. If these two bedfellows are available at the same time where you live, you’re doubly lucky!

Mirabelle Jam

The elusive Mirabelle plums have a cult-like following and while some mistakenly think they aren’t available in the U.S. (they were briefly banned a few years ago), if you’re lucky, you can indeed find them. They’re intensely flavored and sweeter than other plums, and make a wonderful confiture with jewel-like fruits suspended in a shimmering jelly, which are lovely heaped on toast in the morning. (If you want to get a taste of Mirabelles but can’t find them, Bonne Maman makes a golden plum Mirabelle jam that’s exported from France.)

Angel Food Cake

While I wasn’t a fan of Angel Food Cake growing up, which my mother usually made to accompany strawberries, I became a convert as a grown-up. Perhaps it had to do with writing an ice cream book and having an overload of egg whites to use up. (And Angel Food Cake is an express route to doing that.) Nevertheless it’s a treat along with summer fruits and berries, either baked as a compote or fresh, tossed in a little sugar and perhaps a dash of crème de cassis. The spongy cake is an ideal way to make sure you get every drop of the fruit syrup that’s surrounding the airy slab. It’s French cousin, Gâteau de savoie, is equally enjoyable, and doesn’t require an Angel Food Cake pan.

Roasted Strawberry Miso Ice Cream

Roasting strawberries is lesser-known way of coaxing out their flavor, but works well when making ice cream as it concentrates them and reduced the water, so the ice cream stays creamier. Adding a touch of salty miso provides a curious contrast to the berries juicy sweetness, and a little umami to boot.

Strawberry Spritz

Once you make the (very) easy base for this Strawberry Spritz, you can use it to make Strawberry Margaritas, too. (And if you’ve got a hankering for a classic Spritz, I’ve got you covered there, too.) But this Spritz is a great, light apéritif to enjoy all season long. I was drinking lots of these a few weeks ago when strawberries were at their peak. If they available where you live, go infuse some in vermouth blanc for a great spring/summer sipper.

Spiced Plum Cake with Toffee Glaze

Toffee glaze is one of those things you could put on an old sneaker, and it would make those dilapidated Reeboks taste great. Even better (and more recommended) is this spiced plum cake, which isn’t too rich or too sweet. Crunchy toasted almonds on top are a nice contrast to the buttery glaze.

Peach Shortcakes with Butterscotch Sauce

Speaking of buttery sauces, butterscotch with peaches is a natural. Grammar-correct keeps asking me: A natural what? But I think you can figure that out. If not, give them a try together and you’ll see what I’m talking about.

Vin de pêche

If you’re fortunate enough to have a peach tree or can get some of the leaves, they lend a delicate almond-like flavor to this intriguing apéritif wine. I try to make a few bottles every year and serve chilled glasses as the season’s change, reminding me of summer, and reminding me that the light almond flavor of peach leaves in wine is something to put on my calendar for the following year.

Bourbon Peach Cooler

Peaches and bourbon are natural partners, and they don’t mind sharing space in a tumbler with the classic French apéritif, Bonal. But not to worry if you don’t have it; I offer some substitutes that you might already have on your liquor shelf. This cocktail isn’t just pretty, it’s also a pretty effective way to beat the heat. (Yup, nectarines or plums could replace the peaches, if you’re so inclined.)

Nectarine-Berry Popsicles

A vintage metal popsicle mold that was a find at a flea market prompted these summer ‘sicles. You can load ’em up with berries and since I used white nectarines, the popsicles were extra-pretty in pink. But anyone would say “yes” to them in yellow, if you go with standard nectarines.

Mixed Berry Shortcakes

Mixed berry anything automatically makes something my favorite dessert. I love, love, love the juicy tumble of strawberries, blueberries, blackberries, red currants, or whatever else you’ve got. Bring the berries on!

Blueberry Cobbler

While I am nostalgic for the overload of blueberries that I grew up with New England, when I do find myrtilles, I try to keep them as close to their pure state as possible. Topped with crumbly drop biscuits, all that’s needed is a scoop of vanilla ice cream to complete the picture, but white chocolate-fresh ginger ice cream would also be welcome…and appreciated, on this cobbler.

Mango Frozen Yogurt with Blueberry Compote

While everyone’s mind is on peaches and nectarines, don’t forget mangoes, their tropical counterpart, which go just as well with summer berries. Blueberries particularly come to mind but raspberries and strawberries could fill in for them.

Strawberry Frozen Yogurt

With pretty swirls of crispy meringue, this tangy frozen yogurt can be part of a composed dessert, which I like to serve in the summer, being generous with the fresh fruit…and filling in the blanks with frozen yogurt and meringues.

Blueberry Buckle with Lemon Syrup

I don’t know if blueberries get any better than in this buckle, which do indeed “buckle” under the weight of almost too many blueberries…if that’s even possible. A dousing with tart lemon syrup keeps things moist and tangy. You can skip the cream with this one. It’s great on its own.


paris restaurants (new updates)

By: David
12 June 2024 at 14:32

I’ve been featuring some new and revisited favorite restaurants in Paris, writing them up in my newsletter. You can find a list of my Favorite Restaurants in Paris on my website but here are links to the posts in my newsletter of places I’ve eaten at lately…

To get more Paris tips (and stories and recipes) sent right to your Inbox, subscribe to my newsletter here:

Received — 5 June 2024 David Lebovitz

Cherry Compote

By: David
5 June 2024 at 18:14

I think I have something wrong with me. I seem to be afflicted with a particular malady that forces me to buy way too many summer fruits when they’re in season. It gets particularly dire when faced with apricots and cherries, two fruits whose seasons are much shorter than the others. The first fresh apricots I saw were back in upstate New York, around the 1980s, and I’d never seen them before. Someone brought us a basket of the tender, squishy little orange fruits to the restaurant that I worked at, and I remember being completely taken off guard, as the only apricots I’d ever seen were the dried ones. And while I loved the crinkly dried specimens, those fresh beauties with a red blush were a whole other taste entirely.

Fresh Cherry Compote recipe

Then, when I moved to California, I discovered how abundant fresh apricots are (or can be), as they are in France. But no matter how abundant – or not – cherries are when the season is in full swing, I always consider them extra-special fruits and give a prominent place in my kitchen. At the beginning of the season, they’re incredibly expensive and rarely good. Then, as the season moves along, they start showing up in larger mounds at the market, and the prices get gentler, coaxing me to buy as many as I can heft.

Fresh Cherry Compote recipe

Fresh Cherry Compote recipe-3

This week, I was helpless when faced with an overload of summer fruits at the market. And in addition to a giant bag of apricots, two bulging sacks of tomatoes, and eight white nectarines, I bought 2 kilos (about 4 1/2 pounds, give or take a few cherries) of fresh cherries — and from the looks of the other shoppers, it was more than any normal person would buy. (Although I think I made the vendor’s day.) But I couldn’t help it. They were Burlat cherries and I’d bought a small bag from the same vendor last week at the market, and there he was again, tempting me with more. Once I got home, I got my cherry pitter out, and pitted half of them, saving the others to eat fresh. (Except I almost polished off the fresh ones I was reserving as I was pitting these!)

Fresh cherries are, of course, great fresh. But cooking them can deepen, and even improve their flavor, especially nice if you get home and find yourself with a bag of rather wan ones. Or ones that you might snag at the end of the market, when the vendors are trying to get rid of any extras that might not keep until the next market day.

Fresh Cherry Compote recipe-4

In addition to being the answer to what the heck you (or I) are going to do with all those cherries, this recipe also deftly answers that age-old question: Can I freeze that? And the answer is a big, resounding, “Heck, yeah!” Once the compote has cooled, it freezes perfectly in zip-top freezer bags or other containers that you prefer to use, and will last up to a year. (You can also freeze pitted fresh cherries on their own as well.)

And let me tell you, it’s great to stumble upon a bag of cherry compote that may have moved to an unfavorable position in your freezer as summer shifted into fall – or winter, when they can become quickly forgotten. Once defrosted, and perhaps rewarmed, they’re terrific served with vanilla ice cream, plain yogurt, or alongside a cake, such as almond cake, gâteau de savoie, or angel food cake.

Fresh Cherry Compote recipe-5

I like to boost their flavor with a handful of dried sour cherries, added midway during cooking, so they plump up and absorb the cherry juices, which add another dimension of cherry flavor. A shot of kirsch also dials up the flavor nicely.

Print

Cherry Compote

Be sure to use a larger pot that you think. For 2 pounds (1kg) of cherries, I used a 6-quart (6l) pan. Since the cherry juices will foam up as they cook, using a larger pot – and removing the lid from time-to-time – will keep your from having to clean up a sticky mess. I’ve didn’t use much sugar here, so you can add more to taste, if your cherries aren’t as sweet as mine were. If you can get sour cherries, feel free to add some in place of the sweet cherries. If so, you may need to increase the sugar a little, to taste as well.

Ingredients

  • 2 pounds (1kg) fresh cherries
  • 1/4 cup (50g) sugar
  • cup (40g) optional: 1/3 dried sour cherries
  • 2 teaspoons kirsch (or another fruit-based liqueur, or eau-de-vie)
  • 1-2 drops pure almond extract

Instructions

  • Stem and pit the cherries. Put them in a large, nonreactive pot or saucepan and stir in sugar. Turn the heat to medium, cover, and cook for 10 minutes, lifting the lid and stirring them frequently, to encourage juicing and to make sure the liquid the cherries exude doesn’t foam up and overflow.
  • After 10 minutes of cooking, add the sour cherries, if using, and cook for 5 to 10 more minutes, until the cherries are wilted and completely cooked through.
  • Remove from heat and stir in the kirsch and almond extract. Let cool before storing or serving. The juices will thicken as the compote sits.

Notes

Storage: The cherry compote can be stored in the refrigerator for up to 5 days. It can be frozen for up to one year.

Related Recipes

No-Recipe Cherry Jam

Cherry Mess

Quick-Candied Cherries

Cherries in Red Wine Syrup

Lemon Yogurt Cake with Apricot-Cherry Compote

❌